
Make a sweet surprise without any baking using this Crochet OREO Cookies Free Pattern and create little cookie decorations for your home.
There's something so delightfully nostalgic about a sweet treat that brings back childhood memories-and the Crochet OREO Cookies Pattern does just that in the softest, most huggable way. Holding a perfectly round, plush OREO cookie, but made from yarn-cute, squishy, and full of charm. These adorable recreations are not only fun to make but also make fantastic decorative pieces, playful toys, or quirky gifts that spark smiles. Thanks to the talented creator from the YouTube channel Nancy a crochet, whose tutorial and design inspired this project, crocheters can easily bring these little yarn cookies to life.
Tasty Looking Crochet OREO Cookies Free Pattern for Playtime
The finished OREO cookie has a wonderful balance of texture and shape. Each cookie features two round "cookie layers" with a contrasting cream-colored filling sandwiched in between. The edges are neatly defined with a special stitching technique that adds a firm yet inviting boundary, giving the cookie a realistic and polished look. Thanks to their compact size, these cookies serve well as playful collectibles, keychain charms, or even as fun additions to a dessert-themed display.
This project is accessible and enjoyable for intermediate crocheters who want a quick yet satisfying project. Along the way, you'll get to practice increasing stitches, working in rounds, and sewing pieces together in a way that encourages neat finishes and solid structure. The pattern also offers some room for customization-you can experiment with different colors, make various "flavors," or create a whole set to mix and match.
If you're looking to add a bit of sweetness to your crochet OREO or want a charming gift idea, this crochet OREO cookie is a delightful pick. Ready to whip up your own batch of these lovable cookies? Check out the free pattern and tutorial to get started.
Cream Filled Crochet OREO Cookies Free Pattern
This pattern provides a detailed and systematic approach to crocheting a realistic crochet cookie keychain. Following the step-by-step instructions demonstrated in the referenced video, you will learn to construct each component with precision. The tutorial features the construction of two cookie shells, a filled cream center, and a reinforced edge, all joined together to yield a sturdy, decorative accessory. Emphasis is placed on correct foundational techniques and finishing details that make this project both rewarding and accessible.
Quick Overview of Pattern
- Two cookie shells are crocheted in dark brown or black yarn, each started from a magic ring.
- Each shell begins with half double crochet rounds, followed by high/double crochet increases to build the round biscuit form.
- The shells receive a crab stitch border for authenticity and improved structure.
- A white center, using the same steps as the shells, is crocheted between the shells, with an added keychain loop for functionality.
- All pieces are neatly sewn together, resulting in a layered, realistic cookie appearance ideal for keychains or bag charms.
Notes
- Always complete each round before moving to the next step to retain correct stitch counts and shape.
- It is important to work the magic ring tightly to avoid any gap at the center of the cookie.
- The crab stitch is worked in the reverse direction for the unique decorative edging.
- Ensure neat color changes between the dark shells and the white center for the most visually appealing result.
- Reinforcing the border with slip stitches strengthens the structure and prolongs the life of the keychain.

Skill Level
- Intermediate Beginner:
- Basic familiarity with magic rings, half double crochet, double/high crochet, slip stitch, and reverse/crab stitch is recommended. No advanced shaping is required, making this project suitable for confident novices looking to expand their stitch repertoire.
Materials
- 1 mm cotton thread/yarn in two colors: dark brown/black (for cookie shells) and white (for the cream center)
- 1.7 mm crochet hook
- Small scissors
- Yarn/tapestry needle (for joining and weaving in ends)
Measurements / Sizing
- Finished cookie measures approximately 3-3.5 cm in diameter
- Keychain loop height, including ring, adds up to 3-4 cm
Gauge
- Gauge is not critical, but tight stitches are preferred to maintain a firm and durable accessory.
Stitch Abbreviations
- MR: Magic Ring
- ch: Chain
- sc: Single Crochet
- hdc: Half Double Crochet
- dc: Double/High Crochet
- inc: Increase (2 stitches in one space)
- sl st: Slip Stitch
- crab st: Crab Stitch (reverse single crochet)
Special Stitches
- Magic Ring (MR): Loop yarn around finger, insert hook, pull up a loop, secure with chain, and continue working into the ring.
- Crab Stitch: Work single crochet in the opposite direction (left to right for right-handers); yields twisted, rope-like edge.
- Increase: Two stitches worked into one base stitch; used for shaping the cookie.
The Crochet Pattern
Crocheting Cookie Shells (Make 2, in dark brown/black yarn)
Magic Ring & Foundation
- Begin with a MR by wrapping yarn around your finger and securing it with your hook.
- Pull through a loop, then ch 2 to set up your foundation.
Round 1:
- Work 12 hdc into the ring.

- Draw the starting tail tightly to close the center hole completely.
- Sl st into the top of the starting chain to finish this round.
Round 2:
- Ch 3 (counts as first stitch).
- In each base stitch, work 2 dc (inc) all the way around.
- By the end of the round, you should have 24 stitches.
- Sl st to the top of the initial chain-3 to close the round securely.
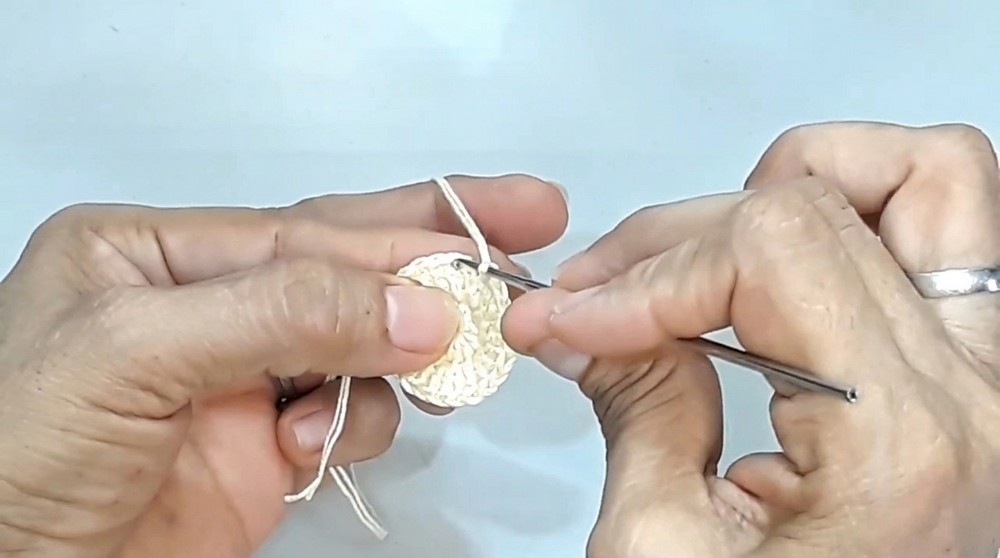
Round 3:
- Ch 1 to start.
- Alternate the following sequence: [1 hdc, inc] across the round.
- Continue pattern (one hdc in next stitch, two hdc in following stitch) until you reach the beginning.
- Finish with a sl st to complete the round, ensuring the motif lies flat and the gap is fully closed.
Crab Stitch Border:
- Work a crab st (reverse single crochet) into every stitch around the outer edge.
- This gives the cookie a defined, twisted perimeter, closely resembling a real cookie edge.
Slip Stitch Reinforcement:
- Position your hook beneath the completed crab stitch border.
- Work sl st in each underlying base stitch all the way around the motif, reinforcing the whole edge for extra structural integrity.
Fasten Off:
- Cut the yarn, leaving a long enough tail for later assembly.
- Secure the end.
- Repeat all above steps to make a second identical cookie shell.
Crocheting the White Center & Keychain Loop (in white yarn)
Foundation and Initial Rounds
- Using white thread, start with a MR.
- Work 2 ch to begin.
Round 1:
- Work 12 hdc into the magic ring.
- Pull tail tightly to close the ring entirely.
- Finish with a sl st into the beginning stitch to close the first round.
Round 2:
- Ch 3 (counts as the first dc).
- In each base stitch, work 2 dc (inc) around for a total of 24 stitches.
- Close with a sl st to the top of the initial chain-3.
Round 3:
- Ch 1.
- Alternate: [1 hdc, inc] around the full circle, just as for shells.
- Complete with a sl st at the end, creating a perfectly round cream "filling."
- Do not add the crab stitch border to this piece.
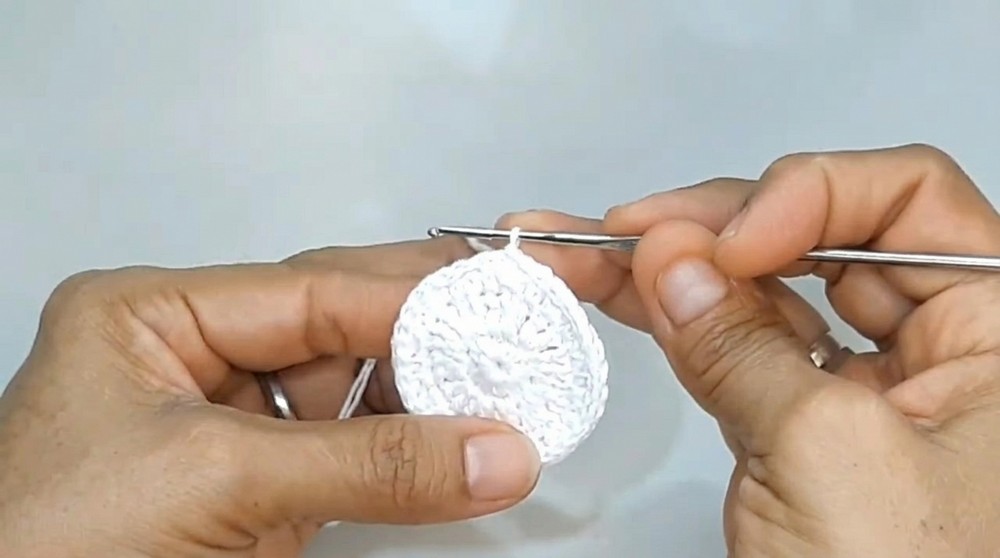
Keychain Loop:
- Without fastening off, ch 20 (or desired length for your loop).
- Anchor the chain with a sl st back into the same space.
- Ch 1 to secure, then cut a long tail for assembly.
Assembly & Joining
Positioning:
- Place the completed white cream center between the two cookie shells, so the decorative edges (crab stitch) of the shells face outward.
- Align the three layers precisely, ensuring that the keychain loop sits at the top and all sides match up evenly.
Sewing Together:
- Thread a yarn or tapestry needle with a matching yarn tail.
- Begin at the base of the keychain loop and sew around the edge, catching all three layers (front shell, cream center, back shell) with each stitch.
- Continue sewing evenly around the perimeter, making sure the white center is neither visible from the side nor protruding.

- When you return to your starting point near the loop, weave in any remaining ends securely and trim excess yarn.
- Gently stretch all edges and adjust the keychain loop so it stands straight.
Assembly & Finished Size
- When fully assembled, the cookie should appear evenly sandwiched, with smooth, undistorted layers.
- Finished diameter: approximately 3-3.5 cm
- Height with keychain loop: approximately 5-6 cm
- The added slip stitch border along with the crab stitch noticeably boosts the structure, extending the item's usefulness and longevity.

Conclusion and Ending Words
Following these clearly structured rounds and finishing techniques gives you a small accessory that successfully mimics the charming look of a favorite sandwich cookie. This pattern utilizes foundational crochet skills as well as unique finishing details, combining them for both structural integrity and striking appearance. Consistently alternating increases and reinforcing border rounds result in a firm, visually appealing project suitable for gifting, personal use, or even as a whimsical bag charm. Attention to the evenness of each round and the careful closure of each component are essential to achieving the most professional result. The addition of the keychain loop transforms the item into a versatile, portable treat, making it a practical as well as an adorable final product. Adjusting the colors or scale may further personalize the accessory for varied tastes or uses. Each completed keychain stands as a reflection of patience, attention, and resourceful crochet technique.