
Stitch a little friend with the Crochet Teddy Bear Free Pattern, a sweet idea for birthday presents and cozy room decor.
If you're looking to create a charming keepsake that blends whimsy with timeless appeal, this project is a delightful inspiration. On the YouTube channel Nancy a crochet, the creator shares a step-by-step tutorial to make an adorable little teddy bear using a unique ring template. This elegant design allows for endless versatility, whether you want to charm as a small accessory or a thoughtful gift. The Crochet Teddy Bear Pattern featured in this project is perfect for adding a cozy, heartfelt touch to any season or occasion, making it ideal for winter snuggles or as a playful summer keychain.
Little Crochet Teddy Bear Free Pattern That Kids Will Love
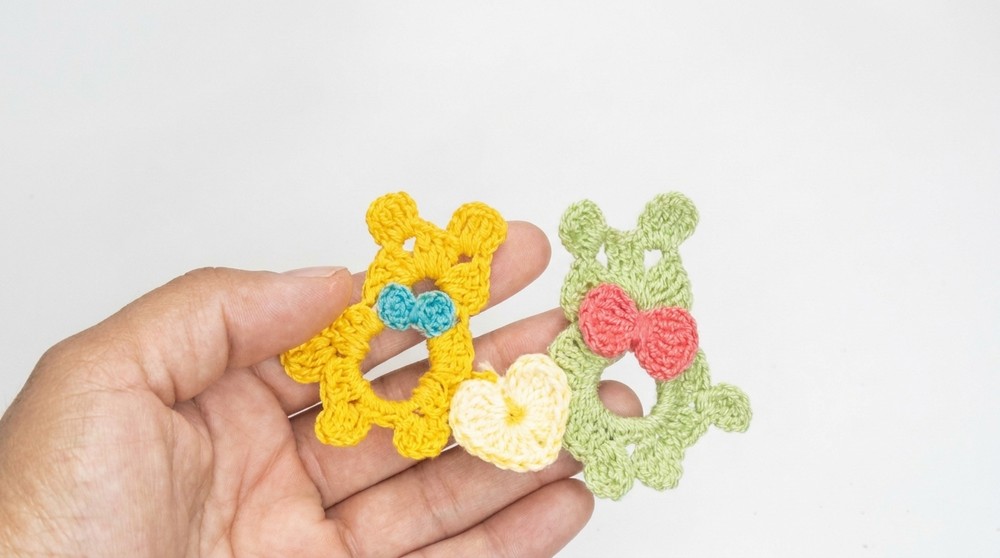
Beautiful in its simplicity, this crochet teddy bear can be paired effortlessly with cozy scarves, baby clothes, or even used as a decorative piece on bags and headbands. Its compact size and customizable finishes-like adding a cute bow or tiny heart-make it a versatile decoration for both children and adults alike.
The texture of this piece is delightfully tactile, created with a fine thread that offers a smooth yet dense feel. The design stands out thanks to its clever use of chains, slip stitches, and double crochets to build structure around the ring base, resulting in a three-dimensional, charming bear silhouette. This dimension lends a soft fullness that invites touch and admiration, while the addition of small embellishments enhances its personality.
Whether you're looking to add a handmade touch to your accessories or a heartfelt gift, this Crochet Teddy Bear Pattern opens the door to creativity and warmth. Jump into the full tutorial now to discover how to bring this lovely little companion to life.
Crochet Teddy Bear - Step-by-Step Free Pattern
This step-by-step guide is an innovative approach to upcycling everyday materials, combining practical crochet skills with a common item-can tabs. Using basic stitches and easy-to-find tools, the process turns a simple metal ring into a charming bear accessory. The instructions are arranged in clear stages, each focusing on precision and ease, so the project suits those just starting out as well as those more familiar with crochet techniques. The bear's structure emerges from strategic placement of chain, half-double, and double crochet stitches, while the bow accent and embroidered details add a playful touch. Materials are listed for both safety and comfort, allowing customization for the finished item's final use. From prepping the metal base to attaching the final embellishments, each step maximizes utility and offers an appealing outcome that can serve as a keychain, pin, or decorative item for bags and gifts.
Quick Overview of Pattern
- Use a large can tab as the main foundation for the bear's body.
- Crochet around the tab to form the bear's body and head.
- Add ears using height adjustments.
- Craft a small bow accessory.
- Finish by attaching embellishments and optional findings (keychain/pin).
Notes
- Safety: Ensure edges of the can tab are smooth and safe.
- Yarn Choice: Thicker yarn creates a fluffier bear; adjust hook size if needed.
- Video Guidance: Use the pause function to match your pace with each step.
- Durability: Using double strands of yarn strengthens the structure.
Skill Level
Beginner to Intermediate
- Basic knowledge of chaining, slip stitch, single crochet, half-double crochet, and double crochet.
- No prior experience with crocheting around hardware required, but helpful.
Materials
- Can Tab: 1 large soda or preserve can tab (clean, dry)
- Yarn/Wool: Medium weight, any color (classic brown preferred)
- Crochet Hook: 1.7 mm
- Yarn Needle
- Scissors
- Stuffing: Small amount, optional
- Optional: Keychain loop, earring hook, or pin backing
Measurements / Sizing
- Finished Bear: Approximately 2" (5 cm) tall x 1.5" (4 cm) wide
- Bow: About 0.5" (1 cm) wide
Gauge / Stitch Pattern
- Gauge: Not critical, but stitches should fit snugly around the can tab.
- Stitch Pattern: Chains, slip stitches, single crochet, half-double crochet, double crochet.
Stitch Abbreviations
| Abbreviation | Stitch Name |
|---|---|
| ch | Chain stitch |
| sl st | Slip stitch |
| sc | Single crochet |
| hdc | Half-double crochet |
| dc | Double crochet |
Special Stitches
- Double Lazada Stitch: Yarn over twice before inserting hook for extra height in stitches.
- Triple Chain Point: Chain 3 to create sharp structural angles on the bear's body.
The Crochet Pattern
Preparing the Base Ring and Initial Stitches
- Attach Yarn:
Bring yarn up through the largest opening in the can tab; secure with a knot if preferred. - Foundation Chains:
Pull the yarn through and chain 3. These count as the height for your first stitch. - Initial Stitches:
Add 3 more stitches alongside the chain, for a total of 4 elevated stitches (dc or hdc)-counting the starting chain.

- Anchor Stitches:
Find the final tab opening, gently widen if needed, and work 2 double crochets into that hole. - Chain & Secure:
Chain 3 again, and finish this step with a slip stitch to the base of your starting chain.
Crocheting the Body Ring Structure
- Secure Double Thread (Optional):
Double your yarn, ensuring you work into both strands for sturdiness. - Continue Ring Structure:
Pass loop through the next available space on can tab and chain 3. - Secure Edge:
Move into the next main opening; attach with a slip stitch, keeping yarn snug. - Pattern Sequence:
Repeat: Chain 3, yarn over, and work double crochet or special stitches into ring.

- Anchor Structural Points:
Where "shoulders" or "hips" should form, use a double lazada, then a triple chain point (chain 3), and anchor with slip stitch in final loop. - Complete Round:
Repeat pattern steps across all can tab spaces. Close with a slip stitch to first stitch in round.
Shaping the Head and Ears
- Anchor Top Stitches:
At the topmost part of the bear's body, insert hook and anchor yarn. - Transition to Head:
Chain 3, then double crochet at intervals to round the head profile and decrease stitch count for head shape. - Create Ears:
On each side (either end of top), work:- Chain 2,
- 2 hdc in same space,
- Chain 2,
- slip stitch back in original space.
- Finish Head/Ears:
Fasten off with slip stitch, cut yarn, and weave in ends using yarn needle.
Crocheting the Bow Accessory
- Begin Bow Center:
Use contrasting yarn and chain 2 to start a small adjustable ring. - Stitch Bow Shape:
Into ring, work 3 half-double crochet stitches (hdc). - Form Bow Ends:
Chain 1, then slip stitch to finish bow round.

- Shape & Secure Bow:
Pull loop tight, wrap yarn several times around bow's middle, and knot securely. - Position Bow:
Attach bow to bear's head or body using yarn needle (center or ear suggested).
Assembly & Finished Details
- Attach Bow:
Sew bow to bear's head or chosen spot. - Embroider Face:
Use embroidery thread or contrasting yarn to add eyes, nose, and optional smile. - Add Stuffing (Optional):
Fill bear's body or head lightly before completely closing seams. - Attach Findings:
Add a keychain ring, earring hook, or pin back for functional use. - Weave Ends:
Trim and hide all loose yarn ends with yarn needle.
Assembly & Finished Size
- Your completed bear measures approximately 2" x 1.5" (5 cm x 4 cm).
- The bow is about 0.5" (1 cm) wide.
- Attach your chosen hardware for a finished accessory.
Conclusion & Final Words
By following each outlined instruction, a can tab is transformed into a soft, decorative bear motif, ideal for personal use or gifting. The guide emphasizes customization, inviting users to select their preferred yarn colors, vary the accessory placement, and add unique embellishments. Attention to detail with secure fastenings and neat finishing encourages tidy results, while optional stuffing provides a plush, three-dimensional effect. Each step is constructed to ensure durability and lasting appeal, whether the project becomes a keyholder, earring, or bag charm. The fusion of traditional crochet and recycled materials showcases resourcefulness and inventiveness. Such projects not only minimize waste but also offer an avenue for creative reuse, highlighting the potential in seemingly ordinary objects. This finished piece can reflect individual style, making each bear a small but meaningful token reflecting craftsmanship and thoughtful assembly.