
Boost organization by trying the Free Crochet Market Bag Pattern for stylish capacity, easy carrying, and sustainable shopping made simple.
A simple handmade bag can make daily shopping feel easier and more enjoyable. The Free Crochet Market Bag Pattern shows how to make a strong and useful bag using easy stitches that are simple to follow. It grows step by step into a flexible bag that can stretch to hold many items while still keeping its shape. The open style design allows air to pass through, which makes it perfect for carrying fruits and vegetables.
Super Easy Crochet Market Bag Pattern Step-by-Step
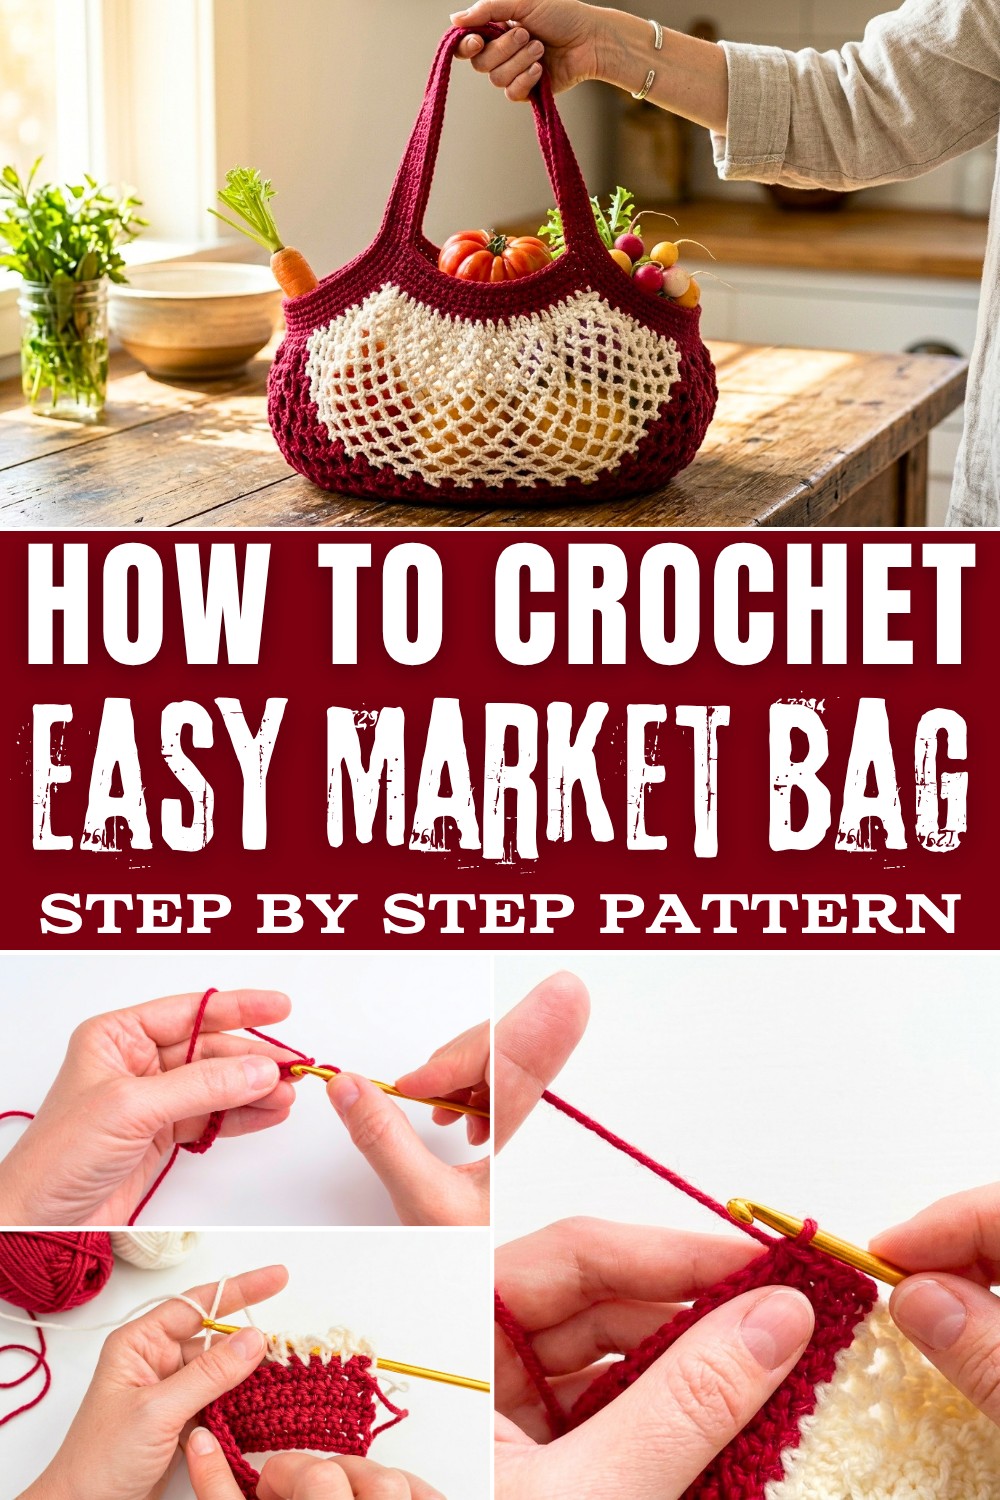
It is very useful for shopping, carrying books, or keeping daily items in one place. It can also be used again and again, which helps reduce the use of plastic bags. This crochet bag is simple, practical, and stylish, making it a great choice for everyday use and a thoughtful handmade item.
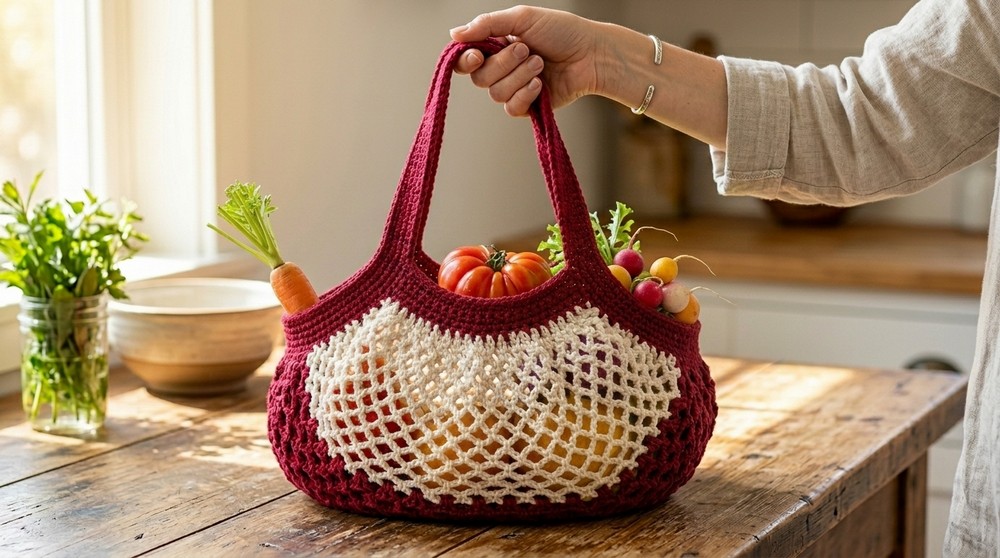
Crochet Mesh Market / Tote Bag
Materials
- Yarn:
- Worsted weight (#4) yarn.
- The pattern uses (at least) two colors:
- Color A Cherry Red (for top bands/handles)
- Color B (for mesh body)
- Cotton or acrylic both work:
- Acrylic has more stretch (works well with a chain‑4 mesh).
- Cotton stretches less (you may wish to use a chain‑5 mesh).
- Hook:
- Size appropriate for worsted yarn (likely 4.0-5.0 mm). If you want your bag tighter and less stretchy, go down a hook size.
- Notions:
- Darning (tapestry) needle
- Scissors
- Stitch marker (for working in rounds)
- Measuring tape (optional, but helpful)
Finished Sizes (Approximate)
- Small bag:
- Starting chain: 20
- Mesh length: ~20" / 51-52 cm
- Handle chain: 75 (each handle)
- Side gathering: ~30 sts per side
- Large bag:
- Starting chain: 30
- Mesh length: ~24" / 61-64 cm
- Handle chain: 80 (each handle)
- Side gathering: ~40 sts per side
Actual finished size will vary with yarn, hook size, and tension.
Pattern Instructions
1. Top Band - First Side
Foundation Chain
- Make a slipknot.
- Small bag: Chain 20.
Large bag: Chain 30.
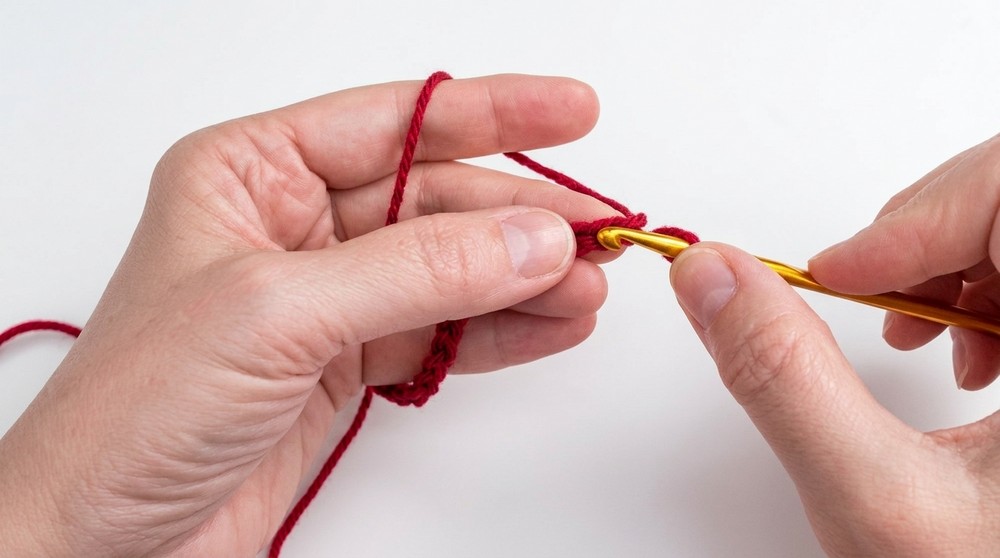
Row 1 - Single Crochet Foundation
- Starting in the 2nd chain from the hook, work 1 single crochet (sc) in the back bump of each chain across.
- Stitch count at the end of Row 1:
- Small: 19 sc
- Large: 29 sc
- This finished edge will be the top edge of your bag.
Row 2-6 - Build the Top Band
- Chain 1, turn.
- Work 1 sc in each stitch across. Do not miss the last stitch at the edge.
- Chain 1 and turn at the end of each row.
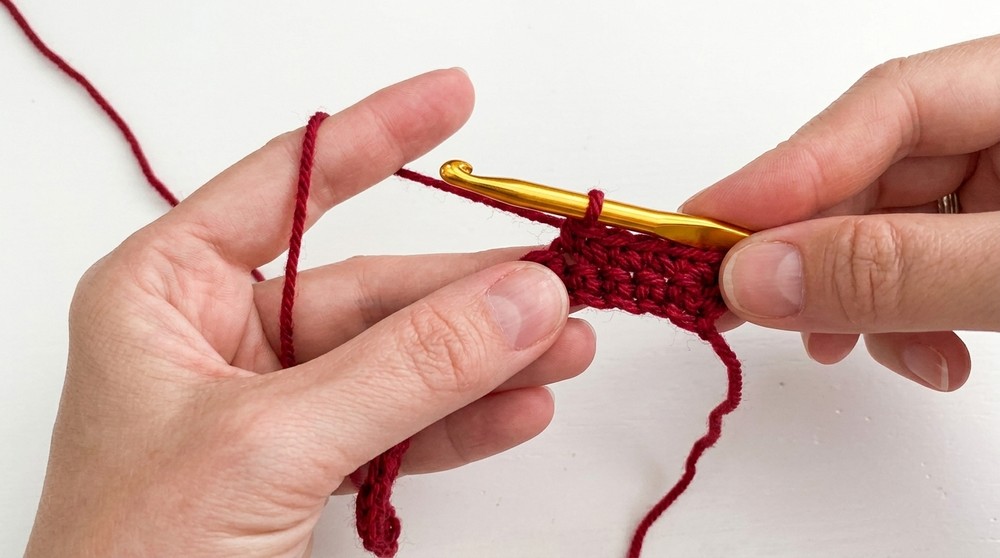
- Repeat until you have 6 rows of sc total.
You now have a small, flat rectangular band.
2. Change Color and Begin Mesh Body
You will now begin working the long mesh portion of the bag (the body), which will be a series of chain loops.
Color Change
- Work Row 6 as usual, but stop before completely finishing the last stitch:
- Insert hook into the last stitch.
- Yarn over with the old color and pull up a loop.
- Instead of completing the sc with old color, drop old color.
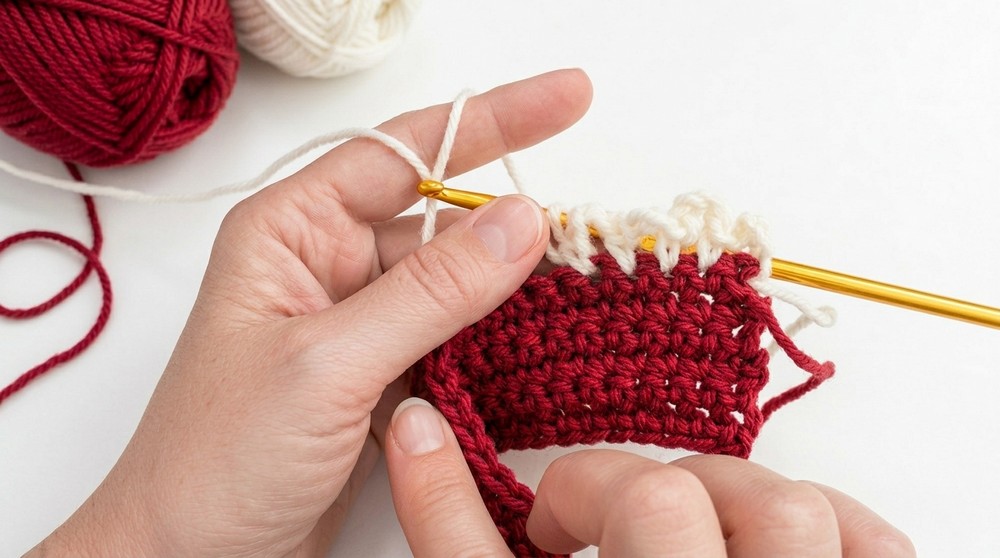
- Yarn over with the new color and pull through both loops on hook to finish the sc using the new color.
- Cut the old color yarn and leave a tail for weaving in later.
For the small bag, the video mentions using 3 color sections of 15 rows each (45 mesh rows total). For the large bag, 55 mesh rows total.
Mesh Row Setup - Start the Loops
From this point, you will work long rows of loops across the width of the bag.
Row 7 - First Mesh Row (in Color B)
- Chain 4, turn.
- Skip the first sc, insert hook into the next stitch, and work 1 sc.
- Chain 4, skip 1 stitch, sc in next stitch.
Repeat this all the way across the row. - You should end with a sc in the last usable stitch.
- Loop counts per row:
- Small: 18 loops
- Large: 28 loops
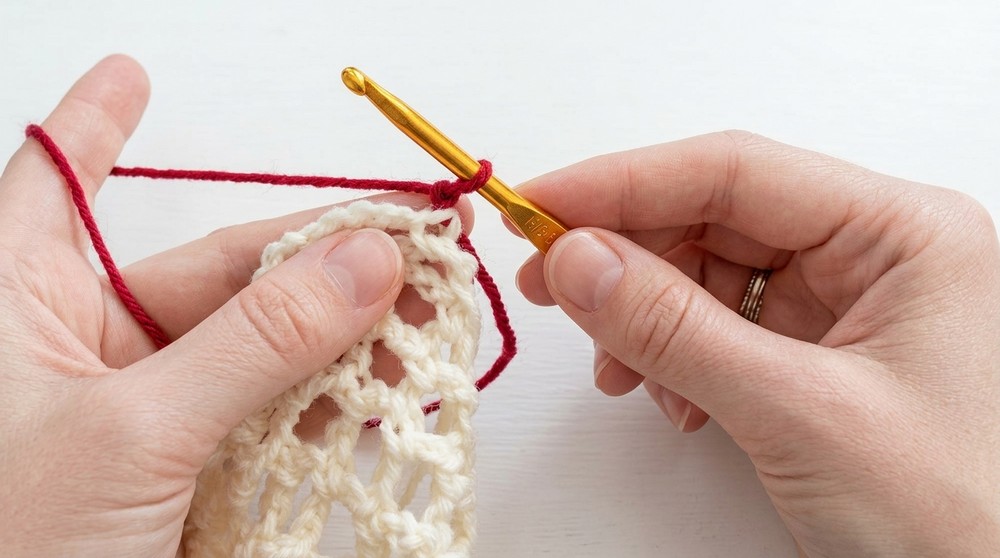
Note: If working in 100% cotton (less stretch), you may use chain 5 instead of chain 4 for each loop.
Mesh Body - Continuing the Loops
Each subsequent row of mesh is worked into the loops from the previous row, not individual stitches.
General Mesh Row (Repeat Pattern)
- Chain 4, turn.
- Work 1 sc into the first loop (the arch made by the previous row's chain 4).
- Chain 4, sc into the next loop.
Repeat this into each loop across the row. - Finish with sc in the last loop of the row.
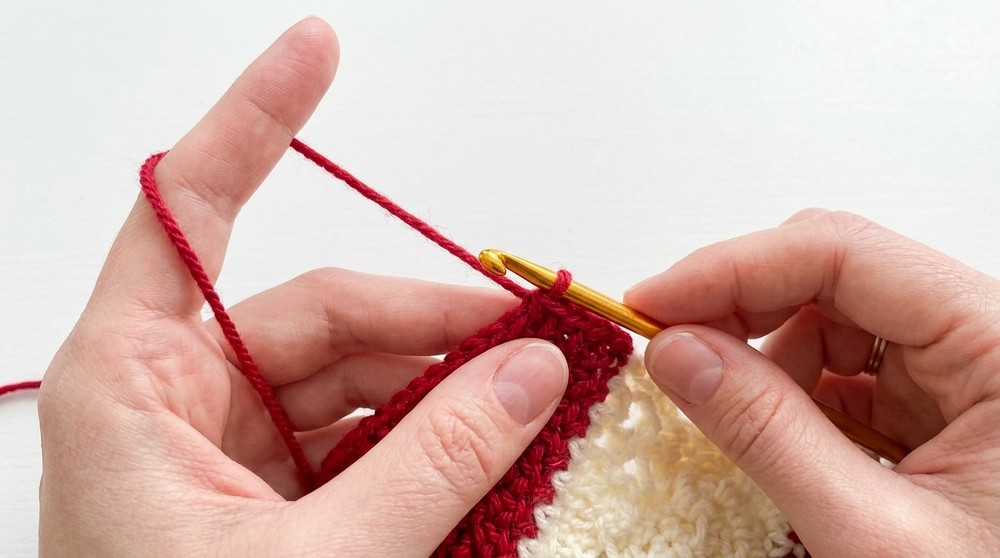
You will always have the same number of loops in each row:
18 loops (small), 28 loops (large).
Color Sections & Length
For the small bag (approximate):
- 15 rows of mesh (Color B): ~9" / 23 cm.
- Change color.
- Next 15 rows (Color A or a new color): total ~13" / 34 cm.
- Change color.
- Final 15 rows (Color B or another color): total ~20" / 51-52 cm.
For the large bag:
- Continue extra mesh rows until the length is about 24" / 61-64 cm total.
Color changes for mesh:
- To change colors between mesh sections:
- In the last sc of the last row of the current color, pull up a loop in old color, then yarn over with the new color, pull through to complete the sc.
- Chain 4 with the new color for the next row.
- Cut the old color and weave in later.
3. Top Band - Second Side
After completing the full mesh length:
Transition from Mesh to Solid Top Band
- At the end of the last mesh row, change color again (usually back to the same color as the first band) in the same method as before.
- This time, only chain 1 and turn (not chain 4).
Row 1 of Top Band (Second Side)
- Work 1 sc into the very first stitch (edge of the mesh).
- Then work 1 sc into each loop across:
- Essentially, for each mesh loop, you work into the space to "solidify" the top.
- Stitch count at end:
- Small: 19 sc
- Large: 29 sc
This mirrors the stitch count from your original foundation edge.
- Cut any extra color tails that are no longer needed.
Rows 2-6 - Build the Second Top Band
- Chain 1, turn.
- Work 1 sc in each stitch across.
- Repeat until you have 6 rows of sc total on this second top edge.
Your piece is now a long, rectangular mesh band with a solid sc strip at both ends.
4. Weave in Ends
Before starting the handles:
- With a darning needle, weave in all color change ends neatly along the top bands or into the mesh, as appropriate.
- This will make the finishing cleaner and prevent tangling while you form the bag.
5. Handles & Side Gathering
Now you will transform the flat piece into a bag by adding handles and gathering along the sides.
First Handle Chain
- With the working yarn still attached at the end of the second top band:
- Work a loose chain:
- Small: chain 75
- Large: chain 80
- Work a loose chain:
- Make sure the chain is not twisted.
- Turn your work to locate the opposite top edge.
- Identify the top of the starting chain on the other side (the top corner of the first band).
- Insert your hook into the top chain/stitch at the opposite edge and slip stitch to join the handle to that side.
You now have one long chain forming the first handle.
Work Along Top Edge - First Side
You will now stabilize the connection around the top edges and begin to form the upper rim of the bag.
- Starting from where the handle joins:
- Work 1 sc into the end of each of the 6 rows of sc along the short top band.
- This gives you 6 sc along this short vertical section.
Gather One Long Side of Mesh
Along the length of the mesh (side seam area):
- You are working into the loops at the side of the rows to create gathering, forming the sides of the bag.
- For the small bag, aim for about 30 sc along the mesh side.
For the large bag, about 40 sc. - The loops occur at every second row, so the pattern to distribute stitches is:
- 1 sc in one loop, 1 sc in the next loop, 2 sc in the next loop, then repeat.
- Continue this pattern down the side:
- 1 sc, 1 sc, 2 sc (into the next loop),
- until you reach approximately 30 (or 40) sc, evenly distributed.
This gathering brings the flat mesh into a curved shape, becoming the side of the bag.
Work Along Bottom Top Band Edge
At the bottom corner:
- Work 1 sc into the end of each of the 6 rows of the original (first) sc band.
- Be sure to place the last sc into the very top of the chain (the foundation or top corner). This gives a neat finish.
Second Handle Chain
- From this corner, chain:
- Small: 75
- Large: 80
- Again, ensure the chain is straight, not twisted.
- Bring the chain across to the opposite top band corner.
- Insert your hook into the top stitch/chain of that corner and slip stitch to attach the second handle.
Work Along Top Edge - Second Side and Gather Second Mesh Side
- Work 1 sc into the end of each of 6 rows of the top band (second side).
- Then, along the second side mesh section:
- Place ~30 (small) or ~40 (large) sc total.
- Use the same pattern as before:
1 sc, 1 sc, 2 sc into consecutive loops, repeating, adjusting at the end so counts are even and consistent.
- Then work 1 sc into the end of each of the last 6 rows to reach your original starting point.
The flat piece has now been gathered at both sides, and both handles are attached.
6. Handle & Top Edge Rounds
Now you will work in continuous rounds around the entire top opening and handles to reinforce them.
- Place a stitch marker at the beginning of your round.
Round 1 - Around Handles and Top Edge
- Start somewhere at the top edge (usually where you finished gathering).
- Handle A:
- Working into the back bump of the handle chain:
- Work 1 sc into the back bump of each chain around the entire first handle.
- This gives a sturdy, rounded handle.
- Working into the back bump of the handle chain:
- Across Top Edge:
- After finishing the handle, work 1 sc in each sc along the top edge (where you previously did the 6 + 30/40 + 6 sc sections).
- Handle B:
- Repeat: work 1 sc into the back bump of each chain of the second handle.
- Complete Round:
- Work 1 sc into each sc across the remaining top edge until you reach the stitch marker.
Move the stitch marker up to mark the start of each new round.
Rounds 2-5 (or 6) - Build Handle Thickness & Upper Edge
- Continue working in the round with sc:
- Work 1 sc into each stitch around, including over both handles and across both top edges.
- Repeat for a total of 5-6 rounds (depending on how thick and sturdy you want the handles and top edge).
Ensure your tension is even so the handles sit flat and not twisted.
7. Finishing
Final Join
- When you reach your desired number of rounds, finish your last sc.
- Cut the yarn, leaving a tail, and pull the tail through the last stitch.
- Use the invisible join:
- Thread on a darning needle.
- Insert needle under both loops of the next stitch (from front to back).
- Insert needle down into the back loop only of the last stitch you made.
- Pull snug to form a smooth "V".
Weave in Ends
- Turn work to the inside of the bag.
- Weave in all remaining ends securely, going back and forth through several stitches.
- Trim excess yarn.
Your bag is now complete.
Suggestions & Tips
- Yarn Choice:
- Acrylic: more stretch, therefore chain‑4 mesh is sufficient.
- Cotton: less stretch; consider using chain‑5 for mesh, or add extra rows for length.
- Adjusting Bag Size:
- To make a wider bag, increase the starting chain (multiple is flexible; just maintain straight sc bands of desired width).
- To make a longer/deeper bag, add more mesh rows before transitioning to the second top band.
- Handle Length:
- If you prefer shorter handheld straps, reduce the handle chain length.
- For shoulder length, increase the chain to your preference.
- Even Gathering:
- If the 1 sc, 1 sc, 2 sc pattern does not line up exactly at the end, simply adjust by adding or skipping a 2‑sc placement to ensure you end up with approximately 30 (small) or 40 (large) sc per side, evenly spaced.
- Maintenance Tips:
- Hand wash or gentle machine wash (depending on yarn label).
- Lay flat to dry to maintain shape, especially for cotton.
- Avoid overloading with very heavy items to prevent overstretching handles, especially with acrylic yarns.
Final Words
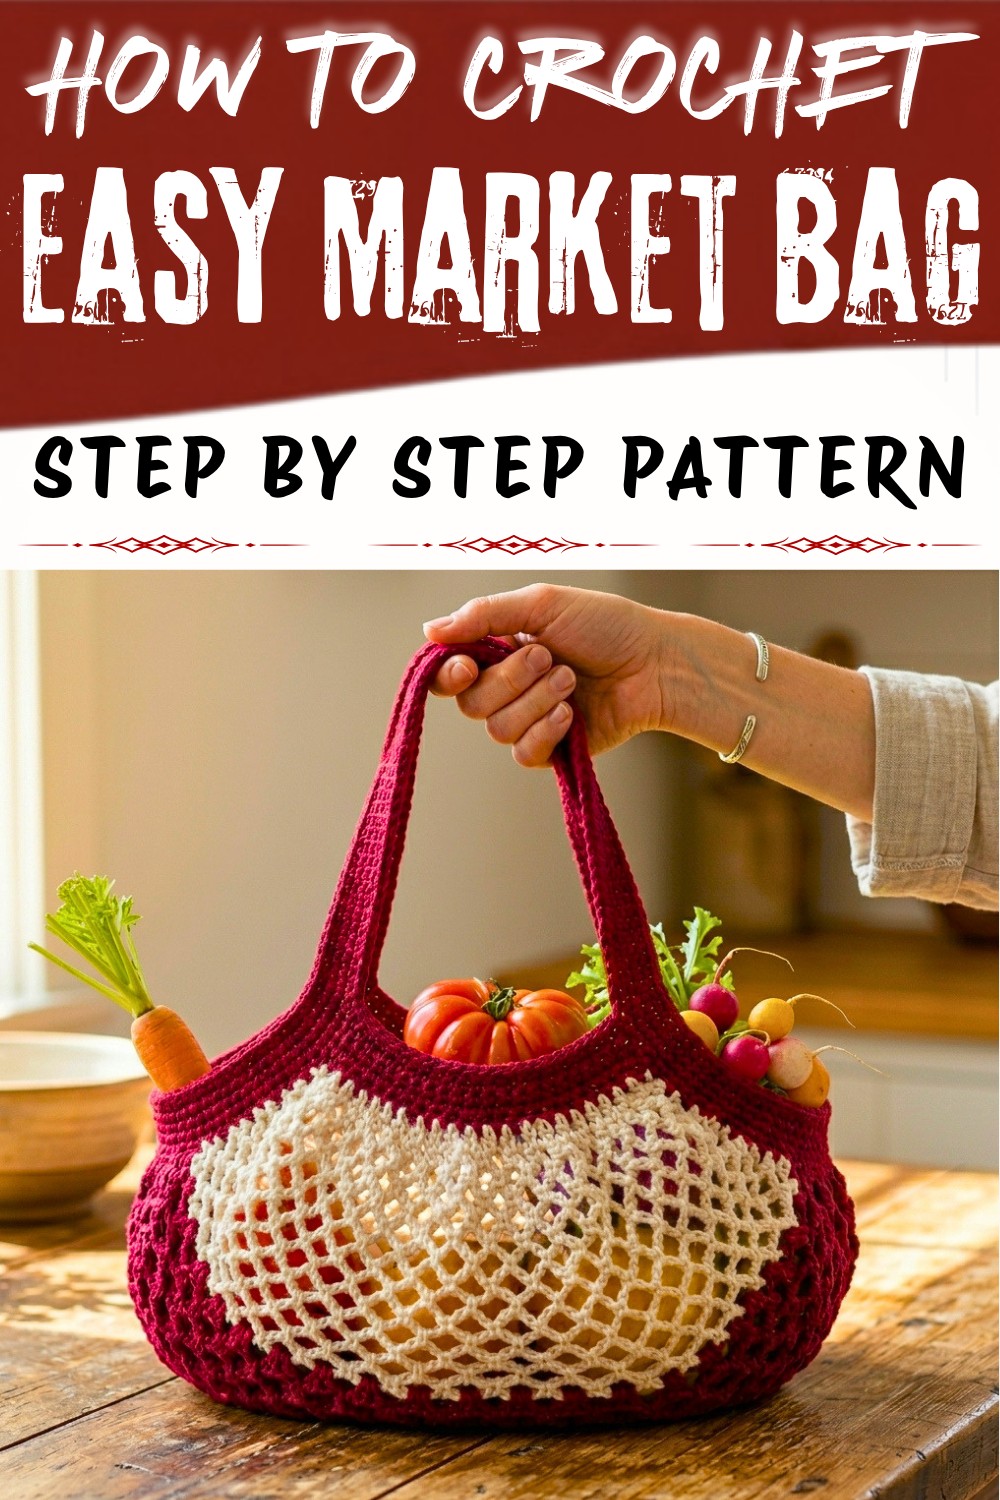
This mesh market bag pattern combines simplicity with practicality. The solid single crochet bands provide structure at the top and along the handles, while the lacy mesh body offers flexibility and capacity for groceries, beach gear, or everyday use. The gathered sides give the bag its rounded, roomy shape.