
Try cheerful projects with the Free Crochet Mushroom Keychain Pattern and enjoy making items that make different and decent.
Sometimes, the smallest projects can pack the biggest charm, and this crochet mushroom keychain pattern proves it perfectly. This adorable pattern blends simplicity and creativity, giving life to a fairy tale-inspired accessory that's both stylish and fun. Crocheted with a 3.0mm hook and 5-ply cotton yarn, it balances durability and delicacy, which is ideal as a keychain or a playful charm for backpacks and purses. You can stick to earthy tones for a rustic look, or go bold with unique colors. The possibilities are endless!
Free Crochet Mushroom Keychain Pattern for Beginners Joyful Projects

This pattern uses single crochet (sc) for most of the mushroom's structure, making it beginner-friendly and meditative for experienced crocheters. You'll also work with increases and decreases for shaping, as well as double crochet (dc) for the decorative mushroom cap and back loop-only stitches to create textured detail. The step-by-step approach ensures that you can build the stem, cap, and frilly underside with ease, resulting in a polished and cohesive design that you'll love showing off.
Other Things You Can Crochet from This Pattern
- Mini mushrooms in different sizes for seasonal decorations or fridge magnets.
- Fairy-tale sets: Combine mushrooms with gnomes, snails, or butterflies to make an enchanting scene.
- Unique plant stakes: Create multiple mushrooms to brighten your garden pots.
- Bag charms and appliqués: Transform this pattern into patches for hats, scarves, or pouches.
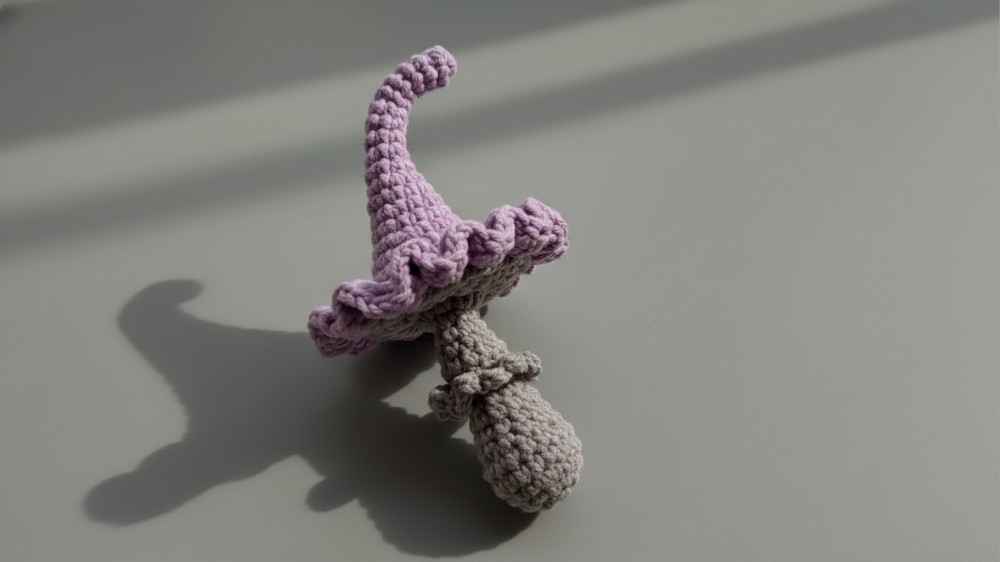
Highlights of the Mushroom Pattern
- Perfect for beginners with simple, repeated stitch techniques.
- Quick to make-a great last-minute gift idea!
- Versatile and customizable in terms of size and colors.
- Adds fun, handmade charm to everyday items.
Necessary Materials
- Yarn:
- 5-ply cotton yarn (recommended for durability and smooth texture).
- Crochet Hook: 3.0mm hook
- Stitch Marker: Helps keep track of rounds (optional).
- Scissors
- Threading Needle: For sewing and finishing tails.
Gauge
Gauge is not critical for this project. However, try completing a quick swatch: 6 SC in a round for 2 rounds = approx. 1 inch in diameter. Adjust your hook size for tighter or looser stitches.
Step-by-Step Instructions
This pattern transcription has been converted into a detailed and formal guide for creating a crochet project (likely a decorative or functional piece). Its rounds build the complete shape with precise stitch counts and structure. Follow this guide for a smooth, enjoyable crochet experience, including customization tips.
What You'll Learn from This Pattern
- Creating rounded shapes through increases and decreases for amigurumi projects.
- Back loop-only stitches to add unique texture and dimension to your creations.
- Layered details like decorative caps and frilly edges using basic crochet techniques.
- Joining and finishing techniques to give your keychain a professional look.
Special Techniques Used
- Magic Circle: To create an adjustable, tight center for rounds.
- Back Loop Only: Working through the back loop for texture or to separate layers.
- Front-Loop Only Double Crochet (DC): Creates decorative edges or flares.
Crochet Mushroom Keychain Pattern
Rounds 1-20 form the main section of this crochet project.
Round 1:
- Create a Magic Circle. Work 6 SC into the loop.
- Tighten the loop and slip stitch (SS) into the first SC.

Round 2-9:
- SC 6 in each round. Maintain tension for consistent shaping.
Round 10:
- SC 5, Inc (increase 1 SC in the next stitch). Repeat for 6 rounds.
- Slip stitch and chain 1.
Round 11:
- 3 SC, Inc, 3 SC. Work evenly around. Slip stitch and chain 1.
Round 12:
- Work [SC, Inc] x4 (SC in the first stitch, Inc in the next). Repeat around.
- Finish with SS and chain 1.
Round 13:
- SC 12 evenly. Slip stitch and chain 1.
Round 14:
- [3 SC, Inc] x3. Repeat. Slip stitch and chain 1.
Round 15:
- SC 15 evenly. Slip stitch and chain 1.
Round 16:
- [SC, Inc, SC] x5. Repeat sequence evenly around. Slip stitch and chain 1.

Round 17:
- SC 20 across all stitches. Slip stitch and chain 1 again.
Round 18:
- [3 SC, Inc] x5. Repeat across. Slip stitch and chain 1.
Round 19:
- [2 SC, Inc, 2 SC] x5. Ensure stitch increases are evenly spaced.
- Slip stitch and chain 1.
Round 20:
- [5 SC, Inc] x5. Evenly work 30 SC total. SS and chain 3.
Decorative Edge
Round 21 creates the decorative edge using the front loops only.
Round 21:
- Work 3 DC in each front loop around the circle.
- Slip stitch, chain 1, and cut yarn.

Secondary Sections
Create smaller complementary sections for this project.
Round 1:
- Make another Magic Circle. Work SC 6 into the loop. Pull tight and slip stitch.
Round 2:
- Increase in every stitch: Work Inc x6 (12 stitches total). Slip stitch and chain 1.

Round 3:
- [SC, Inc] x6 evenly (18 stitches total). Slip stitch and chain 1.
Rounds 4-5:
- Maintain size: SC 18 for 2 rounds. SS and chain 3.
Round 6:
- Decrease shape: [SC, Dec] x6 (12 stitches total). SS and chain 1.

Rounds 7-10:
- Work SC 12 for 4 rounds evenly to maintain shape.
Round 11:
- Build detail: Work SC in back loops only for texture. SS and chain 1.
Round 12-13:
- Shape reduction: Work SC normally in all stitches and follow with [SC, Dec, SC] x3 at corners. SS and chain 1.

Rounds 14-15:
- Work SC 9 evenly, flattening the shape. Chain 3.
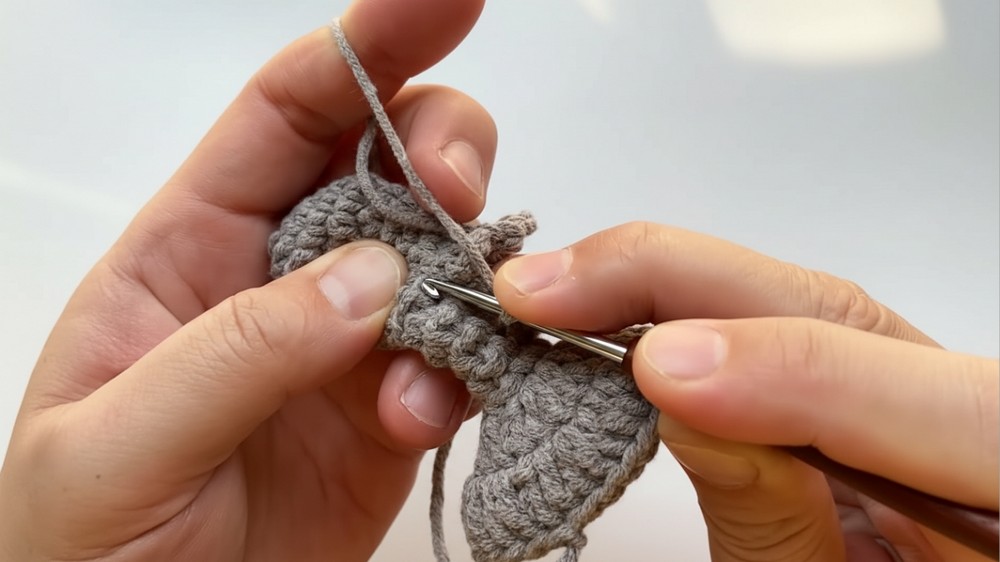
Final Decorations
Complete the optional decorative parts using double crochet increases.
Round 16:
- DC-inc x9 around the circle. Slip stitch and chain 3.
Round 17:
- Detail with DC, DC-inc x17 (work increases in front loops). SS, leave a long tail for sewing.
Optional Edging:
- Begin by crocheting in the back loops of the 11th round.
- Chain 3, SC in the next stitch, repeating [CH 3, SC] evenly across to add flair. SS to finish.

Finished Size
The finished size depends on the tension and yarn used but is approximately 4-6 inches tall/wide.
Tips for Better Results
- Work with Proper Tools: Use a lightweight, comfortable hook to reduce strain during small rounds.
- Avoid Overstuffing: Allow the project to maintain its intended shape with light but firm stuffing.
- Mark Placement for Sewing: Use pins or markers to visualize attachment points before final sewing.
Customization Ideas
- Color Variations: Experiment with bold or pastel color schemes to add character to the finished piece.
- Add a Keychain Ring: Attach a metal ring or loop fabric yarn for a functional accessory.
- Decorative Embellishments: Use beads, sequins, or felt patches to personalize the design.
Conclusion
This Crochet Mushroom Keychain blends an easy-to-follow format with creative potential. By mastering foundational techniques such as increasing and decreasing, as well as working into front and back loops for edge design, this piece becomes an excellent way to practice while crafting something beautiful. Upon completion, admire your work and consider gifting it or adapting the pattern for future projects.
Challenges You Might Face and How to Solve Them
One challenge some may face with this pattern is managing the tight rounds at the beginning, especially when making the mushroom's stem. If your stitches feel too difficult to work into, try loosening your tension slightly or switching to a smaller hook to guide the yarn more easily.
Another common issue is keeping the mushroom cap even when working with double crochet stitches. To fix this, count your stitches carefully and use a stitch marker at the start of each round to stay on track. Lastly, attaching the layers neatly can be tricky for beginners, but leaving a long tail for sewing and working slowly will help you achieve clean, secure seams. Practice patience, it's worth it for the adorable final result!