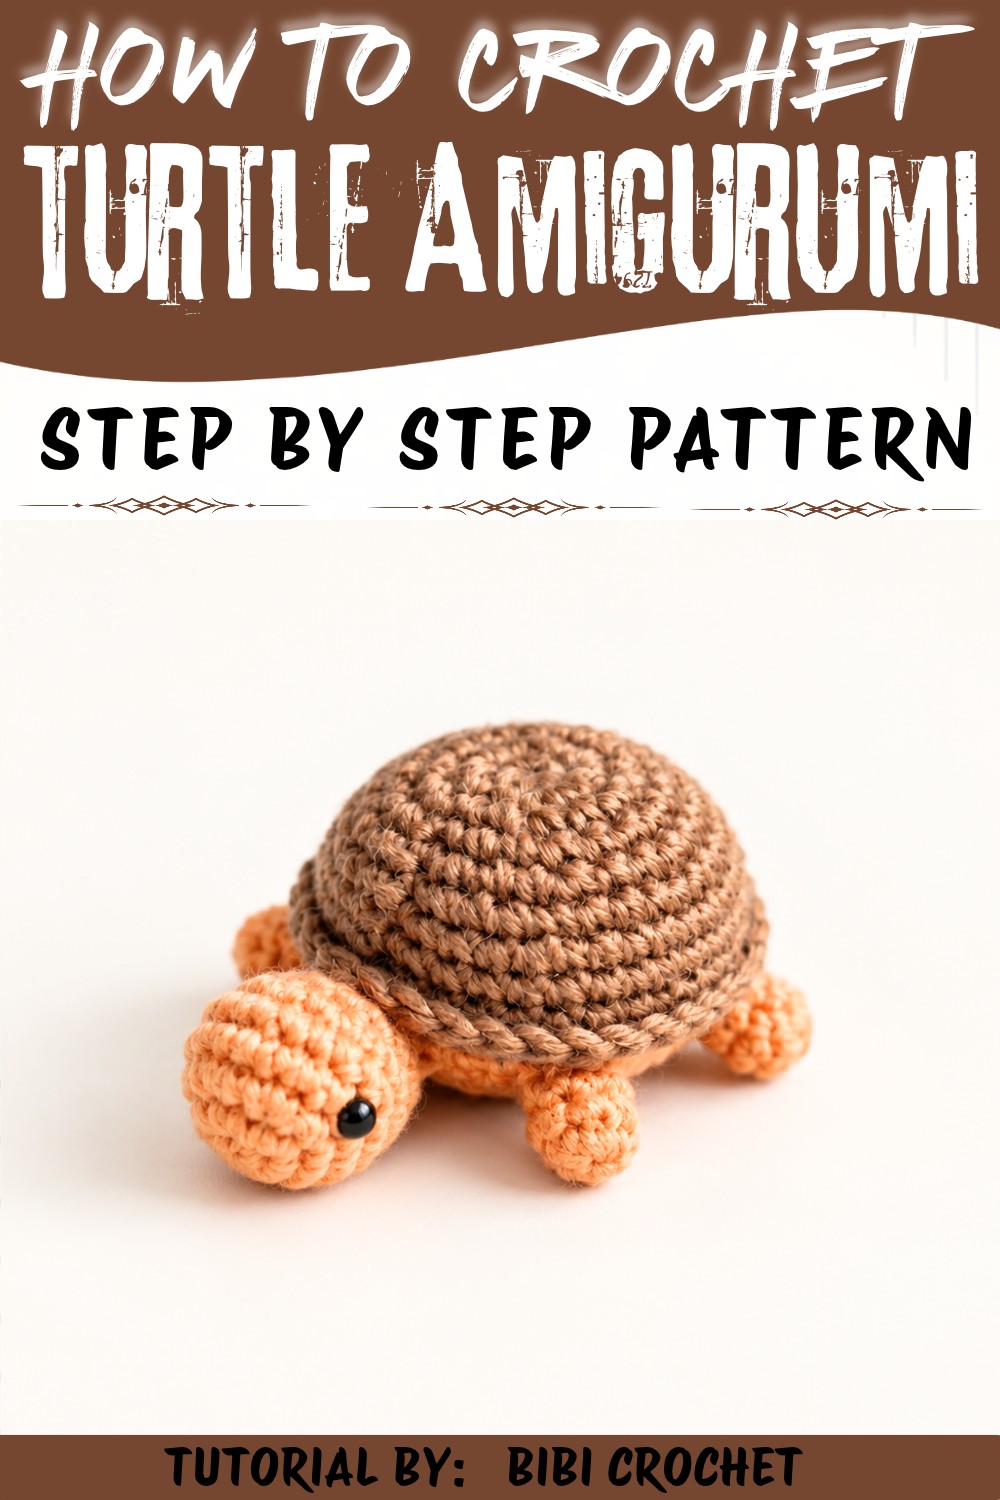
Brighten your toy collection with this Crochet Turtle Amigurumi Free Pattern and stitch a turtle with a round shell for lovely gifts.
There's something truly heartwarming about creating a tiny, adorable companion with your own hands. Imagine making a sweet little turtle that could become a cherished gift or a charming decoration for any room. This is what you get when you follow the "Crochet Turtle Amigurumi Pattern," a delightful project that brings a soft, cuddly turtle to life. The tutorial and the wonderful design come from the talented Bibi Crochet, who provides clear and encouraging guidance to help you through every stitch.
Ocean Buddy Crochet Turtle Amigurumi Free Pattern with a Round Shell
The Crochet Turtle Amigurumi Pattern is an example of amigurumi, a Japanese art form focused on crocheting small, stuffed creatures. This project results in a compact, round-shaped turtle that fits perfectly in the palm of your hand, making it an endearing keepsake for friends and family. Beyond gifts, it also serves as a playful accent on a bookshelf, desk, or nursery. It has a pleasant firmness due to its tight stitches, created with a small 1.25 mm hook and 3.5 weight yarn, giving it a neat and tidy finish.
This little turtle boasts charming, rounded shapes - a sturdy shell that gently domes over, a tiny head with expressive eyes, four stubby legs, and a cute tail. The design's standout features are its snug texture and thoughtful details, like the possibility of mixing and matching yarn colors for personalization. Its smooth, almost plush surface invites holding and squeezing, making it not only decorative but also soothing to touch.
Whether displayed as a whimsical accent, given as a thoughtful, homemade gift, or used as a soft toy, this project offers delight for both creators and recipients alike.
Crochet Turtle Amigurumi - Complete Free Pattern
This project will guide you through a charming amigurumi turtle, showcasing essential techniques such as magic rings, basic increases, seamless decreases, and precise assembly. The shell, head, and limbs are each worked in the round, joining together in a recognizable, well-loved amigurumi toy. Every step in this process is specified and accessible, producing a finished turtle that can be customized in any shade or accent. For best results, each round includes explicit directions regarding stitch placement and marker use. Special emphasis is placed on closing rounds, stuffing, and achieving neat transitions between pieces-mirroring the careful methods modeled in the referenced instructions. With minimal tools and a small amount of yarn, you'll proceed confidently through every stage of construction for a standout turtle figure.
Quick Overview Of Pattern
- The shell and underbelly are crocheted in simple, flat rounds then joined.
- The head, legs, and tail are each worked separately and sewn on.
- Key shaping occurs via regular increases and decreases, always starting each round with a turning chain.
- Assembly involves strategic stuffing and neat sewing for a polished finish.
- Eyes can be sewn or glued on, using beads, safety eyes, or felt.
Notes
- Markers are essential for maintaining precision, as each round is closed with a slip stitch for a neat seam.
- Work tightly, especially for amigurumi, to avoid stuffing leakage.
- Choose yarns with enough grip so stitches form a defined, smooth structure.
- If using a different hook size than specified, your turtle may vary slightly in size.
- Parts can be assembled using either whip stitch or invisible joining techniques, according to preference.

Skill Level
- Confident Beginner - Previous experience with single crochet, increases, and decreases in the round is recommended, but the pattern is accessible to anyone with some amigurumi experience.
Materials
- Yarn / Wool: Worsted weight (3.5 weight) in two or more colors for shell and limbs/head.
- Crochet Hook: 1.25 mm (for compact fabric) or a size up to 3.0 mm if preferred.
- Needle: Yarn or wool needle for assembly.
- Notions: Stitch marker, scissors, small crochet hook/tool for stuffing limbs.
- Stuffing: Polyester fiberfill or cotton.
- Eyes: Black beads, plastic safety eyes, or felt circles.
Measurements / Sizing
- Approximate dimensions when using recommended yarn and hook:
Height: ~4.5-5 cm | Length: ~8-10 cm
(Final size may vary slightly by yarn, tension, and stuffing density.)
Gauge (& Stitch Pattern if applicable)
Gauge is not critical for this pattern.
Standard stitches: single crochet (sc) in rounds, increases, invisible decreases, and specific use of front loop only (flo).
Stitch Abbreviations
- ch: chain
- sc: single crochet
- inc: increase (2 single crochets in one stitch)
- dec: decrease (see Special Stitches)
- flo: front loop only
- sl st: slip stitch
- st(s): stitch(es)
Special Stitches
- Magic Ring: Wrap yarn around two fingers twice, insert hook beneath strands, pull working yarn through, chain one, then work required sc into the ring. Tighten by pulling both short and working ends.
- Invisible Decrease: Insert hook through the front loop of current and next stitch (2 loops on hook), yarn over and pull through both loops, yarn over and pull through two remaining loops on hook.
The Crochet Pattern
Shell (Top Part)
- Round 1: Create a magic ring. Work 6 sc into the ring. Slip stitch to join. Tighten ring fully.
- Round 2: Ch 1. Work 2 sc in each st around (inc in each; 12 sts).
- Round 3: Ch 1. (1 sc, inc) around (18 sts).
- Round 4: Ch 1. (2 sc, inc) around (24 sts).

- Round 5: Ch 1. (3 sc, inc) around (30 sts).
- Rounds 6-9: Ch 1. 1 sc in each st (30 sts per round).
- Round 10 (Front Loop Only): Ch 1. sc flo in each st (30 sts).
- Round 11: Ch 1. 1 sc in each st (both loops as usual) (30 sts).
- Finish: Cut yarn, pull through, and leave a tail for later.

Shell Base (Underbelly)
- Round 1: Magic ring, 6 sc.
- Round 2: Ch 1. inc in each (12 sts).
- Round 3: Ch 1. (1 sc, inc) around (18 sts).
- Round 4: Ch 1. (2 sc, inc) around (24 sts).
- Round 5: Ch 1. (3 sc, inc) around (30 sts).
- Round 6: Ch 1. 1 sc in each st (30 sts).
- Finish: Cut yarn, leaving long tail for sewing.
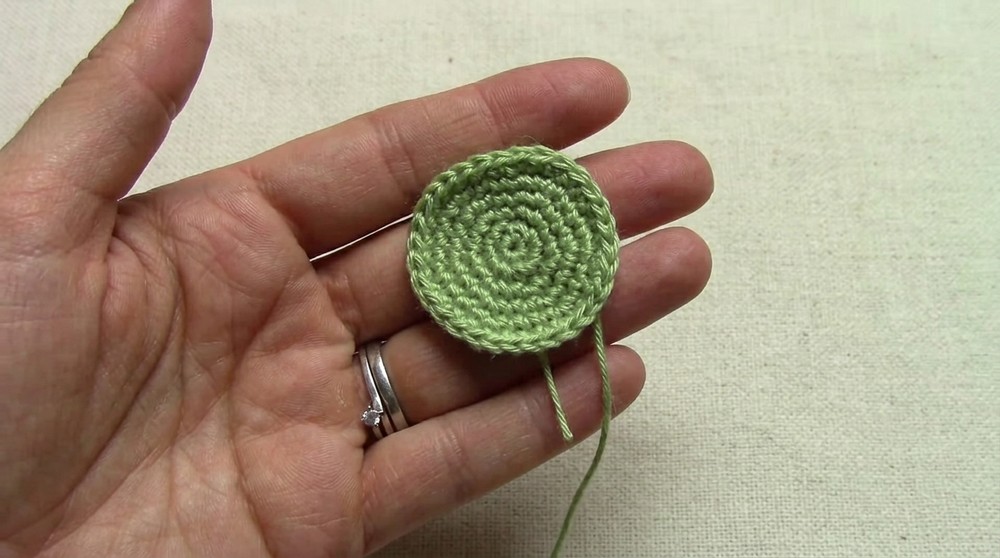
Assembling and Stuffing the Shell
- Align: Match the shell base (wrong side in) to the main shell, lining up seam "lines."
- Join: Using whip stitch or sc, sew together by alternating between a st from the shell and one from the base.
- Stuff: Leave a small gap, stuff the shell firmly with fiberfill, then finish sewing closed.
- Secure: To lock the end, weave the needle through a few stitches on the inside multiple times; then trim.
Head
- Round 1: Magic ring, 6 sc.
- Round 2: Ch 1. inc in each (12 sts).
- Round 3: Ch 1. (1 sc, inc) around (18 sts).
- Rounds 4 & 5: Ch 1. 1 sc in each st (18 sts per round).
- Round 6 (Decreases): Ch 1. (1 sc, dec) around (12 sts).
- Round 7: Ch 1. 1 sc in each st (12 sts).

- Finish Head: Stuff. With needle, weave through each front loop of the remaining sts. Pull gently to close the hole.
- Join to Body: Align head to front of shell (seam line between shell and base), then sew all around securely. Weave and hide ends.
Legs (Make 4)
- Round 1: Magic ring, 5 sc.
- Rounds 2 & 3: Ch 1, 1 sc in each st (5 sts per round).
- Finish: Lightly stuff.
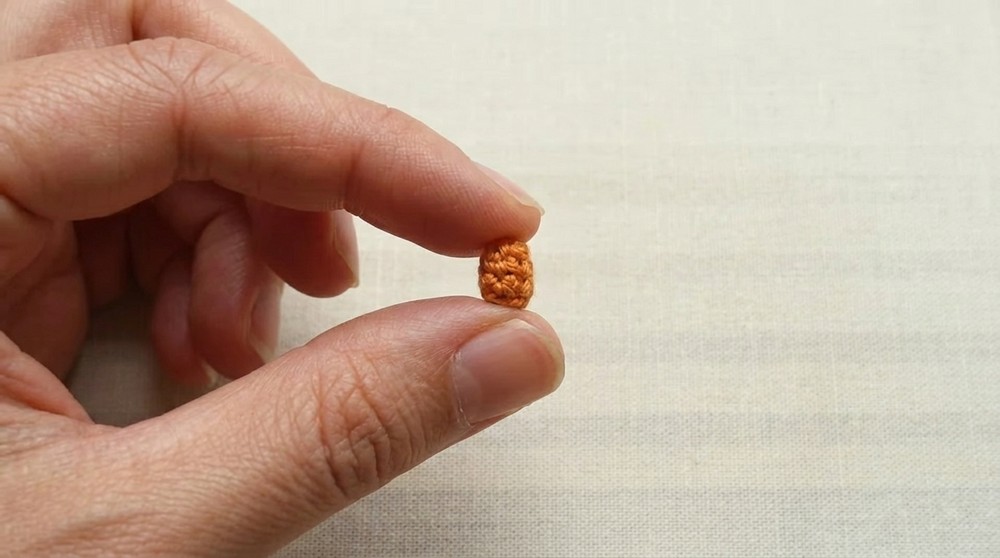
- Attach: Position each leg about a finger's width from head on the body underside. Sew in place, passing needle alternately through a leg and adjacent body stitches. Securely weave to finish.
Tail
- Rounds 1-3: Magic ring, 5 sc per round. Do not close base flat.
- Finish: Stuff lightly. Place at center back between shell and underbelly. Flatten open end and sew both layers of tail flat to body using several stitches. Secure and weave in tail.
Final Details
- Eyes: Attach beads, safety eyes, or felt circles using glue or needle and thread.
- Edge Finish: Hide or poke in any visible threads with hook or needle for a clean look.
Assembly & Finished Size
As all components are joined-head and limbs securely attached, tail stitched into place, and eyes fastened-the turtle will reach a finished size of approximately 4.5-5 cm high and 8-10 cm long. Finished seams are sturdy, limbs and tail fixed in their proper positions, and the turtle is ready for display or gifting.
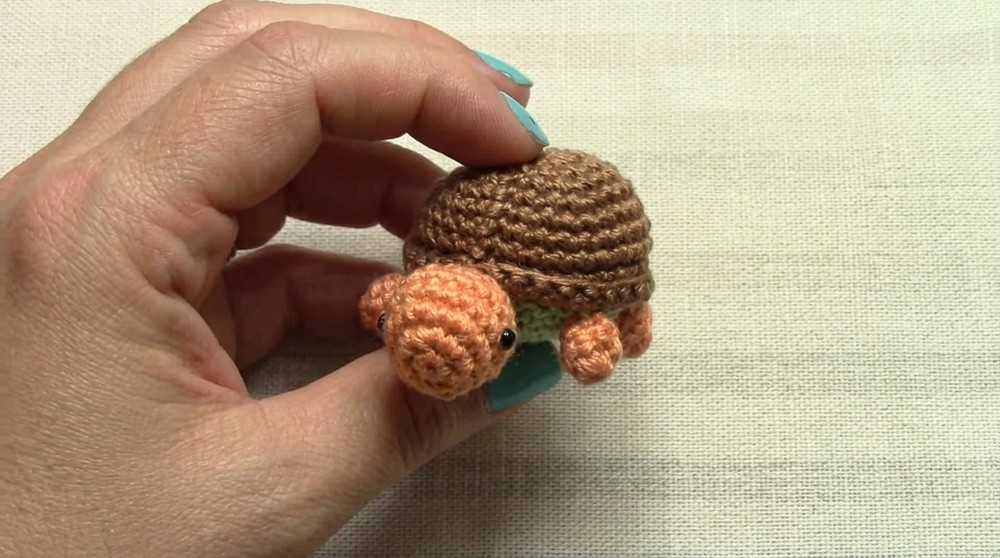
Conclusion and Ending Words
With careful dedication to each stage-forming compact, uniform stitches, shaping and assembling each part, and adding expressive final touches-this amigurumi turtle truly comes to life. The combination of basic stitches and precise assembly ensures a polished, charming result. Color choices and embellishments mean each piece can reflect personal tastes and unique flair. Taking time to match seams and close rounds smoothly leads to a durable project that withstands frequent handling. By working methodically and finishing with attention to detail, you now have a delightful turtle friend, ready for play, display, or thoughtful gifting. This project provides both skill-building opportunity and a rewarding sense of accomplishment as your completed turtle takes shape, one round at a time.