
One day, I wanted to make something simple and happy with my leftover yarn. That's when I found a free crochet mango pattern. Crocheting a mango was so fun. When I finished, it looked just like a real mango, bright, cute, and cheerful.
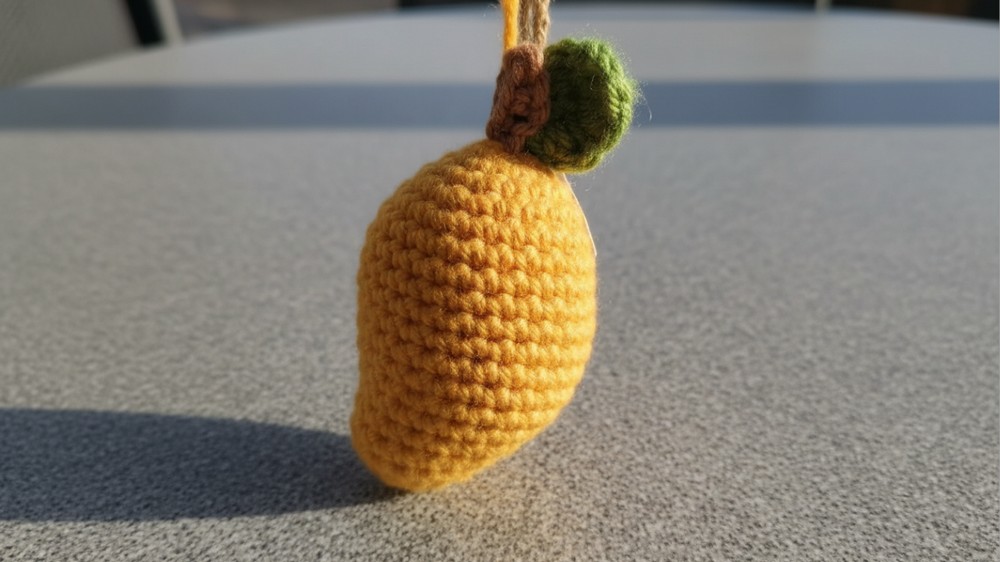
This crochet mango is special because of its lovely look. The mango has a round, plump shape with a gentle curve, just like a real mango. It feels soft and smooth when you touch it, and the bright yellow or orange yarn makes it really stand out. Sometimes, you can add a small green leaf on top to make it look even more real and sweet.
Joyful Crochet Mango Pattern For Kids

There are many ways to use your crochet mango. It can be a keychains, toy for kids to play with in their pretend kitchen. You can use it as a little decoration for your desk or room. If you add a loop, you can hang it on your bag as a cute charm. If you are having a party with a summer or fruit theme, you can make a few of these to use as fun decorations. They even make nice gifts for friends and family who like handmade things.
The best part is that making a crochet mango is easy. Even if you are new to crochet, you can follow this pattern. You only need a little yarn and soft stuffing to shape your mango. If you want a simple and happy project, this crochet mango is just right. It brings a pop of color and lots of smiles wherever you use it.
Materials Needed:
- Yarn:
- Yellow yarn for the mango body.
(Suggested: Big Twist Value Yarn in Varsity Gold) - Green yarn for the leaf.
- Brown yarn for the stem.
(No significant yardage required for stem and leaf; scraps work well)
- Yellow yarn for the mango body.
- Hook: 3.5mm crochet hook. You can use a 4.0mm hook for a larger mango.
- Stuffing: Polyester fiberfill or yarn scraps for filling the mango.
- Scissors
- Tapestry Needle (for sewing the parts together).
- Stitch Marker (optional, to help track rounds).
Gauge:
- Gauge is not critical for amigurumi-style projects as long as your stitches are tight enough to avoid creating noticeable gaps.
Finished Size:
- Using a 3.5mm hook, the mango will measure approximately 3-4 inches tall including its leaf and stem.

Customization Ideas:
- Color changes: Use green yarn to mimic an unripe mango or create color gradients for a realistic, ripening effect.
- Size adjustments: Use different hook sizes or yarn weights to create a smaller or larger mango.
- Add functionality: Turn the mango into a car charm by attaching a loop or make it a keychain by adding a keyring.
Special Techniques Used:
- Magic Circle: Creates a neat, gap-free base for the mango body.
- Invisible Decrease: Ensures smooth shaping and avoids visible gaps at decreases.
- Amigurumi Assembly: Demonstrates how to attach parts like the leaf and stem securely.
Step-by-Step Pattern Instructions
Mango Leaf
Step 1: Creating the Leaf
- Using green yarn, create a slip knot.
- Chain 7.
Step 2: Work the Bottom of the Leaf
- Skip the first chain closest to the hook.
- Slip Stitch into the second chain.
- Single Crochet (sc) in the next chain.
- Half Double Crochet (hdc) into each of the next two chains.
- Double Crochet (dc) into each of the final two chains.
Step 3: Turn and Work the Top of the Leaf
- Chain 1. Rotate your work so you are working along the other side of the leaf's foundation chain.
- Double Crochet (dc) into each of the first two chains.
- Half Double Crochet (hdc) into the next two chains.
- Single Crochet (sc) in the next chain.
- Slip Stitch into the last chain.
Step 4: Finish the Leaf
- Cut the yarn, leaving a long tail for sewing later.
- Pull the yarn through the loop to fasten off.
- Use a tapestry needle to weave the yarn back along the middle of the leaf to create a neat finish. Leave the long tail at the bottom to later attach to the mango.
Mango Stem
Step 1: Creating the Stem
- Using brown yarn, create a slip knot.
- Chain 6 (or 5 for a smaller stem).
- Single Crochet (sc) back along the chain, starting from the second chain from the hook.
Step 2: Finish the Stem
- Cut the yarn, leaving a tail for sewing.
- Pull the yarn through the loop and fasten off.

Mango Body
Step 1: Base of the Mango
- Start with a magic circle using yellow yarn.

- Work 6 single crochets (sc) into the circle. Pull the yarn snug to close the circle.
- Place a stitch marker into the final stitch of the round to keep track of rows.
Step 2: Rounds with Increases
- Round 2: Work 2 single crochet (sc) into each stitch around (increase in every stitch). Total: 12 stitches.
- Round 3: Repeat (1sc, inc) around. Total: 18 stitches.
- Round 4: Repeat (2sc, inc) around. Total: 24 stitches.
- Round 5: Repeat (3sc, inc) around. Total: 30 stitches.
Step 3: Shaping the Mango
- Rounds 6-8: Work 3 rounds of 1sc in each stitch. Total: 30 stitches per round.

Step 4: Decreasing to Create the Mango Curve
- Round 9: (8sc, 1 invisible decrease) 3 times, then sc to finish the row. Total: 27 stitches.
- Round 10: Work 1sc in each stitch. Total: 27 stitches.
- Round 11: (7sc, 1 invisible decrease) 3 times, then sc to finish the row. Total: 24 stitches.
- Round 12: (6sc, 1 invisible decrease) 3 times, then sc to finish the row. Total: 21 stitches.
Step 5: Closing the Mango
- Continue decreasing as follows:
- Round 13: (5sc, 1 invisible decrease) 3 times. Total: 18 stitches.
- Round 14: (4sc, 1 invisible decrease) 3 times. Total: 15 stitches.
- Round 15: (3sc, 1 invisible decrease) 3 times. Total: 12 stitches.

At this stage, firmly stuff the mango with fiberfill. Adjust the stuffing to create a slightly "flat" shape if desired.
- Round 16: (sc, 1 invisible decrease) until the hole is closed.
Assembly
Step 1: Attach the Leaf
- Use the long tail from the green yarn to sew the leaf to the top of the mango. Position the leaf along the curved edge for a lifelike appearance.
Step 2: Attach the Stem
- Position the stem at the base of the leaf. Use the tail from the brown yarn to sew securely to the mango.
Step 3: Optional Drawstring
- Create a long chain with yellow yarn and attach it around the stem. The drawstring can serve as a loop for hanging in the car or on a keychain.
Conclusion and Remarks:
The finished mango looks delightful with functional and realistic accents from the leaf and stem. It makes a lovely gift or decorative piece, and this pattern is beginner-friendly, with opportunities to expand your skillset through shaping and assembly techniques.
Key Notes:
- Proper stuffing and assembly will ensure the mango holds its shape well.
- Feel free to add creative touches like facial embroidery, stripes, or tassels for added personality.
- The mango is adaptable and can easily be turned into a hanging charm, keychain, or keepsake.