
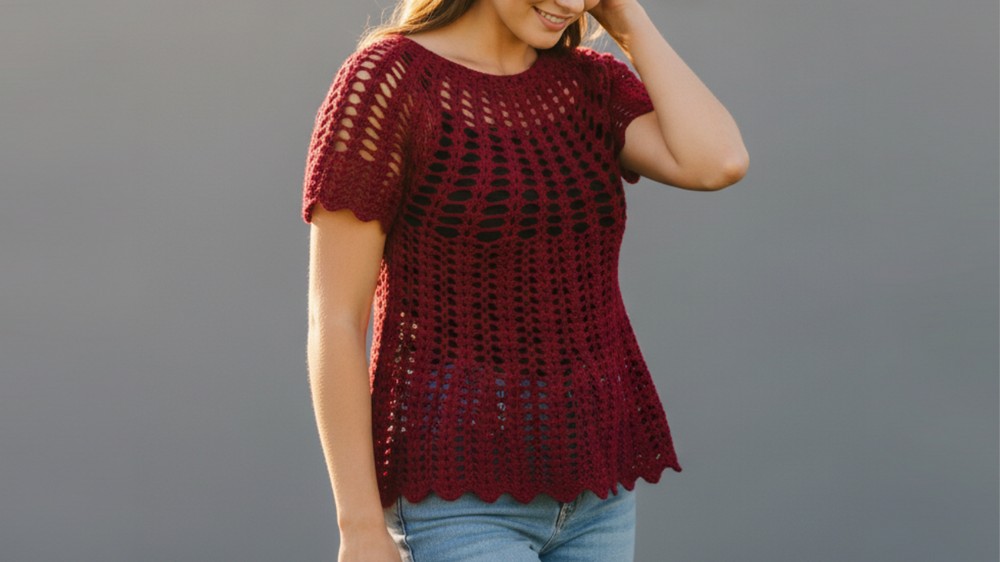
Adding something truly special to your wardrobe that reflects your personality. A crochet blouse pattern allows you to put together a unique, airy top that's ideal for various occasions, from casual weekends to sophisticated evenings. You can pair it with jeans for a relaxed look or match it with a sleek skirt for a touch of elegance. The choice of vibrant hues or soft pastels gives you endless customization options.
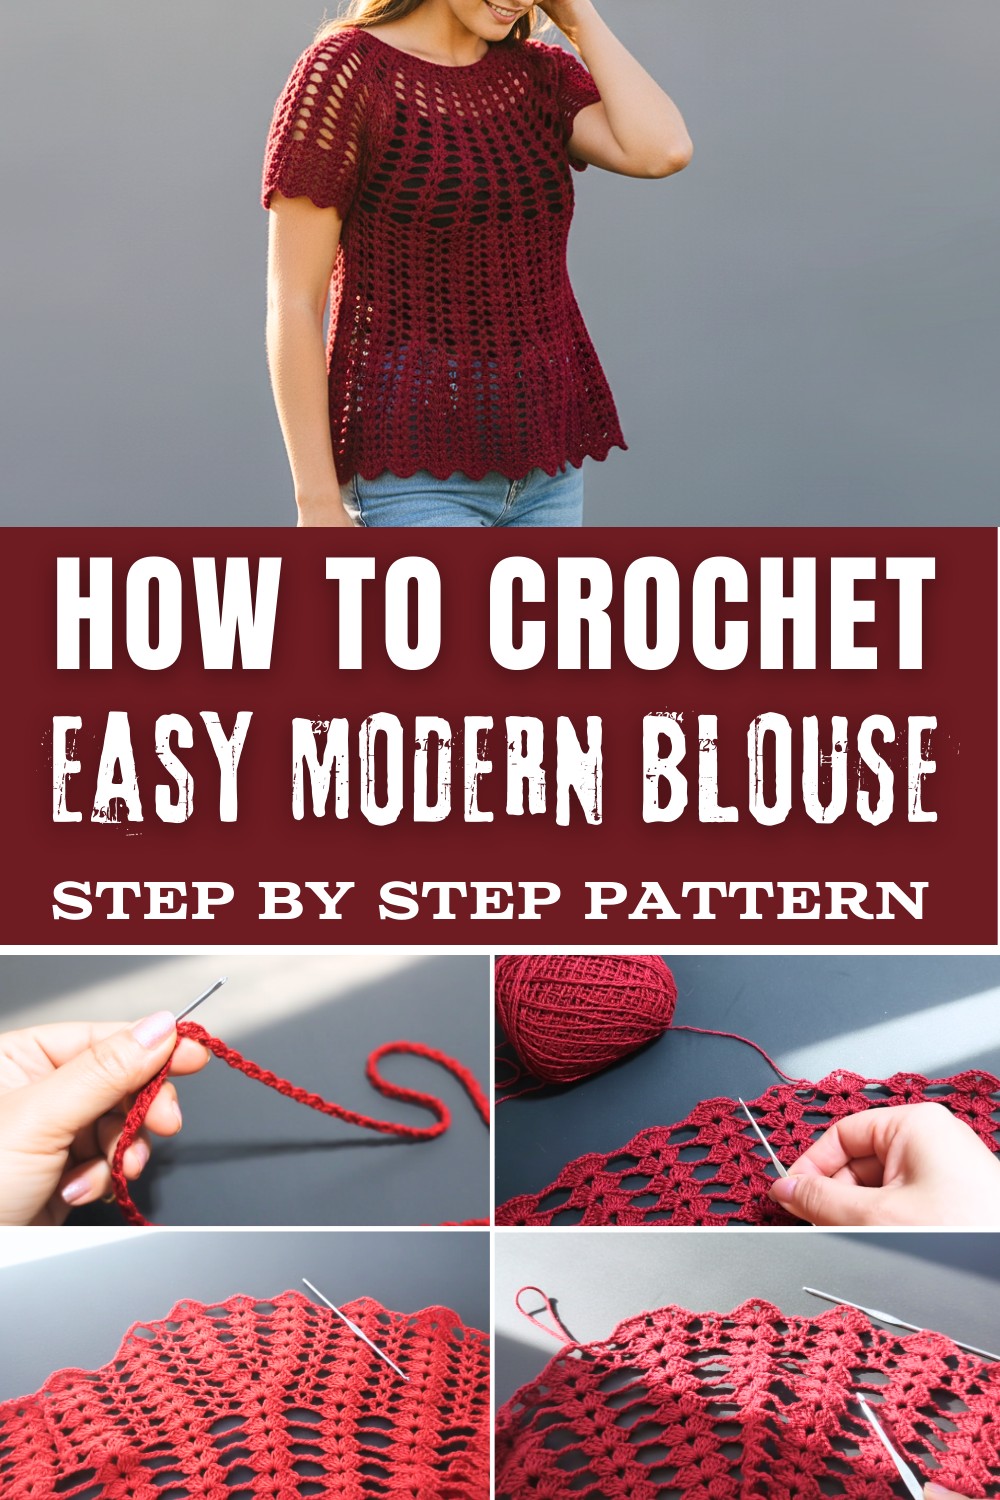
In addition to being a stylish addition, working on your own blouse offers a sense of accomplishment as you experiment with different stitches and textures. Whether it becomes a wardrobe staple or a heartfelt gift, this garment beautifully combines elegance and comfort, enhancing any outfit with personal charm.
Materials Required
- Yarn: Two (148g) skeins of 100% cotton yarn (or approximately 296g in total).
- Ensure the yarn is lightweight or fingering to sport-weight.
- Hook: Metal crochet hook, size Zero (0) (or size appropriate for your yarn and tension).
- Stitch Markers: At least two, for dividing sleeves.
- Scissors: For cutting yarn.
- Tapestry Needle: To weave in ends.
- Measuring Tape: To ensure proper gauge and finished measurements.
Gauge
- Create a sample swatch before starting:
- Fan Stitch Swatch: 1 fan pattern (4 DC, chain 2, 4 DC) = 1.5 inches x 1.5 inches (4 x 4 cm).
- Stitching Tension: Gauge will depend on the size hook and yarn used.
Finished Size
- This pattern creates a large size blouse, but it's customizable for smaller or larger sizes.
- The top is worked top-down in the round starting with the neck.
Pattern Overview
- Blouse begins with a chain circle (for the neckline).
- Fans are worked in repeating rounds throughout, gradually increasing for the body and sleeves.
- The sleeves and bodice are separated midway.
- The bottom section of the blouse is expanded slightly for a looser fit.
- The blouse ends with decorative details for both the neckline and sleeves.
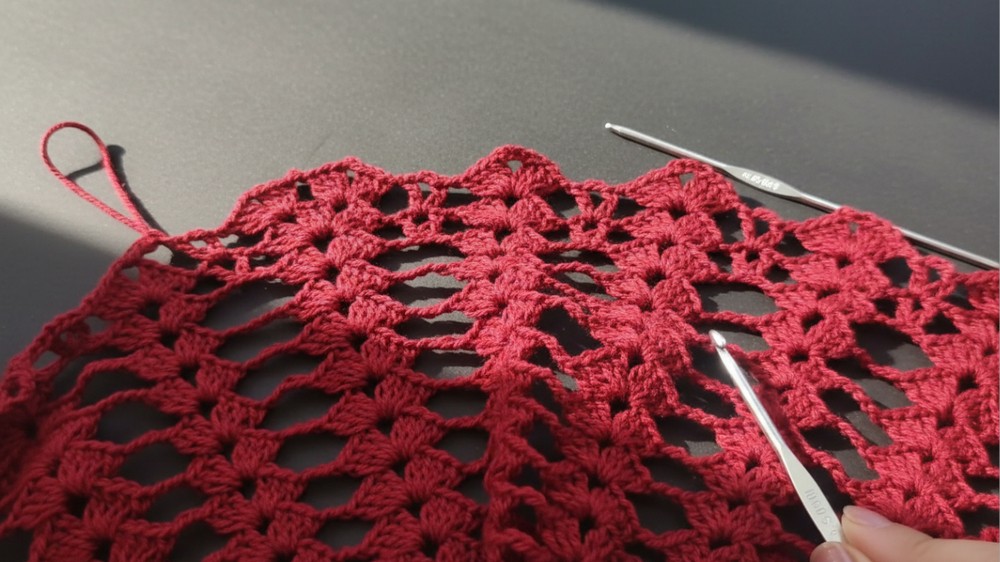
Crochet Blouse Pattern
This detailed pattern provides directions to create a beautiful cotton crochet blouse suitable for various sizes. This is a beginner-to-intermediate-level project that features fans, chains, and double crochets to form a lacy, elegant design.
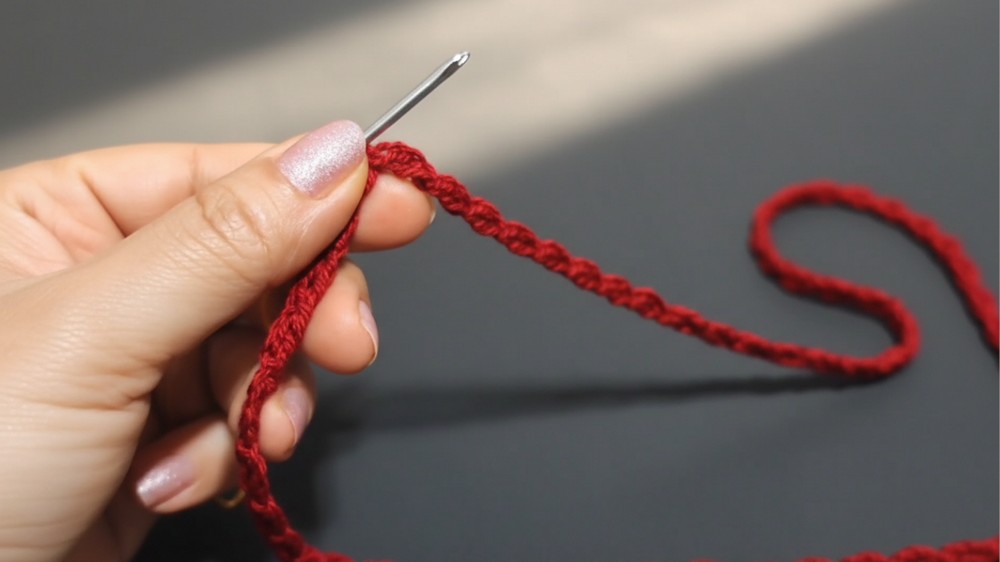
1: Starting the Foundation
- Chain 4. Join with a slip stitch to form a ring.
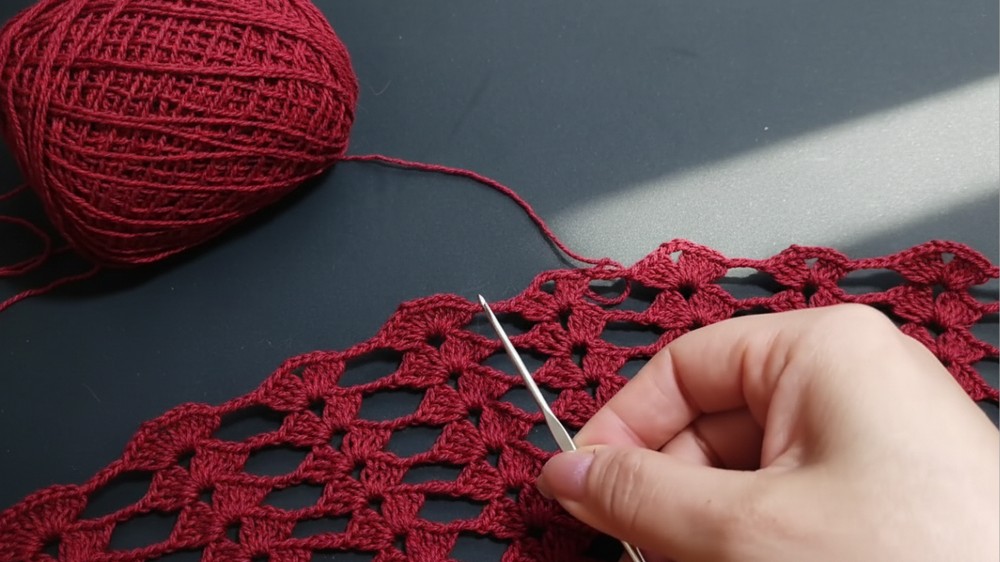
- Begin the first round of fans:
- Chain 3 (counts as the first DC), make 2 more DCs into the ring.
- Chain 2, then make 3 DCs into the ring. (This completes the first fan).
- Repeat:
- Chain 1 to separate.
- Continue making fans (3 DC, chain 2, 3 DC) around, leaving even spacing around the foundation circle.
- End the round with a slip stitch, connecting to the third chain of the starting chain-3.
2: Expanding the Yoke
- Round 2-12 (Yoke Rounds):
- Continue working fans into each previous fan, increasing follows naturally:
- Chain 1 between fans.
- In the middle (chain-2 space of the fan below), work 4 DC, chain 2, 4 DC (fan).
Increase: Every 4-5 rounds, add one more chain between the fans for subtle widening.
- Continue working fans into each previous fan, increasing follows naturally:
- When the yoke fits nicely around your shoulders and arms after approximately 12 rounds, determine separation for the sleeves.
3: Dividing the Sleeves
- Count Fans:
- Mark the number of fans for two sleeves and two front/back parts (e.g., 36 fans are distributed evenly around the piece: 9 for each sleeve and 18 for the body).
- Use Stitch Markers to set boundaries for the sleeves.
- Crochet the Body Section First:
- Skip the fan stitches for the sleeves, chain across the underarm gap, and continue crocheting fans for the body.
4: The Bodice Section
- Rounds 13-25 (Body):
- Work fans only for the body section (as done previously) until the bodice reaches the desired length.
- Use the same fan pattern, increasing for a looser silhouette towards the bottom. Add an extra chain between fans if a flare style is desired.
5: The Sleeves
- Join yarn in any stitch marker of the armhole.
- Using the fan pattern, work fewer chains or higher stitches to taper the design slightly.
- Crochet 6 rounds for each sleeve or adjust for your preferred arm length.
6: Neckline Adjustment
- Starting from the neckline, work around in fan patterns with reduction:
- Change fans to 2 DC, chain 2, 2 DC instead of 4 DC.
- Pull the neckline tighter by skipping additional chains at intervals.
7: Finishing Touches
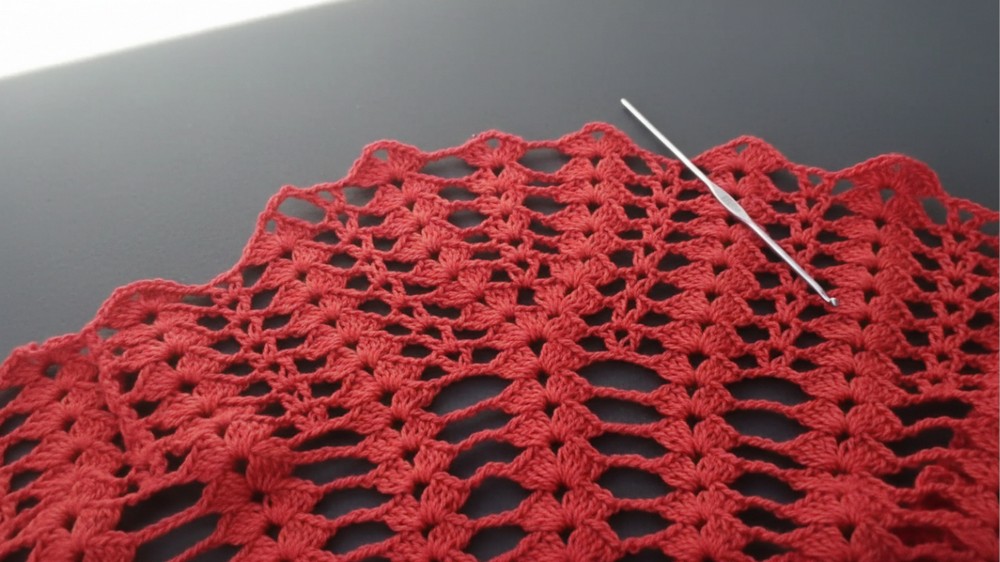
- Add a decorative border to both the hemline and sleeves, increasing chains or trebles for a whimsical edge.
- Weave in all loose ends with a tapestry needle.
- Steam block the blouse for a polished finish.

Special Techniques
- Fan Stitch: Worked as 4 DC, chain 2, 4 DC in one space.
- Joining Rounds: Always join with a slip stitch to create a seamless round.
- Adjusting Size: Add or remove fans in the yoke (beginning) for smaller or larger sizes.
Customization Ideas
- Color: Use a gradient or multicolored yarn for an ombre effect.
- Sleeve Length: Extend or crop the sleeves for winter or summer designs.
- Lacy Look: Add extra chains between fans for an airy, beach-ready blouse.
- Neckline Variety: Convert this blouse into an off-shoulder or V-neck variation.
Tips for Crocheting
- Check Gauge: Re-check gauge when switching hook sizes or adjusting the yarn type.
- Count Often: Ensure consistent fan placements by frequently checking stitch counts.
- Yarn Management: Keep a second skein ready for uninterrupted crocheting.
- Secure Stitch Markers: Proper placement avoids sleeve and body misalignment.
Conclusion
This cotton crochet blouse is perfect for special occasions or casual wear. Its fan stitch offers sophistication, while the versatile design ensures ample room for creativity. Customize the blouse with color, stitch spacing, or sleeve length to make it yours!
Remember: Practice is essential, so take your time and enjoy the process of creating a hand-made masterpiece.
Final Look:
Your blouse should display an elegant, lacy texture, with softly flaring sleeves and a slightly wider bottom. It pairs beautifully with skirts, jeans, or casual summer accessories.