
Try the Free Crochet Tote Bag Pattern for easy instructions to crochet a pretty, neat tote bag that's perfect for school or play.
On a brisk autumn afternoon, I found myself searching for the perfect accessory to carry my essentials, something functional but stylish, something handmade to reflect my personality. That's when I decided to crochet a tote bag, a project that not only brought warmth to my chilly evenings but also gave me an accessory I could proudly call my own. This tote bag pattern has a quiet charm; its clean lines, textured details, and endless possibilities for personalization make it a joy to create. You can experiment with rich, vibrant shades for a bold autumn look, soft pastels for a subtle touch, or earthy tones for a timeless feel.
Learn this Crochet Tote Bag Pattern for Stunning Results
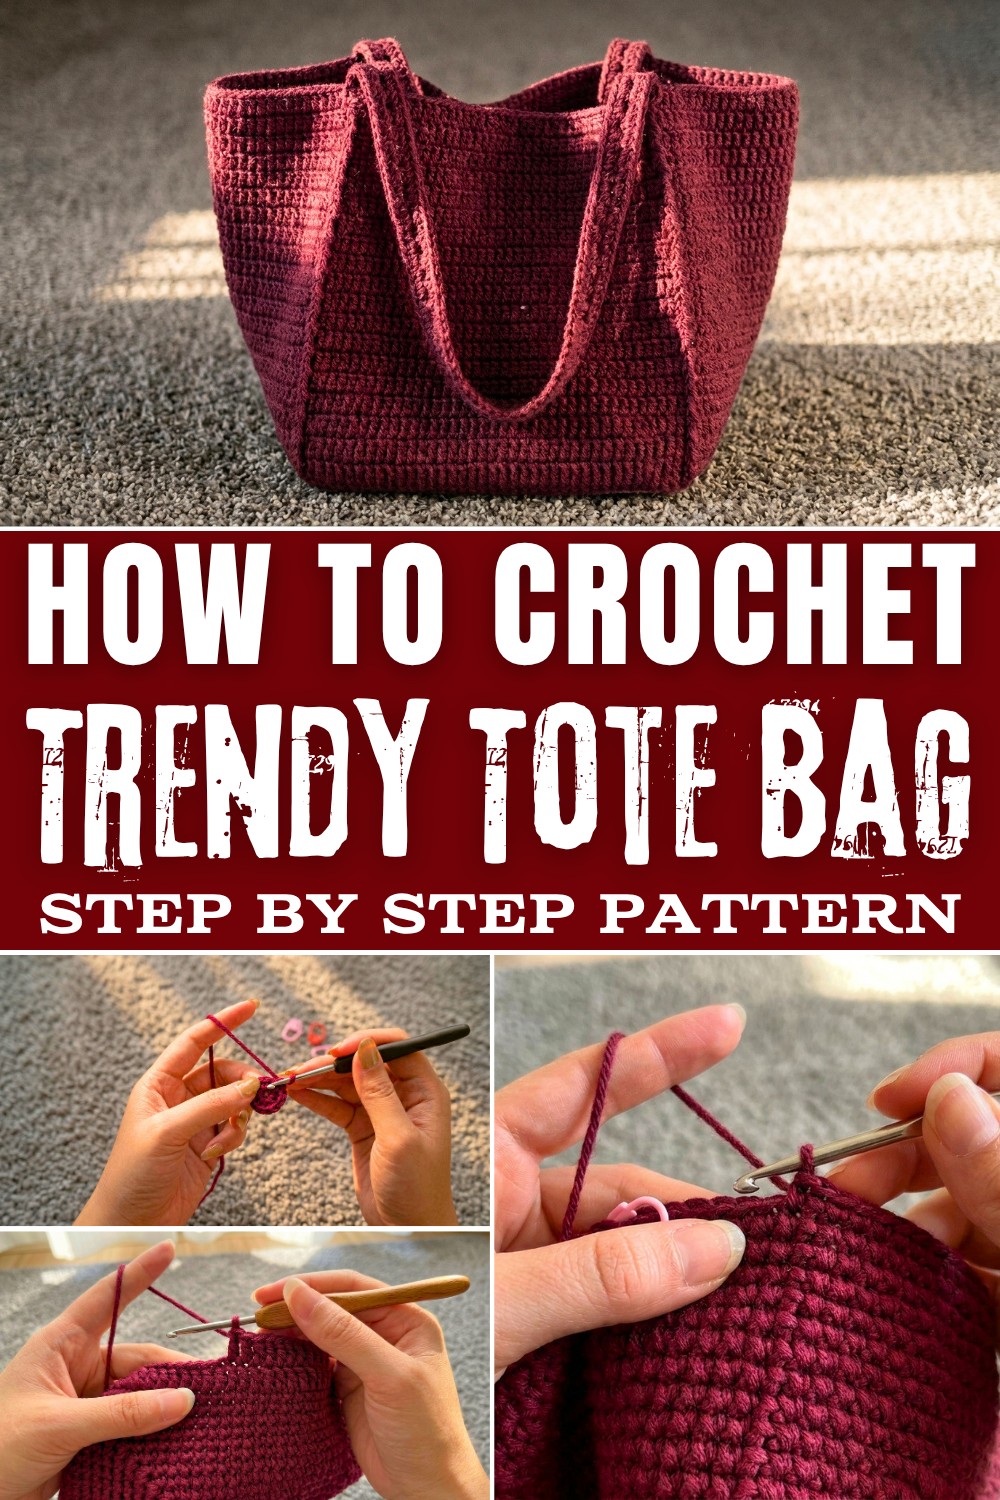
This pattern effortlessly combines beauty and practicality. With double crochet stitches forming the sturdy base and front post double crochet adding a textured twist, the pattern is both functional and chic. What's truly wonderful about these stitches is their versatility-you can use them in countless other projects like blankets, coasters, or even tote-style baskets for home organization. If you're looking to sharpen your crochet skills, this pattern is a great way to dive into techniques like creating a magic ring, mastering seamless joins, and learning how stitch markers simplify life.
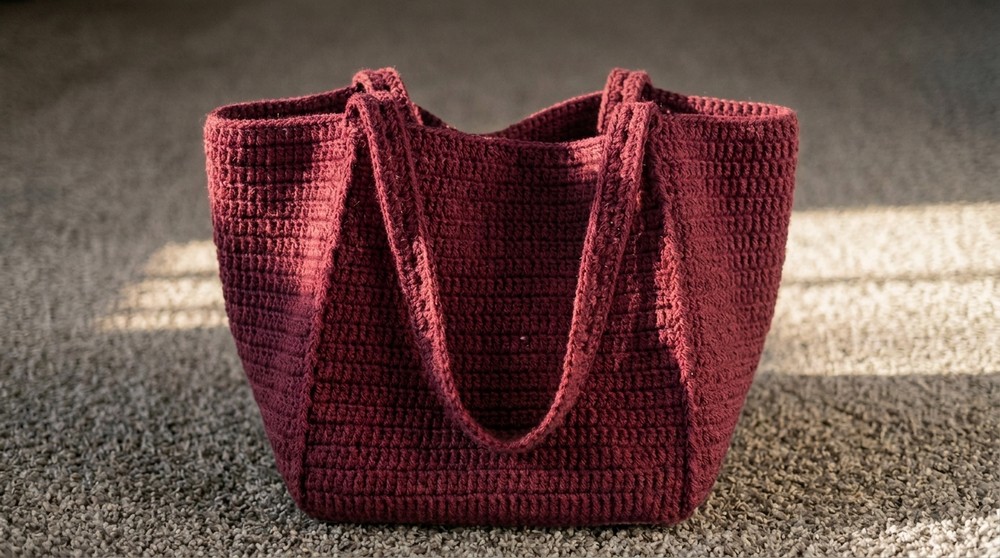
Crocheting this pattern isn't just about making a bag; it's about crocheting a piece that will accompany you on your errands, adventures, or quiet coffee shop visits. Along the way, you'll unlock skills that can be applied to other projects, giving you confidence to dream big with your hooks and yarn. As you work through each round, the bag slowly turns into something uniquely yours, stitched with care and creativity.
By the end of the pattern, you'll have more than just a tote bag; you'll carry a sense of accomplishment. You'll learn how to:
- Master foundational stitches like double crochet and front post double crochet.
- Add texture and structure to your crochet projects.
- Find the joy of making something with your hands that's both beautiful and functional.
Skill Level & Terminology
- Skill Level: Beginner to Intermediate
- Crochet Terminology: US terms are used throughout this pattern.
Materials & Tools
To create this shoulder bag, you'll need the following:
- Yarn: Approximately 3 skeins of medium-weight yarn (e.g., worsted weight) in Burgundy color.
- Hook: Size H/8 (5mm) crochet hook.
- Stitch Markers: For keeping track of your stitches.
- Scissors: To cut your yarn cleanly.
- Tapestry Needle: For sewing and weaving in ends.
Gauge
- Gauge: 10 single crochet stitches x 10 rows = 4 inches.
Test your gauge using single crochet stitches before starting to ensure the correct size. Adjust your hook size if necessary.
Abbreviations List
Here's a quick reference for the stitches and terms in this pattern:
- Ch: Chain
- SC: Single Crochet
- DC: Double Crochet
- Sl St: Slip Stitch
- FPDC: Front Post Double Crochet
Special Stitch Instructions
1. Seamless Double Crochet:
- Yarn over, insert the hook into the desired stitch, yarn over and pull through. Complete as a normal DC, pulling the yarn vertically to keep the stitch straight.
2. Front Post Double Crochet (FPDC):
- Yarn over, insert the hook from front to back, around the post of the stitch below. Yarn over, pull through, and complete the DC.
Finished Size
- Base Diameter: Approximately 19.5 cm (adjustable depending on the number of rounds).
- Body Height: Customizable based on personal preference.
About the Pattern
This shoulder bag pattern is designed with simplicity and elegance in mind, making it ideal for both beginners and more experienced crocheters seeking a quick, satisfying project. Key stitches include SC, DC, and FPDC, all of which come together to create a sturdy, beautiful bag that's ready for everyday use or special occasions.
Step-by-Step Detailed
Bag Base (18 rounds)
Round 1:
- Create a magic ring: Wrap yarn around fingers, insert hook into the loop, yarn over, and pull up a loop. Chain 1 to secure.
- Work 8 single crochet stitches into the ring.
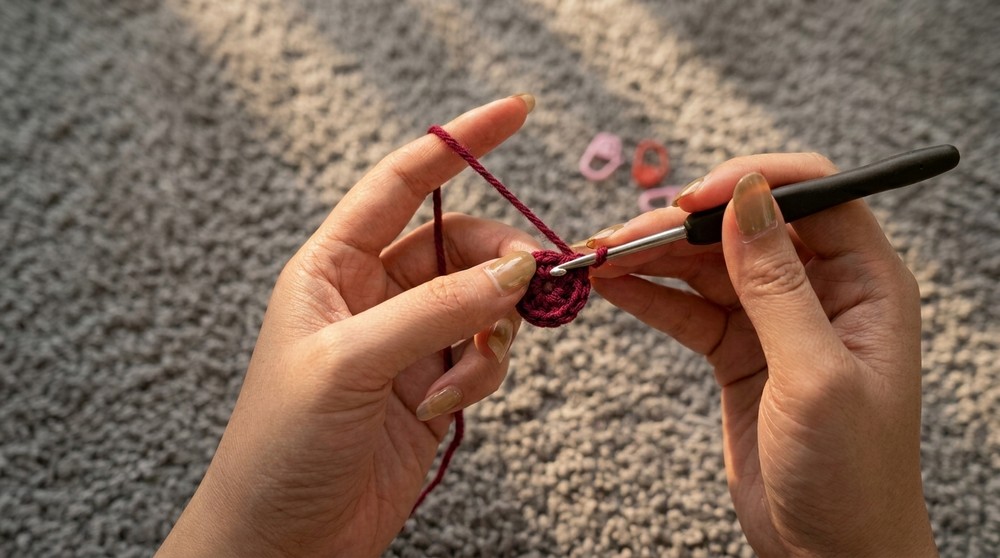
- Place a stitch marker in the first single crochet to mark the beginning of the round.
- Tighten the magic ring and slip stitch into the marked stitch to complete Round 1.
Round 2:
- Chain 1. Single crochet in the same stitch as the slip stitch. Place a marker in this stitch (mark the first stitch of the round).
- In the next stitch:
- Single crochet once.
- In the following stitch, work 3 single crochets, and mark the middle stitch.
- Repeat this pattern for 4 sets: (Single crochet once, Single crochet 3 with marker).
- Slip stitch into the first marked single crochet.
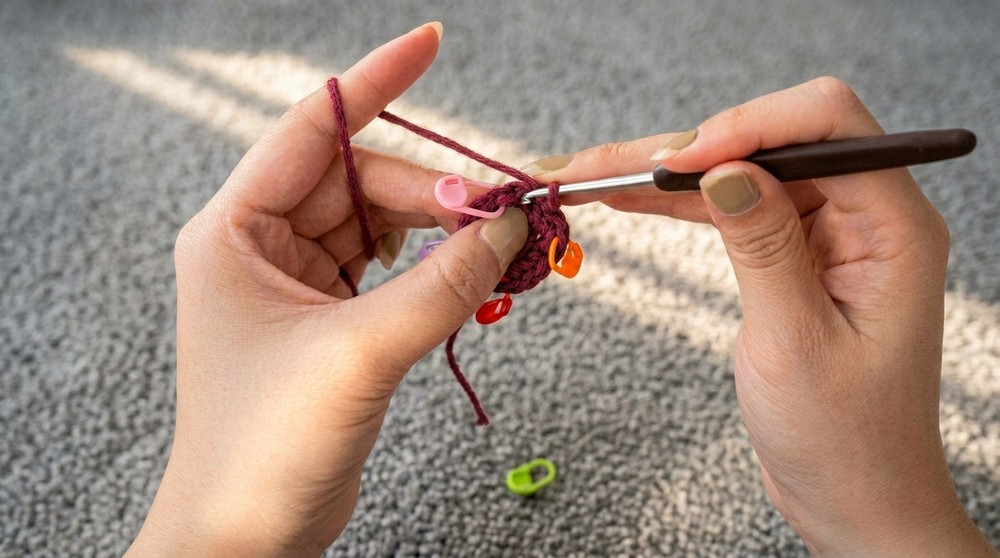
Subsequent Rounds (3-18):
- Pattern:
- Work single crochet stitches into unmarked stitches.
- In marked stitches, work 3 single crochets and re-mark the middle stitch.
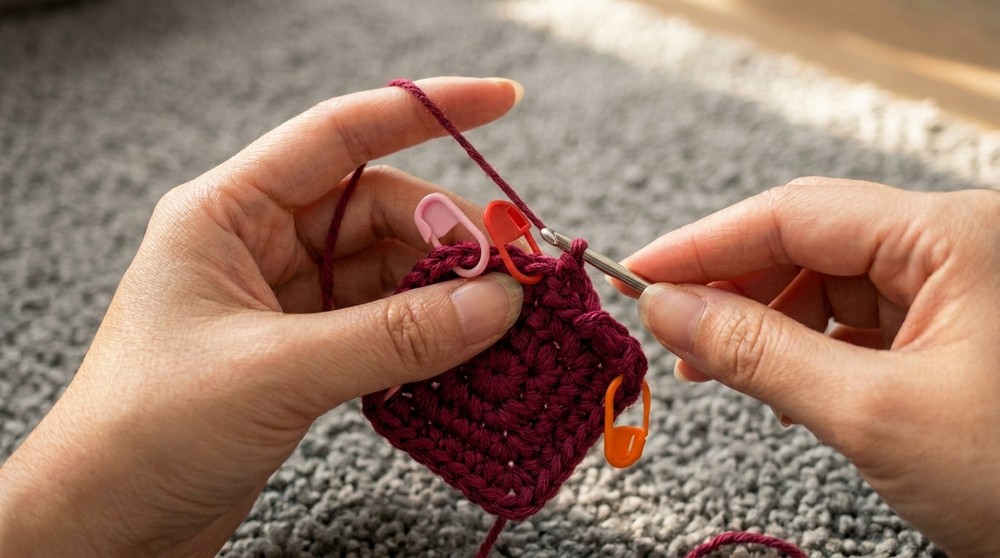
- Repeats: Continue the pattern as the base increases outwardly.
- Tighten the loop after each round.
- Always slip stitch into the first single crochet before starting the next round.
- Stop when the base reaches approximately 19.5 cm (18 rounds).
- If using less yarn, stop at 16 rounds for a smaller base.
Once you've finished the base, you'll have a lovely, uniform circle. Check the size against your desired measurement, making any needed adjustments by increasing or reducing the number of rounds.
Bag Body (Customizable rows)
Row 1:
- Chain 1. Work a seamless double crochet:
- Insert hook into the next stitch, yarn over, pull up a loop, and complete a double crochet.
- Continue working double crochet in each stitch around.
- At corner markers (middle stitch of each "3 single crochet set"): Work 3 double crochets, placing a marker in the middle double crochet of the corners.
- Slip stitch into the first seamless double crochet to finish the row.
Row 2:
- Begin with a seamless double crochet.
- Work double crochet stitches until reaching the marked corner.
- At each marked corner stitch:
- Remove the marker.
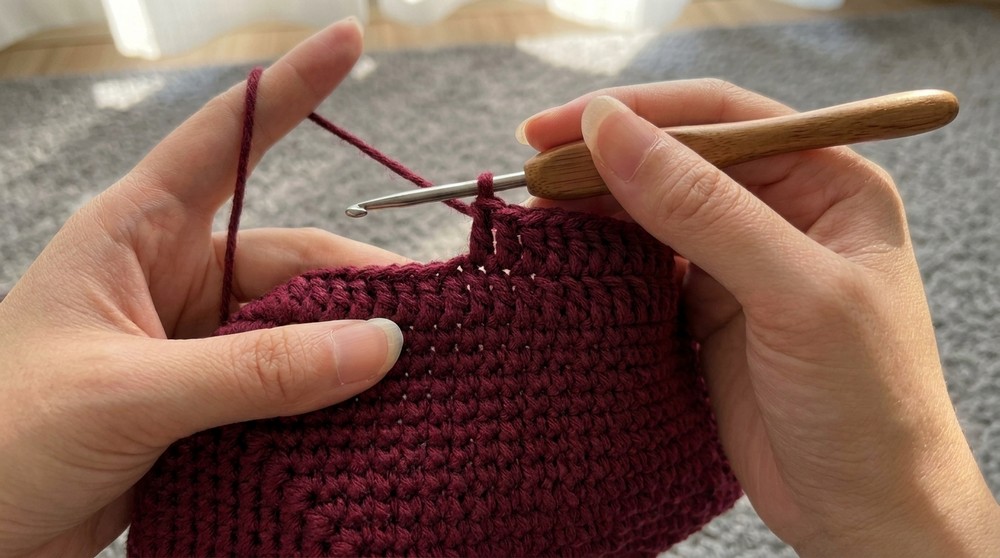
- Work a front post double crochet into the corner instead of a regular double crochet (optional).
- Replace the marker in the post of the front post double crochet.
- Remove the marker.
- Continue the pattern (double crochet in unmarked stitches, front post double crochet at corners). Finish with a slip stitch into the first seamless double crochet.
As your bag grows, you'll notice a seamless, clean transition between rounds. Use the FPDC stitches to maintain defined edges, pulling the loop slightly longer to ensure corners don't indent.
Rows 3 and Beyond:
- Repeat Row 2's pattern, maintaining the corner markers to preserve the bag's square shape.
- For the body height:
- Continue until the desired number of rows is completed.
- Typically, between 15-25 rows depending on your preference.
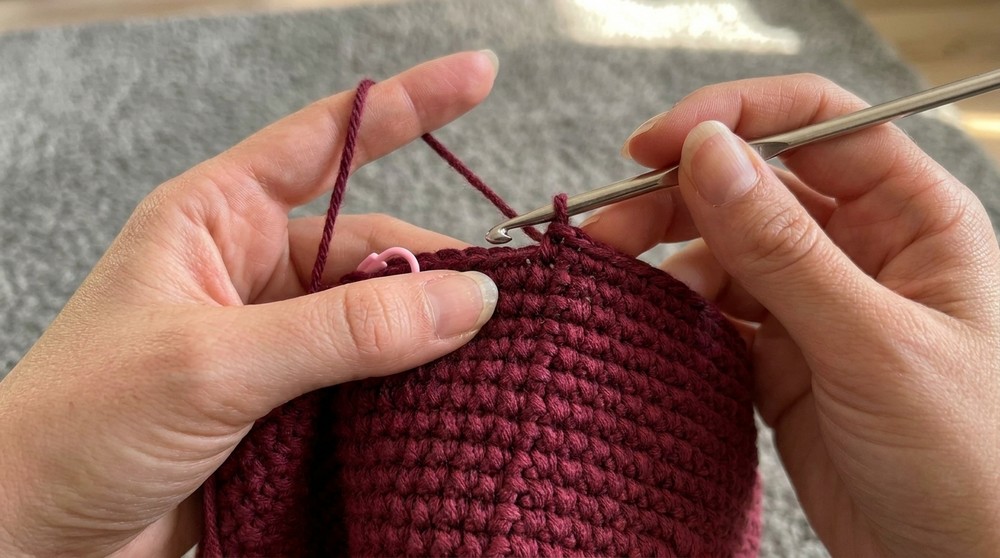
At this point, the base and body of your bag are complete! You'll notice a beautiful, structured bag taking shape with a smooth texture and sturdy form.
Bag Strap (Adjustable rows)
Row 1:
- Foundation Chain:
- Chain the desired length of the strap. Ensure it matches your height and bag positioning.
- For a shoulder bag, typically aim for 50-60 cm.
- Work open-work crochet patterns:
- For example: Chain 2, skip 1 stitch, double crochet into the next stitch.
- Repeat this pattern along the chain.
Subsequent Rows:
- Continue working open-work rows until the strap reaches your preferred width (approximately 4-6 cm).
- Use simple double crochet or add decorative patterns for customization.
Finishing
- Attach straps securely to the top of the bag:
- Use a yarn needle and whip stitch the straps to the bag edges.
- Ensure the straps are equidistant and sturdy.
- Weave in all ends neatly to prevent unraveling.
Make sure the straps are attached securely since they will bear the weight of the bag. Once the straps are attached, your stylish autumn shoulder bag is ready!
Customization Ideas
- Texture Variation: Add shell stitches or puff stitches for decorative texture.
- Color Blocking: Use contrasting yarn colors for stripes or patterns.
- Appliqué: Add a floral crochet piece or embroidery for a unique touch.
Tips and Remarks
- Avoid pulling stitches too tight when working front post double crochet to ensure corners don't distort.
- Always check your stitch markers for accuracy and remove/replace them as needed.
- Gauge consistency is crucial-if your stitches feel uneven, modify your tension or adjust the hook size.
Final Look
The finished bag is a versatile and elegant accessory, perfect for autumn and winter outings. Its sturdy base and seamless body provide durability while the open-work straps add charm. Customize your bag for size, color, and design preferences for a project that reflects your personal style.