
Place a sweet bird on your desk with the Crochet Mini Cardinal Free Pattern, a small red friend for nature lovers and holiday gifts.
Have you ever wished to hold a tiny bird in the palm of your hand? A small, vibrant cardinal with bright red feathers and a charming little beak, sitting happily on your windowsill or decorating your cozy shelves. This delightful figure captures the essence of nature's beauty in a mini size that brings cheer and warmth wherever you place it. Nancy, from the YouTube channel Nancy a crochet, has designed and shared a wonderful Crochet Mini Cardinal Pattern that lets you create this lovely bird easily at home. Full credit goes to Nancy for the original tutorial and creative design.
Winter Crochet Mini Cardinal Free Pattern For Home Decor
This miniature cardinal is not only eye-catching but also full of character with its tiny wings, tail, and standing legs. Its compact size makes it perfect for seasonal decorations, gifts, or even as a cute companion on your desk. The bright red color and detailed features make it stand out, adding a splash of life to any room.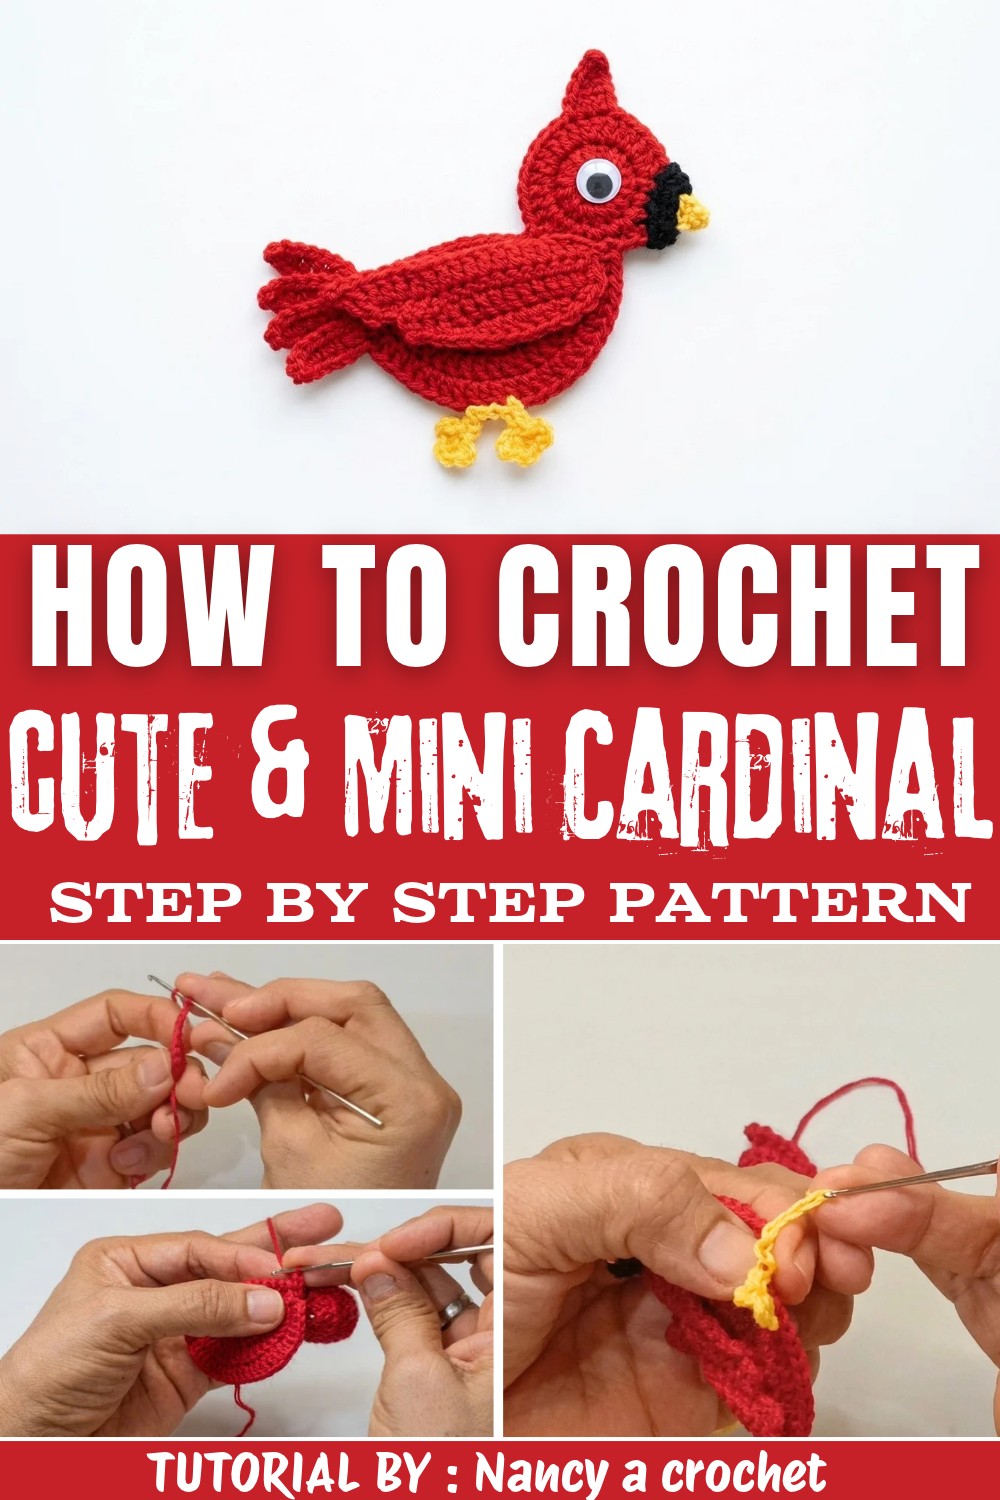
Whether you are new to crocheting or have some experience, this project is enjoyable and simple enough to finish without trouble. The final piece is soft to the touch and very light, making it easy to move around or pack as a charming handmade gift. If you love small projects that bring big smiles, this mini cardinal is an ideal choice. Why not try making your own? Follow the free Crochet Mini Cardinal Pattern and bring this adorable bird to life today! Check it out and let your creativity take flight.
Crochet Mini Cardinal : Step-by-Step Free Pattern
This project puts the spotlight on resourcefulness and thoughtful technique by turning simple yarn into a vibrant cardinal bird. Each section builds on foundational crochet skills, blending rounds and rows with shaping details. In addition to basic construction, textured wings, tiered tail, and a compact, expressive head take shape through careful stitches and strategic increases. Hand-stitching features such as the trumpet-like beak and slender legs add character and fidelity. As the process unfolds, every segment of the bird is clearly defined, ensuring clarity-even for those previously unversed in animal amigurumi. Working row by row, the familiar cardinal silhouette emerges, and the result is both delicately crafted and sturdy, suitable as a keepsake, ornament, or heartfelt gift. Attention to assembly and subtle color details brings the entire figure to life, making this cardinal a rewarding and satisfying project.
Quick Overview of Pattern
- Work the body in increasing spiral rounds with double crochets, starting from a magic ring.
- Shape and build the head foundation directly from the final body round.
- Sculpt the wing structure using rows of half double crochets worked in the back loop for texture.
- Make a three-point layered tail with incremental rows.
- Form a small beak (trumpet) in contrasting yarn and attach at the head tip.
- Attach legs with black yarn, using chains and slip stitches to mimic claws.
- Gently stuff the cardinal and carefully sew all parts together.
Notes
- Hold yarn doubled throughout for sturdiness and reduce gaps in the finished figure.
- Keep counts precise at each round transition for symmetry.
- Stuff the body and head lightly to retain roundness without over-stretching the fabric.
- Standard abbreviations are used, and each round/row progresses logically from the last.
- Secure joins by weaving in ends and tying knots inside parts for lasting stability.
- Adjust the angle of the head upon assembly for lifelike results.

Skill Level
Confident Beginner to Intermediate:
Some experience working in the round, increasing/decreasing, and joining pieces is recommended.
Materials
- Yarn: Cotton, 1 mm thick, two strands held together in Red (main), small amounts of Black and Orange.
- Hook: 1.7 mm steel crochet hook.
- Notions: Tapestry needle, scissors, two small beads or embroidery thread for eyes, small amount of stuffing/polyfill.
Measurements / Sizing
- Finished Cardinal: Roughly 7-9 cm (2.75-3.5 in) from beak to tail tip.
- Wingspan: About 4-5 cm across.
- Beak: Approximately 1 cm long.
- Legs: Each about 2 cm with extended toes.
Gauge & Stitch Pattern
- Gauge: Not critical. Double crochet/half double crochet stitches should be tight enough to prevent stuffing from showing.
- Stitch Pattern:
- Body & Head: Double crochet (dc), increases, worked in spiral or turned rounds.
- Wing & Tail: Half double crochet (hdc), worked flat and in back loop for definition.
Stitch Abbreviations
| Abbr | Stitch |
|---|---|
| MR | Magic ring |
| ch | Chain |
| dc | Double crochet |
| hdc | Half double crochet |
| sl st | Slip stitch |
| inc | Increase (2 sts in 1 st) |
| BLO | Back loop only |
Special Stitches
- Magic Ring (MR): Make a loop, insert hook, pull up a loop, secure with ch 1, work stitches into ring.
- Increase (inc): Work two stitches into the same base stitch.
- BLO: Insert hook into back loop only of indicated stitch.
The Crochet Pattern
The Body
- Round 1:
Start with MR using two strands of red. Ch 3 (counts as dc), 7 dc in ring (8 dc total). Pull yarn to close ring.

- Round 2:
Ch 3, turn. Inc in each st around (16 dc). - Round 3:
Ch 3, turn. Work [1 dc, inc] repeat around (24 dc). - Round 4:
Ch 3, turn. BLO throughout this round: [2 dc, inc] repeat around (32 dc).
Head Base & Shaping
- Create Head Foundation:
On the last st of Round 4, ch 5. Skip 4 chains; in the 4th ch, work 12 dc along the chain back.

- Head Round 2:
Close, ch 3, and work inc into each st along the head row (24 dc). - Head Positioning:
Fold head section upright, position it as desired, and pin temporarily.
Wing and Head Attachment Details
- Slip Stitch Shaping:
From head base, sl st across 5 times, then 6 more slip stitches as you curve. - Half Double Crochets:
Next st: hdc. Then dc, dc in following stitches. Ch 3 to form a small tip for the crest. - Work Down to Marker:
Continue with hdc back down toward the body, then sl st about 8 times to the main circle. - Securing to Body:
Slip stitch through both head base and body.
Work 8 hdc across base-wing region, then return, switching to slip stitches, to anchor.

- Wing Texturing:
Begin rows of hdc BLO across wing, turning with ch 1 at each end.- Continue back and forth, stopping 3 sts before tail each row, until a tapered wing is formed.
- Finally, finish tip with slip stitches, then fasten off and weave in ends.
The Tail
- Foundation:
Make a slip knot, ch 8. - Row 1:
Work hdc in 2nd ch and each across (6 hdc). - Row 2:
Ch 1, turn. Next, build "piquitos" (little points): for each, work a few stitches, make a ch 1, turn, and repeat three times, forming three points. - Row 3:
Work across remaining stitches as above for final layers. - Finish:
Cut yarn, thread tail on tapestry needle, sew tail securely to the body's back end.
The Beak (Trumpet)
- Foundation:
With orange yarn, ch 9, then join to form a ring. - Stitches:
Ch 1, 12 hdc in ring. Close with sl st, leaving a tail for sewing. - Attachment:
Position beak on front of head (about 4 sts in from tip) and sew in place using tapestry needle.
The Legs
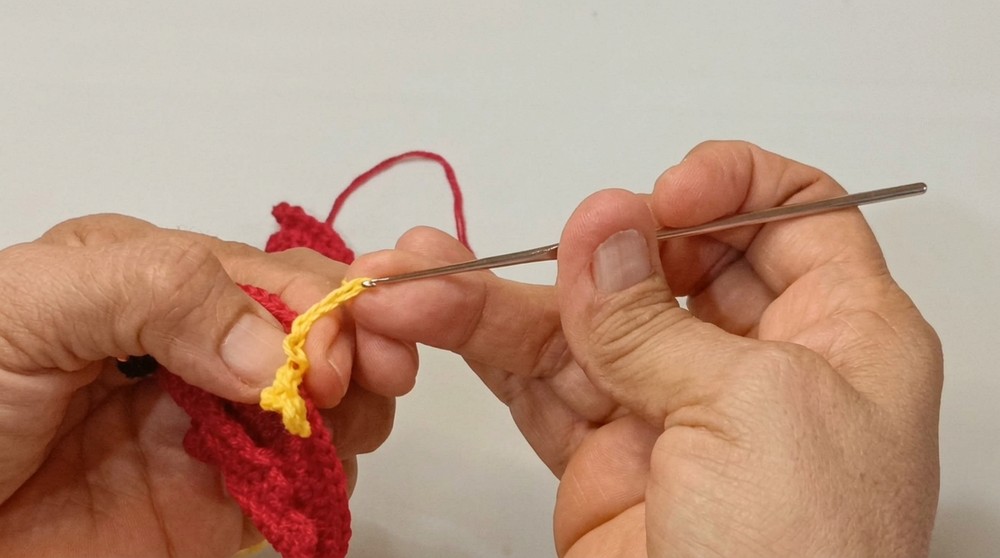
- Leg Construction:
Attach yellow yarn at body underside, about 4 sts from tail.- Ch 6.
- For first toe: ch 3, sl st back into 3rd ch from hook.
- Repeat two more times for three toes.
- Finishing:
Anchor leg back into body with sl st.- Repeat process for second leg (right beside the first).
- Hide Tails:
Securely tie off, then hide remaining yarn tails inside body.
Assembly & Finished Size
- Stuff the body and head lightly before fully closing.
- Stitch or glue small beads for eyes just above and to each side of the beak.
- Adjust crest, head, wings, and tail for lifelike angles as appropriate.
- Finished cardinal measures approximately 7-9 cm long when shaped and assembled.

Conclusion and Ending Words
This crochet cardinal project proves that fundamental stitches, when combined with careful shaping and thoughtful detailing, result in a piece embodying both animation and character. Building the body in the round establishes a sturdy core, while layered wings, a crisp three-point tail, and a small trumpet-shaped beak bring authenticity. By following each section closely-paying attention to directions for BLO, increases, and structured attachment points-the result holds its form while remaining visually accurate. Subtle sewing techniques used in joining the parts ensure durability, while eye placement and crest shaping add a splash of personality. Those who work step by step through this pattern will find gratification in both process and result, and the completed cardinal stands as a testament to precision and creativity using simple cotton and hook.