
Start a fun yarn project with this Crochet Cute Little Kitten Free Pattern and stitch a small cat for children or your favorite shelf.
There's something truly heartwarming about creating small, adorable items that instantly bring a smile to anyone's face. One such delightful project is the Crochet Cute Little Kitten Pattern, a charming handmade piece that stands out for its sweet appearance and comforting presence. Thanks to the clear and detailed tutorial by Nancy a crochet, anyone can bring this little feline friend to life, whether you are new to yarn projects or just want to enjoy a fun, rewarding activity.
Darling Crochet Cute Little Kitten Free Pattern to Decorate Your Shelf
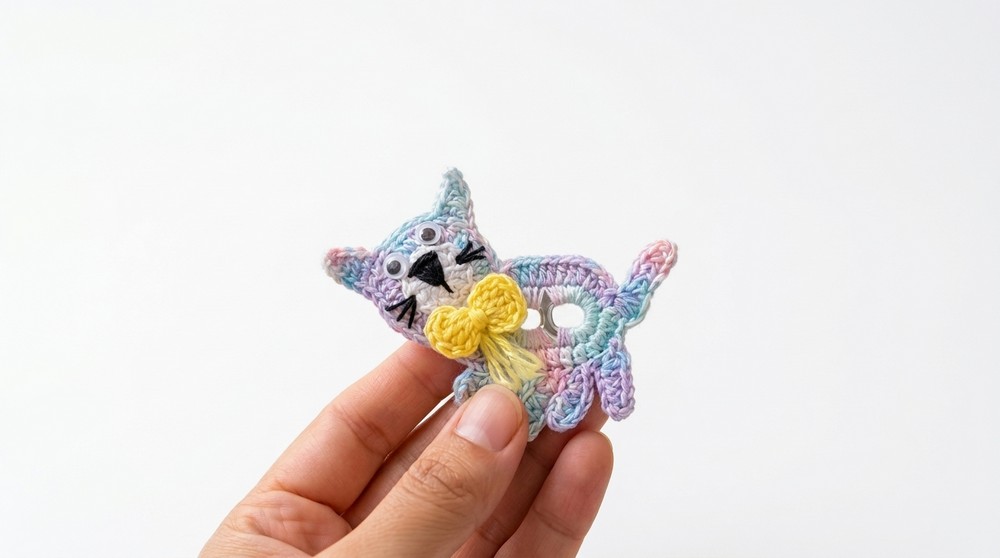
This adorable kitten is the perfect addition to your collection of tiny treasures. Designed as a stuffed toy, it embodies a cozy and soft texture that invites cuddles and admiration. Its petite size makes it an excellent gift for kids, cat enthusiasts, or anyone who appreciates unique, thoughtful presents. Beyond gifting, this kitten pattern shines as a decorative touch on shelves, desks, or even as a cute keychain charm, brightening up everyday spaces.
The beauty of this pattern lies in its simplicity and charm. The kitten features rounded shapes giving it a plump and huggable form, with carefully stitched details that capture the essence of a playful kitten's curious and gentle expression. Soft curves shape the ears and tail, while the subtle use of colors enhances its lifelike and warm appeal. The style is both whimsical and comforting, effortlessly blending with various décor themes, from cozy nooks to colorful children's rooms.
What truly makes this little kitten stand out is its inviting texture and the loving attention to every stitch, replicating the softness and innocence of a real kitten in miniature form. Whether displayed as a cute collectible or nestled in the arms of someone special, this pattern changes simple yarn into a delightful reminder of love and joy.
Playful Crochet Cute Little Kitten Free Pattern
Upcycling everyday items can provide surprising structure and charm in crochet, making resourceful projects highly attractive. In this pattern, two can tabs form the strong foundation for a kitten-shaped ornament, providing not only stability but a unique aesthetic. The assembly process starts by joining and covering the tabs with crochet stitches, then gradually builds the body, tail, head, ears, and paws, each enhanced by strategic shaping and finishing. Facial features are added with embroidery and accessories, resulting in a project that feels both innovative and delightful. Each step employs careful attention to stitch placement, ensuring the final appearance is neat and expressive. This method uniquely balances utility and whimsy, and can be easily adapted to suit multiple colorways or creative embellishments.
Quick Overview Of Pattern
- Build the kitten's base by joining two can tabs with single crochet.
- Form the tail using a chain and half double crochet decreases.
- Construct the back, head, and curves with chains and treble stitches.
- Shape the head, add ears with chains and half double crochets.
- Crochet and attach front paws for expressive detail.
- Make a magic ring muzzle and embroider nose and whiskers.
- Finish by assembling facial features and customizing with beads and bows.
Notes
- Ensure both can tabs are clean and have no sharp edges; use pliers if needed.
- Keep tension tight around the tabs for a neat finish and plenty of structure.
- Color choices can alter personality or make your kitten unique.
- School glue may provide extra firmness on paws or base if desired.
Skill Level
Advanced Beginner to Intermediate:
Familiarity with working in rounds, switching between stitch types, and basic embroidery is recommended. Half double crochet, single crochet, and treble stitches are used frequently.
Materials
- Can Tabs: 2, with smooth edges.
- Cotton Yarn: Main color for body, contrasting colors for details.
- Crochet Hook: As recommended for your yarn weight (typically 2-3 mm for amigurumi).
- Stuffing: Small amount for muzzle.
- Accessories: Beads (eyes), embroidery thread (nose/whiskers), optional yarn bow.
- Optional: School glue.
Measurements / Sizing
- Finished kitten body: approx. 7-9 cm length (including tail).
- Head: approx. 3-4 cm diameter.
- Paws: approx. 1.5 cm each.
Gauge (and Stitch Pattern)
- Gauge: Not critical; stitches should be tight enough to cover can tabs and keep stuffing inside.
- Stitch pattern: Single crochet (sc), half double crochet (hdc), treble (tr), decreases (dec).
Stitch Abbreviations
| Abbreviation | Meaning |
|---|---|
| ch | Chain |
| sc | Single crochet |
| hdc | Half double crochet |
| tr | Treble crochet |
| dec | Decrease (two stitches into one) |
| sl st | Slip stitch |
| MR | Magic ring |
Special Stitches
- Magic Ring (MR): Used for the muzzle.
- Treble Crochet (tr): Adds height and curve to the head/body.
- Half Double Crochet Decrease (hdc dec): Shape tail and paws.
The Crochet Pattern
Preparing and Joining the Can Tabs (Body Base)
- Step 1: Position two clean can tabs together. Secure the center with a stitch marker.
- Step 2: Work 5 single crochets (sc) into the center space between the tabs.

- Step 3: Around the first tab: Work 17 single crochets (sc) along its outer edge, weaving your yarn tail under stitches for security.
- Step 4: Bridge the center, working 5 single crochets (sc) into the space between tabs again.
- Step 5: Around the second tab: Work 17 single crochets (sc) along its outer edge.
- Step 6: Join end to start with a slip stitch (sl st) to close the round.
Body Foundation and Tail
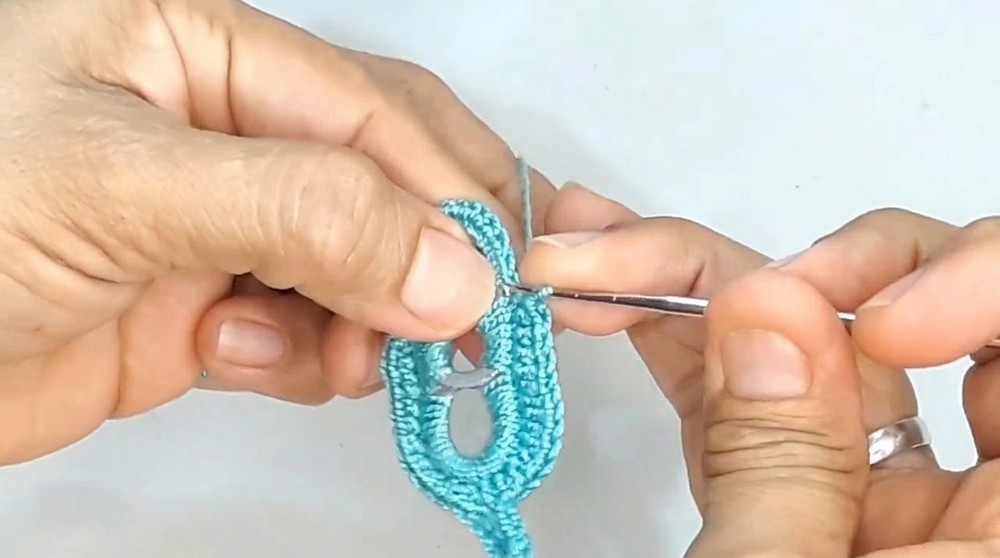
- Row 1: Chain 1. Work 1 single crochet (sc) in each stitch around the base. Place 11 single crochets (sc) to anchor the base shape.
- Tail Formation:
- Chain 7-8 stitches (ch) for the tail's base.
- Turn and work back: 1 slip stitch (sl st), 1 single crochet (sc), then 3 half double crochets (hdc).
- Work 3 half double crochet decreases (hdc dec) to taper the tail.
- Secure tail curve with 1 slip stitch (sl st) in the same stitch.
- Continuing the Body:
- Work 2 single crochets (sc).
- Transition into 10 half double crochets (hdc), one per space.
- Add 2 slip stitches (sl st).
- Finish this curve with 3 single crochets (sc) at the lower resting area.
Back and Head Construction
- Upper Body Curves:
- Where you made 3 single crochets (sc), chain 3 (ch) and secure with a slip stitch (sl st) to form a chain space.
- Into that space, work 12 treble crochets (tr) (the starting chain counts as the first tr).
- Head Increases:
- Work around the contour of the head, making 2 treble crochets (tr) in every space (increase)-this creates fullness for the head curve.
- Joining the Head:
- Anchor stitches with single crochets (sc) into the lower body, skipping alternate stitches to keep rounded shape.
- Close at top of head with a slip stitch (sl st), angling work to firmly lock shape.
Head Details & Ears
- Establishing the Ears:
- From the head closure, make 4 slip stitches (sl st) along the head edge.
- First Ear:
- Chain 6 (ch). Turn back: work 1 slip stitch (sl st), 1 single crochet (sc), then 3 half double crochets (hdc).
- Skip 2 stitches at the base, anchor ear with a slip stitch (sl st) into the 3rd stitch.
- Transition Across Head:
- Make 3 slip stitches (sl st) across the head base.
- Second Ear:
- Chain 6 (ch), turn back, repeat 1 slip stitch (sl st), 1 single crochet (sc), 3 half double crochets (hdc).
- Skip 2 base stitches, anchor into the 3rd with a slip stitch (sl st).
- Finish Edge: Slip stitch down remaining edge to body base.
Front Paws
- Form First Paw:
- Anchor yarn at lower body front. Chain 4 (ch).
- Work back: 2 single crochets (sc) in the chain.
- In last chain stitch, work 3 single crochets (sc) into same stitch.
- Join with a slip stitch (sl st) to complete paw shape.

- Form Second Paw:
- Slip stitch slightly along base, repeat sequence for second paw.
- Finish Off: Cut yarn and weave ends inside. Optional: Apply school glue for extra firmness.
Muzzle and Facial Features
- Muzzle Construction (Magic Ring):
- Form a magic ring (MR), chain 2 (ch).
- Work 11-12 half double crochets (hdc) into magic ring.
- Pull ring tight and join with a slip stitch (sl st); leave a tail for sewing.
- Embroidery & Assembly:
- Position muzzle at lower head, sew in place.
- Embroider a small triangle nose with black thread on muzzle.
- Extend whiskers out: work 2-3 straight stitches (or loops) on each side.

-
- Secure muzzle around all edges.
- Final Touches: Attach beads for eyes above muzzle, embroider eyebrows, add optional heart or bow at chin or ear.
- Sew weakers on head.

Assembly & Finished Size
- Attach paws firmly to base, ensure ears and muzzle are secured.
- Finished kitten: approx. 7-9 cm length, 3-4 cm head diameter, 1.5 cm paws.
- Face features neatly placed; extra fabric or yarn details may be added for personalization.
Conclusion and Ending Words
This recycled can tab kitten brings together practical materials and thoughtfully placed crochet stitches, resulting in a sturdy and expressive keepsake. Each stage, from joining the tabs to building the body and head, highlights the effectiveness of clear stitching and stepwise construction. The addition of embroidered whiskers, stitched nose, and optional accessories elevates character while ensuring durability. Combining the tactile structure of metal tabs with cotton yarn not only produces a playful ornament but also showcases resourcefulness in handwork. The finished piece can serve as a charming decorative accent or thoughtful gift, with potential for further customization in color or embellishment. Working through these steps, crocheters refine their skill in shaping and detailing small figures-an achievement reflected in every completed kitten.