
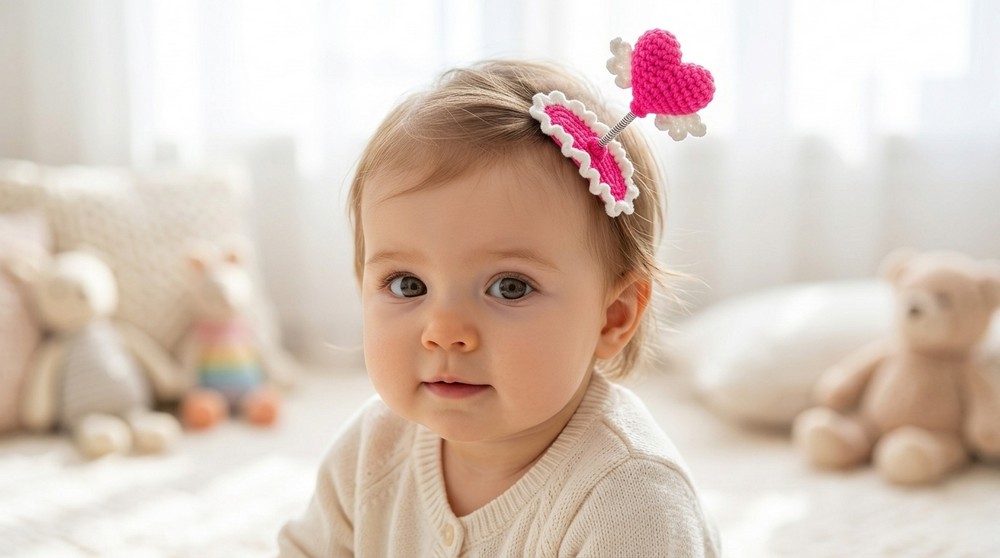
Switch up your style effortlessly with the Free Crochet Heart Hairclip Pattern for a sweet and unique touch to any hairdo.
Have you ever dreamed of combining creativity and function into something as charming as a handmade hair accessory? This crochet heart hairclip pattern is perfect for that! A delicate heart-shaped design attached to a clip, softly accenting your hairstyle with elegance. Using calming shades of red, pink, and white, this pattern celebrates beauty and romance while staying simple enough for beginners to enjoy. Whether you're making it as a thoughtful gift, a fun accessory for kids, or a unique touch to your wardrobe, this project is full of possibilities!
Budget Friendly Free Crochet Heart Hairclip Pattern for Lovely Charm

The real magic lies in the stitches used to create this beauty. The single crochet stitch is the hero here, guiding you through the heart shape with easy-to-follow steps. Building the heart requires patience but feels rewarding as each stitch adds to its smooth curves. If you master this pattern, you'll notice that single crochet stitching can open doors to other creative projects, like tiny stuffed shapes, appliqués, and even intricate garlands. Versatile keywords for creations like bows, flowers, or ornaments can easily weave into this technique, allowing you to explore beyond this specific design.
What Will You Learn and Create
With this crochet heart hairclip pattern, you will:
- Learn how to create a crochet heart from scratch with precise shaping.
- Understand how to work the single crochet stitch around a structure for flat designs.
- Master color changes to make multi-tonal patterns with crisp edges.
Beyond hairclips, this pattern can turn into:
- Heart garlands for party or home décor.
- Appliqués for sweaters, bags, or blankets.
- Keychains or ornaments for gifts or keepsakes.
This cute crochet project is a wonderful opportunity to develop your skills while crocheting something precious.
Materials
- Yarn: 4-ply cotton yarn in two colors (main hot pink color and other off white or contrasting color).
- Hook Size: 2.0mm crochet hook.
- Notions:
- Tapestry needle (for weaving in ends).
- Scissors.
- Hairclip base (small metal or plastic hairclips, for attachment).
- Glue gun or crocheting glue (optional, for securing attachment).
Gauge
- Gauge: 10 single crochet (sc) x 10 rows = 4 cm x 4 cm.
- While exact gauge is not critical for this project, it helps ensure uniform results.
Finished Size
The completed Heart Swing Hairclip will measure approximately 3 inches (7.5 cm) wide, with a gentle "swing" chain attached to give it extra charm. The size may vary slightly depending on your tension and chosen materials.
Pattern Instructions: Two Heart Pieces
Heart Base:
R1:
- Start with a magic loop and work 6 single crochet (sc) into the loop.
- Pull the yarn to tighten the loop.
- Slip stitch (slst) into the first stitch to close the round.
- Chain 1 (ch 1).

R2:
- Work 2 single crochet (sc) in each stitch around (12 sc total).
- Slip stitch into the first stitch to close the round.
- Chain 1.
R3:
- Work 1 single crochet (sc) in each stitch around (12 stitches totaly).
- Slip stitch into the first stitch to close.
- Chain 1 and cut the yarn; secure the tail neatly.
Create the Second Heart
- Repeat R1-R3, but this time do not cut the yarn.
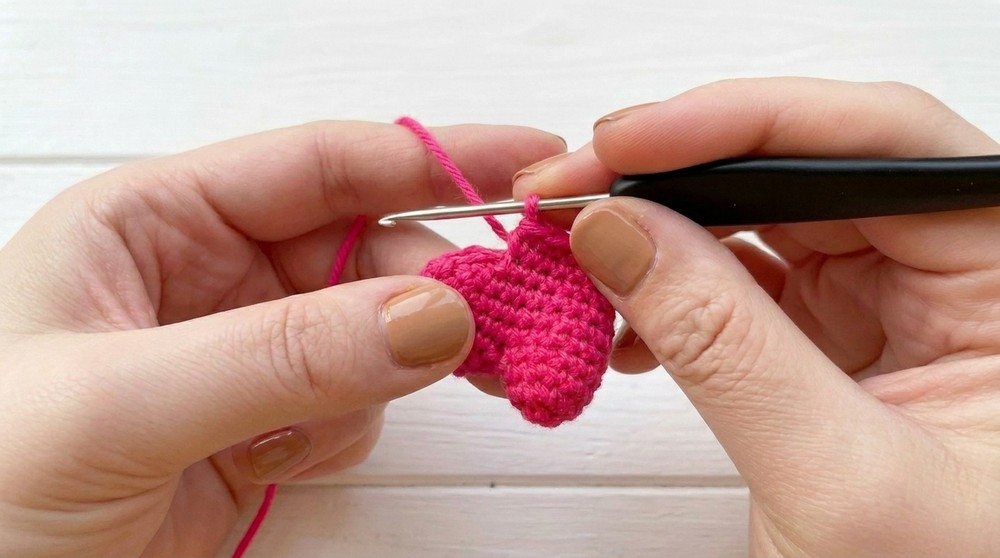
- Once the second heart is completed, connect both hearts together by slip stitching all around the edges, going through both hearts to join them (forming a double-layered heart for sturdiness).
- Chain 1 to prepare for the next rows.
Swing Section
R4-R5:
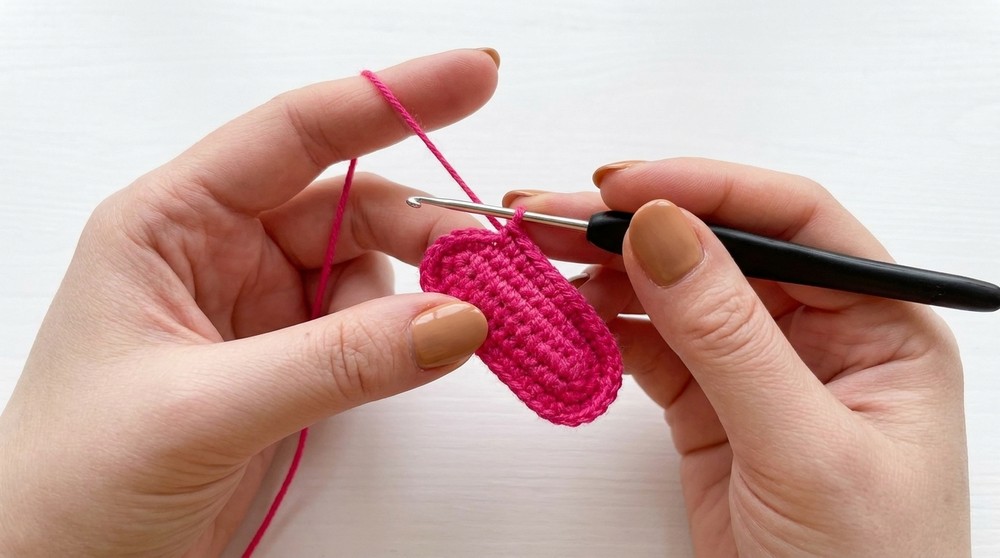
- Work 1 single crochet (sc) in each stitch around (24 stitches - 12 sc from each heart) for two rounds.
- Slip stitch into the first stitch at the end of each round.
R6:
- Begin shaping: Work 4 sc, 2 decreases (2 dec), 8 sc, 2 decreases, 4 sc (reduce the total to 20 stitches).
- Slip stitch to close the round.
R7:
- Work 1 single crochet in each stitch around (20 stitches).
- Slip stitch into the first stitch at the end.
R8:
- Shaping continues: 3 sc, 2 decreases, 6 sc, 2 decreases, 3 sc (16 stitches).
- Slip stitch.
R9:
- Work 2 sc, 2 decreases, 4 sc, 2 decreases, 2 sc (12 stitches).
- Slip stitch.
R10:
- Final shaping: Work 6 decreases (dec) to close the top of the heart (6 stitches remaining).
- Slip stitch and close the round securely.
Decorative Swing Chains
Heart Loops:
- First tier:
- Chain 5 (ch 5).
- Work 4 single crochets (sc) into the chain and slip stitch (slst) back into the edge to attach the loop.
- Second tier:
- Chain 4 (ch 4) and work 3 single crochets (sc) to attach another smaller loop.
- Repeat this chaining and slip stitching process to create smaller loops forming a layered effect.

- Continue chaining for additional rows, increasing or decreasing the chain length as desired.
Final Edging
- Form the Swing: Attach one edge of the swing loops to the heart with a chain of 15 (creating a gentle curve or arc).
- Work single crochet (sc) along the arc to create strength and definition for the swing.
Tips and Customization
Tips for Success
- Tension: Maintain even tension to create a tidy look, especially with smaller stitches and loops.
- Joining Edges: While slip stitching the hearts together, ensure the stitches line up evenly to avoid gaps or misshapen edges.
- Shaping: Pull stitches firmly to create a well-defined heart shape, especially during the decrease rows.
Customization Ideas
- Color Variations: Use contrasting colors for the swing chain or the second heart to add interest.
- Beads or Sequins: Thread small beads onto the chain loops for a sparkly effect.
- Different Sizes: Adjust the starting magic loop stitch count (e.g., 8 sc instead of 6) for a larger heart.
Finished Look
Once completed, the Crochet Heart Swing Hairclip will feature a structured double-heart design with decorative swing loops that gently dangle when attached to a hairclip. The combination of texture and swing adds whimsy and flair, perfect for casual or special occasions.
Conclusion
This stunning hair accessory is both practical and charming, and with the above detailed steps, it's easy to create your own. Perfect as a unique gift or personal accessory, the Heart Swing Hairclip showcases creativity and elegance.
Difficulties You May Face and Their Solutions
Every crochet project comes with its unique challenges, and this heart hairclip pattern is no exception. One common difficulty is achieving the perfect heart shape, especially for beginners still learning how to control stitch tension. If your heart begins to lose its structure or symmetry, don't worry. The key is to count your stitches carefully and ensure you're working into the right spaces. Using a stitch marker can help you keep track of key points, especially when transitioning between rounds or sections.
Another challenge can come in mastering color changes for creating beautiful dual or multi-toned hearts. If your transitions look messy, the solution lies in bringing in the new color at the last pull-through of the previous stitch. This neat trick ensures a smooth and professional finish, so your heart looks as polished as possible.
Finally, attaching the heart to the hairclip may also feel tricky, but using a long yarn tail for sewing can make the process much easier. You'll have better control as you secure the heart in place without it losing its shape. A steady hand and gentle sewing motions are the way to go.
Remember, every small challenge is a chance to learn and grow as a crocheter. With these solutions in mind, you'll feel more confident tackling this delightful design!