
Add warmth and creativity to your holiday season with this free crochet Christmas stocking pattern, perfect for crocheting memorable and unique festive decorations.
Bring some festive joy to your holiday season with this fun and free crochet Christmas stocking pattern. It's the perfect project for beginners and experienced crocheters who want to add a handmade touch to their Christmas decorations. Whether it's hung by the fireplace, filled with treats, or given as a heartfelt gift, this stocking will brighten any celebration.
Best Free Crochet Stocking Pattern for a Homemade Holiday Feel

Made with chunky light teal and white yarn, the stocking has a cozy, textured design with a fluffy toe, a snug heel, and a scalloped cuff that folds over beautifully. Its cheerful appearance makes it a standout decoration for any home. For extra flair, you can add cute pom poms, tassels, or even a holly appliqué, giving it a unique and personalized touch.
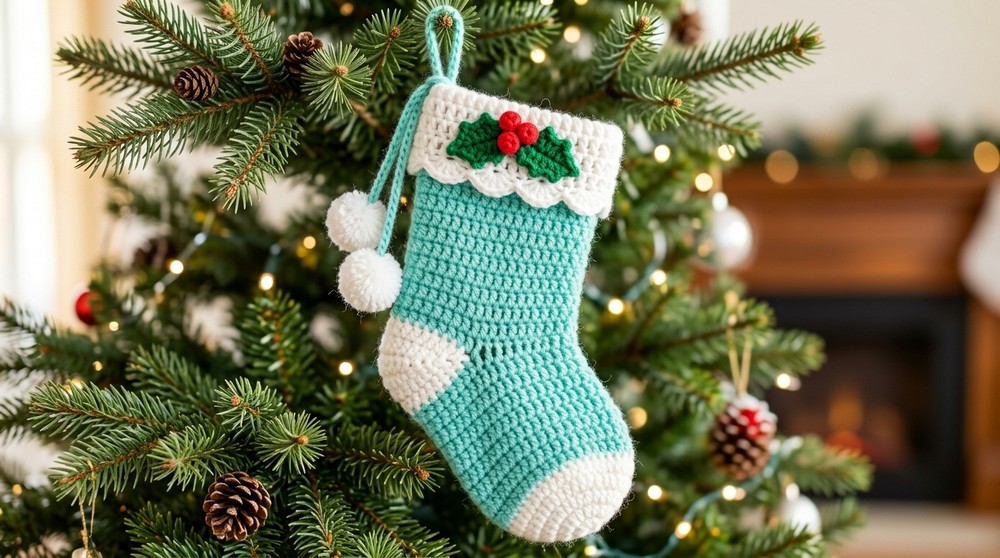
Easy to follow yet full of charm, this crochet stocking pattern is perfect for spreading holiday cheer. Create something special this season with this joyful and festive design.
Festive Crochet Stocking Pattern
Materials Needed
- Yarn:
- light teal and white yarn (double strands; 2 balls of each color if using double strands).
- Green yarn for the optional holly appliqué.
- Tools:
- Crochet hook (6 mm if using double strands, adjust based on yarn thickness).
- Yarn needle.
- Pair of scissors.
- Pom-pom maker (optional; can substitute with a fork).
- Gauge:
- Recommended hook size for single strands is 4 mm. Adjust yarn thickness or hook size as needed to ensure a chunky result.
Finished Size
- Toe to Top: Approx. 13 inches (customizable).
- Width: 6.5 inches across.
Special Techniques
- Magic Circle: Used to start the toe. Helps create a seamless, tight center.
- Double Crochet (DC):
- Yarn over, insert hook into stitch, yarn over and pull up a loop.
- Yarn over and pull through two loops.
- Yarn over and pull through the last two loops.
- Single Crochet Two Together (SC2tog): A decrease stitch used in the heel for shaping.
Important Notes
- The stocking uses double strands for a thicker, chunkier texture.
- Adjust yarn and hook size based on desired thickness or stocking size.
- The cuff is worked in the opposite direction to ensure its right side faces outward when folded over.
Beginning your crochet Christmas stocking is all about building a strong and neat foundation. The process starts with the creation of the stocking toe, worked in white yarn for a festive traditional look. Using the magic circle technique, you establish a tightly closed center and work several rounds of double crochets, increasing methodically to keep the circle flat and even.
Pattern Instructions
(1) Toe Section
- Start with White Yarn (Double Strands):
- Use a 6 mm hook.
- Begin with a magic circle.
- Round 1:
- Chain 2 (does not count as a stitch).
- Work 10 DC into the magic circle.
- Pull the yarn tail to cinch the circle closed.
- Slip stitch into the first DC to join.
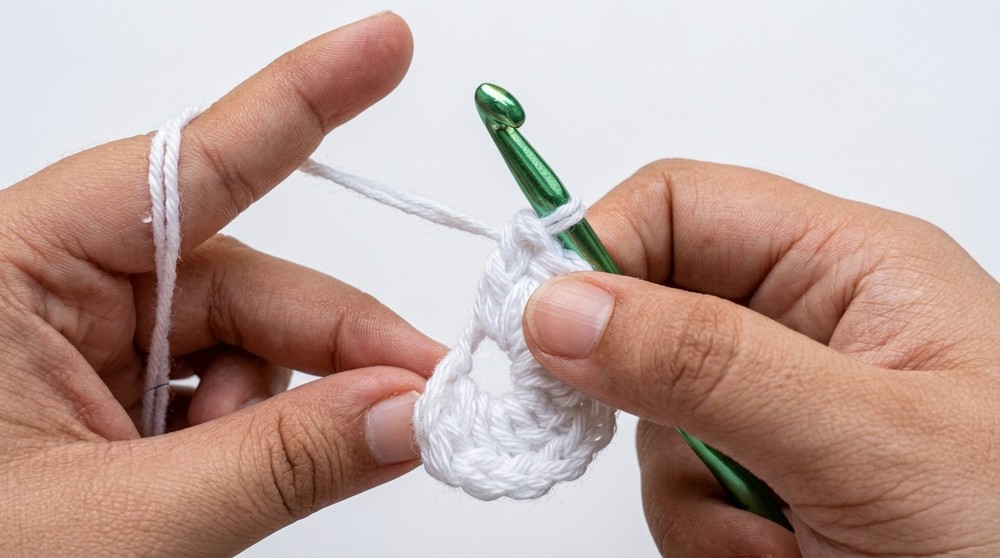
With each round, the stitch count grows, and the toe takes on a robust, clean appearance-this ensures the base of your stocking is both sturdy and visually pleasing. Attention to detail, like correctly identifying stitch placements and avoiding any false stitches created by slip stitches, establishes the foundation for the whole project.
- Round 2:
- Chain 2.
- 2 DC in each stitch around (20 DC total).
- Slip stitch into the first DC to join.
- Round 3:
- Chain 2.
- 1 DC in the next stitch, 2 DC in the next stitch. Repeat this sequence around.
- (30 DC total). Slip stitch into the first DC to join.
- Round 4:
- Chain 2.
- 1 DC in the next two stitches, 2 DC in the next stitch. Repeat around.
- (40 DC total). Slip stitch into the first DC to join.
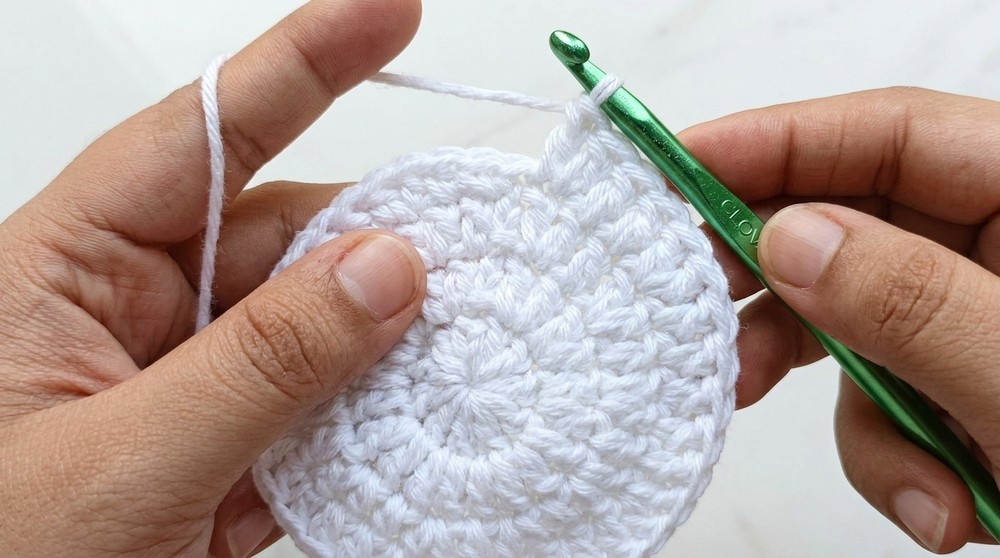
- Round 5 (Final Toe Round):
- Chain 2.
- Work 1 DC in every stitch around (keeping count at 40 DC).
- Slip stitch into the first DC to join.
- Fasten off and weave in the ends.
This segment is designed with beginners in mind: the stitches and rounds are repetitive and straightforward, and there's little sewing or shaping required. When you finish this section, you'll have a circular base that blends seamlessly into the beginning of the foot.
(2) Foot Section
- Attach light teal Yarn (Double Strands):
- Join yarn with a slip stitch into any stitch of Round 5.
- Chain 2.
- Rounds 6-14:
- Work 1 DC in each stitch around (keeping count consistent at 40 DC). Attach with a slip stitch at the end of each round.
- Tip: Measure as you go-your foot section should be around 5 inches in length.
- Do not fasten off the light teal yarn, as it will continue into the leg portion after the heel.

Transitioning into the middle part, the stocking grows into its characteristic shape and length. Switching to vibrant light teal yarn, you continue building up the foot and leg sections in smooth, even rounds of double crochet. The double-strand technique results in a plush and chunky fabric, giving the stocking substance and warmth. Most of this section involves simply repeating double crochets, making it meditative and suitable for crocheters of all skill levels.
(3) Heel Section
- Using White Yarn:
- Skip the first 10 stitches from Round 14. Join white yarn with a slip stitch into the 11th stitch.
- Chain 1.
- Row 1:
- SC in the same stitch and the next 19 stitches (20 SC total).
- Row 2:
- Chain 1, turn. SC2tog in the first two stitches. SC in the next 16 stitches. SC2tog in the last two stitches (18 SC).
- Rows 3-8:
- Repeat Row 2, decreasing by two stitches every row, until six stitches remain.
- Row 9 (Increase Row):
- Chain 1, turn. Work 2 SC in the first stitch, 1 SC in each of the next four stitches, and 2 SC in the last stitch (8 SC).
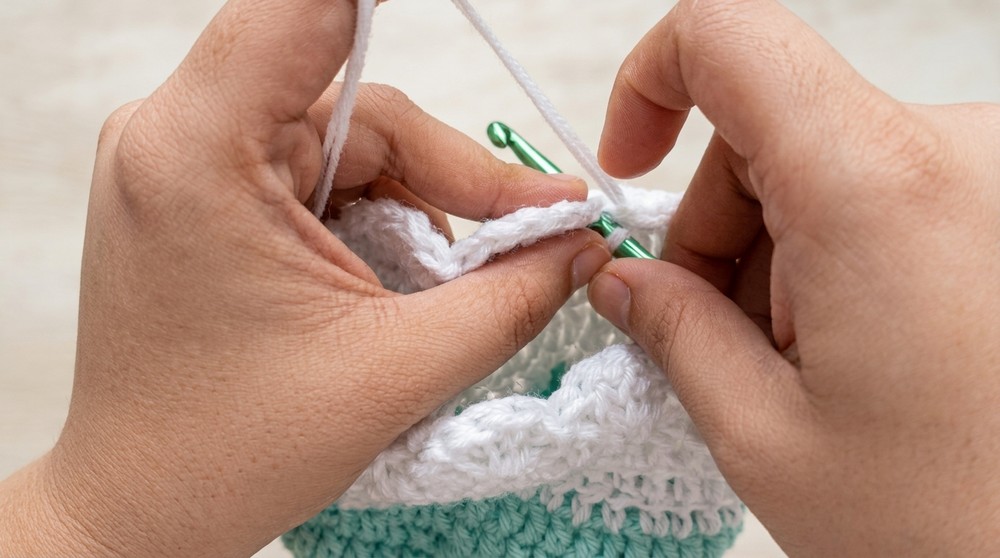
- Chain 1, turn. Work 2 SC in the first stitch, 1 SC in each of the next four stitches, and 2 SC in the last stitch (8 SC).
- Rows 10-15:
- Repeat Row 9, increasing two stitches per row, until you have 20 SC.
- Fasten off, leaving a long tail for sewing.
- Sew the Heel:
- Fold the heel edges together and sew them using a whip stitch. Weave in ends.
The heel construction introduces basic shaping and seaming-single crochets are used to create a squared portion, then strategically decreased and later increased to form the heel cup. Once the heel is sewn, you seamlessly rejoin the light teal yarn to work upwards into the stocking's leg. This main body is finished off with several more rounds, allowing you to adjust the length for a custom, personal touch. Throughout, you'll find opportunities to practice working in the round, changing colors, and switching between different stitch techniques.
(4) Leg Section
- Continue with light teal Yarn (Double Strands):
- Attach yarn into any stitch of the stocking and chain 2.
- Rounds 15-28:
- Work 1 DC in each stitch around (40 DC per round). Slip stitch at the end of each round.
- Tip: Adjust the length by adding or reducing rounds.
(5) Cuff Section
- Using White Yarn (Double Strands):
- Attach yarn into any stitch at the top of the leg with a slip stitch.
- Chain 2.
- Rounds 29-32:
- Work 1 DC in each stitch around.
- Note: Ensure the stitches face the opposite direction for a clean fold.
- Round 33 (Scalloped Edge):
- Skip the next stitch, work 5 DC into the following stitch. Skip the next stitch, slip stitch into the next.
- Repeat this sequence around for the scalloped border. Fasten off and weave in ends.
- Fold the cuff over the leg.
The pattern's final segment brings festive finishing touches and functionality to the piece. A soft, white cuff is crocheted onto the top of the stocking, using rounds of double crochet in the opposite direction so that when folded down, the stitches lay beautifully on the outside. The last round employs shell stitches to create a charming scalloped edge, infusing the stocking with a pleasing decorative detail.
(6) Accessories (Optional)
Hanging Loop
- Using a single strand of white yarn and a 4 mm hook, create an i cord:
- Chain 3.
- Follow the video instructions to form an i cord (approx. 4 inches).
- Attach the loop to the cuff's corner with a simple knot or sew it securely.
Tassel and Pom Poms
- Create 2 small pom poms using a pom pom maker or fork.
- Attach the pom poms to a 10 inch i cord. Knot the ends securely and attach the cord to the stocking.

To complete your stocking, optional embellishments are added: a sturdy hanging loop made with an i-cord, playful pom poms attached on a tassel, and an adorable holly applique. These accessories not only enhance the stocking's playful appearance, but also demonstrate the versatility of crochet and give you a chance to try small add-on projects. Final assembly includes weaving in all yarn tails, securing knots, and arranging the cuff and decorations-resulting in a cheerful, functional crochet stocking that is as much fun to create as it is to display or gift.
Customization Ideas
- Use different color combinations to personalize for family members.
- Embroider initials or festive designs onto the stocking.
- Add beads, sequins, or buttons to enhance the decoration.
Final Touch
Your Christmas stocking is now complete! It features a soft, chunky texture, festive colors, and optional accents like a hanging loop and pom-poms. Display it proudly or gift it to loved ones.