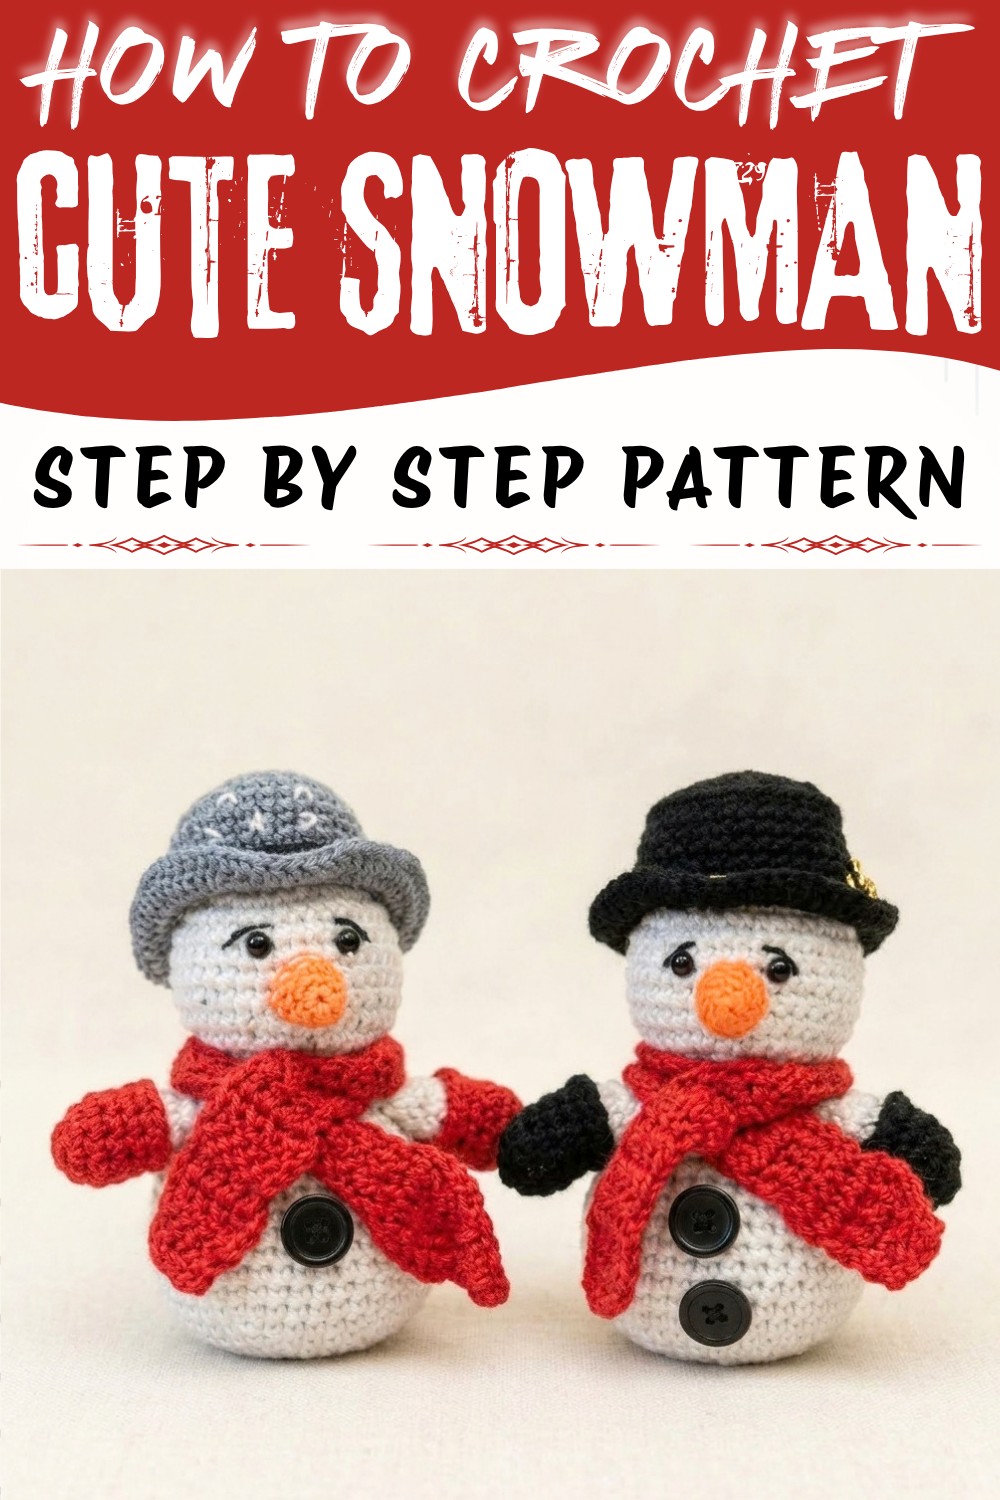
Stitch a cheerful winter friend with the Crochet Snowman Free Pattern, featuring a cozy scarf and cute hat for holiday decor.
Enjoy the charm of winter with a delightful project that warms the heart and brightens any space-a beautifully designed crochet snowman. This enchanting piece blends whimsical style with cozy comfort, making it the perfect decorative companion for the colder months. Whether you're looking to add a touch of festive cheer to your home or searching for a thoughtful handmade gift, this crochet snowman embodies seasonal warmth and personality.
Amigurumi Crochet Snowman Free Pattern for Christmas Gifts
Thanks to the detailed tutorial and original design by Nancy a crochet, you can confidently bring this adorable figure to life. The Crochet Snowman Pattern showcased in the video guides you through creating a snug, perfectly sized snowman adorned with a playful scarf and charming little hat. Its proportions and fit make it ideal for lining your mantelpiece, decorating holiday tables, or gifting during winter celebrations. Pair it with classic winter motifs like pine cones, cozy blankets, or twinkling lights for a captivating seasonal display.
One of the standout features of this snowman is its inviting texture. The pattern uses meticulous stitches that create a smooth yet tactile surface, giving the snowman a plush and cuddly appearance. The play of stitches adds depth, especially around the head and body, making the details like the tiny arms and button accents pop with character. The scarf and hat enhance its personality, adding layers of style and warmth without overwhelming the design.
Whether nestled among your holiday décor or displayed as a year-round symbol of frosty fun, this crochet snowman is a delightful project that combines artistry with seasonal spirit. Dive into the full pattern and discover how you can bring this charming winter friend into your home.
Snowman Amigurumi Crochet Pattern
This cheerful snowman amigurumi is constructed from head to toe in one seamless piece, featuring traditional colors and charming accessories. Using fine yarn and small hooks offers a neat, lightweight finish, ensuring that each section has great definition. The process begins with crocheting the body and head, extending upward in a continuous manner for smooth shaping. Additional features such as a scarf, gloves, carrot nose, and top hat are crocheted separately and then attached. Simple increases, clear decreases, and classic amigurumi construction methods ensure reliable shaping for both novice and experienced crocheters. The completed ornament displays delightful details-bead eyes, a snug scarf, buttoned tummy, and a hat-all worked with straightforward stitches for an accessible and rewarding project.
Quick Overview Of Pattern
- Work the body and head together in one piece (continuous rounds).
- Shape the scarf in simple rows and fasten with a button.
- Gloves and arms are made in the round, joined and attached after shaping.
- Carrot nose is stitched small with finer hook and sewn on.
- Top hat is worked from the top down, finishing with a brim.
- Assembly includes attaching facial features, scarf, arms, and buttons.
Notes
- Use a stitch marker to identify the start of each round for even shaping.
- Substitute thicker yarn and larger hooks for a larger snowman.
- Firm stuffing is essential for maintaining shape and structure.
- Sew on all embellishments securely to avoid detachment.
- Consistency in tension throughout ensures a uniform appearance.

Skill Level
- Confident Beginner to Intermediate
- Knowledge of working in the round, basic increases and decreases, color changes, and assembling small parts is recommended.
Materials
- 1 mm cotton yarn in white, black, red, and orange
- 1.75 mm crochet hook (main body and accessories)
- 1.0 mm crochet hook (for carrot nose)
- Synthetic stuffing
- Small black beads (eyes)
- Two small buttons (tummy)
- Yarn needle and scissors
Measurements / Sizing
- Finished size: Approximately 10-12 cm (4-5") tall.
- Adjust yarn weight and hook size for varied sizes.
Gauge
Approximate: 10 stitches x 10 rounds = 2.5 cm x 2.5 cm in sc stitch. Gauge is not critical but stitches should be tight enough to hold stuffing.
Stitch Abbreviations
- MR: Magic Ring
- ch: Chain
- sc: Single crochet
- hdc: Half double crochet
- dc: Double crochet
- st(s): Stitch(es)
- sl st: Slip stitch
- inc: Increase (2 sts in one st)
- dec: Decrease (sc two together, invisible decrease preferred)
- BL: Back loop only
- FL: Front loop only
Special Stitches
- Invisible decrease (dec): Insert hook into the front loops of the next two stitches, yarn over, pull through, yarn over, and pull through both loops.
- Cross-stitch effect: Insert hook from top down and slightly forward through the base for a crisscrossed texture.
The Crochet Pattern
Body and Head (Worked Continuously in White Yarn)
Body
- Round 1: MR, 6 hdc. Join with sl st. (6 sts)
- Round 2: Work inc in each st around. (12 sts)
- Round 3: Repeat [1 hdc, 1 inc] around. (18 sts)

- Round 4: Repeat [2 hdc, 1 inc] around. (24 sts)
- Round 5: Repeat [3 hdc, 1 inc] around. (30 sts)
- Round 6: Repeat [4 hdc, 1 inc] around. (36 sts)
- Rounds 7-15: 1 hdc in each stitch. (36 sts per round, cross-stitch style for definition)
Continue evenly for a seamless tube until you have completed 15 rounds in total.
- Round 16: Repeat [4 hdc, 1 dec] around. (30 sts)
- Round 17: In FL only: Repeat [3 hdc, 1 dec] around. (24 sts)
- Round 18: Repeat [2 hdc, 1 dec] around. (18 sts)
- Pause and stuff the body firmly before closing further for a neat finish.
- Round 19: Repeat [1 hdc, 1 dec] around. (12 sts)

Head
- Round 20: Inc in each stitch around. (24 sts)
- Round 21: Repeat [1 hdc, 1 inc] around. (36 sts)
- Rounds 22-28: 1 hdc in each stitch. (36 sts per round)
Shape the head as a firm sphere by stuffing gradually as you proceed.
- Round 29: Repeat [3 hdc, 1 dec] around. (30 sts)
- Round 30: Repeat [2 hdc, 1 dec] around. (24 sts)
- Continue stuffing for smooth shaping.
- Round 31: Repeat [1 hdc, 1 dec] around. (12 sts)
- To close: Cut yarn. With needle, weave through all front loops and pull to close securely.
Scarf (Red or Color of Choice)
- Ch 7.
- Skip 3 chains and work 4 dc beginning in the third chain from the hook. (4 sts)
- Ch 3, turn, 4 dc across each row to desired length.
- Repeat rows until scarf fits around neck and hangs at the sides.
Fasten off and weave in ends.
Arms With Gloves
Gloves (Black Yarn)
- Round 1: MR, 6 sc, join with sl st.
- Round 2: Inc in each st around. (12 sts)
- Rounds 3-5: 1 sc in each st around. (12 sts per round)
Do not fasten off; switch to white yarn.
Arms (White Yarn)
- Round 6: Join white in BL only and work 1 sc in each st. (12 sts)
- Round 7: Repeat [1 sc, 1 dec] around. (8 sts)
- Rounds 8-10: 1 sc in each st, making the arm long enough to fit against the snowman's side.
Stuff the glove tip lightly.
Finish opening: Fold flat and stitch closed for smooth edge.

Repeat for second arm.
Carrot Nose (Orange, 1.0 mm Hook)
- Round 1: MR, make 4 sc, join with sl st.
- Rounds 2-3: 1 sc in each st around. (4 sts per round)
- Round 4: Inc in first st, 1 sc in each rem. (5 sts)
- Round 5: Inc in first st, sc in next 4. (6 sts)
- Round 6: Inc in first st, sc in next 5. (7 sts)
- Fasten off with long tail for sewing.
Top Hat (Black Yarn)
- Round 1: MR, 6 sc, join with sl st.
- Round 2: Inc in each st. (12 sts)
- Round 3: Repeat [1 sc, 1 inc] around. (18 sts)
- Round 4: Repeat [2 sc, 1 inc] around. (24 sts)
- Round 5: Repeat [3 sc, 1 inc] around. (30 sts)
- Rounds 6-11: BL only, 1 sc in each st. (30 sts per round)
- Round 12 (Brim): FL only, 2 sc in each st around. (60 sts)

- Round 13: 1 sc in each st.
- Finishing: Work a round of sl st around brim edge. Fasten off.
Assembly & Finished Size
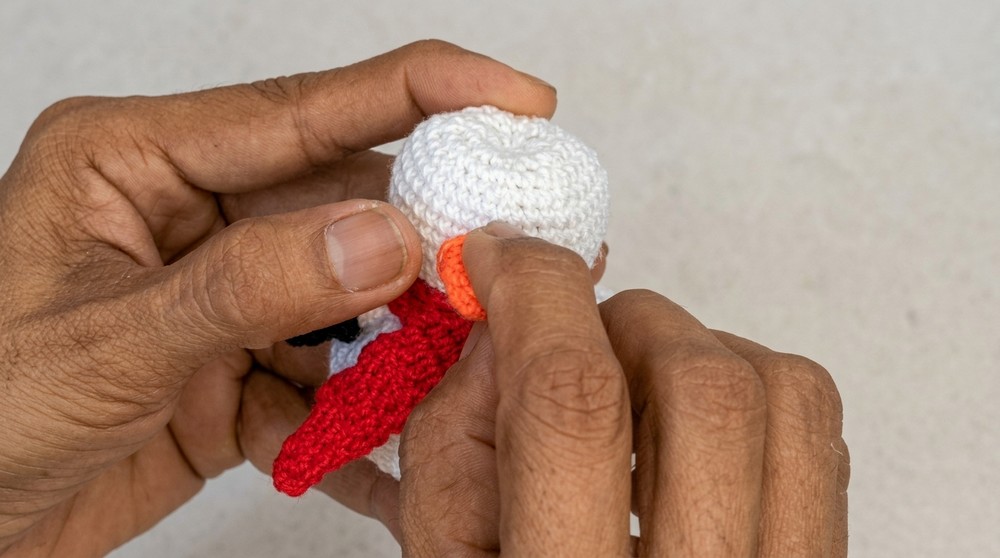
- Arms: Sew both arms securely to the upper part of the body, just below head join.
- Scarf: Wrap and tie firmly around neck. Secure with a stitch or button as preferred.
- Facial Features: Attach carrot nose at center of face, position bead eyes above, and embroider eyebrows.
- Buttons: Sew either one or two buttons to the front, evenly spaced.
- Hat: Place hat atop head, stitch or glue in place lightly.
- Final Stuffing: Adjust and add stuffing as required for final shaping.
- Finished height: About 10-12 cm.
Conclusion
This snowman amigurumi demonstrates that classic techniques combined with simple outlines yield a playful, season-ready figure ideal for display or gifting. The seamless transition between different sections, careful detail in accessories, and neat finishing touches help showcase both skill and patience. Selecting colors and textures with care ensures that each snowman is distinctive and memorable. Whether perched on a mantel or handed to a friend, the amigurumi stands as a finished piece that highlights both workmanship and holiday spirit. Thoughtful assembly allows personalization, and each time these ornaments are seen or handled, they radiate the warmth and cheer associated with handmade celebrations.