
Level up your keychain game instantly using this Free Crochet PIG Keychain Pattern, packed with trendy details and easy-to-follow steps.
Who doesn't love quirky keychains that bring a bit of personality to everyday items like backpacks, purses, or keys? This crochet pig keychain pattern makes for an adorable and functional accessory that perfectly balances cuteness and convenience. Designed with simplicity in mind, this little pattern is made using basic crochet techniques, making it attainable for beginners while still being enjoyable for seasoned crocheters. The miniature size makes it quick to assemble and highly portable, ensuring it's the perfect on-the-go project.
Quick and Easy Crochet Pig Keychain Free Pattern Fun for All

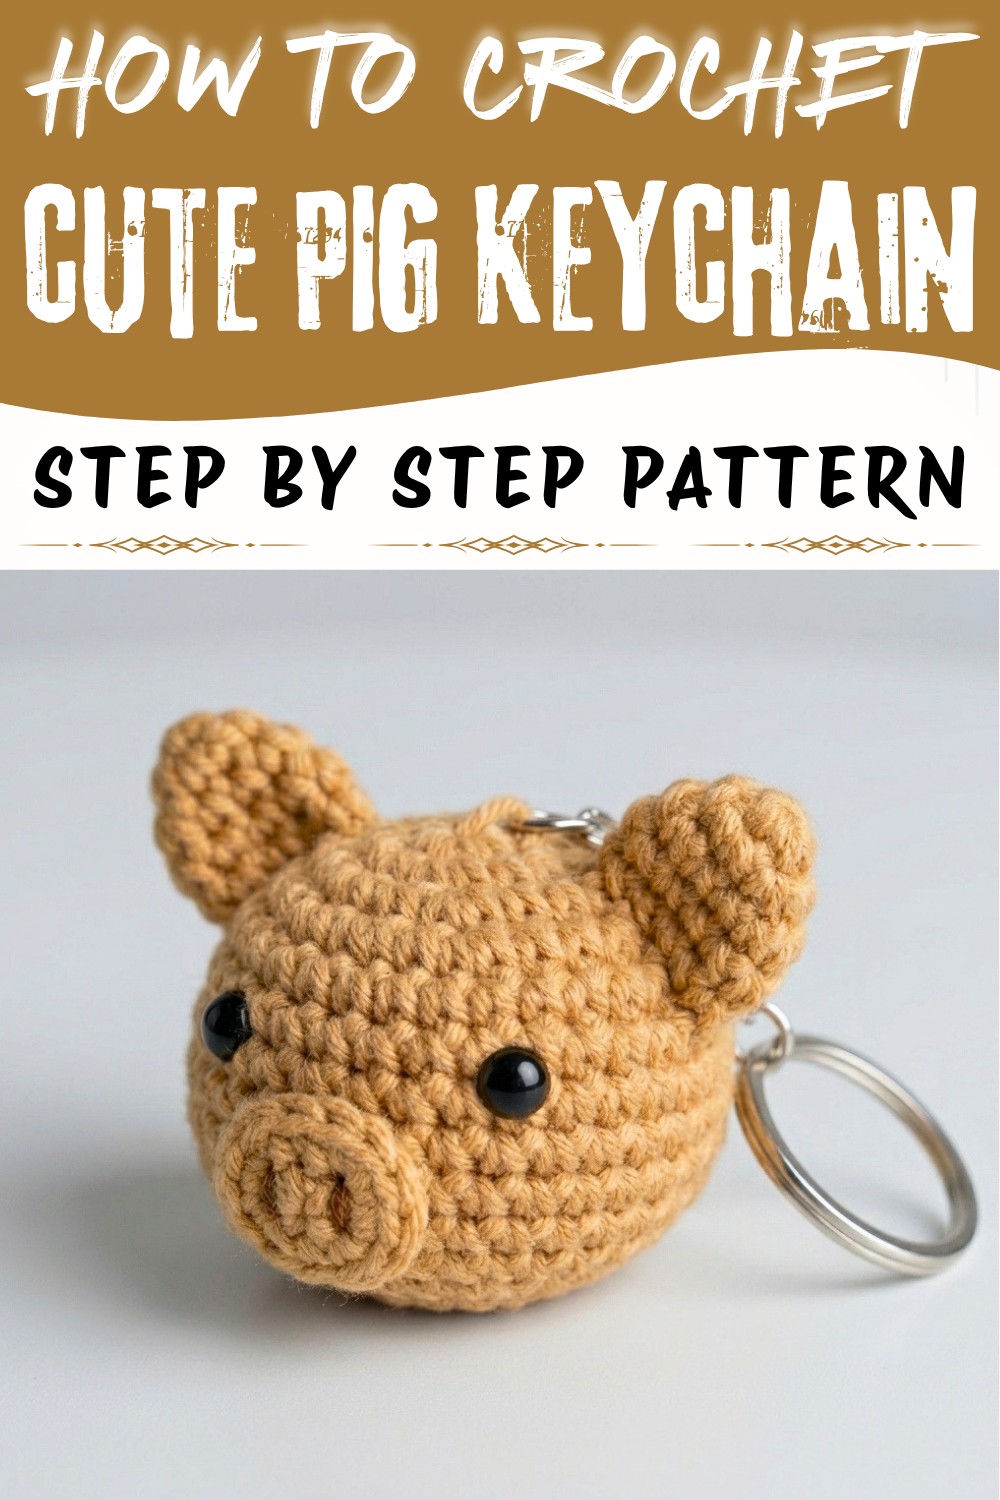
With its cheerful rounded face, tiny ears, and charming snout, this pig is a delightful way to add character to your belongings. Complete with a small keyring attachment, it transforms into a practical keychain or decorative charm. Beyond its aesthetic appeal, it doubles as a thoughtful handmade gift for friends, family, or little ones who love collecting playful accessories.

Benefits of This Pattern:
- Quick and Manageable: Perfect for short crafting sessions.
- Functional: A cute, handmade keychain that adds flair to everyday items.
- Customizable: Adjust yarn colors and eye styles to personalize your pig.
- Beginner-Friendly: Uses simple stitches like single crochet and slip stitches.
With just a touch of fiberfill, black yarn for the snout, and safety eyes for added character, this pig keychain is a small yet satisfying project that blends fun and function seamlessly!
Necessary Materials
- Yarn:
- Body and Ears: Medium-weight yarn (One Pound Yarn or similar). Prefer Camel color for a classic pig look but feel free to experiment with other colors.
- Nose Details: Black yarn (thin or standard weight for embroidery).
- Crochet Hook: Size 4.5mm hook
- Safety Eyes: Any size works. Typically, 8-12mm safety eyes are preferred for this size project.
- Stuffing: Fiberfill (or scrap yarn).
- Stitch Marker: Essential for tracking rounds.
- Scissors
- Threading Needle: For embroidery (nostrils) and sewing parts together.
Gauge
Gauge is not critical for this project. Maintaining a consistent tension will ensure your pig head has a firm, neat look.
Finished Size
- Approximately 2-3 inches in diameter, depending on yarn thickness and tension.
Crochet Pig Keychain Pattern
This delightful crochet pig keychain pattern is perfect for creating keychains, bag charms, or collectibles. Designed to be simple yet adorable, it's an excellent project for beginners while offering a bit of challenge with techniques like working small rounds and attaching parts. Follow the steps for a successful pig-head creation!
Special Techniques Used
- Magic Circle: Creates a neat, adjustable center for the project.
- Invisible Decrease: Achieves clean shaping when decreasing.
- Basic Stitches: Single Crochet (SC), Slip Stitch (SS), Chain (CH).
Pig Head (Main Body)
Rounds 1-13, worked in continuous spirals.
Round 1:
- Using pink yarn, make a Magic Circle. Work SC 6 into the circle. (6 stitches total).
- Close the round with a Slip Stitch (SS) into the first stitch and place a stitch marker.

Round 2:
- Increase in each stitch: Work 2 SC in each stitch around. (12 stitches total).
Round 3:
- Alternate stitches: [Increase in 1st stitch (2 SC), SC in next stitch]. Repeat (Inc, SC) around. (18 stitches total).
Round 4:
- Build up larger size: [Increase in 1st stitch (2 SC), SC into next 2 stitches]. Repeat (Inc, SC, SC). (24 stitches total).
Round 5:
- Final increase round: [Increase in 1st stitch (2 SC), SC into next 3 stitches]. Repeat (Inc, SC, SC, SC). (30 stitches total).

Rounds 6-10:
- SC into every stitch for 5 rounds. No increases, creating the length for the pig head.
Round 11:
- Begin decreases: [Invisible Decrease over 2 stitches, SC into next 3 stitches]. Repeat (Dec, SC, SC, SC). (24 stitches total).
Round 12:
- Further decrease: [Invisible Decrease over 2 stitches, SC into next 2 stitches]. Repeat (Dec, SC, SC). (18 stitches total).

Round 13:
- Final decrease round: [Invisible Decrease over 2 stitches, SC into next stitch]. Repeat (Dec, SC) around. (12 stitches total).
- Cut yarn, leaving a tail for sewing. Do not completely close yet-leave an opening for stuffing.
Ears (Make 2)
Smaller rounds create cute ears for your pig.
Round 1:
- Using pink yarn, create a Magic Circle. Work SC 4 into the circle. (4 stitches total).
- Close with SS and add stitch marker.
Round 2:
- Increase: 2 SC in each stitch around. (8 stitches total).
Rounds 3-5:
- SC into every stitch for 3 rounds, adding length to the ear.
Shaping the Ear:
- Flatten the ear and slightly pull the sides outward to form a rounded yet slightly triangular look.
Finishing:
- Leave a tail of yarn for sewing. Pull the yarn through and set the ears aside.

Nose
The pig's nose is worked in an oval shape using a chain instead of a circle for rounded detailing.
Steps
- Make a Slip Knot: Create a loop.
- Chain 3: CH 1, CH 2, CH 3.
- Work Stitches Around the Chain:
- SC into the middle chain.
- SC 3 into the last chain (this naturally curves your work).
- Rotate your work to crochet along the opposite side. SC into the next chain.
- SC 2 into the last chain for the other curve.
Expanding Nose Shape:
- Once rounded, SC into every stitch, occasionally working extra increases (2 SC into 1 stitch) at the curved edges to maintain an oval shape.
Finishing:
- Cut yarn, leaving a sewing tail. Tie off and embroider nostrils using black yarn.
Attaching Details
Placing Ears:
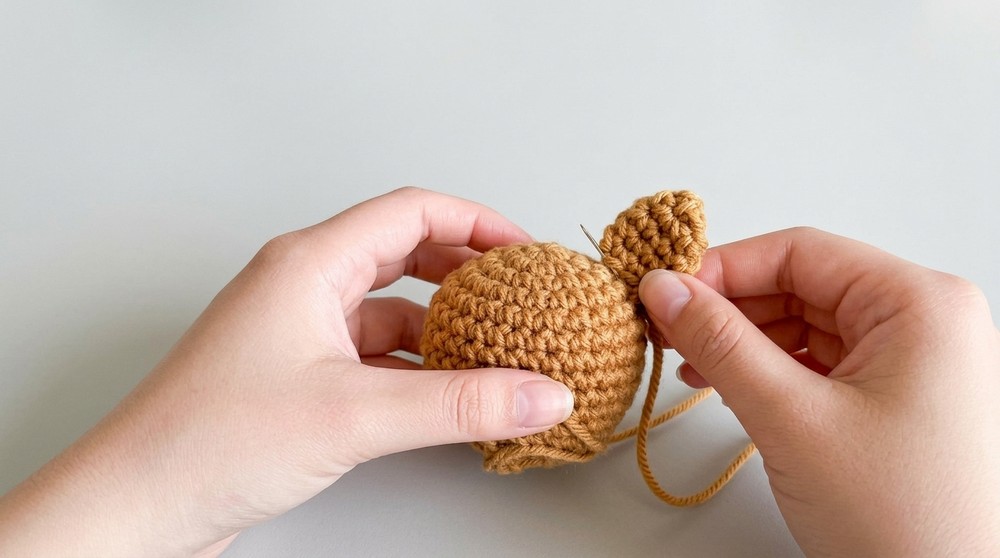
- Sew ears onto the pig head, placing them approximately 2 rounds down from the top center.
- Use a threading needle to go through the ear and head firmly, leaving no gaps. Flatten the ears slightly during placement for a cute appearance.
Adding the Nose:
- Position the nose centrally, below the ears. Sew in place using the tail. Ensure stitches are evenly spread to preserve the shape.
Safety Eyes:
- Insert safety eyes above the nose, ensuring symmetrical placement. Attach securely.
Stuffing and Closing
- Fill the pig head with fiberfill, ensuring it is firm but not overly stuffed.
- Close the remaining hole using normal decreases until fully closed.
- Secure the yarn tail by weaving it through the bottom stitches.
Customization Ideas
- Color Variations:
- Try pastel body shades like white, yellow, or blue for playful designs.
- Add Accessories: Crochet a tiny bow, hat, or sunglasses for added personality.
- Keychain Variations: Add a metal ring or a loop of yarn before complete closure.
Tips
- Take Breaks: Working small rounds can strain your fingers. Stretch every few minutes.
- Avoid Distortion: Push smaller parts (the ears and nose) into proper shapes if needed before sewing.
Optional Add-ons
- Embroider the pig with quirky expressions (smiles or winks).
- Add small blush circles using yarn or felt for cheek accents.
Conclusion
Congratulations! You've completed your charming Crochet PIG Keychain . With its playful design and compact size, this crochet project makes a perfect handmade gift or collectible. Customize it to your heart's content, and don't forget to share your creation!
Common Challenges and Solutions
This pattern is relatively simple, but a few areas might be tricky for some. Working with the Magic Circle to start the pig's head can feel challenging for beginners, as it requires precision and control. To make it easier, practice the Magic Circle separately a few times before starting the project, or use a beginner-friendly alternative like chaining and joining in a loop. Another common difficulty is attaching the small features, such as the ears and nose. To ensure accurate placement, use pins to hold the pieces in place before sewing them on. Additionally, crocheting the tight rounds for the ears may cause hand strain-take breaks and use a slightly looser tension if needed. These small adjustments will help you achieve a polished and professional finish!