
Solve your need for a fun winter project with this Free Crochet Penguin Amigurumi Pattern, perfect for gifts or decoration in a snap.
Crafting your very own mini crochet penguin is a joyful and relaxing experience that fills your heart with warmth. This adorable amigurumi penguin is about 7.5-8 cm tall, making it the perfect size for keychains, pendants, or even a thoughtful handmade gift. Its charm lies in the simplicity of its design, combined with the soft, plush feel of crochet. Using basic stitches like the magic ring, single crochet, and increases and decreases, you'll find this project not only beginner-friendly but also incredibly fun to create. These versatile stitches can also be used to whip up other adorable amigurumi animals, like bears, bunnies, or even birds, giving you endless possibilities for creativity.
Adorable Winter Crochet Penguin Amigurumi Pattern for Beginners

This penguin pattern showcases a delightful combination of colors-you can stick to classic shades like white and gray or personalize it with bold, cheerful hues. The process emphasizes the magic ring technique for a seamless start and teaches you how to shape a neat, rounded base for the penguin's head and body. By adding small details like wings, feet, and a cute beak, this project truly brings the little penguin to life. Plus, whether you opt for embroidered sleepy eyes or safety eyes, you'll have plenty of ways to customize its personality.
What You'll Learn and Create
With this pattern, you'll master common crochet techniques while learning how to shape and assemble small crochet parts to form a perfect miniature penguin. You'll also gain confidence in working with fine materials and customizing your work.
Here's what you can make using these skills:
- Other adorable amigurumi animals like bunnies or cats
- Crochet ornaments for gifts, decor, or special occasions
- Keychains or pendants with various characters and themes
- Cute desk companions for your workspace
So grab your hook, some yarn, and let your creativity soar.

Crochet Pattern: Mini Penguin Amigurumi (7.5-8 cm) - Step-by-Step Detailed Instructions
Creating this adorable Mini Penguin Amigurumi is perfect for beginner crocheters or experienced crafters looking for a quick and rewarding project. This pattern uses basic stitches like single crochet (sc), magic ring, and increasing and decreasing to create a cute, mini penguin that works as a keychain, pendant, or decor.
This pattern turns simple crochet stitches into a delightful 7.5 to 8 cm penguin. It's the ideal handmade project for gifting or personal use. Choose your favorite colors to customize your penguin and make it unique!
Skill Level & Terminology
- Skill Level: Beginner to Intermediate
- Terms: US crochet terminology
Materials & Tools
- Yarn: 2 mm cotton thread (primary for the body): white, your chosen dark color (e.g., gray, black, or navy), and orange for the beak and feet.
- Crochet Hook: 2 mm crochet hook
- Other Tools:
- Tapestry needle
- Scissors
- Stuffing material (poly-fil or similar)
- Stitch markers or safety pins (optional)
- Liquid or hot glue (for assembly, as needed)
- Blush or fabric paint (optional for cheek accents)
- Optional: Safety eyes or black thread for embroidery
Gauge
- Gauge is not critical for this pattern. The size may vary slightly based on the yarn and hook used. Using a thicker yarn or hook will result in a larger penguin.
Abbreviations List
- MR: Magic Ring
- ch: Chain
- sc: Single Crochet
- st(s): Stitch(es)
- inc: Increase (2 sc in the same stitch)
- dec: Decrease (single crochet two together)
- sl st: Slip Stitch
Special Stitch Instructions
- Magic Ring (MR): Form a loop with the yarn, insert the hook into the loop, pull up a loop, and tightly secure the stitches in place when crocheting into the ring.
Finished Size
Your penguin will measure approximately 7.5 to 8 cm tall using the specified yarn and hook.
The Pattern Itself
Body (Dark Color)
- Round 1: Start with a magic ring, work 6 sc into the ring. Pull the ring to close. (6 sts)
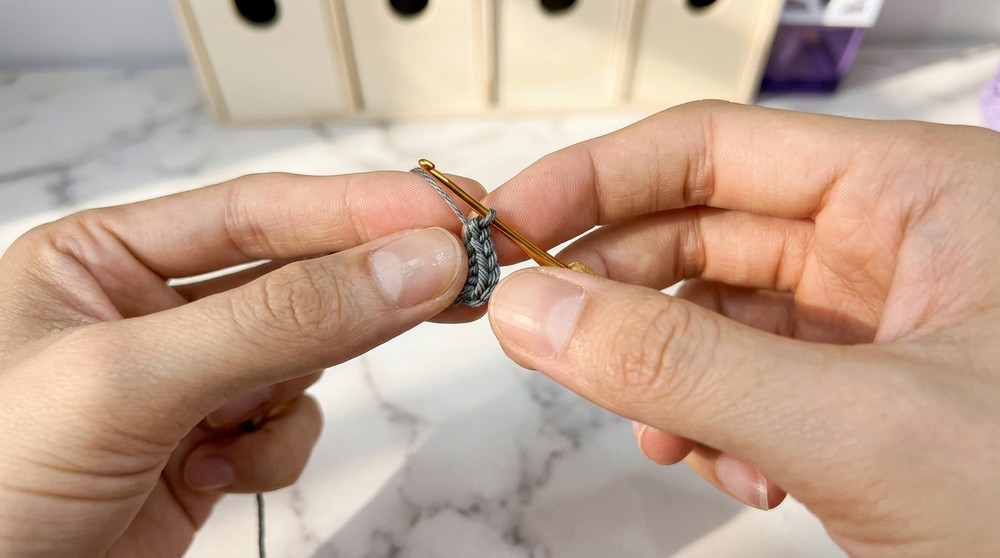
- Round 2: Inc in every stitch around. (12 sts)
- Round 3: (1 sc, inc) repeat around. (18 sts)
- Round 4: (2 sc, inc) repeat around. (24 sts)
- Round 5: (3 sc, inc) repeat around. (30 sts)
- Round 6: (4 sc, inc) repeat around. (36 sts)
- Rounds 7-15: Sc in each st around. (36 sts per round)
- Round 16: (4 sc, dec) repeat around. (30 sts)
- Round 17: (3 sc, dec) repeat around. (24 sts)
- Add stuffing as you go. Ensure the head does not overfill.
- Round 18: (2 sc, dec) repeat around. (18 sts)
- Switch to white yarn.
- Round 19: Work through the front loops only, (1 sc, inc) repeat around. (24 sts) - This creates the head's distinct transition.
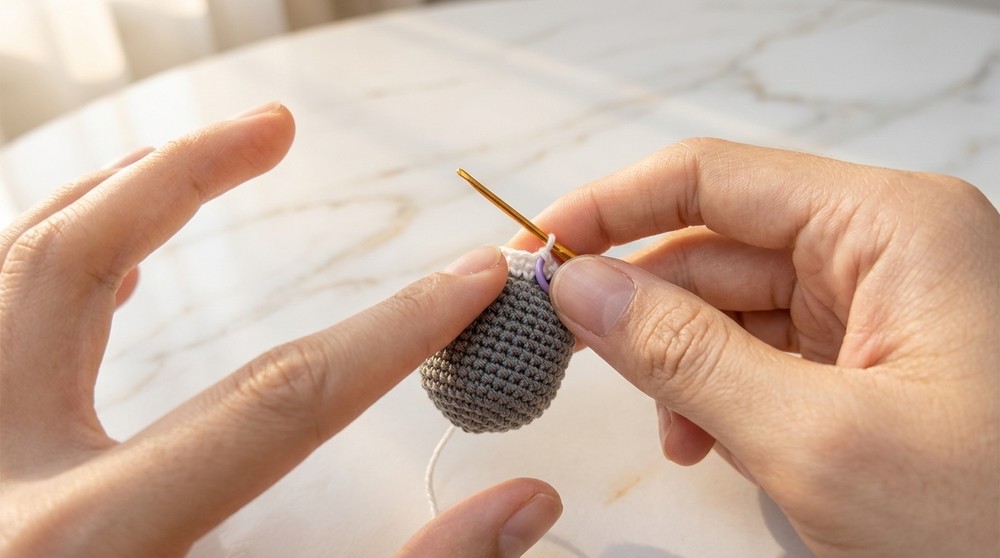
- Round 20: Work in both loops, (3 sc, inc) repeat around. (30 sts)
- Round 21: (4 sc, inc) repeat around. (36 sts)
- Rounds 22-30: Sc in each st around. (36 sts per round)
- Round 31: (4 sc, dec) repeat around. (30 sts)
- Round 32: (3 sc, dec) repeat around. (24 sts)
- Round 33: (2 sc, dec) repeat around. (18 sts)
- Round 34: (1 sc, dec) repeat around. (12 sts)
- Round 35: Dec around. (6 sts)
Finish: Cut the yarn, leaving a long tail. Use the tapestry needle to weave the yarn through the front loops of the remaining 6 stitches and pull tight to close the hole. Secure and weave in the ends.
Body complete! You've now finished the main base of your penguin's body and head.
Helmet or Cap
- Magic Ring: Start with 6 sc into the ring.
- Round 2: Inc in every st around. (12 sts)
- Round 3: (1 sc, inc) repeat around. (18 sts)
- Round 4: (2 sc, inc) repeat around. (24 sts)
- Round 5: (3 sc, inc) repeat around. (30 sts)
- Round 6: (4 sc, inc) repeat around. (36 sts)
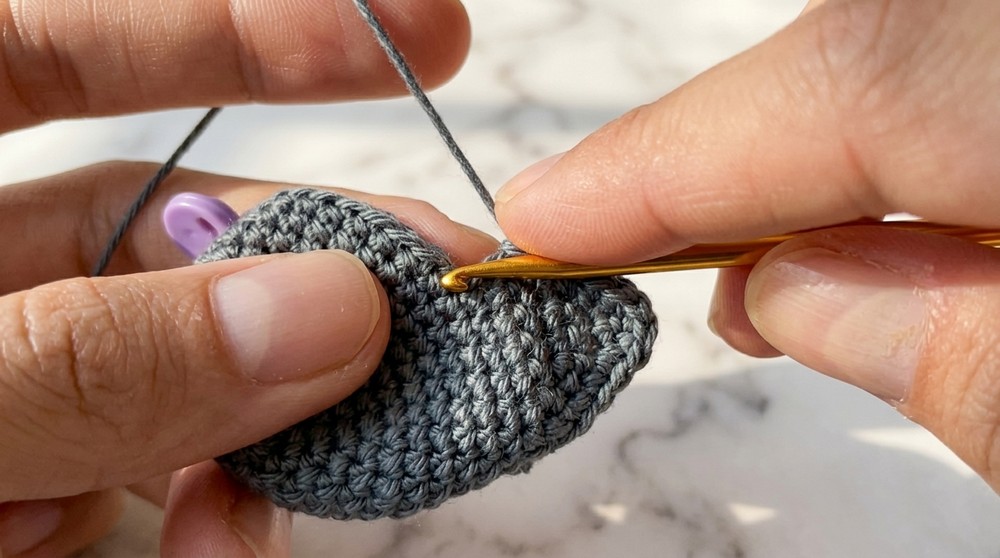
- Rounds 7-11: Sc in each st around.
Finish: Secure and sew the cap onto the top of the penguin's head using glue or sewing thread.
The helmet gives the penguin its distinctive, polished look and layers the head beautifully.
Wings (Make 2)
- Magic Ring: Make 6 sc into the ring.
- Round 2: (1 sc, inc) repeat around. (9 sts)
- Round 3: (2 sc, inc) repeat around. (12 sts)
- Round 4: (3 sc, inc) repeat around. (15 sts)
- Rounds 5-6: Sc in each st around. (15 sts)
- Round 7: (3 sc, dec) repeat around. (12 sts)
Finish: Flatten the wing and close the edge neatly with slip stitches. Leave a long tail and sew or glue onto the penguin's body on both sides.
The wings are small and help achieve the characteristic penguin silhouette.
Feet (Make 2)
- Magic Ring: Make 6 sc into the ring.
- Round 2: Inc in every st around. (12 sts)
- Rounds 3-4: Sc in each st around. (12 sts)
Finish: Leave a short tail and glue the feet onto the bottom of the penguin's body.
Feet complete! These tiny additions complete the penguin's adorable stance.
Beak
- Magic Ring: Make 7 sc into the ring.
- Close with a slip stitch.
Finish: Use glue or carefully sew the beak beneath the eyes area.
The beak is a simple yet necessary detail to bring your penguin to life!
Assembly & Finishing
- Attach Parts: Securely sew or glue the wings, feet, and beak onto the penguin's body.
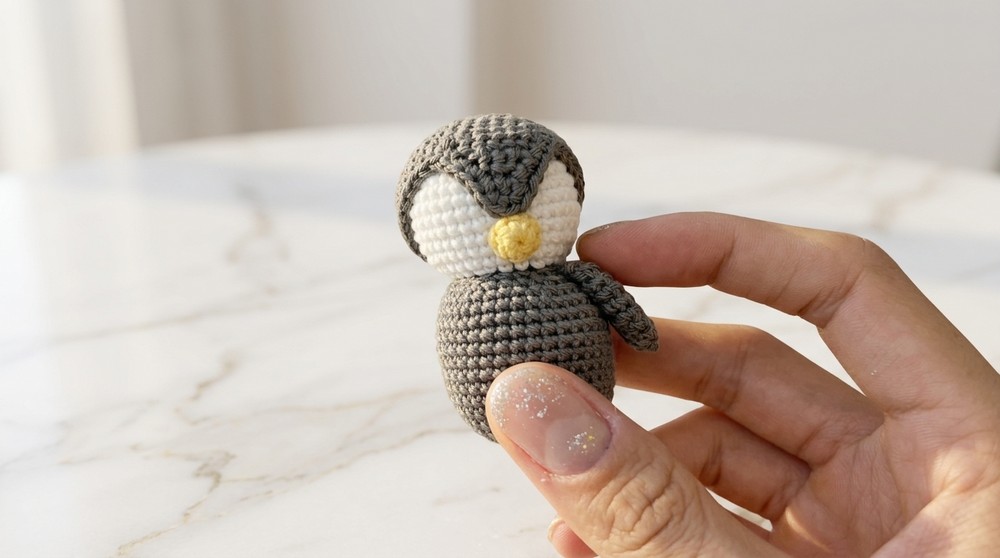
- Add Eyes: Use safety eyes or embroider sleepy eyes with black thread.
- Blush: Apply blush to the penguin's cheeks for a playful, finished look.
- Final Touch: Add a keychain ring if you're making this as a keychain.
Conclusion
Congratulations! You've completed your Mini Crochet Penguin Amigurumi. This adorable little creation can now serve as a charming keychain, a thoughtful handmade gift, or an adorable decoration for your desk or room. You've worked through foundational crochet techniques like the magic ring, increases, and decreases, and gained confidence in creating intricate details like wings, feet, and a beak.
Don't hesitate to experiment with other colors, sizes (by changing the yarn or hook), or even add unique embellishments to personalize your little penguin even more. Whether for yourself or a loved one, this crochet pattern is sure to bring smiles and warmth wherever it goes.