
Rock a unique garden look with this free crochet granny square bucket hat pattern to make soft hat that protects you from the sun with grace.
Colorful hats can brighten up anyone's day and the Crochet Granny Square Hat Pattern is a fun way to make something special with your hands. Basic crochet moves are all you need to join small squares together just like patchwork. Each square can be made in any color you like so you can use bright shades or soft tones based on your taste or mood. The best part is you do not have to follow complicated instructions because the pattern is made up of repeating easy shapes. People can use this hat every day in winter to keep warm or in summer for style.
Free Crochet Granny Square Hat Pattern for Your Next Beach Day

Children and adults love the lively look which comes from mixing many colors. This hat are comfortable and fit well as each square is soft and flexible. The Crochet Granny Square Hat Pattern also lets you use leftover yarn pieces so nothing goes to waste making your project friendly to the environment. If someone wants a special gift for a friend or family member this hat is a perfect choice since it shows care and creativity. Wearing this hat spreads smiles and makes people feel proud.

The pattern brings people together as making squares can be a social activity in groups or families. Even beginners can try this hat pattern because the steps are simple and mistakes are easy to fix. People do not need to know difficult words or techniques to finish the hat. Skill level does not matter since the process is fun and relaxing for everyone. With the Crochet Granny Square Hat Pattern anyone can express personality and bring new life to their wardrobe without spending much money or time.
Crochet Granny Square Hat Pattern
Finished Size
- Head circumference: 56 cm (22 inches).
- Hat depth: Approx. 18-20 cm from crown to brim (adjustable).
Materials Needed
- Yarn:
- Medium weight (Worsted #4) yarn in your choice of color(s). For a classic look, use a solid color. For a bold, granny inspired design, mix and match colors for different rows.
- Crochet Hook: Size 4.0 mm (G/6) or according to gauge.
- Tapestry Needle: For weaving in the ends.
- Scissors: To cut your yarn.
- Stitch Markers: Optional, to mark the beginning of rows.
Important Pattern Notes
- The hat is worked in joined rounds from the top down.
- After each round, always join with a slip stitch to the first stitch.
- Increase evenly in the early rounds to create a flat circle for the crown.
- This pattern is sized for a 56 cm head circumference-adjust for other sizes as needed.
Gauge
- 10 double crochet (dc) = Approx. 5 cm (2 inches).
- Adjust hook size if your gauge differs. Matching gauge ensures the hat fits as intended.
Abbreviations (U.S. Terminology)
- ch: Chain
- sl st: Slip Stitch
- dc: Double Crochet
- MR: Magic Ring
- sp: Space
- rep: Repeat
Special Techniques
Magic Ring (MR):
The magic ring creates a tight center at the beginning of crocheting in the round. Wrap the yarn around your fingers, insert the hook under the loop, pull through a loop, and crochet as instructed. Pull the tail to tighten the ring after completing stitches.
Pattern Instructions
Crown Section (Rounds 1-6)
This section creates the rounded top of the hat. The making of this hat begins with a magic ring, creating a strong and neat foundation for the crown.
Round 1
- Start with a Magic Ring (MR).
- Ch 1, and work 12 double crochet (dc) into the ring.
- Pull the tail to close the ring tightly.
- Join with a slip stitch (sl st) into the top of the first dc.
- (12 stitches)
Round 2
- Ch 1. Work 2 dc in each stitch around. Add 1 ch between every 2 dc cluster.
- Pattern: [2 dc in the same stitch, ch 1].
- Join with a sl st into the top of the first dc.
- (24 stitches + chain spaces)
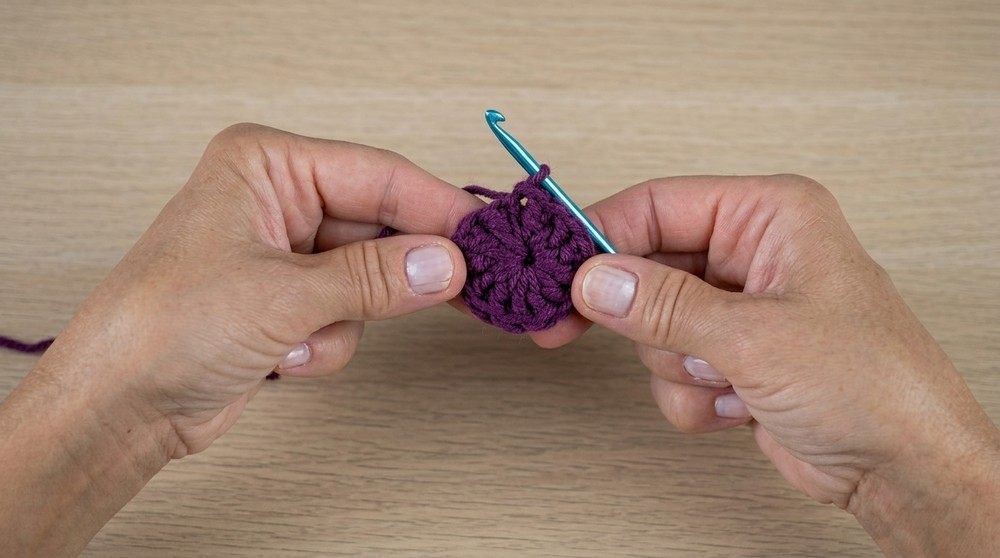
Right from the start, you build the base round with chain stitches followed by twelve double crochet stitches, closing the round securely with a slip stitch. As you move to the second round, the pattern starts to take shape with chain stitches and repeating two double crochet in each stitch, separated by a chain and joined again by slip stitches.
Round 3
- Ch 1. Slip stitch (sl st) into the next space.
- Work 3 dc into the space. Add 1 ch after the cluster.
- Pattern: [3 dc in the same space, ch 1]. Repeat 11 times, crocheting into each ch 1 space from the previous row.
- Join with a sl st.
- (36 dc clusters + chain spaces)
Round 4
- Ch 1. Slip stitch into the next space.
- Work 3 dc into the first space, ch 1, then work 4 dc into the next space.
- Pattern: [3 dc in one space, ch 1, 4 dc in next]. Repeat this pattern around and end with sl st.
- (Alternating 3 and 4 dc clusters)
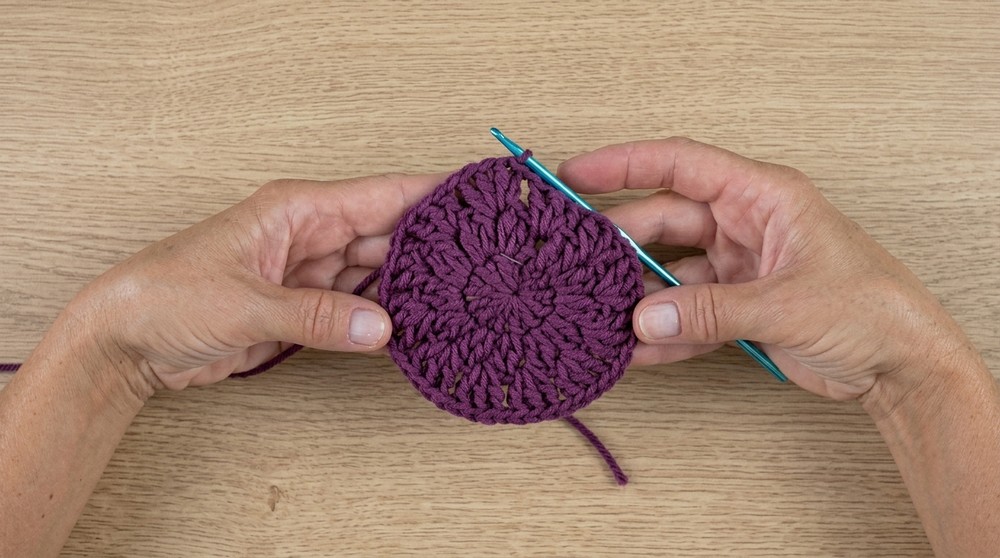
This sequence is continued and expanded in the third and fourth rounds, where you increase the number of double crochets in each cluster and keep adding chain stitches between them.
Rounds 5-6
- Continue working 3 dc into each space, chaining 1 after each cluster.
- Growing the crown width stops after Round 6 (or your desired crown diameter).
Note: Measure the diameter at this point. It should be around 19 cm (7.5 in). Increase or decrease rounds as needed to match the desired size.
Body Section (Rounds 7-12)
This section builds the body and gives the bucket hat its shape.
Rounds 7-12
- Ch 1. Continue working [3 dc in each space, ch 1].
- No increases are made in these rounds, allowing the hat to curve downward for the body.
- Join with a sl st at the end of each round.

Tip: Measure the length from the crown as you go. Adjust the number of rounds if you prefer a deeper or shallower hat. The body depth should be around 10-12 cm.
Brim Section (Rounds 13-18)
The brim is flared outward for a classic bucket hat look.
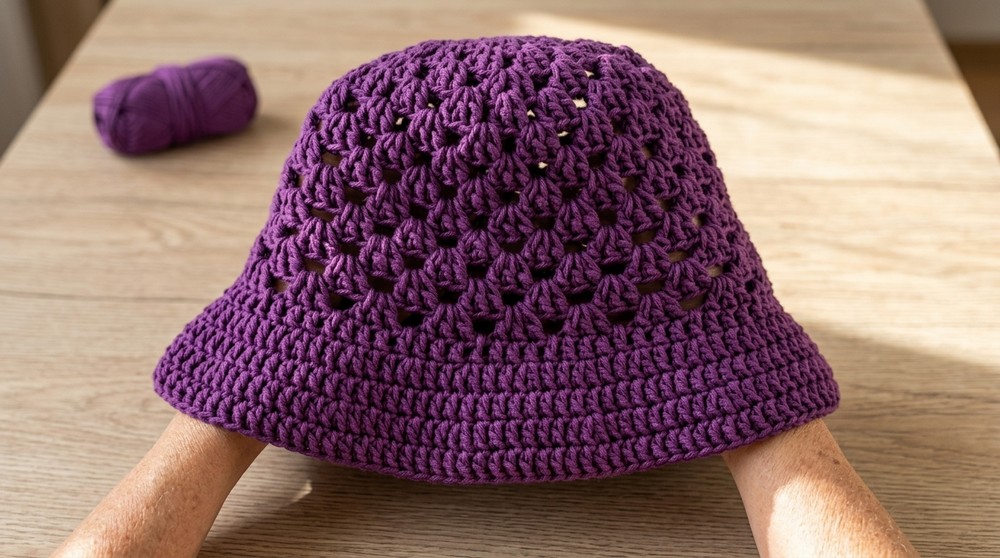
The mid-section of the hat grows through consistent repetition of patterned rounds, forming firm and decorative granny square clusters. As the rounds increase, the sides expand and the hat takes on its recognizable shape. In the later rounds, double crochets and cluster increases are repeated to widen and lengthen the hat, making it fit the average adult head.
Round 13
- Ch 1. Work [2 dc in each stitch around]. This increases the stitch count and begins the brim.
- Join with a sl st.
Round 14
- Ch 1. Work the following pattern: [2 dc in the first stitch, 1 dc in the next stitch].
- Join with a sl st.
Round 15
- Ch 1. Work 1 dc in each stitch around. This round creates a clean brim edge.
Rounds 16-18
- Repeat the increase pattern as desired to make the brim wider:
- [2 dc in the first stitch, 1 dc in the next 2 stitches].
- Adjust the number of single dc stitches between increases as you prefer (e.g., every 3rd stitch).
- End each round with a sl st.
Final Edge (Optional)
- Add a final row of reverse single crochet (crab stitch) or slip stitches to give the brim a polished edge.
The final rounds are focused on completing the hat's length and achieving the right fit. Every round is joined securely with slip stitches, and after reaching the desired size, all yarn ends are woven in neatly to finish the hat.
Customization Ideas
- Color Play: Alternate between colors every round or create a striped effect for a more vibrant design.
- Flower Applique: Crochet small flowers or motifs to attach to the brim for embellishment.
- Adjustable Brim: Add more rows to the brim section if you prefer a wider brim.

Troubleshooting & Corrections
- If the hat is too tight or too loose, adjust hook size or number of rounds.
- Ensure even tension, especially when joining rounds.
- Correct any missed increases in the next round by working two dc in one space if necessary.
Care and Customization
- Add pom-poms, buttons, or appliqués for a personalized touch.
- Use up yarn scraps for a colorful, eco-friendly creation.
Tips for Success
- Use a stitch marker to remember the start of each round if working continuously.
- If your stitches feel stiff, try using a larger hook size.
- Regularly measure the hat circumference and depth as you work to ensure the correct sizing.
Finishing Up
- Weave in Ends: Use a tapestry needle to neatly weave in all loose ends.
- Block the Hat: Lightly steam block the hat if necessary to smooth out any uneven stitches and give the brim a firm finish.
Final Remarks
Congratulations, You've just completed a granny square bucket hat fit for a modern, trendy look. This hat is lightweight and breathable, making it excellent for sunny weather, casual outings, or as an eye-catching handmade gift.
By following this detailed guide, we hope you had an enjoyable crocheting experience. Experiment with colors, textures, and additional embellishments to make each hat unique.