
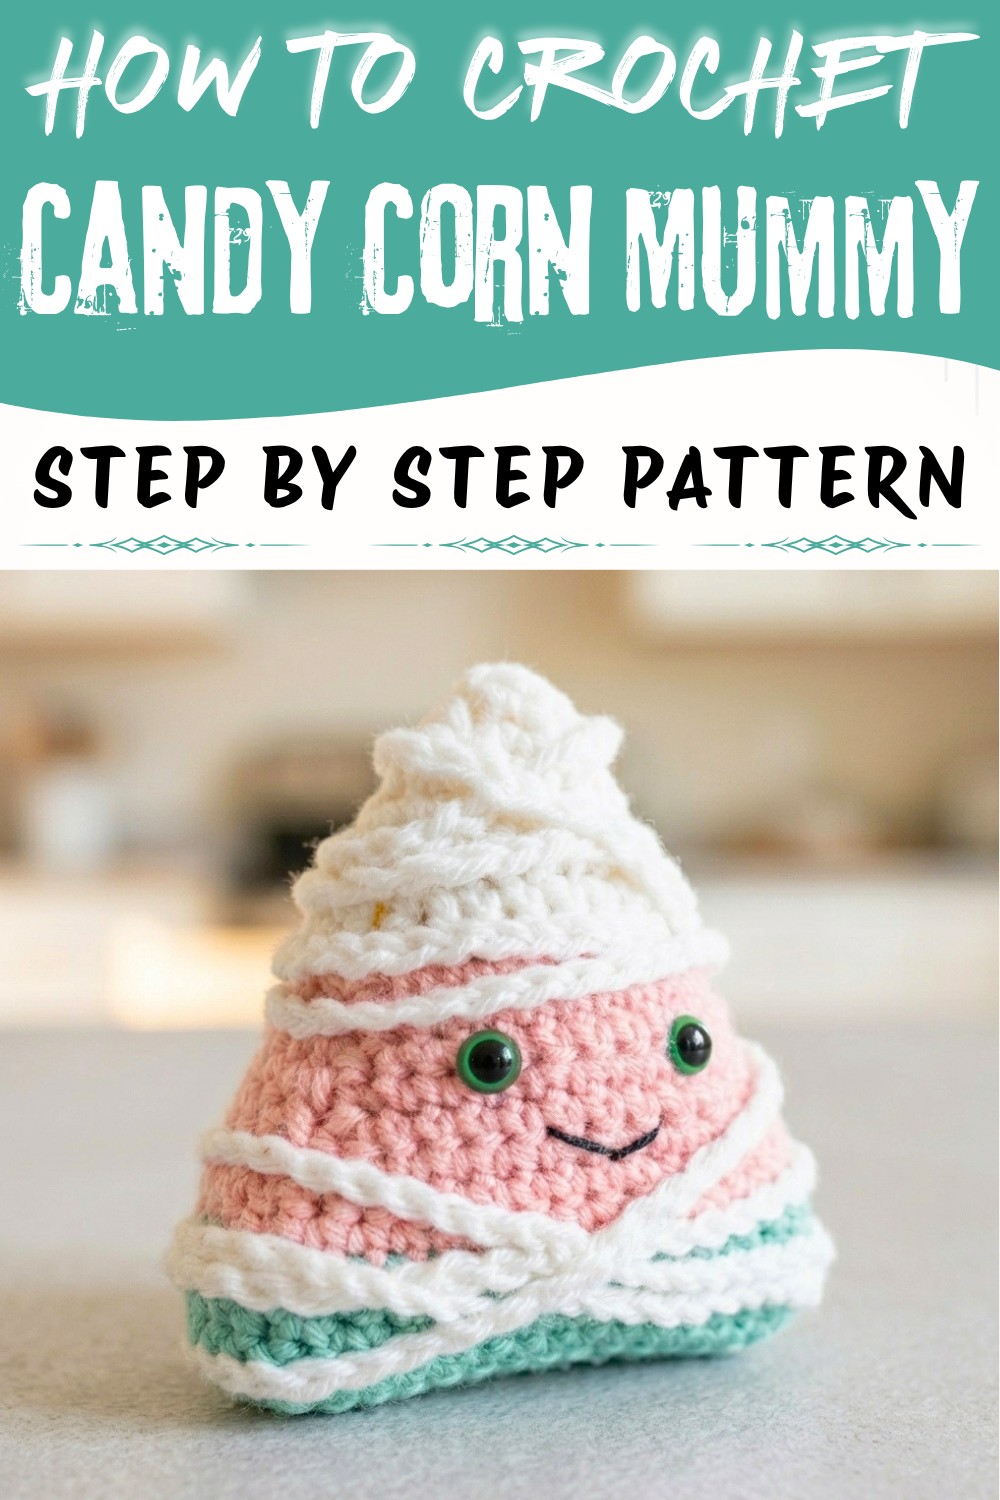
Brighten up your Halloween decor with a Crochet Candy Corn Mummy Pattern, the perfect mix of spooky and festive fun. Shaped like classic candy corn and wrapped in playful mummy details, this project is ideal for adding personality to small spaces or Halloween setups.

It's versatile enough to use as a cute decoration for shelves, a hanging ornament, or even a fun way to hold candy for guests. This quirky idea works for all skill levels, offering a fun and satisfying way to bring a seasonal vibe to your home. The combination of cheerful colors and spooky charm makes it a memorable addition to Halloween celebrations, adding warmth and creativity to the season.

Materials
- Yarn (4 weight/medium):
- White (top section and mummy wrap).
- Baby Pink (middle section).
- Sea Green(bottom section).
- Crochet Hook: 5mm.
- Safety Eyes:
- Use 9 mm or 10 mm safety eyes.
- Optional: Try colored safety eyes (e.g., green, red, or orange for Halloween vibes).
- Embroidery Thread and Needle: For stitching on the mouth, scar, or other details (use black, red, or white thread as desired).
- Stuffing: Fiberfill or use scrap yarn for an eco-friendly twist.
- Scissors: For cutting yarn and threads.
- Hot Glue Gun: To secure the white chain "wrapping" for the mummy texture.
Gauge
Gauge is not critical for this project, but ensure your stitches are tight to prevent gaps in the fabric, especially after stuffing.
Finished Size
The completed mummy measures approximately 5-6 inches tall, depending on yarn tension and stuffing.
Special Techniques
- Magic Ring: Start your project seamlessly with this technique, ensuring no hole at the top.
- Single Crochet Increase (Inc): Creating two single crochets in the same stitch to expand the triangle shape.
- Simple Color Changes: If you're new to color changes, don't worry! This pattern includes a clean and easy approach.
- Hot Glue Wrapping: The white chain gives the mummy its bandaged texture.
Crochet Pattern Instructions
Triangle Body Base
White Section (Top)
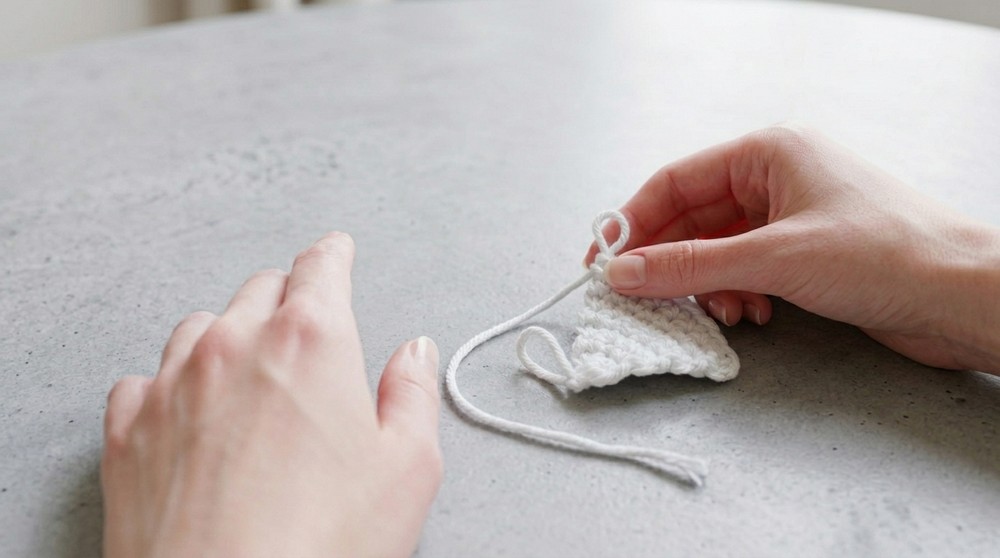
- Start with White Yarn:
- Create a slip knot and insert your 5mm crochet hook.

- Create a slip knot and insert your 5mm crochet hook.
- Row 1:
- Chain 2.
- Work 2 single crochet (sc) into the first chain.
- Chain 1, turn.
- Row 2:
- Work 1 sc in the first stitch.
- In the second stitch, work an increase (2 sc in the same stitch).
- Chain 1, turn (3 stitches at the end of the row).
- Continue Increasing Each Row:
- Follow this pattern: Work 1 sc in each stitch across until the last stitch, where you'll increase by working 2 sc.
- Row 3: 2 sc, 1 inc (4 stitches).
- Row 4: 3 sc, 1 inc (5 stitches).
- Row 5: 4 sc, 1 inc (6 stitches).
- Continue this pattern until the end of Row 8, finishing with 9 stitches.
- Fasten Off:
- Cut the white yarn, leaving a 4-6 inch tail, and attach the Baby Pink yarn.
- Cut the white yarn, leaving a 4-6 inch tail, and attach the Baby Pink yarn.
Baby Pink Section (Middle)
- Attach Baby Pink Yarn:
- Loop the new color through the last stitch of the previous row and secure.
- Chain 1 to begin.
- Row 9:
- Work 1 sc in each stitch across, increasing in the last stitch only (resulting in 10 stitches).
- Repeat the Pattern for 5 Rows:
- Continue working 1 sc in each stitch, increasing in the last stitch, for a total of 5 rows in Baby Pink.
- Finish with 14 stitches at the end of Row 13.
- Fasten Off:
- Cut the Baby Pink yarn and attach the Sea Green yarn.
Sea Green Section (Bottom)
- Attach Sea Green Yarn:
- Loop the new color through the last stitch of the previous row and secure.
- Chain 1 to begin.
- Rows 14-20:
- Work 1 sc in each stitch across, increasing in the last stitch of each row for rows 14-15.
- Rows 16-20 are straight single crochet rows with no increases.
- Maintain 16 stitches for the last five rows.
- Fasten Off:
- Cut the yarn, leaving a long tail for sewing.

- Cut the yarn, leaving a long tail for sewing.
Make the Second Panel
- Repeat the exact steps from the Triangle Body Base section to create a second identical triangle.
Assembling the Candy Corn Mummy
- Position the Panels:
- Place the two triangles together with their right sides facing outward.
- Use the Sea Green yarn tail to sew the edges together with a whip stitch or running stitch, leaving the bottom edge open for stuffing.

- Stuffing:
- Lightly stuff the candy corn shape with fiberfill or scrap yarn. Avoid overstuffing to retain the triangular shape.
- Close the Bottom:
- Once stuffed, finish sewing the bottom edge closed.

- Once stuffed, finish sewing the bottom edge closed.
Adding the Face
- Attach Safety Eyes:
- Position the safety eyes in the middle of the Baby Pink section.
- Place them about 1 stitch apart (or closer, depending on your desired look).
- Secure them with their backings.
- Create the Mouth and Scars:
- Thread black embroidery floss into a needle.
- Stitch a smile or zigzag mouth on the Baby Pink section beneath the eyes. For scars, make simple X shapes with the thread.
- Knot the embroidery thread securely and hide the ends inside the body.
Mummy Wrapping
- Create the Wrapping Chain:
- Using the White yarn, chain 250-300 stitches (or more for a fuller wrap).
- Secure the Wraps:
- Use a hot glue gun to attach the beginning of the chain to the back of the candy corn.
- Wrap the chain around the body, layering and crisscrossing to create a "mummy" effect. Secure each section with hot glue as you go.
- Finishing the Wrap:
- End the chain at the back of the candy corn. Trim any excess chain and secure the end with hot glue.
Customization Ideas
- Scar Placement: Use embroidery thread to add scars on different sections (e.g., on the white or Sea Green parts).
- Eye Variations: Try different eye placements (e.g., close together, far apart) or use spooky-colored safety eyes (glow-in-the-dark eyes would be fun).
- Pastel Colors: For a cute and less spooky candy corn, swap the bold colors for pastels.
- Add a Loop: Crochet or braid a small strap at the top for a hanging ornament.
- Larger Sizes: Use a thicker yarn and larger hook to make a jumbo version, perfect as a pillow or festive decoration.
Special Notes
- Tidy Color Changes: When changing colors, make sure to leave a small tail and tie a secure knot. Weave in yarn ends for a seamless finish.
- Glue Tips: Be cautious when working with the hot glue gun to avoid burns. Work slowly and in sections to ensure the chain "wrapping" stays in place.
Final Look & Conclusion
Your Candy Corn Mummy in White, Baby Pink, and Sea Green is complete! With its vibrant colors, adorable facial features, and spooky mummy wrap, this crochet project is perfect for the Halloween season. Display it on your mantel, gift it to loved ones, or turn it into a hanging decoration.