
Decorate your favorite shelf using this Crochet Mini Bear Free Pattern and enjoy an adorable little bear that brings warmth to your space.
There's something truly heartwarming about tiny, adorable creations that can bring a smile to anyone's face. A little bear so small it fits perfectly as a phone charm or keychain, adding a touch of personality and warmth wherever it goes. This delightful item is exactly what the Crochet Mini Bear Pattern offers-a charming miniature bear that is both cute and practical. Thanks to the detailed tutorial by Nancy a crochet on her YouTube channel, this pattern makes it easy for anyone to create their own mini bear with just some yarn and a 1 mm crochet hook. The Crochet Mini Bear Pattern offers a wonderful opportunity to create a personalized gift, perfect for friends, family, or even as a sweet little keepsake for yourself.
Sweet Crochet Mini Bear Free Pattern for a Little Keepsake
The mini bear stands out due to its beautifully rounded shape and thoughtfully constructed features. Its soft, textured yarn gives it a cuddly, plush feel, while its small size makes it ideal for accessorizing phones, bags, or desks. The design includes tiny ears, arms, legs, a snout, and a little tail, all perfectly proportioned to create a harmonious and irresistible look. The bear's style is simple yet enchanting, balancing a cozy handmade vibe with a polished finish that highlights every detail, from the "T" shaped embroidered nose to the neatly sewn eyes.
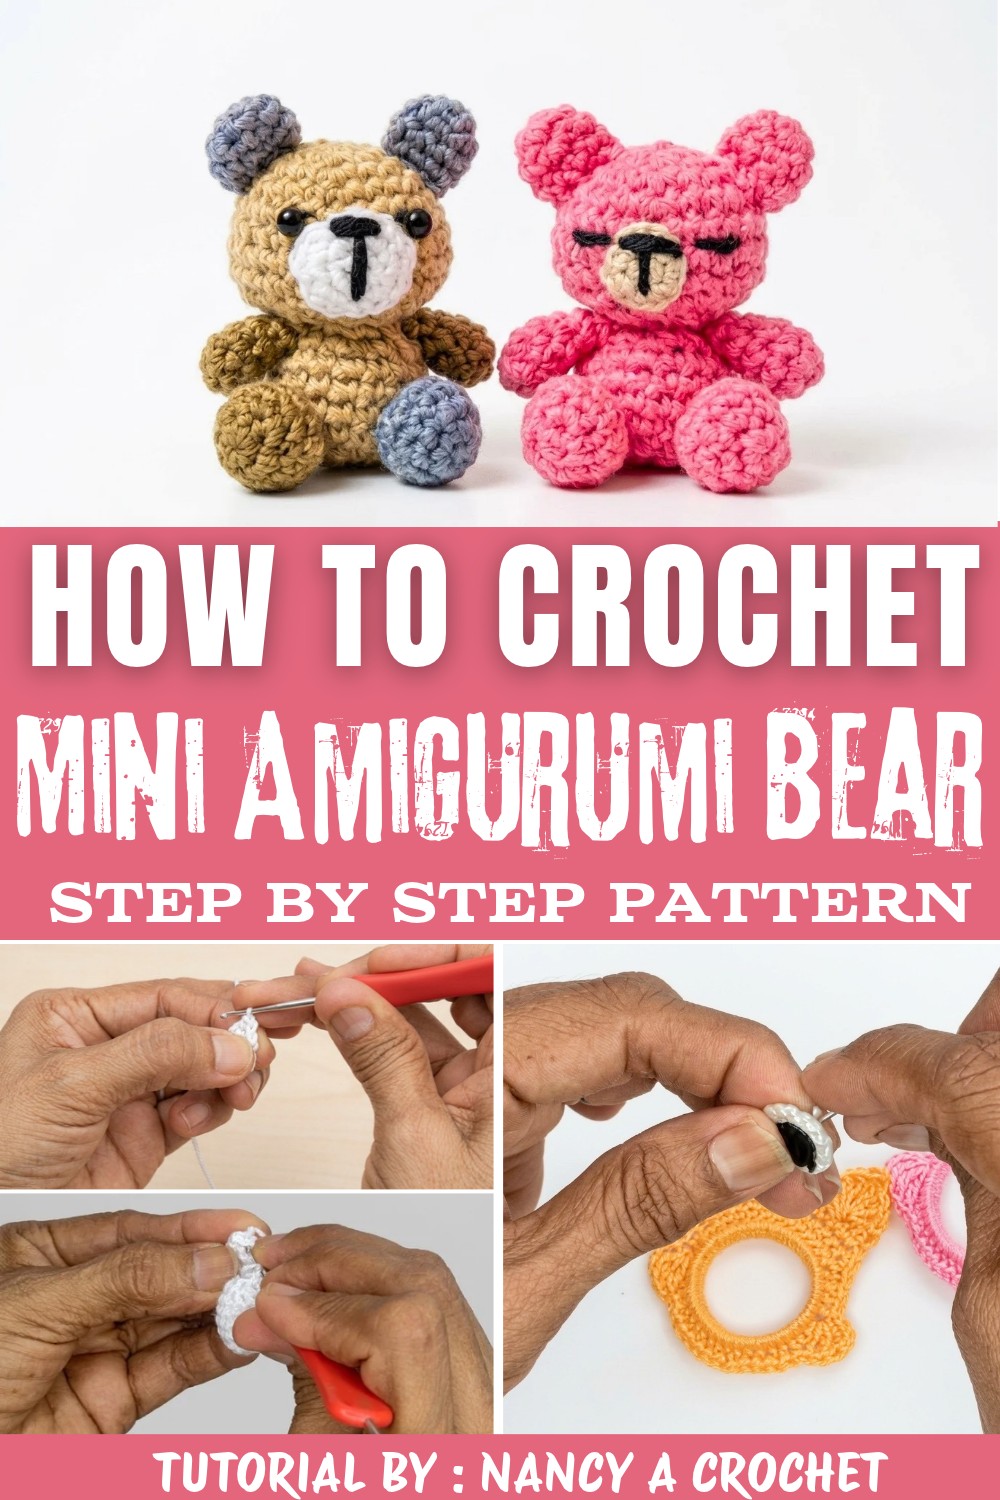
Beyond its decorative charm, this mini bear carries a sentimental value. It can brighten up daily essentials, bring comfort as a small token, or even spark joy as a beginner-friendly project that encourages creativity and patience. Whether given as a thoughtful gift or kept as a delightful personal companion, this little bear is sure to captivate hearts with its sweet appearance and handmade charm.
Cheerful Crochet Mini Bear Free Pattern
A small amigurumi bear adds warmth and delight to any space, serving as an accessory for keychains or mobile phones. This project incorporates foundational crochet techniques with an emphasis on tidy finishing and subtle details. Amigurumi methods, such as working in continuous spirals, precise shaping through increases and decreases, and secure assembly, lead to an appealing three-dimensional structure. Gentle, hand-embroidered elements contribute to the bear's gentle expression, offering opportunities for personal touches in color and styling. Attention to detail during both stitching and assembly ensures the finished item is sturdy and visually attractive. This project appeals to those seeking a quick, hands-on activity where thoughtful construction results in a cheerful, tactile companion. Rooted in simplicity and suitable for various color palettes, this bear is both functional and decorative, offering a charming presence for accessories or small gifts.
Quick Overview Of Pattern
- Construct the head, body, ears, arms, legs, snout, and tail in separate small sections.
- All segments begin with a magic ring for seamless shaping.
- Continuous spiral rounds provide a smooth, nearly invisible seam.
- Increases create dimension and fullness; decreases form curves and tapering.
- Minimal embroidery is used for facial effects.
- Individual parts are sewn together for final assembly.
Notes
- All pieces are worked in the round, usually in spiral (except where a slip stitch or turning chain is specified).
- Use a stitch marker to track the first stitch of each round to maintain an accurate stitch count.
- The bear is lightly stuffed as you progress, so add fiberfill after each part is closed.
- Ensure stitches are tight to keep the stuffing from showing.
- You may substitute any yarn or hook size for different results, but adjustments to sizing will occur.

Skill Level
- Advanced Beginner:
- This pattern is suitable for those familiar with working in the round, using the magic ring, increasing, decreasing, and simple sewing/embroidery.
Materials
- Yarn: 1 mm thick yarn, or small amounts of any cotton or wool yarn in your chosen bear color
- Crochet Hook: 1.0 mm (alternatively, 1.5 mm or 1.75 mm for a slightly bigger bear)
- Stuffing: Fiberfill or polyester batting
- Embroidery Thread: Black, for facial features
- Needles: Tapestry needle for sewing parts together and embroidering the face
- Notions: Scissors and stitch marker
Measurements / Sizing
- Finished Size: Approximately 4-6 cm (1.5-2.5") tall, depending on yarn and hook.
- Schematic: Head and body are spherical/oval, arms and legs are short tubes, ears are small semicircles.
Gauge (and Stitch Pattern)
- Gauge: Not crucial, but keep stitches tight (amigurumi style) so the stuffing does not show.
- Main Stitch: Single crochet (sc) in the round.
Stitch Abbreviations
| Abbreviation | Meaning |
|---|---|
| st(s) | stitch(es) |
| sc | single crochet |
| inc | increase (2 sc in one stitch) |
| dec | decrease (single crochet two together) |
| sl st | slip stitch |
| MR | magic ring |
| ch | chain |
Special Stitches
- Magic Ring (MR): Form a loop and work initial stitches directly into the ring, allowing it to pull closed.
- Increase (inc): Two sc in the same stitch.
- Decrease (dec): Combine two stitches into one (sc2tog).
The Crochet Pattern
Head
- Round 1: MR, secure with a chain. 6 sc into the ring. Sl st to join. (6 sts)

- Round 2: Ch 1, 2 sc in each st around (6 inc). (12 sts)
- Round 3: [1 sc, 1 inc] repeat around. (18 sts)
- Round 4: [2 sc, 1 inc] repeat around. (24 sts)
- Rounds 5-6: 1 sc in each st around. (24 sts per round)
- Round 7: 10 sc, 2 inc in next 2 sts, 10 sc, 2 inc in next 2 sts. (28 sts)
- Round 8: 1 sc in each st around. (28 sts)

- Round 9: [2 sc, 1 dec] repeat around. (21 sts)
- Round 10: [1 sc, 1 dec] repeat around. (14 sts). Stuff lightly at this point.
- Round 11: 1 dec, then [1 sc, 1 dec] repeat to end. Fasten off, leaving a tail; weave through remaining stitches to close.
Ears (Make 2)
- Round 1: MR, secure with a chain. 6 sc in ring. Sl st to join. (6 sts)
- Round 2: Ch 1, place marker, 2 inc in a row, 1 sc, 2 inc in a row, 1 sc. (10 sts)
- Rounds 3-4: 1 sc in each st around. (10 sts)
- Fasten off, leaving a tail for sewing.
Arms (Make 2)
- Round 1: MR, secure with a chain. 6 sc in ring. Sl st to join. (6 sts)
- Round 2: Ch 1, place marker, [1 sc, 1 inc] repeat around. (9 sts)
- Rounds 3-4: 1 sc in each st around. (9 sts)
- Round 5: [1 sc, 1 dec] repeat around.
- Round 6: 1 sc in each st around. Fasten off.
Legs (Make 2)
- Round 1: MR, secure with a chain. 6 sc in ring. (6 sts)
- Round 2: 2 sc in each st around (6 inc). (12 sts)
- Round 3: 1 sc in each st around. (12 sts)
- Round 4: [1 sc, 1 dec] repeat around. Fasten off and lightly stuff.
Body
- Round 1: MR, secure with a chain. 6 sc in ring. (6 sts)
- Round 2: 2 sc in each st around. (12 sts)
- Round 3: [1 sc, 1 inc] repeat around. (18 sts)
- Rounds 4-5: 1 sc in each st around. (18 sts)
- Round 6: [2 sc, 1 dec] repeat around. Stuff gradually as you work.
- Round 7: [1 sc, 1 dec] repeat around.

- Round 8: As you work 1 sc in each st around, join arms to the body, working through both arm and body stitches to secure.
Snout
- Round 1: MR, secure with a chain. 6 sc in ring. Sl st to join. (6 sts)
- Round 2: Ch 1, [1 sc, 1 inc] repeat around. (9 sts)
- Fasten off and leave a tail for sewing.
Tail (Optional)
- MR, 5 sc. Fasten off, leaving a tail. Attach to the lower back of the body.
Assembly & Finished Size
- Ears: Sew starting at the second round of the head, align side increases horizontally.
- Sew Arms to the body.
- Head to Body: Match the increases on both sides and sew securely.
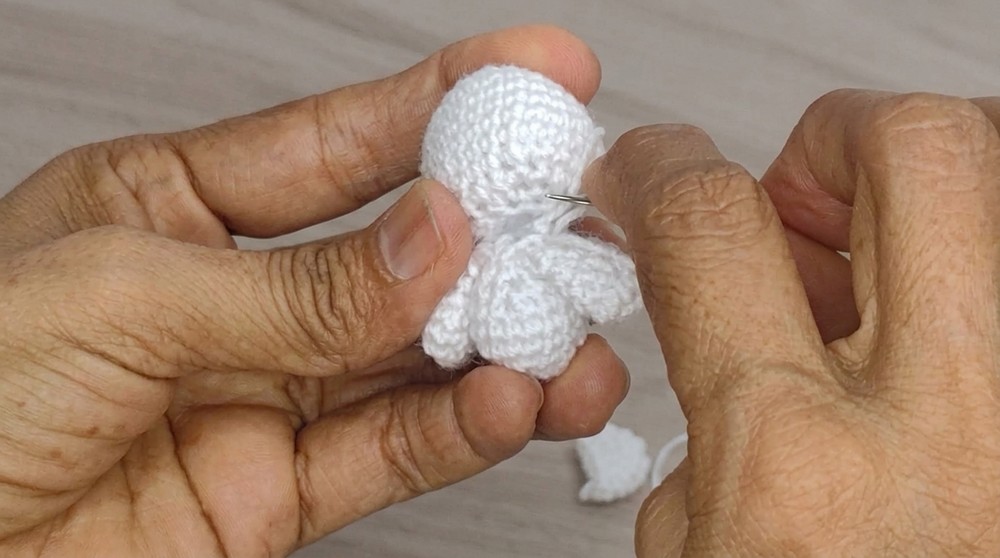
- Legs: Attach to the underside or slightly forward of the body, spaced about 1-2 stitches apart.
- Snout: Before attaching, embroider a T-shaped nose with black thread on the center. Position and sew to the lower center of the face.
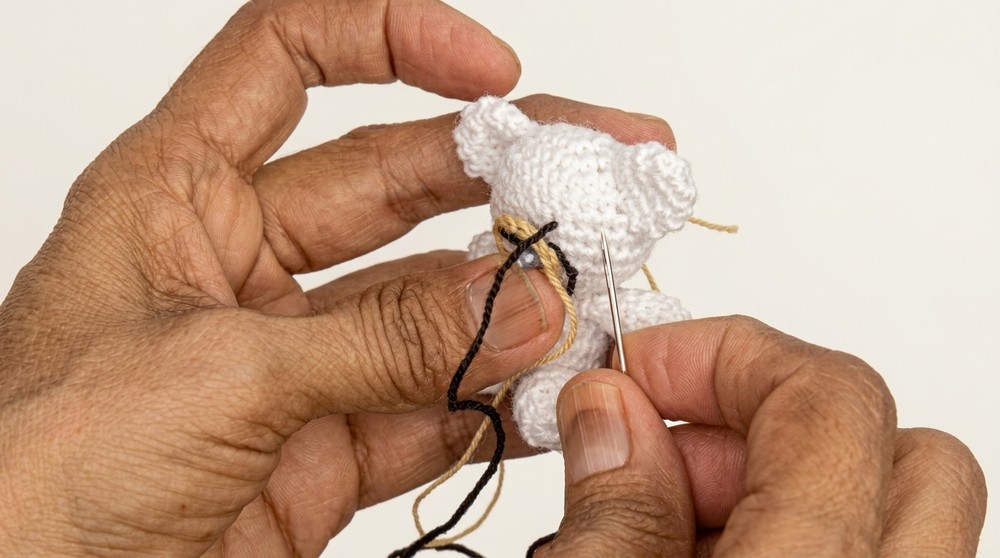
- Eyes: Using black thread, embroider eyes on either side of the snout above the nose, spaced about two stitches apart.
- Tail: Attach as desired.
The finished bear measures approximately 4-6 cm (1.5-2.5") tall, depending on your yarn and tension.
Conclusion and Ending Words
Completing a mini amigurumi bear offers a sense of accomplishment and a tangible result that brings a bit of warmth to any collection. As the process concludes, each assembled piece-from the precisely stitched limbs and ears to the expressive little face-stands as evidence of careful technique and purposeful attention at every stage. By maintaining a consistent stitch tension and approaching the details with care, the final bear achieves both durability and a neat appearance. Subtle embroidery and hand-sewn components provide small opportunities for individual style to shine through. Whether set aside as a sentimental keepsake, attached as an accessory, or presented as a thoughtful token, this small bear combines charm and subtle personality, holding value both as a finished item and as a symbol of steady, intentional handiwork. 