
Boost your collection easily by using the Free Crochet Teddy Bear Amigurumi Pattern to make sweet, lovable teddies with lasting appeal.
Crocheting your own adorable teddy bear amigurumi is such a rewarding experience, especially when the pattern is easy to follow and fun to create. This charming little bear, standing about 7 to 8 cm tall, is packed with personality and delicate details that make it the perfect handmade gift or decorative keepsake. You'll enjoy creating this bear pattern with soft and smooth yarn, using foundational crochet techniques like the magic ring, single crochet, and decreases. These stitches make shaping the bear's head, arms, legs, snout, and even its tiny flowers a creative process.
Charming free crochet Teddy Bear Amigurumi pattern for collectors

One of the highlights of this pattern is the bouquet of roses held by the bear, which adds an elegant and cheerful touch. This detail not only makes the project unique but also introduces you to creative techniques like crocheting tiny flowers and wrapping wire to create floral stems. The end result is a heartwarming decor piece or a thoughtful handmade gift that looks professionally made. The blush detail on its cheeks and the sparkle in its eyes make the finished bear even more adorable.
What You'll Learn:
- Amigurumi Basics: You'll master shaping tiny parts like the head, arms, and legs with strategic increases and decreases.
- Decorative Details: Techniques for crocheting roses and bows bring layers of creativity to your project.
- Assembly Skills: Learn the art of joining small parts seamlessly for a polished finish.
What You Can Make With These Skills:
- Custom amigurumi animals like bunnies, cats, or other small creatures.
- Mini floral bouquets for embellishments or garlands.
- Adorable accessories such as bows, flowers, or decorative details for other crochets.
- The base for other creative crocheted gifts or decor items.
With this pattern, your creativity will bloom, and you'll find endless ways to use these skills for new and exciting projects.
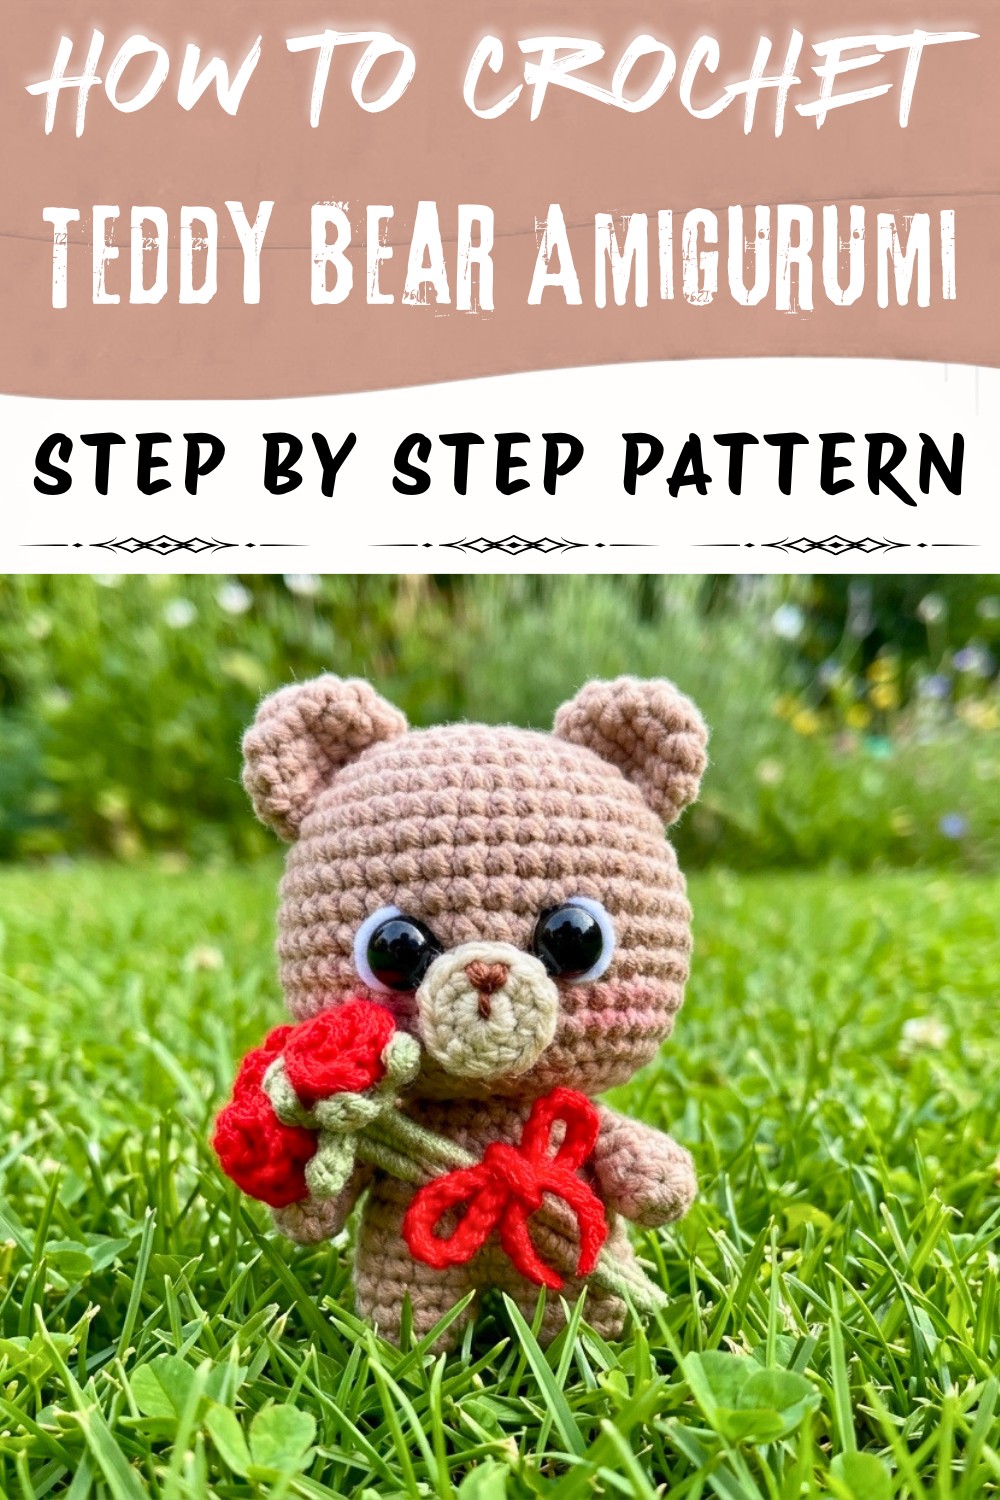
Crochet Little Bear with Flowers Pattern
Welcome to this adorable crochet project! This pattern will help you create a sweet little bear holding a bouquet of roses. Standing about 7-8 cm tall, this bear is a perfect gift or keepsake. The size of your bear may vary slightly based on the materials you choose and your crochet tension. Throughout the pattern, you'll use single crochet, magic ring, increases, decreases, and simple shaping techniques to bring this bear to life. Plus, we'll crochet flowers and wrap stems for an added charm.
This pattern is designed with simple yet decorative details, making it beginner-friendly and fun to make. Follow along to create something that will bring smiles to anyone who sees it!
Skill Level & Terminology
Skill Level: Beginner to Intermediate
Terminology: US Crochet Terms
Materials & Tools
- Yarn:
- A neutral tone for the bear (beige or brown).
- Green for the flower stems.
- Pink or red for the roses.
- White for details and sparkle in the eyes.
- Hook: 2.2 mm crochet hook.
- Safety Eyes: 7 mm, with safety backs.
- Wire: For flower stems.
- Glue: For securing details like roses.
- Stuffing: Silicone cotton or fiberfill.
- Needles: Tapestry needle (for sewing and embroidery).
- Other Tools: Pins, scissors, blush for cheeks.
Gauge
Exact gauge is not critical for this project. However, you should work with a consistent tension to ensure tight stitches that will firmly hold the stuffing.
Abbreviations List
- MR: Magic Ring
- SC: Single Crochet
- HDC: Half Double Crochet
- INC: Increase (two stitches in one stitch)
- DEC: Decrease (combine two stitches into one)
- Sl St: Slip Stitch
- Ch: Chain
Special Stitch Instructions
- Magic Ring (MR): Form a loop, insert your hook, draw yarn through, and crochet directly into the ring before pulling it tight.
- Invisible Decrease (DEC): Insert your hook under the front loops of the next two stitches, yarn over, and pull through both loops; finish as a single crochet.
Finished Size
The finished bear will measure approximately 7-8 cm tall, depending on yarn weight, hook size, and tension.
The Pattern
1. Head
- Round 1: Make a MR, and work 6 SC into the ring. (6 SC)
- Round 2: INC in every stitch. (12 SC)

- Round 3: 1 SC, INC around. (18 SC)
- Round 4: 2 SC, INC around. (24 SC)
- Round 5: 3 SC, INC around. (30 SC)
- Round 6: 4 SC, INC around. (36 SC)
- Round 7: 5 SC, INC around. (42 SC)
- Rounds 8-16: 1 SC in each stitch. (42 SC per round)
- Insert safety eyes between Rounds 12-13, leaving 4 stitches apart.
- Round 17: 5 SC, DEC around. (36 SC)
- Round 18: 4 SC, DEC around. (30 SC)

- Round 19: 3 SC, DEC around. (24 SC)
- Round 20: Make 6 DEC. (6 SC)
- Finish off and close the opening with a tapestry needle by weaving through the front loops of the remaining stitches. Stuff firmly before closing.
For users: The head is the base for the bear's expression. Use small amounts of stuffing at a time to ensure a smooth, rounded shape.
2. Snout
- Round 1: Make a MR and work 6 SC into the ring. (6 SC)
- Round 2: INC in every stitch. (12 SC)
- Cut a long tail for sewing, and attach below the eyes, between Rounds 12-15 of the head.
- Use brown thread to embroider a small triangle-shaped nose on the snout, adding a vertical line downward.

For users: The fun details like the nose and stitching give the bear its character. Use pins to secure placement before attaching.
3. Ears (Make 2)
- Round 1: Make a MR, and work 6 SC into the ring. (6 SC)
- Round 2: INC in every stitch. (12 SC)
- Round 3: 1 SC, INC around. (18 SC)
- Round 4: 1 SC, DEC around. (12 SC)
- Leave a long tail for sewing. Sew the ears to the head between Rounds 3-7.
For users: Position the ears evenly on the head using pins to avoid crooked placement.
4. Body
- Round 1: Make a MR, and work 5 SC into the ring. (5 SC)
- Round 2: INC in every stitch. (10 SC)
- Round 3: 1 SC in each stitch. (10 SC)
- Repeat the instructions above to make two legs, but do not cut the yarn after the second leg.
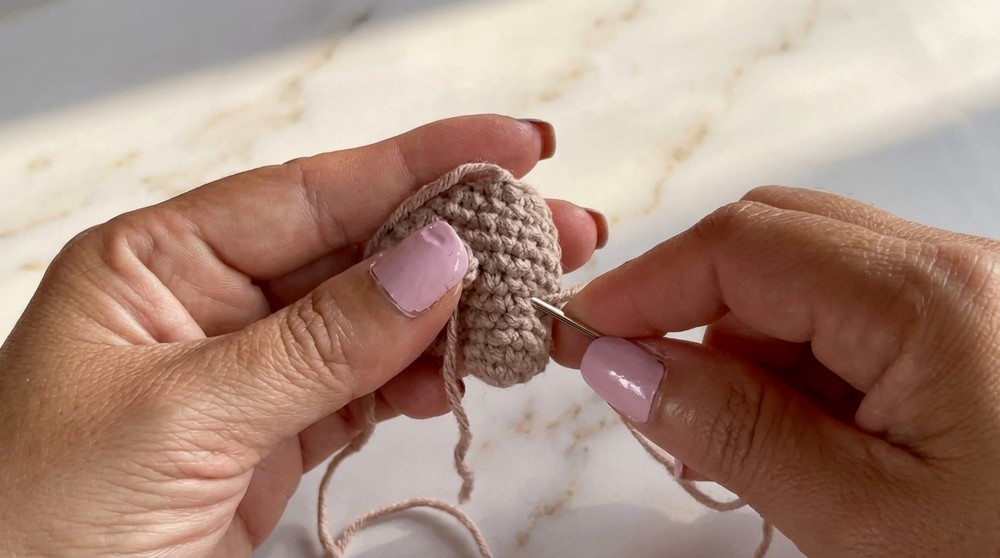
- Round 4: Ch 2. Attach to the first leg by working into the next available SC. Continue crocheting around both legs, including the 2 chains. (24 SC)
- Rounds 5-8: 1 SC in each stitch. (24 SC per round)
- Round 9: 2 SC, DEC around. (18 SC)
- Round 10: 1 SC in each stitch. (18 SC)
- Round 11: 1 SC, DEC around. (12 SC)
- Stuff firmly and leave a long tail for sewing. Attach the body to the head's bottom.
For users: The carefully created legs and body create the base for your bear's structure. Be sure to stuff evenly without overpacking.
5. Arms (Make 2)
- Round 1: Make a MR, and work 4 SC into the ring. (4 SC)
- Round 2: INC in every stitch. (8 SC)
- Rounds 3-4: 1 SC in each stitch. (8 SC per round)
- Round 5: 2 SC, DEC around. (6 SC)
- Leave a long tail for sewing. Attach arms to the body between Rounds 7-9.
For users: As the arms are not stuffed, their soft structure allows them to drape naturally, giving the bear its huggable charm.
6. Flowers (Make 3)
- Petals:
- Start with a slipknot and Ch 10.
- In the 3rd Ch from the hook, 2 HDC, Sl St.
- Repeat 3 HDC in the next Ch, Sl St in the next Ch across the chain.
- Roll up the petal strip to form a rose, securing it with glue.
- Stems:
- Work a MR with green yarn. Inside the ring, alternate Ch 3, Sl St into the next Ch space.
- Wrap the green yarn around wire and secure the stem to the flower.
For users: Assemble your bouquet by arranging flowers and wrapping them with yarn to secure.
7. Finishing Touches
- Sew or glue the bouquet to one of the bear's arms. Wrap a ribbon securely around the flower stems for a polished look.

- Apply blush lightly to the bear's cheeks for added cuteness.
Assembly & Final Thoughts
Once all parts are attached, admire your finished bear! This pattern uses simple repetitive rounds and basic stitches to create lovely details. With patience and care, this bear and its flowers will make an excellent addition to your handmade collection.