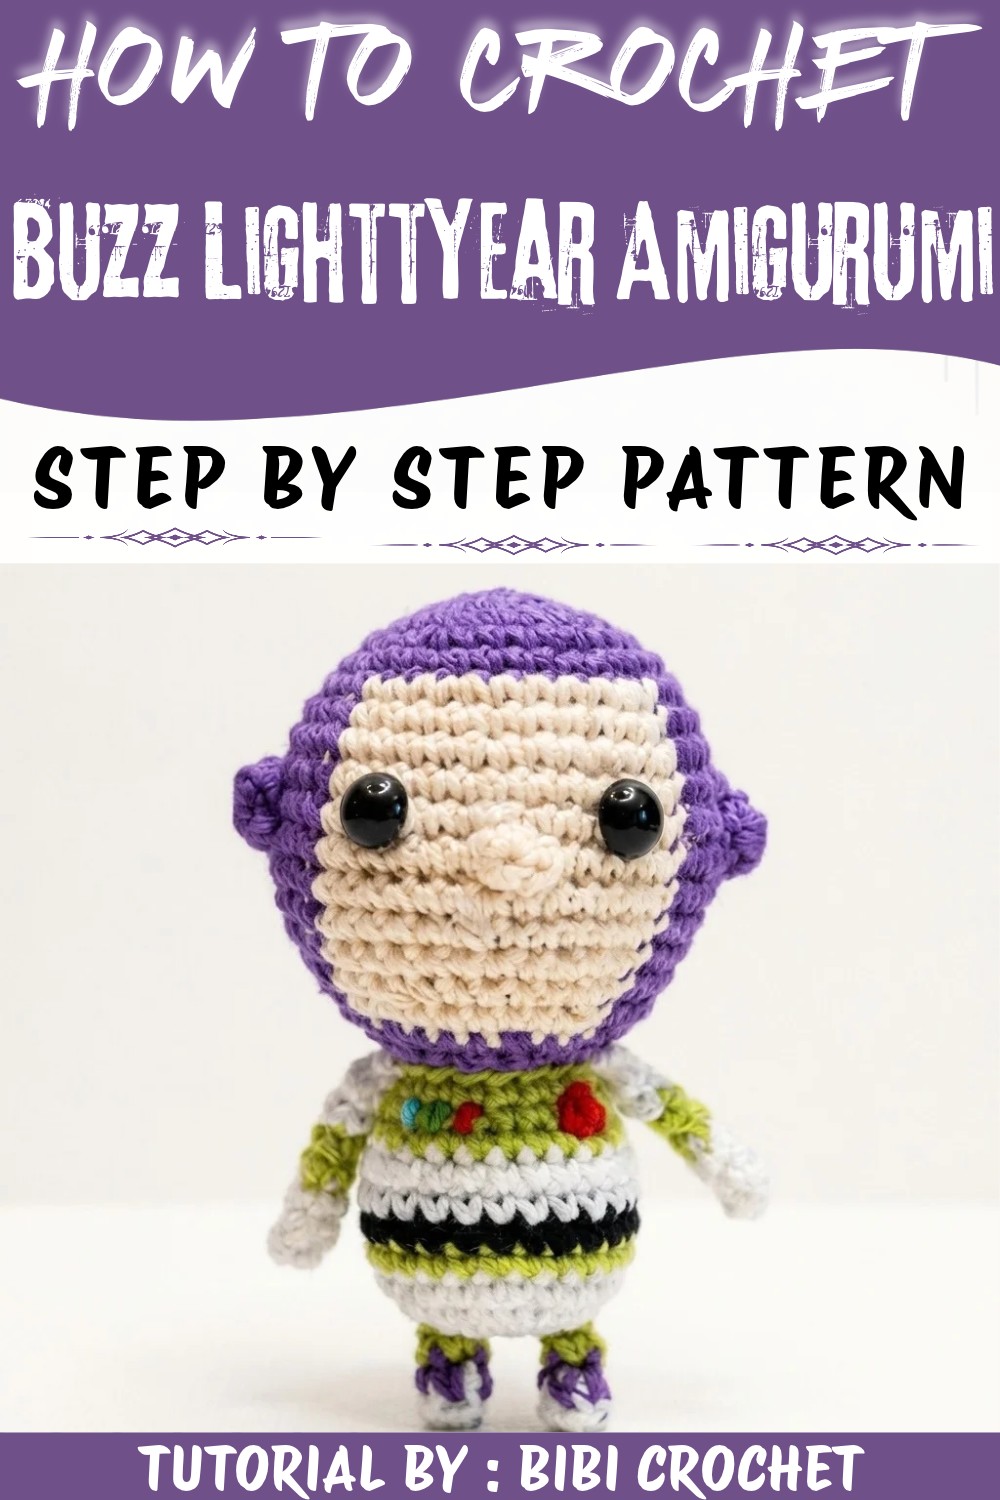
Capture space adventure with this Crochet Buzz Lightyear Amigurumi Free Pattern featuring colorful details and a space hero look.
Sometimes, a simple idea sparks a wonderful creative journey. Bringing to life one of the most beloved space rangers from childhood, not through action figures or digital screens, but with yarn and a bit of patience, creates a truly special keepsake. This delightful project, shared by the talented creator at Bibi Crochet, brings reality with a charming handmade doll that captures Buzz Lightyear's adventurous spirit. For those who love unique and personal handmade items, the Crochet Buzz Lightyear Amigurumi Pattern offers a fantastic way to engage in a rewarding and fun process.
Colorful Crochet Buzz Lightyear Amigurumi Free Pattern with Hero Style
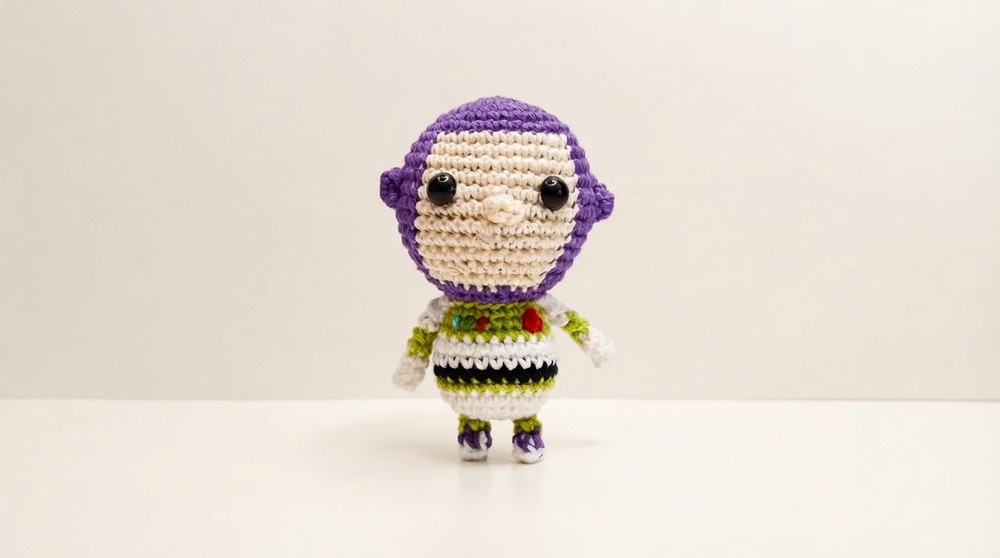
This pattern results in a cozy, cuddly Buzz Lightyear doll that is both a delightful toy and a captivating decorative piece. Perfect as a thoughtful gift, this amigurumi appeals to fans of all ages-from kids who dream of space adventures to adults who cherish nostalgic memorabilia. The doll's soft texture invites hugs, while its sturdy shape allows it to stand proudly on a shelf, brightening any room. The standout design features include Buzz's iconic space suit details, precise color work in green, white, and purple, and his unmistakable helmet, all recreated with love and attention to detail.
The beauty of this project lies in its charming display of personality through yarn. Whether displayed in a child's playroom, on a collector's shelf, or used as a heartfelt gift, this crochet Buzz Lightyear brings warmth and a touch of magic to everyday life. Its compact size and soft feel make it especially suitable for young fans, while its meticulous style and shape ensure it will also charm older admirers. This delightful doll is more than just an item-it's a celebration of creativity and a tribute to a timeless hero.
Mini Buzz Lightyear Amigurumi Crochet Pattern
Buzz Lightyear stands out as one of the most recognizable heroes in animation, known for his vibrant suit and confident personality. This step-by-step guide provides clear and systematic instructions to replicate his miniature likeness in the form of amigurumi. Through detailed rounds, strategic color changes, and precise shaping, each aspect of this character-from his helmet and facial features to his distinct suit stripes-is translated into crochet form. Special attention has been given to maintaining proportion and structural integrity, resulting in a figure that remains both expressive and sturdy. This project seamlessly combines various techniques, ensuring a result that appeals to both those who appreciate iconic characters and those who value thorough construction. Whether intended as a collector's item, a heartfelt gift, or a playful addition to any space, this Buzz Lightyear amigurumi stands as a testament to thoughtful workmanship.
Quick Overview of Pattern
- Start by crocheting the head from the top down, working color changes for the helmet and face.
- The body is constructed separately with sectioned colorwork at the waist and chest.
- Simple cylindrical arms and stubby legs anchor the figure, worked in changing shades.
- Miniature ears and a nose are crocheted separately and seamed onto the head.
- Carefully embroider or glue on eyes and chest details for character accuracy.
- Assemble parts in the recommended order for the best result and finish.
Notes
- Always use a stitch marker to mark the first stitch of each round to avoid losing your place.
- Change yarn colors as instructed, always finishing the last yarn-over of the previous stitch in the new color.
- Tension should remain tight so stuffing does not show through the stitches.
- All stitch counts at the end of each round should be checked to match instructions.
- Use either safety eyes, sewn eyes, or glue-on googly eyes as discussed in the assembly; insert before closing the head if needed.
- Consider leaving long yarn tails for sewing at the end of each component.
Skill Level
- Confident Beginner to Intermediate - Knowledge of basic stitches (sc, inc, dec), working in the round, color changes, invisible decreases, and basic hand sewing required.
Materials
- Yarn (DK/Light Worsted size 3): Purple, beige (skin tone), white, green, accent green, black, red, blue
- 2.0 mm crochet hook
- Fiberfill stuffing
- Yarn needle (for sewing parts)
- Stitch marker
- Safety eyes or small flat googly eyes & hot glue (optional)
- Keychain ring or strap (optional)
Measurements / Sizing
- Approximate Height: 7-9 cm (fits comfortably as a keychain/accessory)
- Width: Proportional to head/body, generally 3-4 cm across
Gauge
- Not critical for amigurumi; fabric should be firm so stuffing does not show
- For reference: 7 sc x 7 rows ≈ 2.5 cm square
Stitch Abbreviations
| Abbreviation | Meaning |
|---|---|
| sc | single crochet |
| inc | increase (2 sc in same stitch) |
| dec | decrease (sc 2 together) |
| BLO | back loop only |
| FLO | front loop only |
| st(s) | stitch(es) |
| MR | magic ring |
Special Stitches
- Magic Ring (MR): Form an adjustable ring, crochet stitches into ring, pull tail to close.
- Invisible Decrease (dec): Insert hook into front loop of next 2 stitches, yarn over, pull through both, yarn over, pull through remaining loops.
- Color Change: On last yarn over of the previous stitch, switch to next color and complete the stitch.
The Crochet Pattern
Head
Work from the top down.
Top of the Head
- Round 1: With purple, make a magic ring, 6 sc. (6 sts)
- Round 2: Inc in each st around (12 sc). (12 sts)
- Round 3: [1 sc, 1 inc] x 6. (18 sts)
- Round 4: [1 inc, 2 sc] x 6. (24 sts)
- Round 5: 2 sc, 1 inc, [3 sc, 1 inc] x 5, 1 sc. (30 sts)
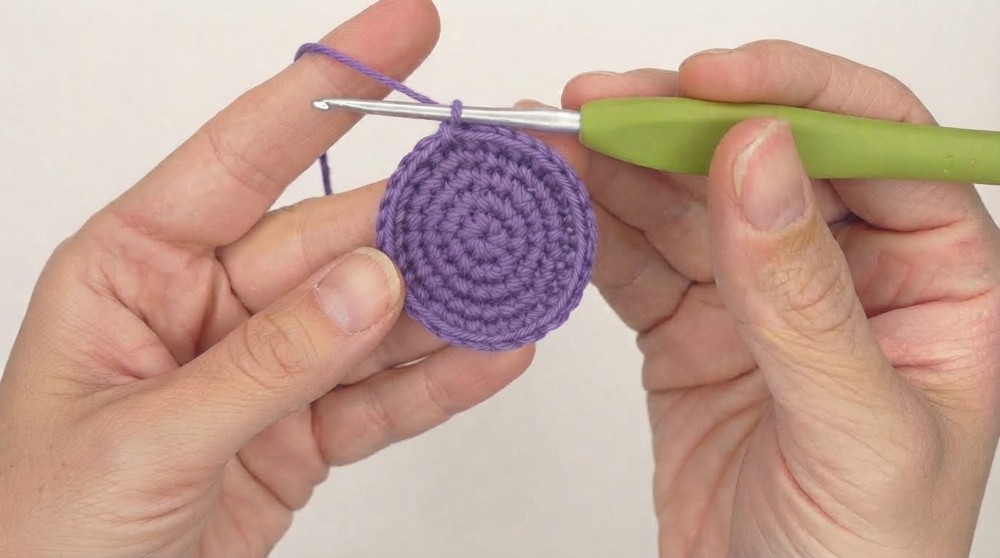
- Round 6: 1 sc in each st around. (30 sts)
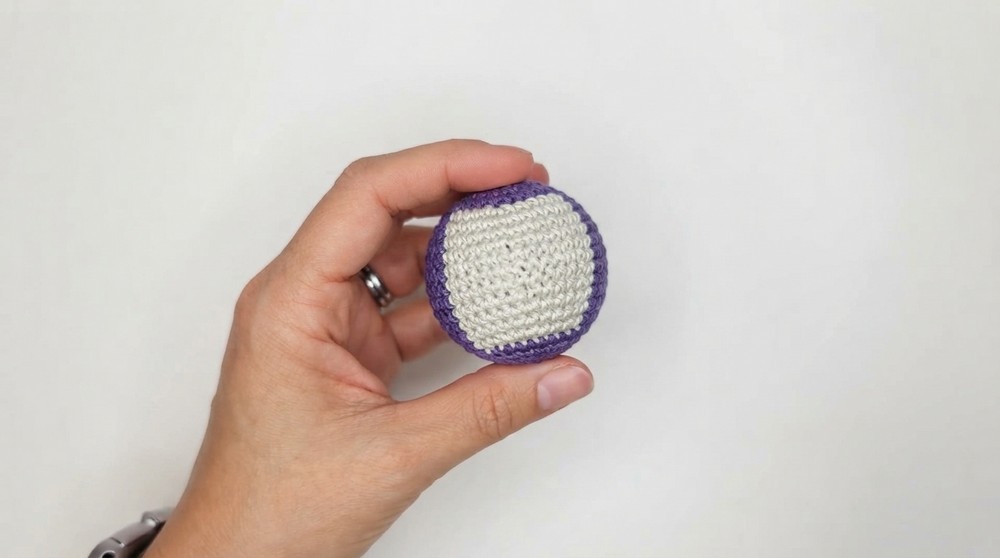
Face Colorwork Section
- Round 7:
- Purple: 4 sc, 1 inc, 4 sc, 1 inc, 1 sc (13 sts)
- Switch to beige: 4 sc, 1 inc, 4 sc, 1 inc, 1 sc (12 sts)
- Switch to purple: 3 sc, 1 inc, 4 sc, 1 inc (11 sts, 36 total)
- Round 8:
- Purple: 13 sc
- Beige: 12 sc
- Purple: 11 sc (36 sts)
- Round 9:
- Purple: 1 inc, 5 sc, 1 inc, 5 sc, 1 inc, 3 sc (16 sts)
- Beige: 2 sc, 1 inc, 5 sc, 1 inc, 5 sc (14 sts)
- Purple: 1 inc, 5 sc, 1 inc, 4 sc (12 sts, 42 total)
- Rounds 10-13:
- Purple: 16 sc
- Beige: 14 sc
- Purple: 12 sc (42 sts each round)
Lower Face & Decrease Rounds
- Round 14:
- Purple: 1 dec, 5 sc, 1 dec, 4 sc (13 sts)
- Beige: 1 sc, 1 dec, 5 sc, 1 dec, 2 sc (12 sts)
- Purple: 3 sc, 1 dec, 5 sc, 1 dec (11 sts, 36 total)
- Round 15:
- Purple: 13 sc
- Beige: 12 sc
- Purple: 11 sc (36 sts)
- Round 16:
- Purple: 4 sc, 1 dec, 4 sc, 1 dec, 1 sc (11 sts)
- Beige: 3 sc, 1 dec, 4 sc, 1 dec (10 sts)
- Purple: 4 sc, 1 dec, 3 sc (9 sts, 30 total)
- Round 17: Fasten off beige.
- Purple: 11 sc
- Beige: 10 sc
- Purple: 9 sc (30 sts)
- Round 18: Switch to all purple: 2 sc, 1 dec, [3 sc, 1 dec] x 4, 1 sc. (24 sts)
- Round 19: [1 dec, 2 sc] x 6. (18 sts)
- Round 20: [1 sc, 1 dec] x 6. (12 sts)
Assembly Note: If using safety eyes, insert them between Rounds 10 and 11 now.
- Stuffing: Stuff head firmly with fiberfill.
- Round 21: 6 dec. (6 sts)
- Fasten off, leaving a tail. Thread into a needle, pick up FLO of last 6 sts, pull tight to close, knot, and hide yarn end.
Body
Base & Waist
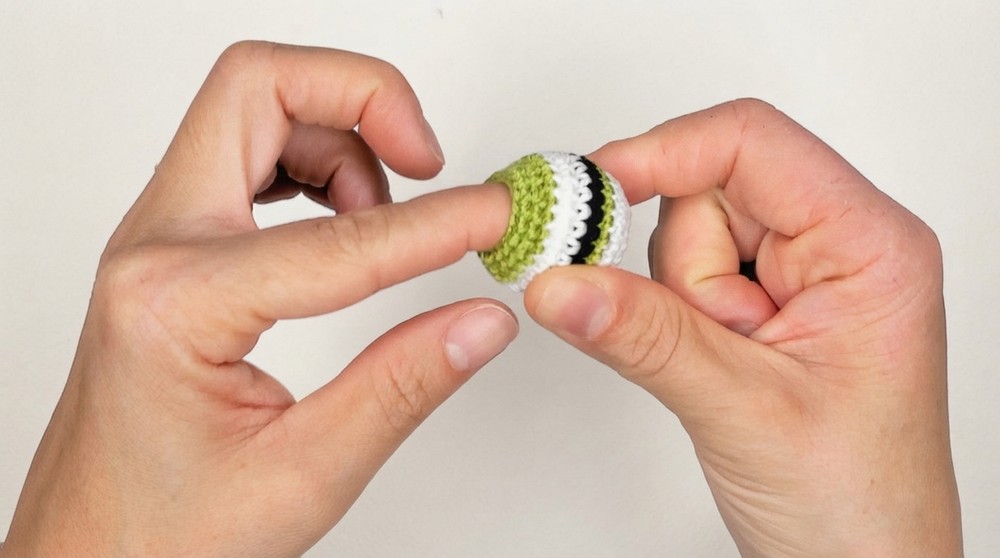
- Round 1: With white, MR, 8 sc. (8 sts)
- Round 2: 8 inc. (16 sts)
- Round 3: [1 sc, 1 inc] x 8. (24 sts)
- Round 4: 1 sc in each st around with white, change to green on final st. (24 sts)
- Round 5: With green, 1 sc in each st around, changing to black on last st. (24 sts)
- Round 6: With black, 1 sc in each st around, changing to white. (24 sts)
Torso & Chest
- Rounds 7-8: With white, 1 sc in each st around, changing to green at end of Round 8. (24 sts each)
- Round 9: With green, 1 sc in each st around. (24 sts)
- Round 10: With green, [1 sc, 1 dec, 2 sc, 1 dec] x 3, 1 sc. (18 sts)
- Round 11: With green, 1 sc in each st around. (18 sts)
- Fasten off, leaving a long tail for sewing.
- Stuff the body firmly.
Arms (Make 2)
- Round 1: With white, MR, 4 sc. (4 sts)
- Rounds 2-3: With white, 1 sc in each st around; change to green at end of 3rd round. (4 sts each)
- Rounds 4-5: With green, 1 sc in each st around; change to white at end of 5th round. (4 sts each)
- Rounds 6-7: With white, 1 sc in each st around. (4 sts each)
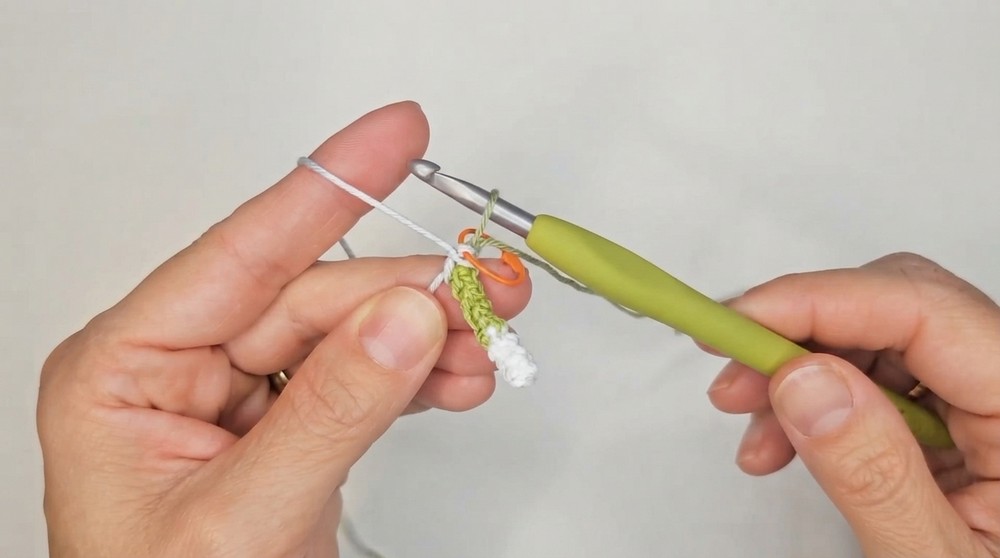
- Fasten off, leaving a sewing tail.
Legs (Make 2)
- Round 1: With white, MR, 4 sc; change to purple on last loop. (4 sts)
- Round 2: With purple, BLO, 1 sc in each st around; change to green on last loop. (4 sts)
- Round 3: With green, 1 sc in each st around (both loops). Fasten off, leaving a tail for sewing. (4 sts)
Ears (Make 2)
- Round 1: With purple, MR, 5 sc. (5 sts)
- Fasten off, leaving a tail for sewing.
Nose
- Round 1: With beige, MR, 5 sc. (5 sts)
- Fasten off, leaving a tail for sewing.
Assembly & Finished Size
- Attach Body to Head: Center and sew the opening at the top of the body neatly to Round 3 at the base of the head. Align the color stripes front to back.
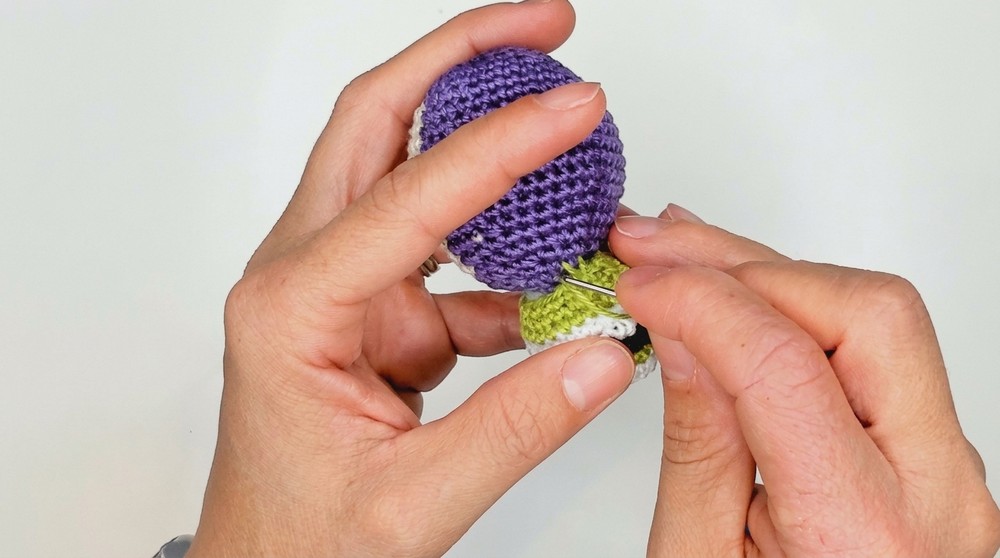
- Attach Arms: Sew arms onto either side of the upper body, just under the green collar.
- Attach Legs: Evenly space and sew legs to the underside of the body, beginning along Round 2.
- Attach Ears: Place ears symmetrically below Round 4, keeping 3 stitches from the edge of the face, and secure.
- Attach Nose: Center the beige nose between Rounds 5 and 6.
- Attach Eyes: Position safety eyes (if not already inserted), or glue flat eyes on both sides of the nose.
- Embroider Chest Buttons: Using blue, green, and red, embroider vertical lines for the chest panel buttons. For the red button (left of chest), make a small red circle using stitches or knots.
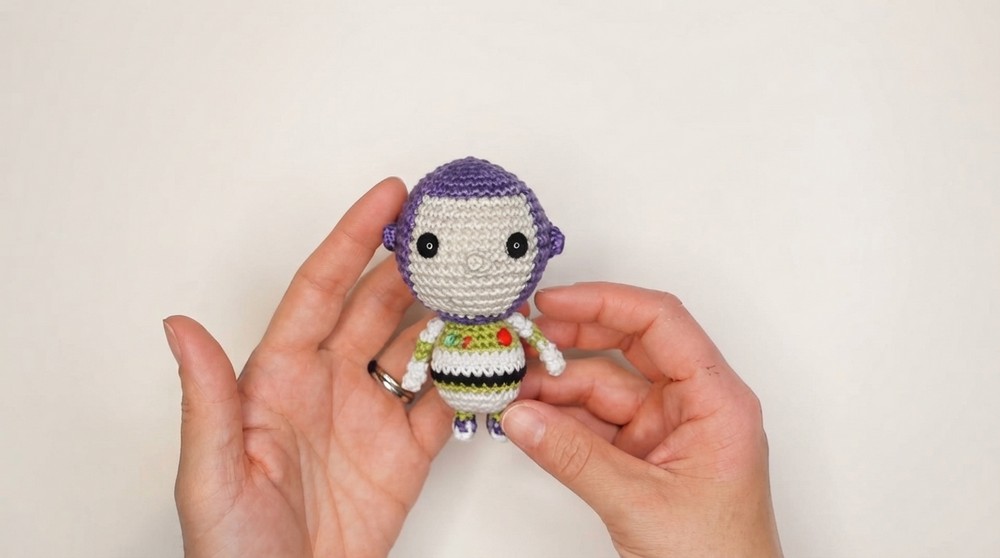
- Optional: Attach keychain ring or phone strap if desired.
Finished size: Approximately 7-9 cm tall, 3-4 cm wide.
Conclusion and Ending Words
Each round and assembly step outlined above supports the completion of a compact and expressive amigurumi figure. The focus on accurate color transitions, secure construction, and precise placement of distinctive suit details ensures a consistent and visually appealing result. This project emphasizes accessibility for a range of skill levels while challenging the maker with structured colorwork and shaping. As the finishing touches are applied-from the embroidered buttons to the attachment of arms and legs-the recognizable silhouette of Buzz Lightyear emerges. The completed character brings both personality and durability, making it a charming handheld piece suitable for display, gifting, or everyday use. The clarity of these instructions allows for modifications and personalization, reflecting both the maker's intention and the heroic legacy of the character.