
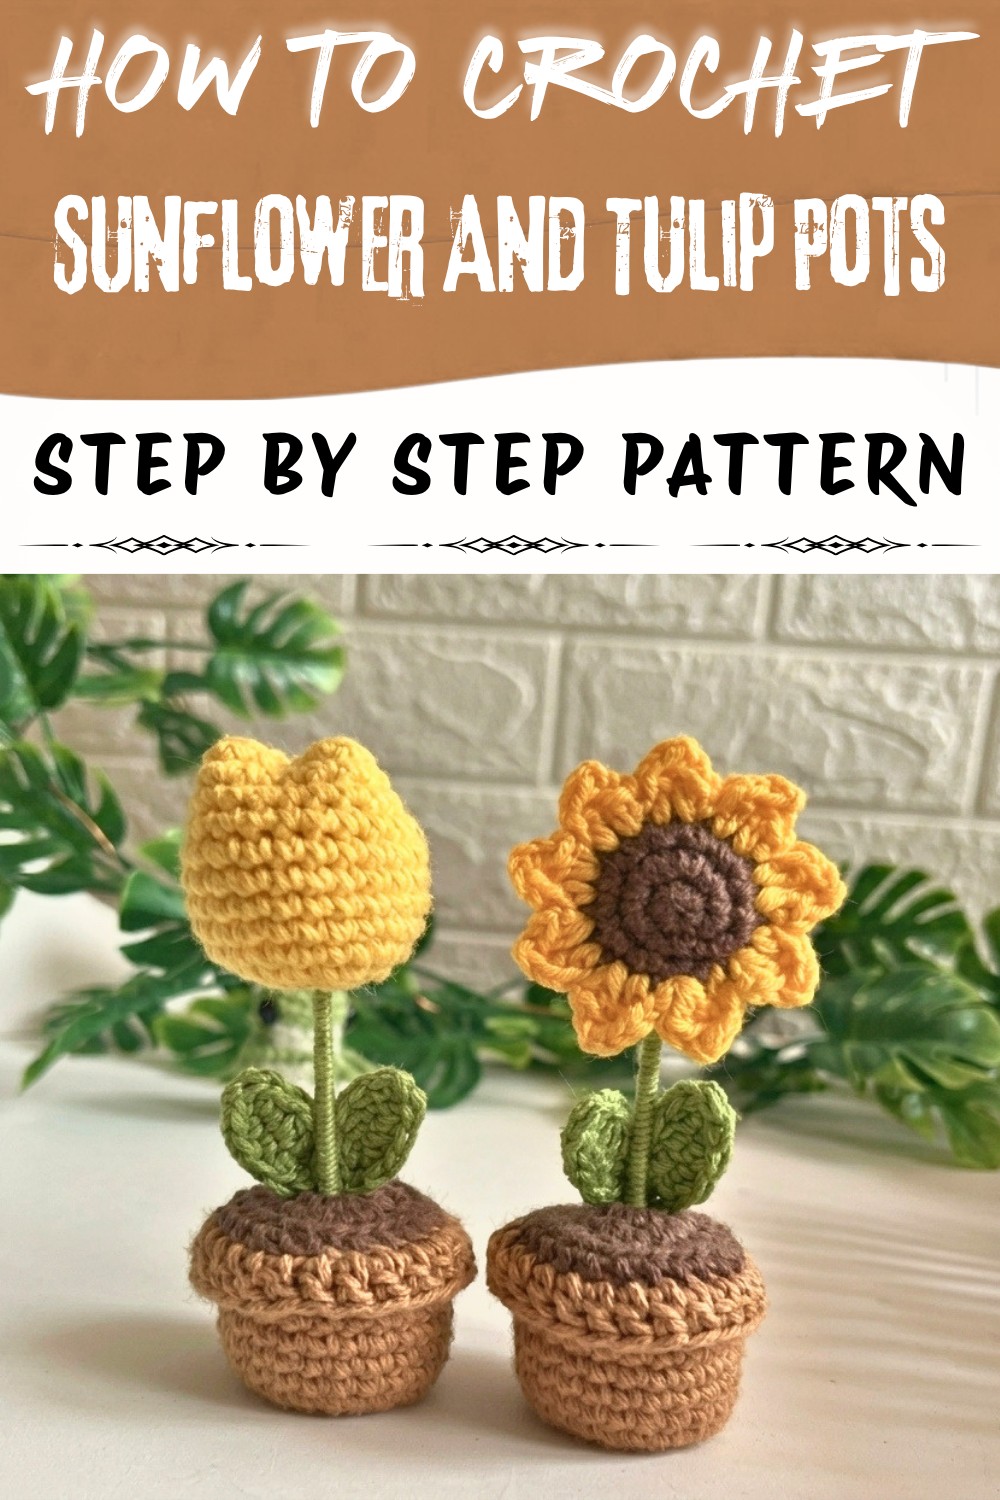
Brighten your space with this Free Crochet Sunflower & Tulip Pots Pattern, a charming and beginner-friendly project perfect for adding floral vibes to any corner.
Bring a little bit of sunshine and joy right into your room with the Free Crochet Sunflower & Tulip Pots Pattern! Anyone can enjoy making these bright flowers, even if you're just starting out. Each flower stands tall in its own pot, just like real ones but made from squishy, colorful yarn.
Crochet Sunflower & Tulip Pots Pattern for Plant Lovers
These sunflower and tulip pots are so pretty! The sunflower's yellow petals look like rays of sunshine, while the pink and red tulips remind you of spring and happiness. When you look at them, you will smile, you don't even need to water these flowers, they stay beautiful forever.

You can use them in so many ways. From this pattern, you can make things like cheerful desk decorations, sweet gifts for friends or teachers, or even cute toys for pretend play. They are great for brightening up small spaces, and help make your home or classroom feel warm and happy. Add a ribbon or a tag to turn them into special presents.
You can choose your favorite colors, try classic yellow for sunflowers and bright pink, red, orange, or even purple for tulips. Make a big pot with chunky yarn for a larger flower, or use thin yarn for a tiny pot. Using a 3.0 mm crochet hook and soft cotton yarn makes the flowers strong and neat. The first round of your pots and petals often starts with a magic ring, which helps everything stay round. When finished, each flower and pot is about as big as a real crochet flower you can hold in your hand.
Mini Flowerpots Amigurumi Pattern
Welcome to your step-by-step guide for crocheting adorable mini flowerpots, inspired by the Crochet Soul Vibes channel. These charming table-top plants stand about 10.5 cm tall and add a touch of handcrafted beauty to any space. Designed for intermediate stitchers, this pattern breaks every section down into rounds, with clear explanations beneath each part to ensure a smooth experience even if you're new to reading crochet patterns. Enjoy making your sunflower and tulip pots!
Skill Level
Intermediate
Requires experience with working in the round, increases/decreases, back loops only, simple sewing, and amigurumi assembly.
Materials & Tools
- Yarn:
- Medium (worsted) weight yarn in:
- Brown (flowerpot)
- Dark brown (soil and sunflower center)
- Yellow (sunflower petals)
- Green (leaf and stem)
- Pink or other color for tulip
- Medium (worsted) weight yarn in:
- Hook: 2.5 mm (or size for tight fabric with your yarn)
- Stuffing: Polyester fiberfill
- Wire stem: 16-gauge wire, approx. 7.5 cm for each flower
- Silicone glue (for assembling stems/leaves)
- Scissors
- Tapestry/yarn needle
- Pins (optional)
- Tweezers/stick (for enlarging magic rings)
Key Abbreviations
| Abbreviation | Meaning |
|---|---|
| MR | Magic ring |
| ch | Chain |
| sc | Single crochet |
| hdc | Half double crochet |
| dc | Double crochet |
| inc | Increase (2 sc in same stitch) |
| sl st | Slip stitch |
| BLO | Back loop only |
| rep | Repeat |
| st(s) | Stitch(es) |
Pattern uses US crochet terms
Special Notes
- All pieces are worked in continuous rounds unless otherwise stated.
- Use a stitch marker for tracking round beginnings.
- Adjust the stem length/wire to match your preferred flower size.
- Silicone glue can be replaced with hot glue or fabric glue.
Finished Size
Each flowerpot stands approx. 10.5 cm (4") tall.
Step-by-Step Pattern
Flowerpot
Rounds
- R1: MR, 8 sc into ring (8 sts)
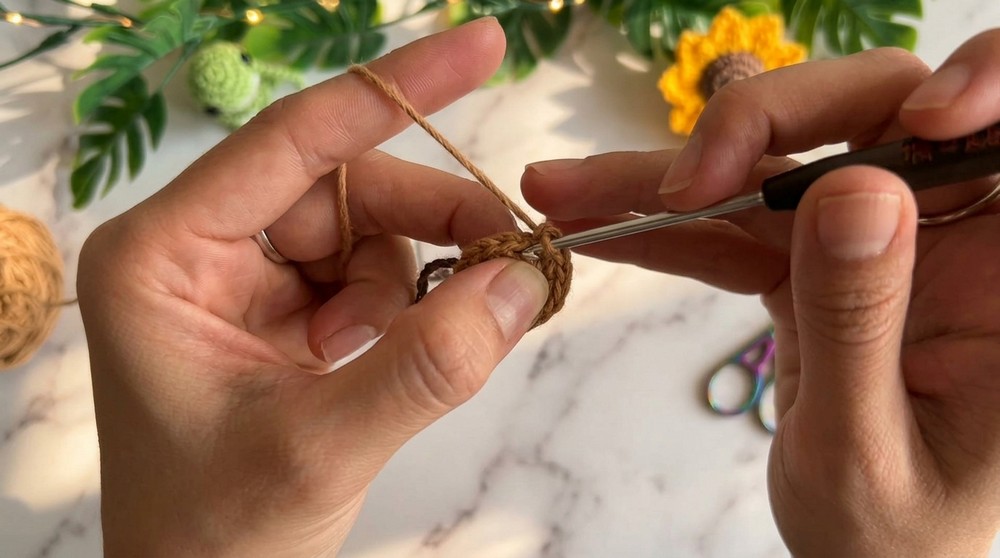
- R2: inc in each st (16 sts)
- R3: (sc, inc) x8 (24 sts)
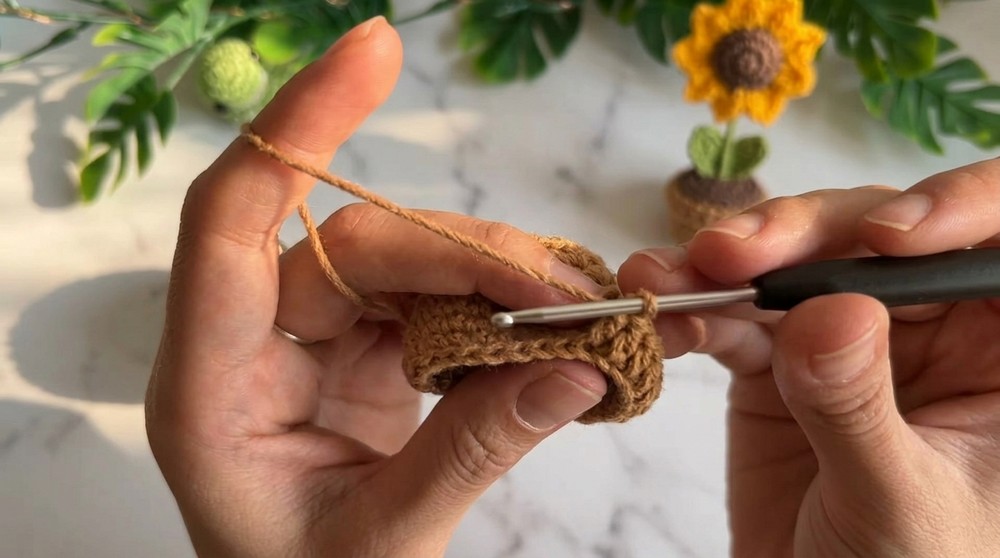
Your base is now a tight flat circle. This forms the bottom of the pot.
- R4: BLO, sc in each st (24 sts)
- R5-R10: sc in each st (24 sts each round)
This creates the walls of your pot. Working in the back loop only for Round 4 gives a crisp edge for the base. Repeat Round 5 to 10 to build height. After Round 10, you'll have a neat, cylindrical flowerpot.
- At the end of Round 10, ch 2 and turn your work.
- Now, working in BLO, dc in each st around (24 sts, plus 1 extra dc for overlap).
- Join with a sl st to the first dc, ch 1, cut yarn, and weave in ends.
You just made the top rim of your flowerpot, which uses double crochet worked side-to-side for a flared edge. Finish by hiding the yarn tails for a clean pot.
Soil
Rounds
- R1: MR, 8 sc (8 sts)
- R2: inc in each st (16 sts)
- R3: (sc, inc) x8 (24 sts)
- Sl st to join, leave a long tail for sewing.
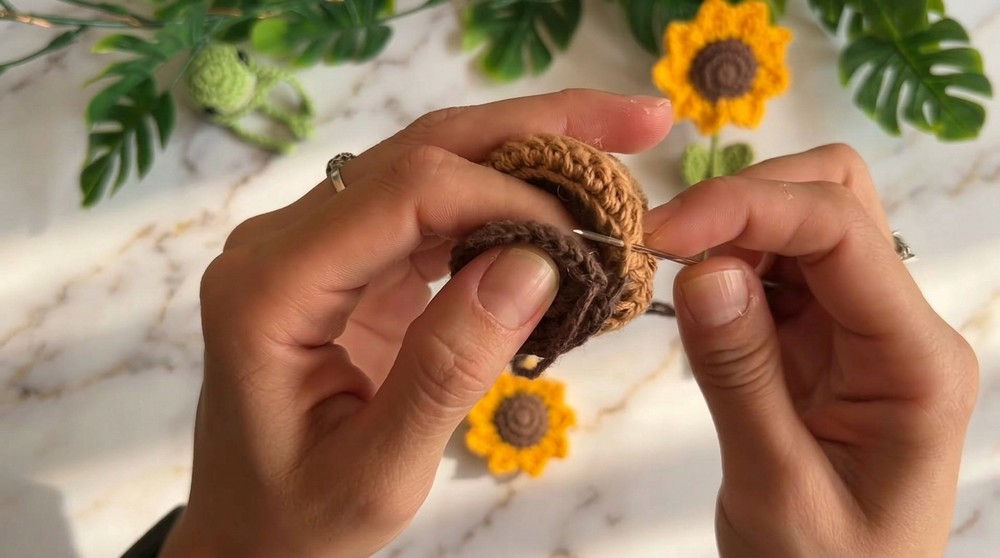
The soil piece is a flat circle that fits snugly inside your flowerpot. Don't close the magic ring too tightly-you'll insert the flower stem through it later. Keep the long tail for sewing the soil to the pot.
Leaf (Make 2)
- Ch 6.
- Working in back loops:
- Skip 1 ch, sc in next ch,
- hdc in next 3 ch,
- 3 sc in last ch (round the tip),
- Now working on other side of chain, hdc in next 3 ch, sc in next ch.
- Sl st in last st, ch 1, fasten off, and weave in excess ends.
Each leaf is a curved oval made by working around both sides of the chain. You'll have two leaves for each flower, adding realistic detail.
Stem
- Cut 7.5 cm of 16-gauge wire (or use green pipe cleaner).
- Coat wire with silicone glue, then tightly wrap with green elastic thread or yarn.
- Allow to dry; trim excess.
The stem is simple wire wrapped with yarn for color and durability. The glue secures the wrapping. If using a pipe cleaner, just bend to shape.
Assembly: Pot & Soil
- Place a small amount of stuffing inside the flowerpot.
- Mold to ensure the base stays flat.
- Using yarn tail, sew soil to the inside rim of the pot, grabbing only the BLO of soil piece and the inside loops of the pot.
- Add stuffing between soil and pot before closing.
- Hide all yarn tails.
Attaching the soil gives the flowerpot a realistic look. Make sure it's firm but not over-stuffed to retain shape.
Build Stem & Leaves
- Open the center of the soil's magic ring with tweezers or your hook.
- Apply silicone glue to one end of stem; insert into pot through soil.
- Press firmly so stem sits upright.
- At the soil's edge, apply silicone glue at stem base and attach leaves.
Gluing leaves at the base makes them appear to sprout naturally. Hold in place until glue sets.
Sunflower
Back (Yellow) and Center (Brown)
- R1: MR, 6 sc (6 sts)
- R2: inc in each st (12 sts)
- R3: (sc, inc) x6 (18 sts)
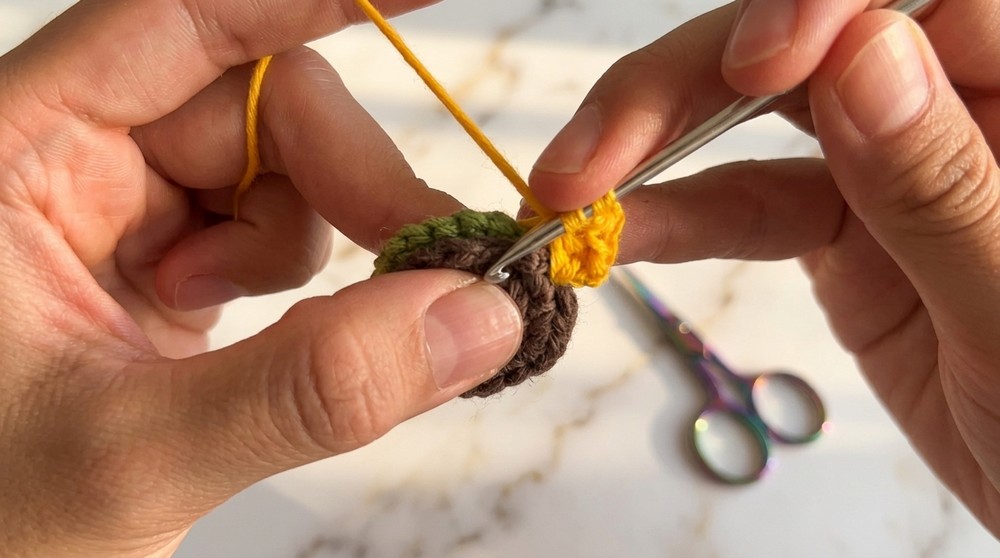
- Sl st, ch 1, fasten off.
- Repeat pattern for center with brown yarn.
Sunflower is made from two equal pieces: yellow for petals backing, brown for center. They are joined together for a double-sided look.
Petals
- Place yellow and brown circles together, join with yellow yarn.
- In same st: ch 1, hdc, dc, ch 1, sl st (this forms one petal).
- Next st: dc, hdc, ch 1, sl st (another petal).
- Repeat this petal formation around flower, making approx. 9 petals.
- Stuff gently before final petal closure.
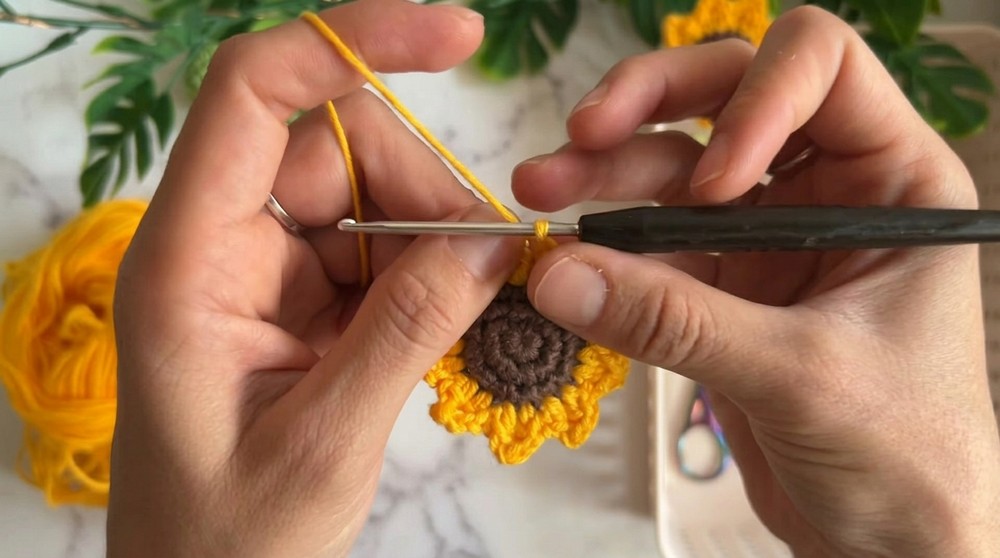
Petals alternate between hdc and dc, separated by ch 1 and anchored with sl st, making them stand out. Add stuffing before closing.
- Sl st to first petal, ch 1, cut, and weave in ends.
Sunflower should now have 9 prominent petals for a full 3D look. Make the center hole large enough for stem.
Tulip
(Pattern for tulip head-make as shown on screen or use this guide:)
- MR, 6 sc (6 sts)
- R2: inc in each st (12 sts)
- R3: (sc, inc) x6 (18 sts)
- R4-R6: sc in each st (18 sts)
- Stuff lightly, fold, and sew edges together to form tulip shape.
- Open up MR for stem insertion.
The tulip is formed as a rounded head, sewn and shaped before placing on the stem.
Final Assembly
- Use tweezers/hook to enlarge flower head's MR.
- Apply silicone glue to the top of stem, insert flower head, press firmly.
- Hold in place until secure.
- Repeat with tulip and sunflower.
- Optional: Adjust flower heads and leaves for a natural look.
You now have a blooming flowerpot! Position heads and leaves for lifelike appeal. Use glue to keep parts secure.
Conclusion
Congratulations-your mini flowerpots are complete! These adorable plants bring color and cheer to any setting. With rounds clearly separated and assembly explained, you've practiced several amigurumi basics: increases, working in back loops, basic sewing, and creative finishing. Enjoy customizing your pots or make a garden collection.
Pattern Corrections & Tips
Corrections:
- Confirm stitch counts at the end of every round for consistent shaping.
- Petals: Adjust number for fullness (more or fewer as desired).
Tips:
- Use a stitch marker to mark round starts.
- Make petal stitches loose for more volume.
- Wire stems can be slightly bent for dynamic positioning.
- For best results, let glue dry fully before handling.