
Keep cozy and on-trend with a Free Crochet V Stitch Hat Pattern that's perfect for beginners and seasoned crafters seeking chic simplicity.
Crocheting hats is such a fun and relaxing way to welcome the colder months, and this unique V Stitch Hat pattern adds a touch of elegance to your winter wardrobe. The hat combines texture and style with the use of simple yet striking stitches, like the V Stitch (made with DC2 together) and crisscross stitches, giving the pattern a refined yet modern feel. These stitches create beautiful dips and rises that look fantastic on the hat, ensuring that it pairs wonderfully with other accessories like scarves, blankets, or even bags. You'll love how adaptable the pattern is-it works well for different sizes and allows for personal touches such as adding a unique border or playing with colors.
Stylish Free Crochet V Stitch Hat Pattern You Will Love

The hat pattern is designed to provide both warmth and style, making it a perfect choice for everyday wear or thoughtful handmade gifts. The best part is that It can be tailored to fit snugly or with extra slouch, depending on your personal preference or the recipient's needs. Plus, it's beginner-friendly if you take the project step-by-step, making it a satisfying challenge for anyone looking to advance their crochet skills.
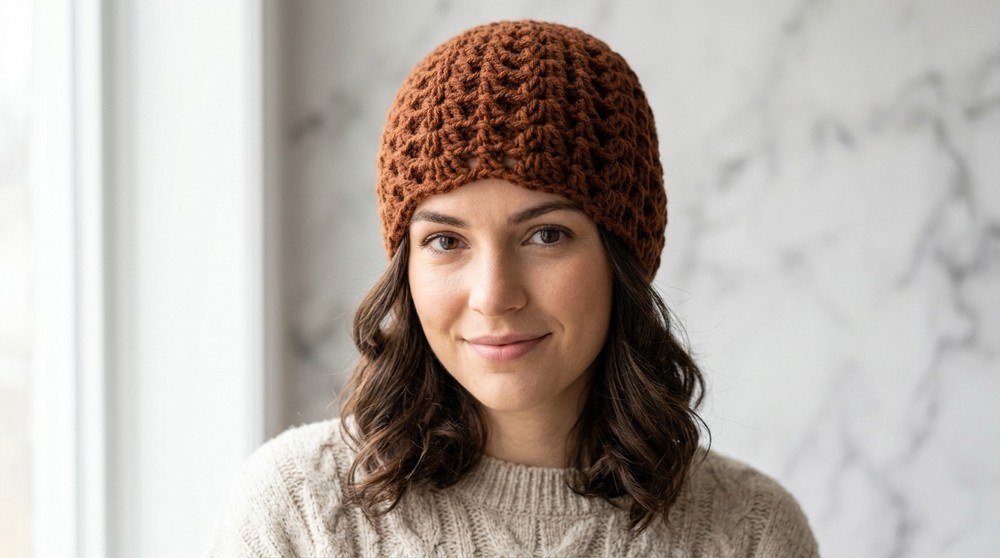
Here's what you'll learn and create from this pattern:
- How to crochet the V Stitch, DC2 together, and crisscross stitches for unique textures.
- Mastering hat shaping and maintaining even tension throughout the project.
- Versatility to use these stitches in other items like scarves, blankets, and decorative pillow covers.
- Adding borders, adjusting sizes, and experimenting with color combinations for a personal touch.
This pattern is not just about crocheting a hat but also about discovering creative possibilities with crochet while building your skills!
Materials Needed
- Yarn: A skein of medium weight (#4) yarn. The pattern uses brown color, but any medium weight yarn will work.
- Crochet Hook: 5.75 mm hook. Adjust if your tension differs slightly (choose between 5 mm or 6 mm depending on tension).
- Tapestry Needle: For weaving in ends.
- Scissors: For cutting yarn.
- Stitch Markers (Optional): Useful for marking the first stitch of each round to keep track of stitch placement.
Special Techniques Used
- V Stitch: Composed of a "Double Crochet 2 Together" (DC2Together), a chain, and another "DC2Together" in the same space. This resembles the shape of a "V."
- Crisscross Stitch: A double crochet worked in a crossed over sequence of skipped and previous stitches, creating a textured crisscross effect.
- Magic Ring (optional): If preferred over chaining 4 and slip stitching to form a circle.
Abbreviations
- CH: Chain
- SL ST: Slip Stitch
- DC: Double Crochet
- DC2Together: Double Crochet Two Together
- SK: Skip
- ST: Stitch
Pattern Instructions
Foundation Round:
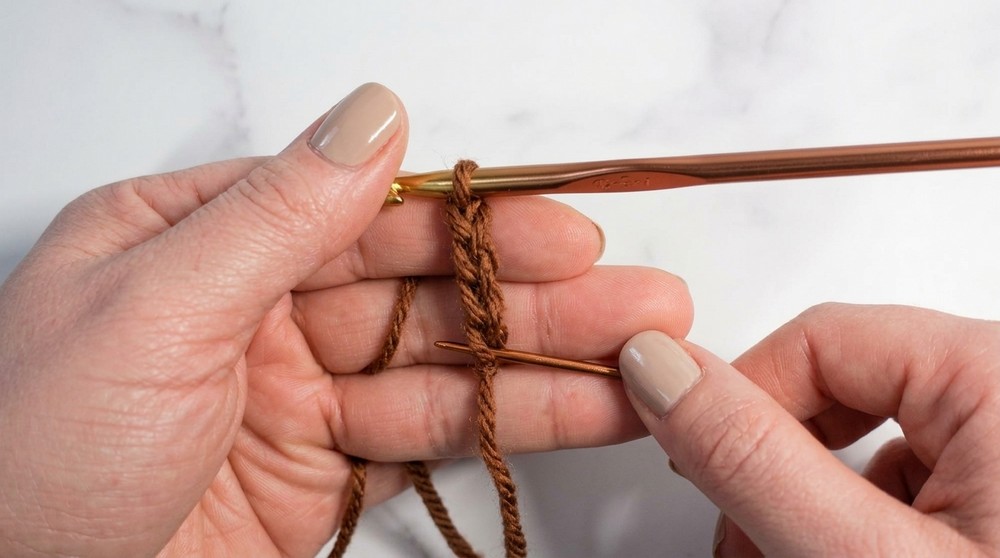
- Begin by creating a slip knot on your hook.
- Chain 4, then slip stitch into the first chain to form a ring. Alternatively, you can start with a magic ring.
Round 1:
- Chain 3 (this does not count as a stitch).
- Work 8 DC stitches into the center of the ring.
- Tip: To make a larger hat, work 10 DC into the ring.
- Slip stitch into the first DC to close the round.
Stitch Count: 8 stitches (or 10 for a larger size).
Round 2:
- Chain 3 (does not count as a stitch).
- Work a V Stitch into the first stitch (DC2Together, CH 1, DC2Together). Use a stitch marker to mark the top of the first DC2Together for easy reference.
- In the next stitch, work 1 DC.
- Alternate the following pattern all around:
- In the next stitch, work 1 V Stitch.
- In the next stitch, work 1 DC.
- SL ST into the top of the first DC2Together to close the round.
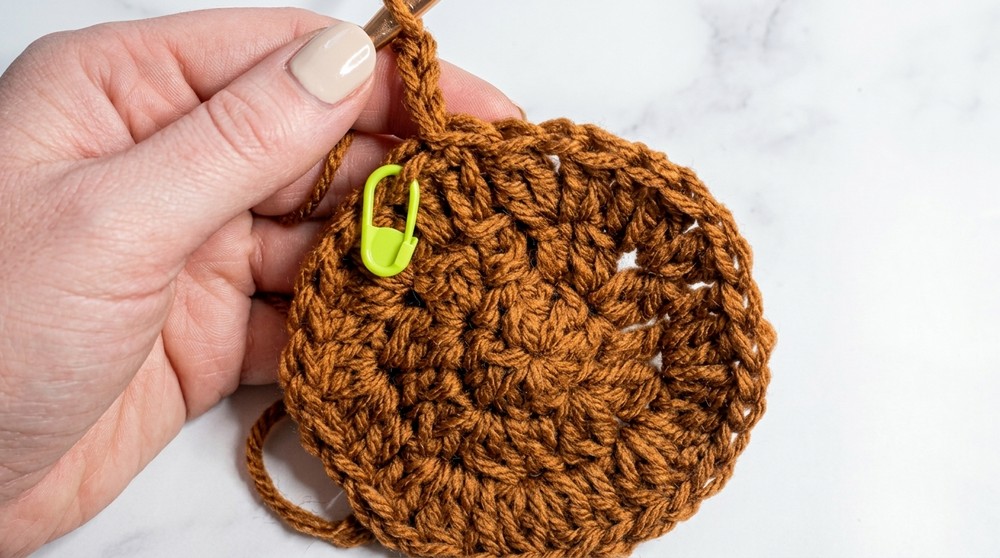
Stitch Sequence: V Stitch, DC, V Stitch, DC, repeated around.
Round 3 (Increase Round):
- Chain 3 (does not count as a stitch).
- Work 1 DC into the first stitch (top of the first DC2Together). Move your stitch marker to this DC to mark the new round start.
- In the CH 1 space of the V Stitch, work another V Stitch.
- In the top of the DC2Together, work 1 DC.
- Repeat this alternating pattern around the hat:
- Work 1 DC into the top of each DC2Together.
- Work 1 V Stitch into each CH 1 space of the V Stitches.
- SL ST into the top of the first DC to close the round.
Round 4 (Final Increase Round):
- Chain 3.
- Work 1 DC in the first stitch (top of the first DC2Together).
- In the CH 1 spaces of all V Stitches, work 1 V Stitch only.
- Work 1 DC into every other stitch around.
- Slip stitch into the top of the first DC to close the round.
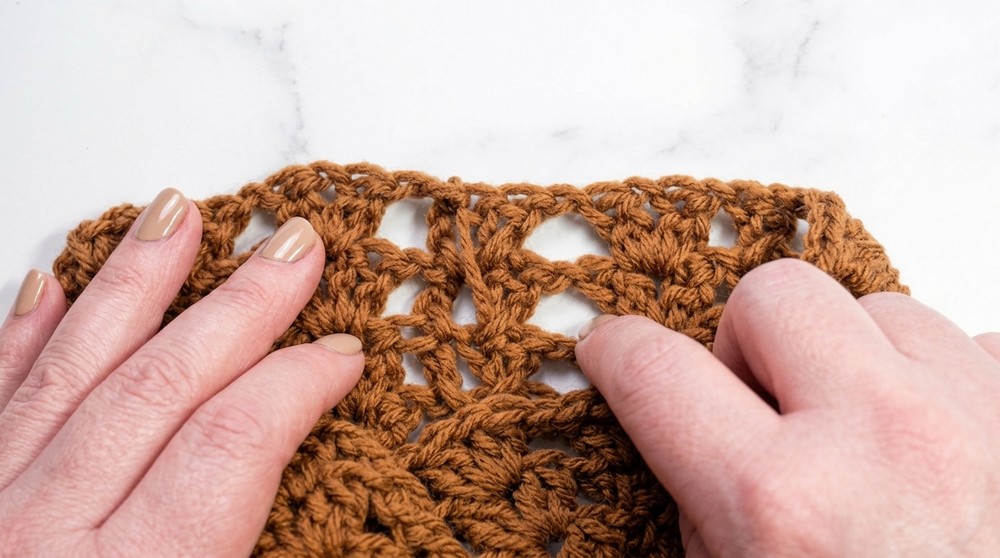
Crisscross & V Stitch Rounds:
- Chain 3.
- To create the crisscross stitch, do the following:
a. Yarn over and skip the first stitch.
b. Work 1 DC in the next stitch.
c. Yarn over, go back to the skipped stitch, and work 1 DC to form the crisscross. - Chain 1, then in the CH 1 space of the next V Stitch, make another V Stitch ([DC2Together, CH 1, DC2Together]).
- Repeat the pattern around as follows:
- Crisscross stitch
- Chain 1
- V Stitch in CH 1 space
- Chain 1
- Slip stitch into the first DC of the crisscross to close the round.
Repeat this round for the desired hat length, alternating crisscross stitches and V stitches with chain 1 spaces in between.
Final Round (Optional):
- Once the hat has reached your desired length, you can sc around the final round to finish, or keep the textured edge as is for a unique style.
- Chain 1, slip stitch into the first DC to join. Tie off your yarn, leaving a 6-8 inch tail for weaving in.
Finishing:
- Weave in any remaining tails using a tapestry needle. Secure the weave by fastening with a small knot on the hat's interior.
- For a polished finish, add a single crochet border if preferred, or leave the textured edges as-is for a stylish, natural look.
Final Notes and Tips:
- Customization: Add or reduce the number of increase rows to adjust the hat size. For a larger hat circumference, start with 10 DC in the foundation round.
- Tension: Adjust hook size if the hat feels too tight or too loose.
- Matching Set: The pattern is designed to complement a V stitch scarf, making it a perfect winter set. Use matching yarn colors to create a beautiful ensemble.
- Edging Options: If you want a cleaner brim, add a few rounds of single crochet or reverse SC at the end.
- Head Size Guide: As a suggestion:
- Small: Stop increases at Round 3, continue stitching until the desired length is reached.
- Medium: Follow the pattern as written.
- Large: Increase extra stitches in Round 1 and continue with the pattern for a more spacious fit.
Measurements:
- Height: ~9 inches (can be adjusted based on personal preference).
- Circumference: Based on preferred fit, ranging from ~20-22 inches.
Final Words:
Congratulations, You've created a stunning crisscross and V stitch hat, perfect for keeping warm and stylish. Whether you make this for yourself or gift it to someone special, this hat is sure to impress. The texture and design give it a modern and elegant feel, while still being fun to crochet.
If you enjoyed making this hat, consider experimenting with different yarn colors or adding embellishments like pom poms for extra flair.
Tackling Challenges and Finding Solutions
Crocheting the V Stitch Hat pattern can come with a few small challenges, especially if you're newer to some of the techniques. For instance, maintaining consistent tension can take some practice, particularly when working with the crisscross stitch or shaping the hat. Another difficulty might be aligning your stitches perfectly to create that neat, textured look. But don't worry-the key is to take your time and focus on getting the basics down first. A great tip is to use stitch markers to track your rounds and ensure everything stays aligned. If you're feeling stuck, watching the tutorial step-by-step, pausing as needed, and practicing the V Stitch separately before working on the full pattern can make a huge difference. With a little patience and determination, you'll overcome these hurdles and enjoy the process of bringing this beautiful design to life!