
Beautify festive arrangements using the Free Crochet Tulip Flower Basket Pattern to bring a lively floral accent to your celebrations.
The first time I made this tulip flower basket, I remember watching the flat circle slowly grow in my hands and then suddenly turn into a sweet little tray covered in blooms. It starts very simply with a soft round base and then rises into a neat wall of stitches, finished off with a row of delicate tulip flowers sitting neatly around the edge. You can play with color combinations like a neutral base with pastel tulips, or a dark base with bright petals in pink, yellow, or white. This makes the basket perfect for holding jewelry, keys, sewing notions, or small gifts, and it looks beautiful on a desk, dresser, or coffee table.
Cute free crochet tulip basket pattern for floral arrangements

This free crochet tulip flower basket pattern uses basic stitches like single crochet and double crochet, along with a magic ring to create a clean, tight center. The sides of the basket are built using back loop only single crochet, which gives that nice sharp edge where the base meets the wall. The tulip pattern comes from working double crochet clusters into triangle spaces, giving the effect of little flowers growing all around the top. With the same stitches, you can go on to make coasters, small bowls, plant pot covers, mug rugs, or amigurumi bases.
From this pattern, you will learn how to work in rounds, increase evenly to form a flat circle, and use back loop only to shape the basket's height. You will also practice creating decorative open spaces and flower clusters, which are useful in many lace or edging projects. Once you understand this design, you can adapt it to make matching tulip-themed trays, larger storage baskets, or even decorative edging for blankets and bags.
What You Can Make With These Skills
- Tulip coasters and matching mini trays for your table
- Gift baskets for candies, skincare, or small handmade items
- Plant pot sleeves with tulip borders for indoor plants
- Decorative edges on blankets, shawls, table runners, or bags
- Amigurumi bases and bowls using the same round and increase techniques

Crochet Tulip Basket Pattern
A perfect project for crochet lovers who want to create a functional and decorative piece! This Tulip Crochet Basket features a unique combination of textures, a sturdy base, and a decorative tulip stitch pattern that gives it a beautiful finish. It's great for gift-giving, home storage, or simply as a fun crochet to try.
This comprehensive pattern takes you through every step, from crocheting the base to creating the height and finishing with the stunning tulip design. Even if you're new to crochet, the clear instructions and simple techniques will have you stitching with confidence.
Skill Level & Terminology
Skill Level: Beginner to Intermediate
Terminology: Pattern uses US crochet terms.
Materials & Tools
- Yarn: Worsted-weight yarn in 3 colors (Base, Border, Tulip)
- Crochet Hook: Size recommended for your yarn (e.g., 4mm or 5mm)
- Stitch Marker: To mark your first stitch in rounds
- Scissors
- Tapestry Needle: For weaving in ends
Gauge
For worsted-weight yarn:
10 single crochets (sc) and 10 rows = 2 inches
Check your gauge to ensure the finished size of the basket matches the pattern.
Abbreviations List
Here are the abbreviations used in this pattern:
- ch: Chain
- sc: Single Crochet
- dc: Double Crochet
- BLO: Back Loop Only
- sl st: Slip Stitch
- MR: Magic Ring
Special Stitch Instructions
- Magic Ring (MR): Form a loop with your yarn, insert hook, pull through a loop, and secure with one chain. This creates a tight, adjustable circle.
- Back Loop Only (BLO): Work stitches into the back loop of each stitch in the round.
Finished Size
Diameter: ~6 inches (15 cm)
Height: ~5 inches (12.5 cm)
The Pattern Itself
Base of the Basket
Round 1:
- Create a magic ring (MR).
- Ch 1, then work 6 sc inside the magic ring.
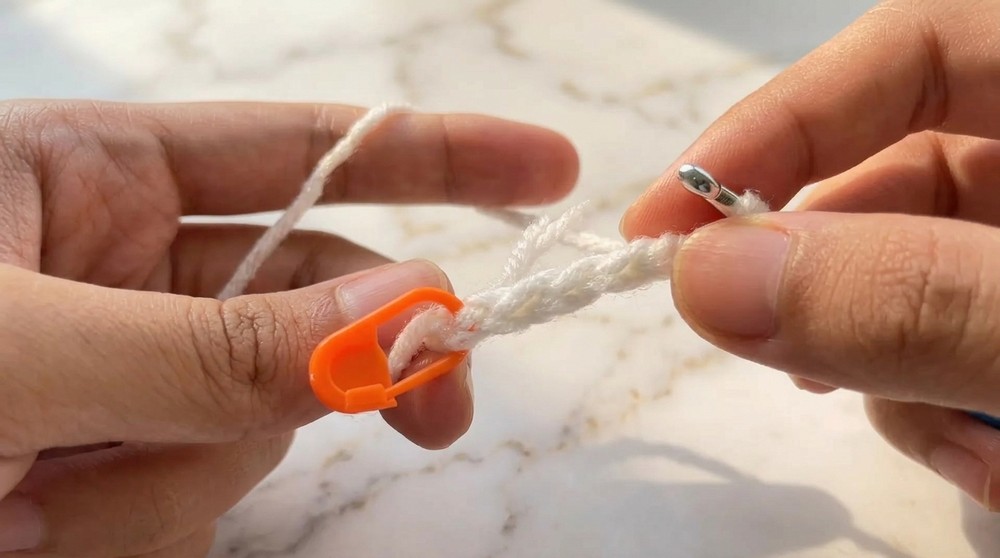
- Pull the tail to close the ring tightly and secure with a sl st into the first sc.
This is the starting round for your base. Make sure that the stitches are tight and evenly spaced.
Round 2:
- Ch 1, then work 2 sc in each stitch around.
- You should have 12 sc at the end of this round.
You are starting to expand the base. Double-check your stitch count to ensure accuracy.
Round 3:
- Ch 1, then alternate between 1 sc in the first stitch and 2 sc in the next stitch, repeating this pattern around.

- At the end, you'll have 18 sc.
Your circle will start to grow as you continue this increase pattern.
Round 4:
- Ch 1, work 1 sc in each of the next 2 stitches, then 2 sc in the next stitch.
- Repeat this pattern around. Total: 24 sc.
Notice how the base becomes flatter and larger with each round.
Round 5:
- Ch 1, work 1 sc in each of the next 3 stitches, then 2 sc in the next stitch.
- Repeat this pattern for a total of 30 sc.
Continue growing the base as evenly as possible.
Rounds 6-9 (Increasing Rounds):
- Follow the same pattern, increasing one single crochet between increases with each round:
- Round 6: 1 sc in each of the next 4 stitches, 2 sc in the next stitch (36 sc).
- Round 7: 1 sc in each of the next 5 stitches, 2 sc in the next stitch (42 sc).
- Round 8: 1 sc in each of the next 6 stitches, 2 sc in the next stitch (48 sc).
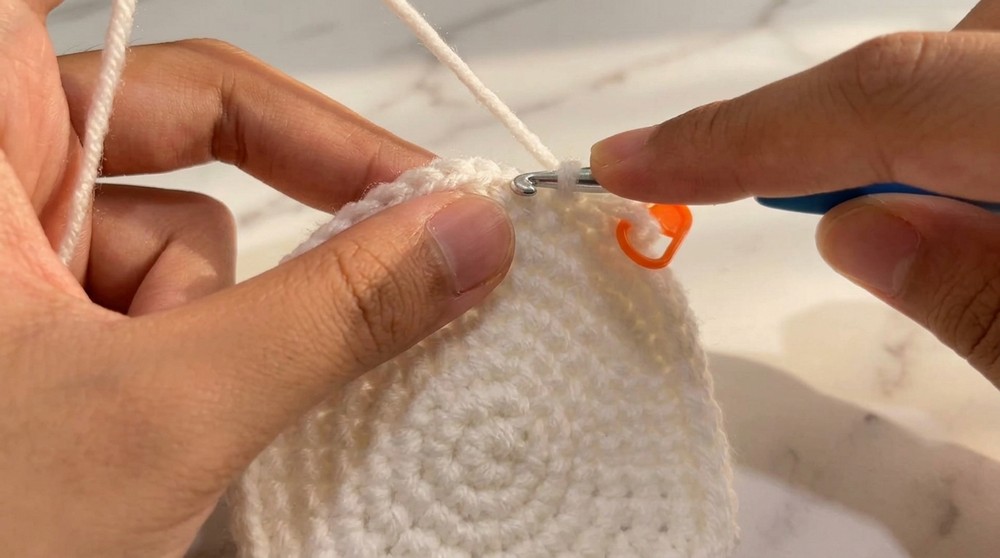
- Round 9: 1 sc in each of the next 7 stitches, 2 sc in the next stitch (54 sc).
The base of your basket is now complete. Make sure it lies flat before moving to the height.
Creating the Basket Height
Rounds 10-14:
- Work in BLO (Back Loop Only) for this section to create a textured edge.
- Ch 1, then sc in BLO of each stitch around. Continue for 5 rounds.
This step completes the height of the basket. Adjust the number of rounds to make your basket taller or shorter.
Tulip Design
Round 15 - Base of Tulips:
- Attach your tulip color yarn.
- Ch 3, then in the same stitch, work 1 dc.
- Skip 2 stitches, then in the next stitch work: (1 dc, ch 1, 1 dc).
- Repeat (skip 2 stitches, 1 dc, ch 1, 1 dc) around. You will create triangle-shaped openings.

Round 16 - Tulip Petals:
- Switch to a contrasting yarn color.
- Chain 3, work 5 dc In each triangle opening.
- To form the tulip, slip stitch into the first dc and the last dc of the group of 5.
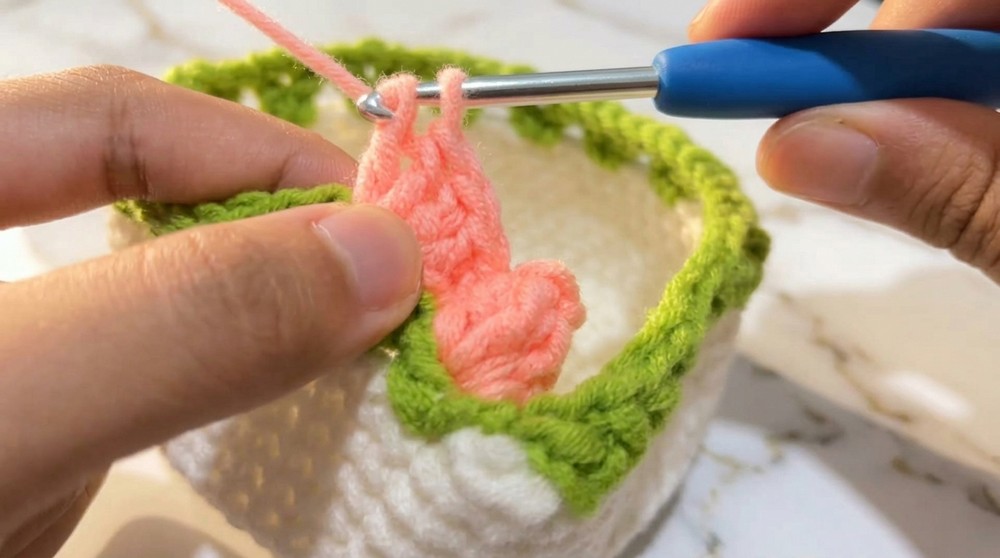
- Repeat this for each triangle opening.
Finishing and Assembly
- Turn the basket inside out and weave in all yarn ends using a tapestry needle.
- Trim off any excess yarn to keep your project neat.
- Flip the basket right side out, ensuring the tulip petals sit outward and upright.
Assembly & Finishing Notes
Once your basket is complete, ensure that the base is sturdy and the walls of the basket hold their shape. Block the basket if needed to achieve a perfect finish.
Pattern Summary
This pattern walks you through creating a beautiful crochet basket with a sturdy base and decorative tulip detail. The main stitches used are single crochet (sc), double crochet (dc), the magic ring (MR) for a clean starting point, and back loop only (BLO) to add structure. Follow the step-by-step guide to complete your basket, and feel free to personalize with your own color choices!
Overcoming Difficulties in the Pattern
As with any new pattern, you might face some challenges while working on your tulip flower basket, but these are easy to overcome with a bit of patience and practice. If the magic ring feels tricky at first, take your time practicing with different yarn tensions until you can comfortably create a tight, seamless center. The back loop only section for building the basket's height can be challenging if you're unsure where to insert your hook-just slow down and focus on the back loop, the one furthest from you, which creates the clean edge.
The tulip cluster pattern might look intimidating since it involves working into triangle-shaped spaces, but following pattern instructions closely will help you place the double crochet stitches correctly for even flowers. Remember, crochet is a journey, and getting through these small hurdles will give you the confidence to tackle even more advanced projects in the future!