
Instantly solve chilly days using the Free Crochet Baby Bear Hat Pattern to make a fun, snug hat for babies aged six to twelve months.
There's nothing sweeter than crocheting a handmade baby bear hat that combines warmth, comfort, and absolute cuteness. This delightful crochet hat pattern is perfect for babies aged 6 months to 1 year and is designed to keep little heads cozy while adding an adorable touch with bear ears. It's an easy and fun project, making it ideal for beginners who want to create something functional and filled with charm. The beauty of this pattern lies in its versatility when it comes to colors. You can explore gentle pastels like blush pink, baby blue, or mint green for a soft look, or use earthy tones such as caramel, beige, or chocolate brown for a classic bear feel.
Adorable Free Baby Bear Hat Crochet Pattern for New Moms

The stitches in this pattern include double crochet, single crochet, and the magic ring technique. These easy-to-learn stitches aren't just for hats-they're the foundation for countless crochet projects like toys, scarves, or even blankets! This baby bear hat pattern isn't just about crocheting; it's about creating a keepsake piece. Gifting this handmade treasure to a friend at a baby shower or using it as a thoughtful accessory for those memorable baby photos.
What You'll Learn From This Pattern
- How to use the magic ring technique for seamless round starts.
- How to create double crochet and single crochet stitches to shape the hat and ears.
- Techniques for increasing stitches evenly in a round to form the crown.
- Professional assembly methods for attaching the bear ears.
- Finishing tips, including invisible slip stitching for a flawless result.

Why You'll Enjoy Making This Hat
- Customizable in endless color combinations.
- Perfect for beginners to build crochet skills.
- Serves as a thoughtful and unique handmade gift.
- Uses minimal supplies for an affordable project.
- Brings joy to the maker and the baby wearing it!
Materials
- Yarn: Soft, thick yarn (ideal for baby projects, like acrylic or cotton). Ensure the yarn is comfortable for sensitive baby skin.
- Crochet Hook: Size 4.0 mm (or as recommended for your yarn).
- Tapestry Needle: For sewing and finishing the project.
- Stitch Marker: Helpful for marking the first stitch in rounds.
- Scissors: For trimming excess yarn.
Gauge
- 10 double crochets (DC) x 5 rows = 4 x 4 inches (10 x 10 cm). Adjust your tension or hook size accordingly.
Abbreviations List
- CH: Chain
- SC: Single Crochet
- DC: Double Crochet
- INC: Increase (2 stitches in the same stitch)
- SL ST: Slip Stitch
Special Techniques Used in the Pattern
- Magic Ring: Used to start the hat and the ears neatly by eliminating gaps.
- Double Crochet (DC):
- Yarn-over, insert hook, yarn-over again, pull through two loops, yarn-over again, and pull through the remaining two loops.
- Single Crochet (SC):
- Insert hook, yarn-over, pull through, yarn-over again, and pull through both loops on the hook.
- Invisible Slip Stitch: A finishing technique to give a seamless edge to the project.
Crochet Baby Bear Hat Pattern Instructions
About the Pattern
This pattern uses simple stitches like double crochet and single crochet, making it perfect for beginners. Starting with a magic ring, you'll learn to build the crown of the hat using basic increases. Then, with straightforward rounds of double crochet, the base takes shape into a cozy baby hat. Adding the ears is a fun and rewarding final step that turns the hat into an adorable bear accessory perfect for a baby.
Hat Body
- Start with a magic ring.
- Wrap yarn around your pinky and middle fingers to create a loop. Insert the hook into the loop, yarn-over, and pull through to create the ring.

- Wrap yarn around your pinky and middle fingers to create a loop. Insert the hook into the loop, yarn-over, and pull through to create the ring.
- Round 1:
- Chain two (these chains don't count as a stitch).
- Double crochet 12 stitches into the magic ring.
- Pull the yarn tail to tighten the loop gently.
- Slip stitch into the first stitch to close the round.
- Round 2:
- Chain two.
- Crochet 2 double crochets (DC) into each stitch from the previous round (increase in every stitch). You should end with 24 stitches.

- Round 3:
- Chain two.
- Crochet 1 double crochet into the first stitch and 2 double crochets into the second stitch. Repeat this pattern (1 DC, 2 DC) throughout the round.
- Round 4:
- Chain two.
- Crochet 1 double crochet into the first two stitches and 2 double crochets into the third stitch. Repeat the pattern (2 DC, 1 increase) throughout the round.

- Round 5:
- Chain two.
- Crochet 3 double crochets into the next three stitches and 2 double crochets into the fourth stitch. Repeat the pattern (3 DC, 1 increase) throughout the round.
- Round 6:
- Chain two.
- Crochet 2 double crochets, 1 increase (2 DC in one stitch), and then crochet 2 double crochets again. Repeat the pattern (2 DC, 1 increase, 2 DC) throughout the round.
- Rounds 7-14:
- Chain two at the beginning of each round.
- Work one double crochet into every stitch without increasing.
- Final Round:
- Do not slip stitch at the end.
- Leave a long yarn tail, cut the yarn, and thread it through a tapestry needle to create an invisible slip stitch.
- Insert the needle through the first stitch and the middle of the last stitch to complete the seamless edge.

Bear Ears
- Start with a magic ring.
- Create a loop and insert the hook into it.
- Round 1:
- Chain one (this chain does not count as a stitch).
- Single crochet 8 stitches (SC) into the magic ring.
- Pull the yarn tail to tighten the loop. Slip stitch into the first stitch to close the round.
- Round 2:
- Chain one.
- Crochet 2 single crochets (SC) into each stitch from the previous round. You should end with 16 stitches.

- Round 3:
- Chain one.
- Crochet 1 single crochet into the first stitch and 2 single crochets into the second stitch. Repeat the pattern (1 SC, 1 increase) throughout the round.
- Rounds 4-6:
- Chain one at the start of each round.
- Single crochet into each stitch without increasing.

- Final Round of Ear:
- Leave a long yarn tail and cut the yarn for sewing.
- Flatten the ear, place it on the hat in your preferred position, and sew it securely using the tapestry needle.
Finishing the Hat
- Attach the Ears:
- Flatten each ear, aligning them symmetrically on either side of the hat.
- Position the ear so the base lines up between Round 2 and Round 3 of the hat. Thread the tapestry needle, and sew the ear to the hat, inserting the needle back and forth through both the ear and the hat for stability.
- Weave in all excess yarn inside the hat for a clean finish.
- Final Touches:
- Ensure all loose yarn tails are woven in securely and trimmed neatly.
- Stretch the hat gently to shape it properly.
Final Words
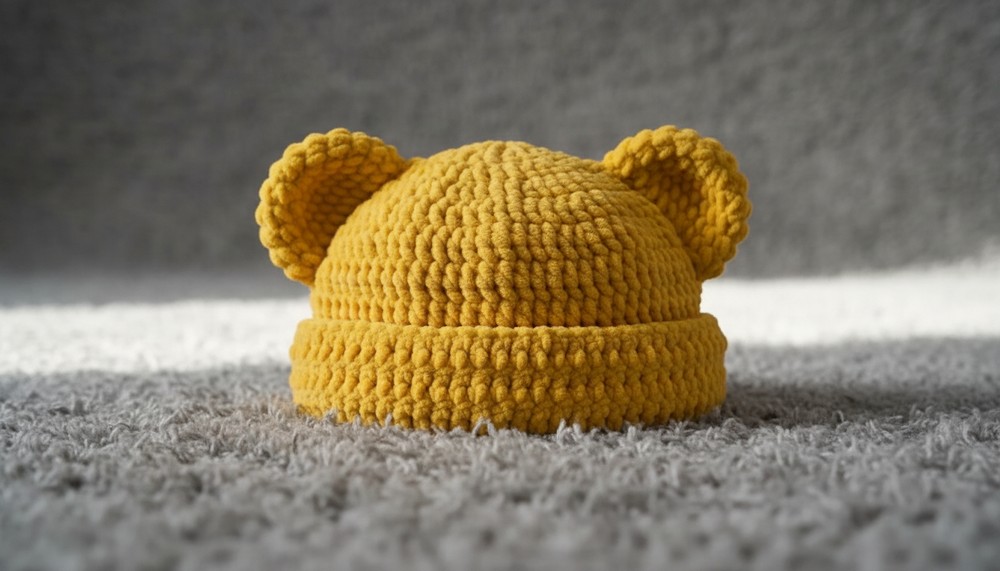
Your adorable crochet baby bear hat is now complete! This cozy and charming hat will keep the baby warm and stylish. The simple yet elegant texture offers a timeless look, and the handmade touch makes it extra special.
Why Choose This Pattern?
- Beginner-friendly, with easy steps and clear instructions.
- Perfect for gifting or as a special handmade piece for your little one.
- Highly customizable with colors or added embellishments (like a pompom or ribbon).
Grab your hook, and start crocheting this precious baby bear hat-it's a project filled with love that you'll finish in no time.
Tips to Maintain the Hat
- Washing: Use gentle, baby-safe detergent and hand wash the hat. Lay flat to dry to maintain its shape.
- Sizing: If you want to create a larger or smaller size, adjust the number of rounds or the yarn thickness.
- Customizations: Try adding embellishments like bows, buttons, or additional stitching to personalize the hat further.
Enjoy the beauty and practicality of your handmade baby bear hat! It's a thoughtful and heartfelt project that doubles as a perfect gift.