
Pick this Crochet Avocado Amigurumi Free Pattern for a fun project and make a tiny avocado that looks adorable in any food collection.
There's something wonderfully charming about small, handmade toys that brighten up any space, and this little avocado amigurumi fits the bill perfectly. Its cute, plump shape brings a touch of whimsy to your day, whether it's perched on a shelf, used as a keychain, or given as a heartfelt gift. Thanks to the original tutorial and design by Bibi Crochet, this delightful piece comes to life with personality and warmth. If you're looking for a fun project to make, the Crochet Avocado Amigurumi Pattern offers a joyful way to create something both adorable and useful.
Playful Crochet Avocado Amigurumi Free Pattern for Kitchen Decor
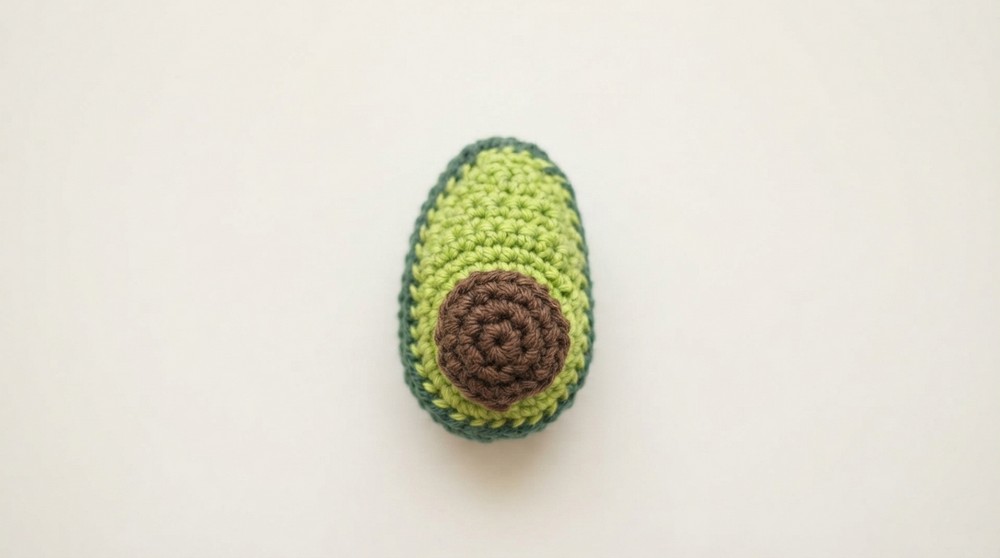
This avocado features that classic pear-like shape we all recognize, complete with a pit nestled right in the center - a perfect detail that makes it instantly recognizable. The texture is soft and squishy, making it enjoyable to hold and squeeze. Its size is just right for displaying around your home or carrying along as a cute companion. One of the best parts is how customizable it is; you can experiment with different shades of green and brown yarn, or even add little embellishments like a tiny smile to give your avocado more character.
Whether you're just picking up the hook or have plenty of experience, this project is approachable and rewarding. While it's accessible for intermediate levels, beginners willing to take their time will find satisfaction in bringing this avocado to life stitch by stitch. Along the way, you'll gain confidence in shaping 3D forms and combining simple stitches to achieve a polished look.
If you enjoy making sweet, squeezable friends or want to expand your amigurumi skills, this pattern is a delightful addition to your repertoire. Ready to start your own little avocado buddy? Check out the free pattern and bring this cute creation to life.
Crochet Avocado Amigurumi Free Pattern
This adorable amigurumi avocado is worked using basic crochet techniques and thoughtful shaping, producing a three-dimensional, realistic piece complete with a brown seed, creamy light green interior, and a contrasting dark green outer shell. The video demonstrates slight color variations, yet the method and size remain unchanged, allowing for personal color selection to match preference. As shown, this project can be easily adapted as a keychain or soft plush accessory. The construction begins by forming the inner and outer avocado halves separately, then building up the sides for dimension, and working a separate seed, which is attached and lightly stuffed. The final assembly involves careful joining and stuffing to ensure the plush maintains both firmness and neat edges. The step-by-step nature of this pattern is intended to guide even those new to amigurumi through the process, ensuring consistent and polished results.
Quick Overview of Pattern
- Two main body panels:
- Light green (front) and dark green (back), worked almost identically.
- Dimensional side wall:
- Four additional rounds are worked onto the dark green back panel to form the avocado's depth.
- Separate brown seed:
- Stitched onto the center of the front piece before assembly.
- Firm stuffing:
- Seed and body pieces are stuffed during the finishing stages.
- Final assembly:
- Panels are sewn or crocheted together along edges for a seamless finish.
Notes
- Each section begins with a magic ring, ensuring no center gaps.
- Use a stitch marker to easily locate the start/end of rounds, especially important for maintaining shape and symmetry.
- Keep your stitches firm for best amigurumi structure.
- Yarn color for the avocado's front and back can be selected to suit your design preference.
- Yarn weight and hook size can be adjusted, but ensure you keep the fabric tight enough to prevent stuffing from showing.
- The shape is made more organic by the series of straight rows and angled decreases in the top half.
Skill Level
- Advanced Beginner
- The pattern is composed of single crochet in the round and row, basic increases and decreases, simple stuffing, and standard seaming techniques-making it suitable for those comfortable with amigurumi basics and wishing to refine 3D crochet shaping.
Materials
- Light Green Yarn (Weight #3)
- Dark Green Yarn (Weight #3)
- Brown Yarn (Weight #3)
- Size 2 mm Crochet Hook
- Yarn Needle
- Stitch Marker
- Fiberfill Stuffing
Measurements / Sizing
- Finished Avocado Size: Approximately 8-10 cm (3-4 inches) tall, depending on tension and yarn used.
- Schematic: Oval-shaped with a flatter base, rounded top, and noticeable dimensional depth provided by the side wall.
Gauge (and Stitch Pattern)
- Gauge is not critical. Focus on creating tight, even stitches so stuffing does not show.
Stitch Abbreviations
| Abbreviation | Description |
|---|---|
| MR | Magic ring |
| ch | Chain |
| sc | Single crochet |
| inc | Increase: 2 sc in same st |
| dec | Decrease: sc two sts together |
| st(s) | Stitch(es) |
Special Stitches
- Magic Ring (MR):
Loop yarn to create a ring, insert hook, pull up a loop and form the initial round of single crochet. - Invisible Decrease (dec):
Insert hook into the front loop of each of the next two stitches, yarn over, pull through both loops, yarn over again and complete the single crochet, resulting in a subtle decrease.
The Crochet Pattern
Light Green Front Piece
- Round 1:
- Form a magic ring, work 7 sc into the ring.
- (7 sts)
- Round 2:
- Chain 1. Increase (2 sc) in every stitch around.
- (14 sts total)
- Round 3:
- Chain 1. [1 sc, 1 inc] repeat all the way around.
- (21 sts total)
- Round 4:
- Chain 1. [2 sc, 1 inc] repeat all the way around.
- (28 sts total)
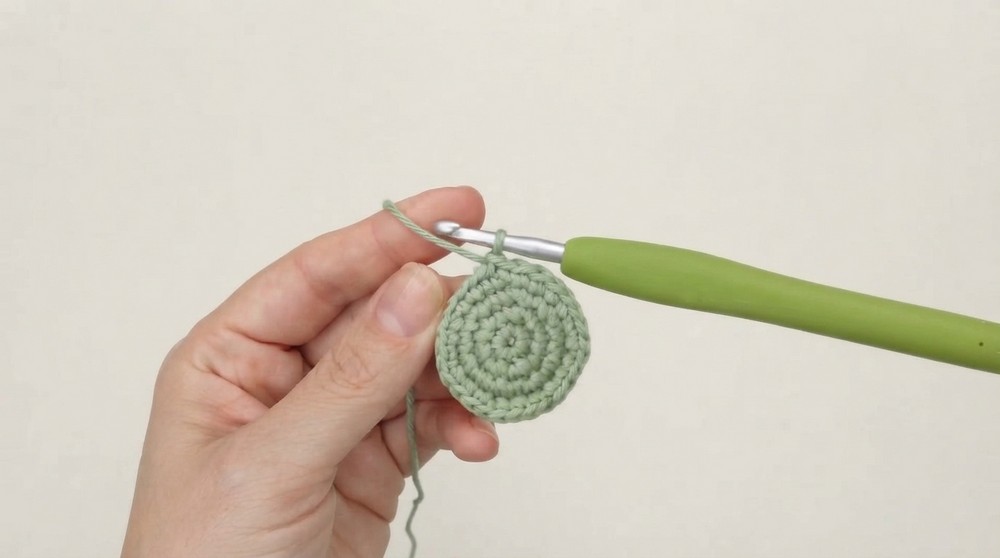
- Row 5:
- Chain 1. Work 10 sc across-this starts to create the characteristic top of the avocado.
- Row 6:
- Chain 1, turn. Work 1 sc into each stitch across (10 sts).
- Row 7:
- Chain 1, turn. Decrease at the start (dec), 6 sc across, decrease at the end (dec).
- (8 sts)
- Row 8:
- Chain 1, turn. Decrease at the start, 4 sc across, decrease at the end.
- (6 sts)
- Row 9:
- Chain 1, turn. 1 sc into each stitch (6 sts).
- Row 10:
- Chain 1, turn. Decrease at the start, 2 sc, decrease at the end.
- (4 sts)
- Row 11:
- Chain 1, turn. 1 sc, 1 decrease, 1 sc across.
- (3 sts)
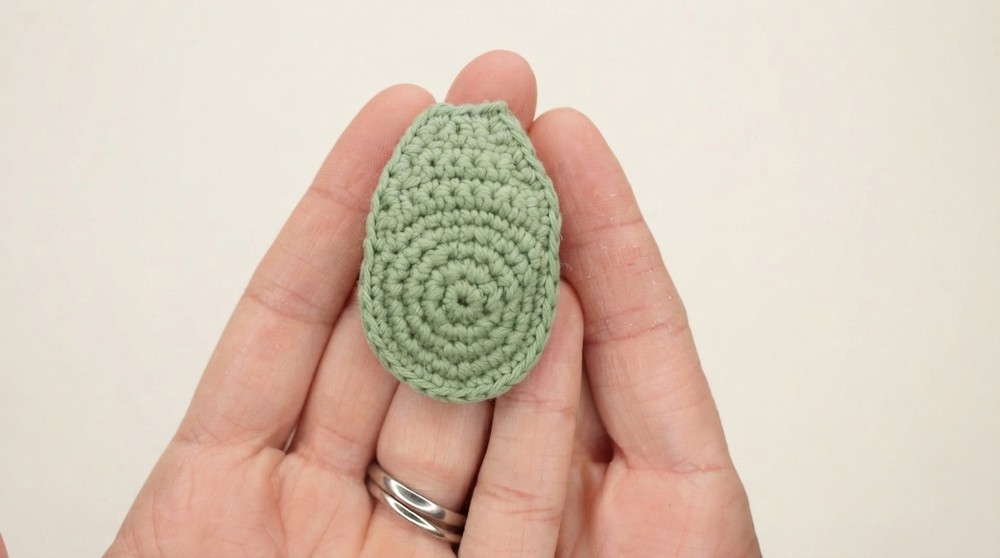
- Edging:
- Chain 1. Single crochet evenly all the way around the piece, smoothing over row edges for a clean border. Fasten off and weave in the end.
Dark Green Back Piece
- Rounds 1-4 and Rows 5-11:
- Repeat exactly the same procedure as for the light green front piece above (including the border).
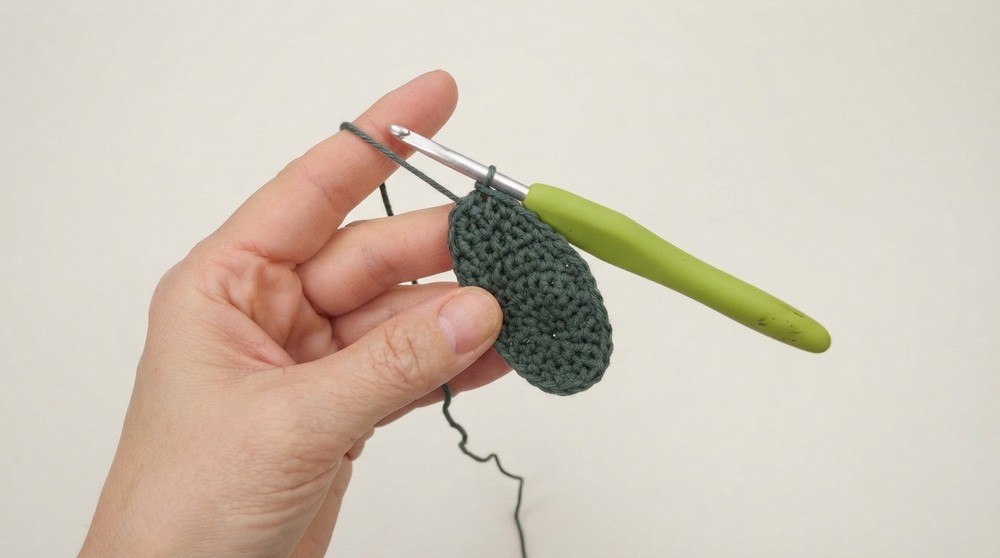
- Edging:
- Chain 1. Single crochet evenly around the outer border of the piece, but do not cut the yarn.
- Side Wall:
- Work 1 sc into each stitch around the border for 4 rounds. This forms the avocado's characteristic depth. Maintain consistent tension and overlap corners smoothly.
Brown Seed
- Round 1:
- Form a magic ring with 7 sc into the ring.
- (7 sts)
- Round 2:
- Chain 1. Increase in every stitch (2 sc in each).
- (14 sts total)

- Round 3:
- Chain 1. [1 sc, 1 inc] repeat all the way around.
- (21 sts total)
- Finish:
- Fasten off, leaving a long tail for sewing.
Assembly & Finished Size
- Attach the Seed:
- Center the brown seed on rounds 1-3 of the light green front piece.
- Using a yarn needle and the brown yarn tail, sew around the edge of the seed.
- Before closing the seam entirely, add a small amount of fiberfill stuffing inside the seed for a slightly raised effect.
- Continue sewing until secure, and fasten off neatly.
- Join the Body:
- Carefully align the light green front piece with the dark green back piece (with side wall).
- Use the yarn from the side wall or a separate strand to crochet (or sew, using whip stitch) through both layers of the border, joining them smoothly.
- As you approach the final edge, pause to stuff the avocado with fiberfill-ensure it is firm but not overstretched.
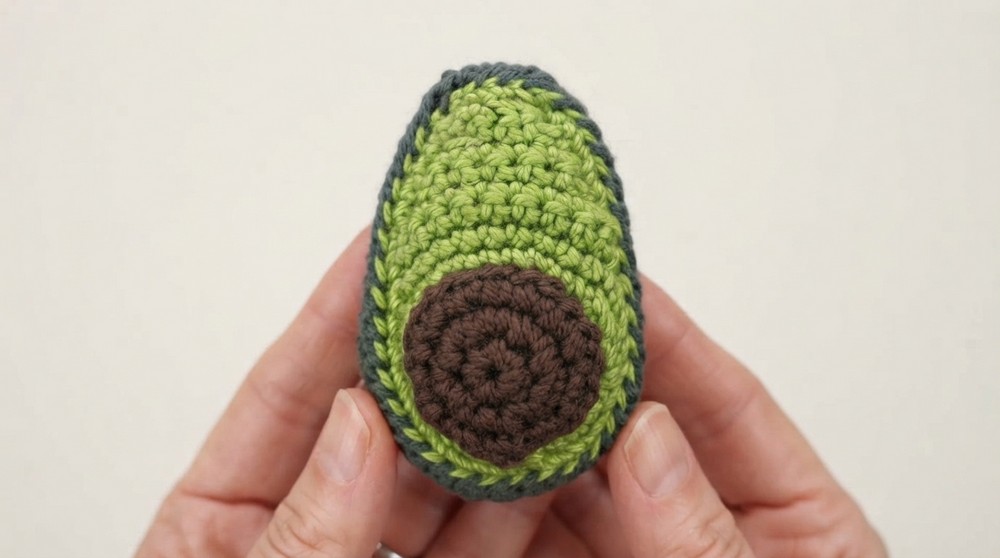
- Finish:
- Complete the final stitches, close the seam, and weave in any remaining yarn ends inside the piece for a tidy appearance.
- Shape the avocado gently to encourage the desired oval, realistic finish.
Conclusion and Ending Words
This amigurumi avocado is a perfect practice in combining rounds, rows, increases, and decreases to achieve gentle, lifelike shaping. The process, while straightforward, results in a finished plush that is visually appealing and structurally strong, especially when attention is given to consistent stitch tension and careful seaming. The added seed enhances authenticity, and the side walls provide satisfying dimension. Such a piece is suitable as a playful accessory or soft décor item, and with the addition of a keychain ring, it can be adapted as a fun everyday companion. By adhering to each step, from magic ring beginnings through careful stuffing and assembly, the finished avocado reflects both skill and creativity-making it an enjoyable project with broad appeal.