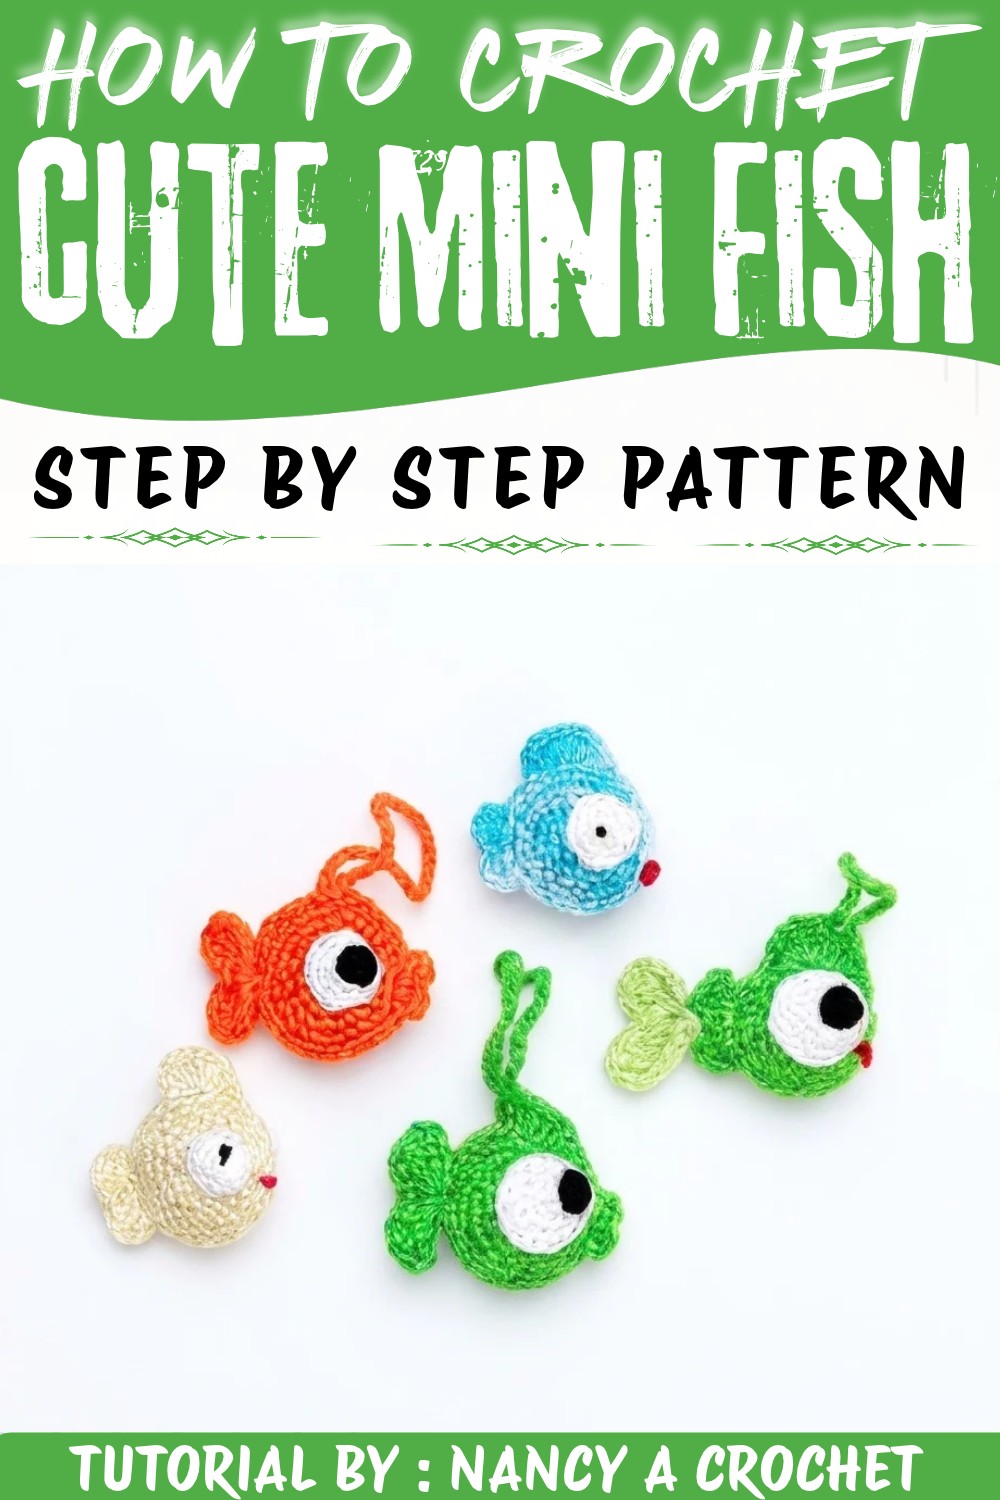
Make a sea friend with this Crochet Mini Fish Pattern and enjoy a fun project that adds a lovely touch to your bags or room decor.
There's a certain joy in creating small, charming items that bring a smile to anyone who sees them. One delightful example is the Crochet Mini Fish Pattern, a wonderful project designed and taught by Nancy a Crochet, available on her YouTube channel. This detailed tutorial shows how to transform simple mercerized cotton yarn and a small hook into an irresistibly cute fish that's perfect for a variety of uses. Full credit goes to Nancy a Crochet for this creative design and easy-to-follow instructions.
Adorable Crochet Mini Fish Free Pattern for Bag Decorations
The Crochet Mini Fish Pattern results in a petite, soft fish that's not only eye-catching but also enjoyable to make. Its compact shape shows off rounded bodies with delicate fins and a playful tail, all built up with neat half double crochet stitches that give it a slightly textured yet smooth feel. Adding little eyes made from tiny circles brings personality and charm, making each fish unique and full of character.
This miniature fish is a fantastic gift idea, whether as a keychain, a zipper charm, or a whimsical decoration for a child's room. Its size and lightweight nature make it easy to carry or hang anywhere, while its cheerful appearance can brighten up bags, desks, or shelves. The open chain stitches used on the fins add a touch of elegance and style to the design, enhancing its visual appeal without complicating the process.
Whether you're looking to give a handmade token or want to enhance your space with a playful accessory, the Crochet Mini Fish Pattern offers both charm and versatility. Its approachable style makes it suitable for makers of many skill levels, and its vibrant look and pleasant texture ensure it will be treasured by anyone lucky enough to receive one.
Ocean Inspired Crochet Mini Fish Free Pattern
This amigurumi fish makes a delightful keychain or a charming decorative piece, worked efficiently with basic crochet stitches and minimal materials. The following instructions guide you through creating two flat, circular bases, joining them seamlessly, adding decorative and structural fins, and forming a curved tail. Optional features such as embroidered or crocheted eyes provide personalization, while strategic stuffing ensures the finished fish maintains its softness and form. The steps emphasize precision at every phase, contributing to a polished and visually appealing project that presents both elegance and simplicity.
Quick Overview Of Pattern
- Crochet two circular panels for the body using half double crochet increases.
- Join panels by crocheting along the edge, incorporating openings for stuffing.
- Form the upper and lower fins while continuing along the body edge.
- Shape a tapered tail using chain and slip stitches.
- Add a dorsal fin to the top of the body with double crochets and single crochet edging.
- Crochet and embroider round eyes, then sew them to the body for expression.
Notes
- Use two strands of 1mm mercerized cotton for the body panels, which enhances durability and gives a firmer texture.
- Maintain a moderate tension for even stitch definition, essential for both structure and appearance.
- Place a stitch marker at the start of each round for accurate counting and alignment.
- Stuff the fish before closing to achieve a slightly plump and tactile look.
- The pattern includes both written and visual (video) guidance for complex areas such as assembly and face embroidery.

Skill Level
Advanced Beginner
- Experience with basic stitches (magic ring, single crochet, half double crochet, double crochet, slip stitch).
- Confidence in working in the round and joining pieces with crochet.
Materials
- Yarn: 1mm mercerized cotton, held double (for the fish body)
- Hook: 1.7mm crochet hook (size 6, per the tutorial)
- Stuffing: Synthetic fiberfill
- Scissors
- Yarn needle
- Black thread or yarn: For facial features and eyes
Measurements / Sizing
- Completed fish is approximately 5-6 cm from nose to tail before attaching the tail extension.
- The width (not including fins) is about 3-4 cm.
- Tail length can be customized.
Gauge
Gauge is not critical for this small project, but keep stitches tight to maintain shape and contain stuffing.
Stitch Abbreviations
- MR: Magic ring
- ch: Chain
- sc: Single crochet
- hdc: Half double crochet
- dc: Double crochet
- sl st: Slip stitch
- inc: Increase (2 stitches in the same base stitch)
- st(s): Stitch(es)
Special Stitches
- Magic Ring: Form an "X" with the yarn, insert hook, pull up a loop, then crochet into the ring.
- Increase (inc): Make 2 specified stitches in the same base stitch.
- Joining with sc: Insert hook through both pieces, work single crochet as usual.
The Crochet Pattern (Step-by-Step)
Circular Base (Make 2 Panels)
- Magic Ring:
- Create a magic ring by crossing the yarn into an "X."
- Insert 1.7mm hook, pull up a loop, chain to secure.
- Work 6 sc into the ring.
- Pull tail to close, join with a sl st to first sc.

- Round 2:
- Place marker.
- 2 sc in each st around (12 sc).
- Join with sl st.
- Round 3:
- (1 sc, 1 inc) all around (18 sts).
- Pattern: sc in next st, 2 sc in next st. Repeat.
- Round 4:
- (2 sc, 1 inc) all around (24 sts).
- Pattern: sc in next 2 sts, 2 sc in next st. Repeat.

- Round 5:
- 1 sc in each st around (24 sts).
- Repeat above steps for the second circle, so you have two identical circular bases.
Joining and Body/Fins Construction
Lay the two circles wrong sides together.
Joining Edge:
- Begin at the edge, work 10 sc through both pieces, joining them together.
Upper Fin:
- Next st:
- Yarn over, dc in next st (through both layers).
- Yarn over, dc in same st.
- Ch 1, skip to next st, sl st.
- Ch 1, yarn over, dc in next st, dc again in same st (for next fin "bump").

-
- Ch 1, insert through both layers, sl st.
Continue Along Body:
- 3 sc along edge.
Lower Fin:
- Work the following in the next 3 sts:
- 2 dc in each of next 3 sts (for a fuller, wavy lower fin).
Tail:
- Ch 20 (or desired length).
- Working back down ch, sl st in each ch back to base.
- At base, ch 3 and sl st into same base to form a "forked" tail tip.
Stuff the Body:
- Insert stuffing before closing the opening completely, ensuring a plump fish shape.
Complete Closure:
- Continue sc around the remainder of the body edge to close.
- Finish with a sl st at the end.
Dorsal Fin (Top Fin)
- Attach yarn along back top edge of fish.
- Ch 4, turn.
- 4 dc into same base st.
- Ch 1, move to next st, sl st.
- Next st: 5 dc in same base.
- Ch 1, turn, and sc in each of the 5 dc just created (5 sc).
- Sl st to base to secure, pull thread through, and cut.
Eyes
Eye Base:
- MR, using a single strand.
- 6 sc in MR, pull closed, sl st to first sc.

Round 2:
- 6 inc around (12 sc).
- Pattern: 2 sc in each st.
Round 3:
- (1 sc, 1 inc) around (18 sts).
Embroidery and Attachment:
- Thread black yarn or thread; embroider a pupil in the center.
- Sew finished eye(s) to each side of the fish head, anchoring securely.

Assembly & Finished Size
- Ensure that the fins, tail, and eyes are attached securely.
- Weave in or hide all yarn ends for tidiness.
- Final fish size (not including keychain hardware): ~5-6 cm long, with tail length adding further size as preferred.
- Fish is slightly plump with stuffing, and all details are firmly affixed for daily use or display.

Conclusion and Ending Words
This small crocheted fish is a quick, satisfying project that highlights the impact of simple shapes and bold assembly. With clean increases, structured joining, and expressive features, the finished piece demonstrates an effective use of construction techniques that result in a well-formed, functional keychain or decorative item. Adjustments in tail length, fin shapes, or eye size can personalize the design to your aesthetic preference. By carefully closing seams and affixing details, the fish remains sturdy and visually appealing, ready to serve as a charming gift or cheerful companion. The approachable instructions and minimal material requirements ensure that this project fits effortlessly into any crafter's repertoire, supporting both skill development and creative enjoyment.