
Enjoy adding a splash of color to your keychain with the Free Crochet Fish Keychain Pattern, made easy and trendy for all ages.
Who would have thought a tiny fish could bring so much joy to your keyring? This crochet pattern is not just about making a keychain; it's about adding a splash of color and creativity to your daily routine. The pattern features vibrant yarn colors, such as blush pink, white for glow, or even sea green for a whimsical twist. The beauty of the pattern lies in its playful texture and simplicity, making it a fun and beginner-friendly project for anyone looking to crochet something small yet meaningful.
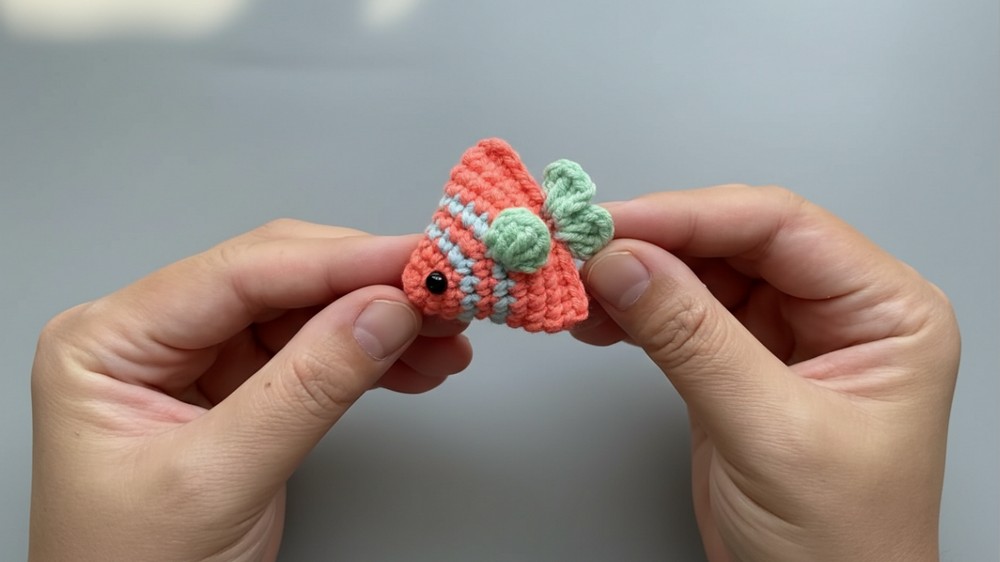
Adorable Free Crochet Fish Keychain Pattern to Try Delightful Finish

The stitches used in this pattern include single crochet and double crochet, which are perfect for giving the fish its soft, dimensional look. You'll also use simple increases and decreases to create its adorable rounded body. These techniques are foundational skills that can later be applied to other creative projects, like amigurumi animals, key covers, or bag charms. Beyond its visual appeal, this pattern is practical, it's compact, lightweight, and makes your keys easy to locate in a cluttered bag.
What You Can Crochet from These Stitches
The stitches learned here open doors to numerous possibilities:
- Amigurumi Toys: Turn your fish skills into creating adorable sea creatures like turtles or whales.
- Bag Charms and Pendants: Customize bag accessories with fun shapes.
- Mini Home Décor: Crochet tiny fish to use as wall garlands or fridge magnets.

Materials Needed
- Hook Size: 2.5mm crochet hook.
- Yarn Type: 4-ply cotton yarn (select your choice of colors for the body, fins, and tail).
- Safety Eyes: 5mm safety eyes for the fish's eyes.
- Stuffing: Polyfiber stuffing to fill the fish.
- Keychain Ring/Clip: To attach the fish as a keychain accessory.
- Tapestry Needle: For assembling and weaving in ends.
- Scissors: For cutting yarn ends.
Abbreviations
- ch: Chain
- sc: Single crochet
- slst: Slip stitch
- inc: Increase (2 single crochets in the same stitch)
- dc: Double crochet
- st: Stitch
Finished Size
- The fish measures approximately 3-4 inches in length, depending on tension and yarn type.
Special Techniques Used
- Magic Loop (Magic Circle): Creates a tight, adjustable circle to start your project.
- Increases: Adding stitches to expand the shape.
- Uniform Shaping: Gradual increases for rounded body structure.
- Seamless Color Changes: Changing yarn color to create striped details.
- Embellishments: Creating the fins, tail, and attaching eyes for a finished look.
What You Will Learn From This Pattern
This pattern is more than just a project; it's a hands-on learning experience:
- Working in Rounds: Learn how to create a seamless fish shape using rounds.
- Color Changes: Master the skill of switching yarn colors to make multi-toned designs.
- Shaping: Understand increases and decreases to form the fish body and fins.
Step-by-Step Pattern
Part 1: Creating the Fish Body
- Round 1: (Start with body)
- Create a magic loop and chain 1.
- Work 6 single crochets (sc) into the magic loop.
- Pull the yarn tail to tighten the loop.
- Slip stitch (slst) into the first stitch to close the round.
- (6 sc total)

- Round 2: (Increase round)
- Chain 1.
- Work 1 sc in the first stitch, 2 sc in the next stitch.
- Repeat this pattern: 1 sc, 2 sc all around.
- Slip stitch into the first stitch.
- (9 sc total)
- Round 3:
- Chain 1.
- Work 1 sc in the first 2 stitches, 2 sc in the third stitch.
- Repeat: 2 sc, inc around the round.
- Slip stitch into the first stitch.
- (12 sc total)
- Round 4: (Add color stripes if desired. Change yarn after completing the slip stitch.)
- Chain 1.
- Work 1 sc in the first 3 stitches, 2 sc in the fourth stitch.
- Repeat: 3 sc, inc around.
- Slip stitch into the first stitch.
- (15 sc total)
- Round 5: (Continue with stripes)

- Chain 1.
- Work 1 sc in the first 4 stitches, 2 sc in the fifth stitch.
- Repeat: 4 sc, inc around.
- Slip stitch into the first stitch.
- (18 sc total)
- Round 6:
- Chain 1.
- Work 1 sc in the first 5 stitches, 2 sc in the sixth stitch.
- Repeat: 5 sc, inc around.
- Slip stitch into the first stitch.
- (21 sc total)
- Round 7:
- Chain 1.
- Work 1 sc in the first 6 stitches, 2 sc in the next stitch.
- Repeat: 6 sc, inc around.
- (24 sc total)
- Slip stitch into the next stitch to complete the round.

- Rounds 8-9:
- Work 1 sc in each stitch around the circle.
- (24 sc in each round)
Part 2: Finalizing the Body
- Stuff the Body:
- Begin adding stuffing to the body as you go to give the fish its rounded shape.
- Round 10 and Decrease:
- Start reducing by skipping every 6th stitch to close the body gradually.
- Finish the Body:
- Secure the final stitches and weave in the end securely to avoid unraveling.
Part 3: Creating the Tail and Fins
Tail
- Attach Yarn:
- Identify the back (narrower) end and attach yarn.
- Chain 3, then work: 2 dc in the same stitch, chain 3, slip stitch into the same stitch (forms one side of the tail).
- Move to the next st.
- Repeat: Chain 3, 3 dc, chain 3, slip stitch.
- You should now have a 2-pointed tail.

Side Fins
- Attach Yarn for Fins:
- On the side of the fish's body, attach the yarn where you want the fins to start.
- Chain 3, work 2 dc into the same stitch, chain 3, slip stitch into the same stitch.
- Repeat on the opposite side of the body to create the second fin.
Part 4: Adding the Eyes
- Attach Safety Eyes (5mm recommended):
- Insert safety eyes on both sides of the fish approximately halfway down its body. Make sure they are aligned.
- Secure the safety backing on the inside.
Attaching to a Keychain
- Secure the Fish:
- Sew a small loop on top of the fish using the existing yarn or attach a metal loop.
- Attach Keychain Ring:
- Use pliers to attach the fish securely to the keyring.
Customizations
- Color Options:
- Experiment with multiple color stripes for a more vibrant fish.
- Different Fins/Tails:
- Customize the tail or fin shapes by increasing/decreasing stitches or stitches per cluster.
Finishing Tips
- Inspect for Loose Ends:
- Ensure all yarn tails are woven in tightly to prevent unraveling.
- Block the Fish (Optional):
- Gently steam-block the fish to bring out its shape.
Final Words
This Crochet Fish Keychain is a great project for both beginners and experienced crocheters. With its simple but creative design, you can make personalized gifts or craft several pieces for different uses. This little fish can be customized in endless ways to match your personal preferences or those of your gift recipients.
Why You'll Love This Project
- Quick and Portable: Perfect for an evening project or on-the-go crafting.
- Customizable: Experiment with endless color combinations.
- Thoughtful Gift: Make it as a special handmade gift for friends and family.
Challenges and Solutions
Every crochet project comes with its unique hurdles, especially for beginners. In this fish keychain pattern, one common challenge might be switching yarn colors seamlessly, as uneven transitions can disrupt the design. To solve this, pull the new color tightly and secure it with a small knot before continuing. Another tricky spot is working in tight rounds, which can be hard to maintain consistently. Using a stitch marker to track the first stitch of each round will help avoid confusion. Additionally, shaping the fins might feel intimidating at first, but following the pattern closely and practicing your double crochets will make them easier to handle. With patience and determination, these hurdles will transform into learning moments that boost your crochet confidence!