
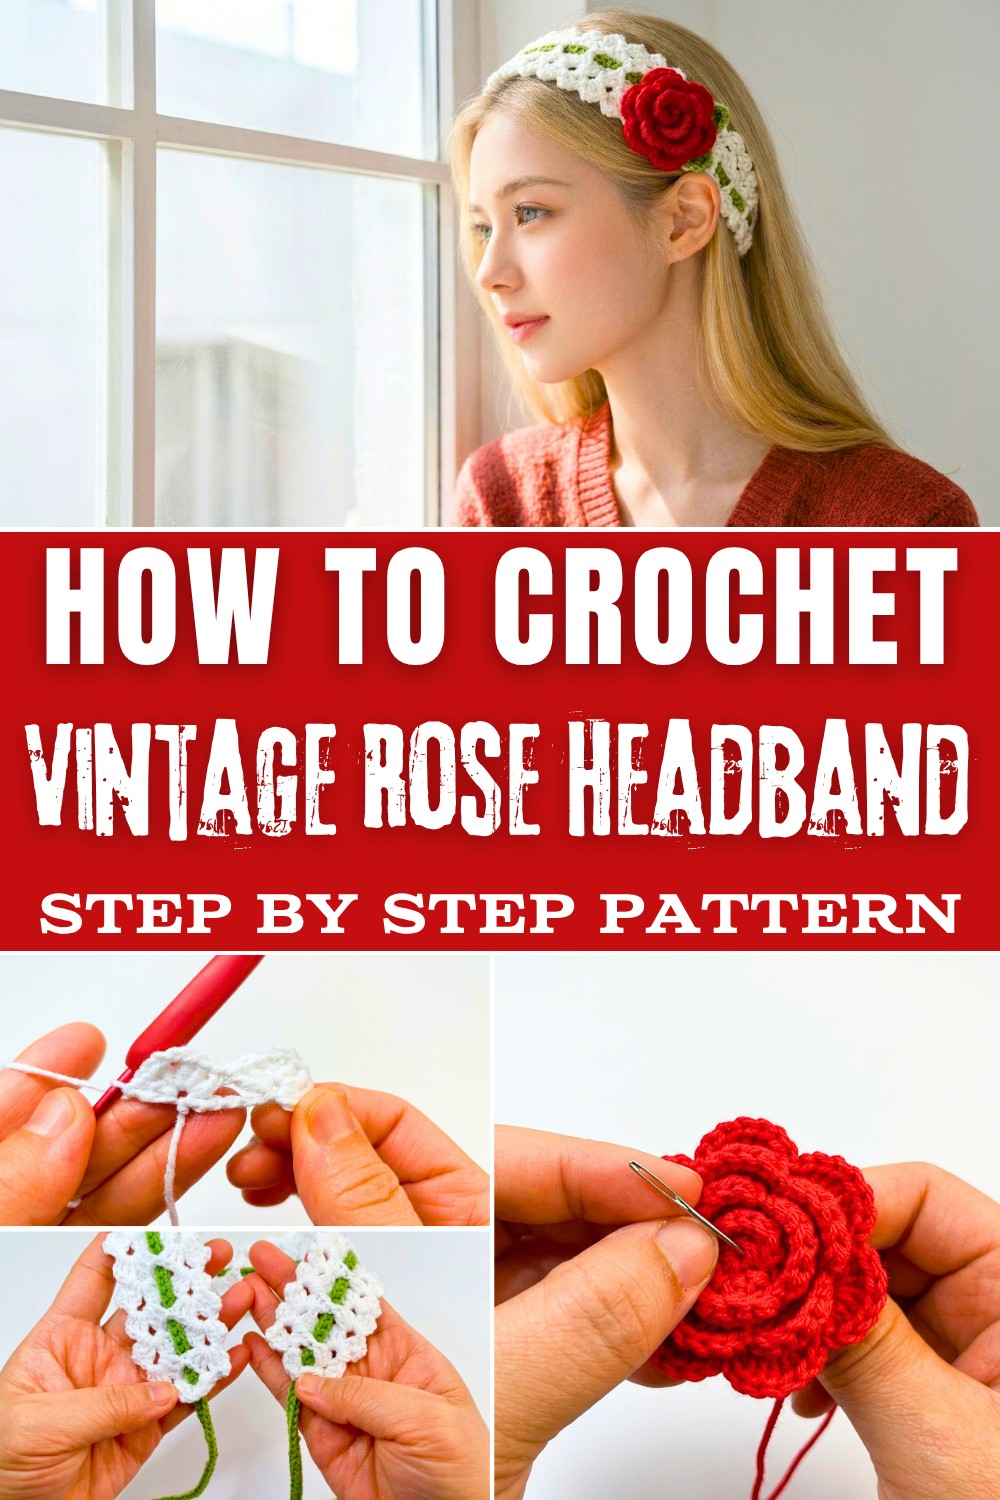
Effortlessly combine vintage vibes and modern flair with this free crochet vintage rose headband pattern for a gorgeous handmade masterpiece.
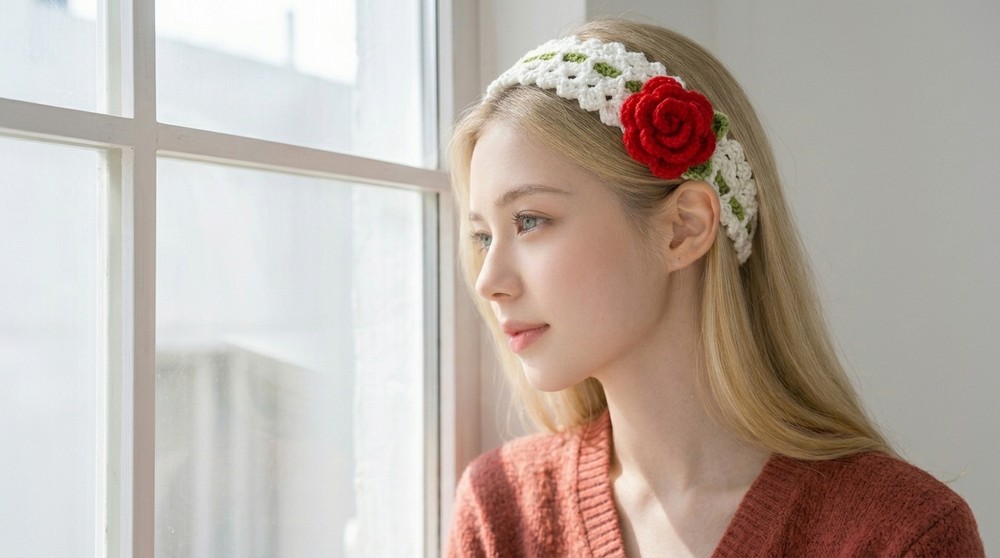
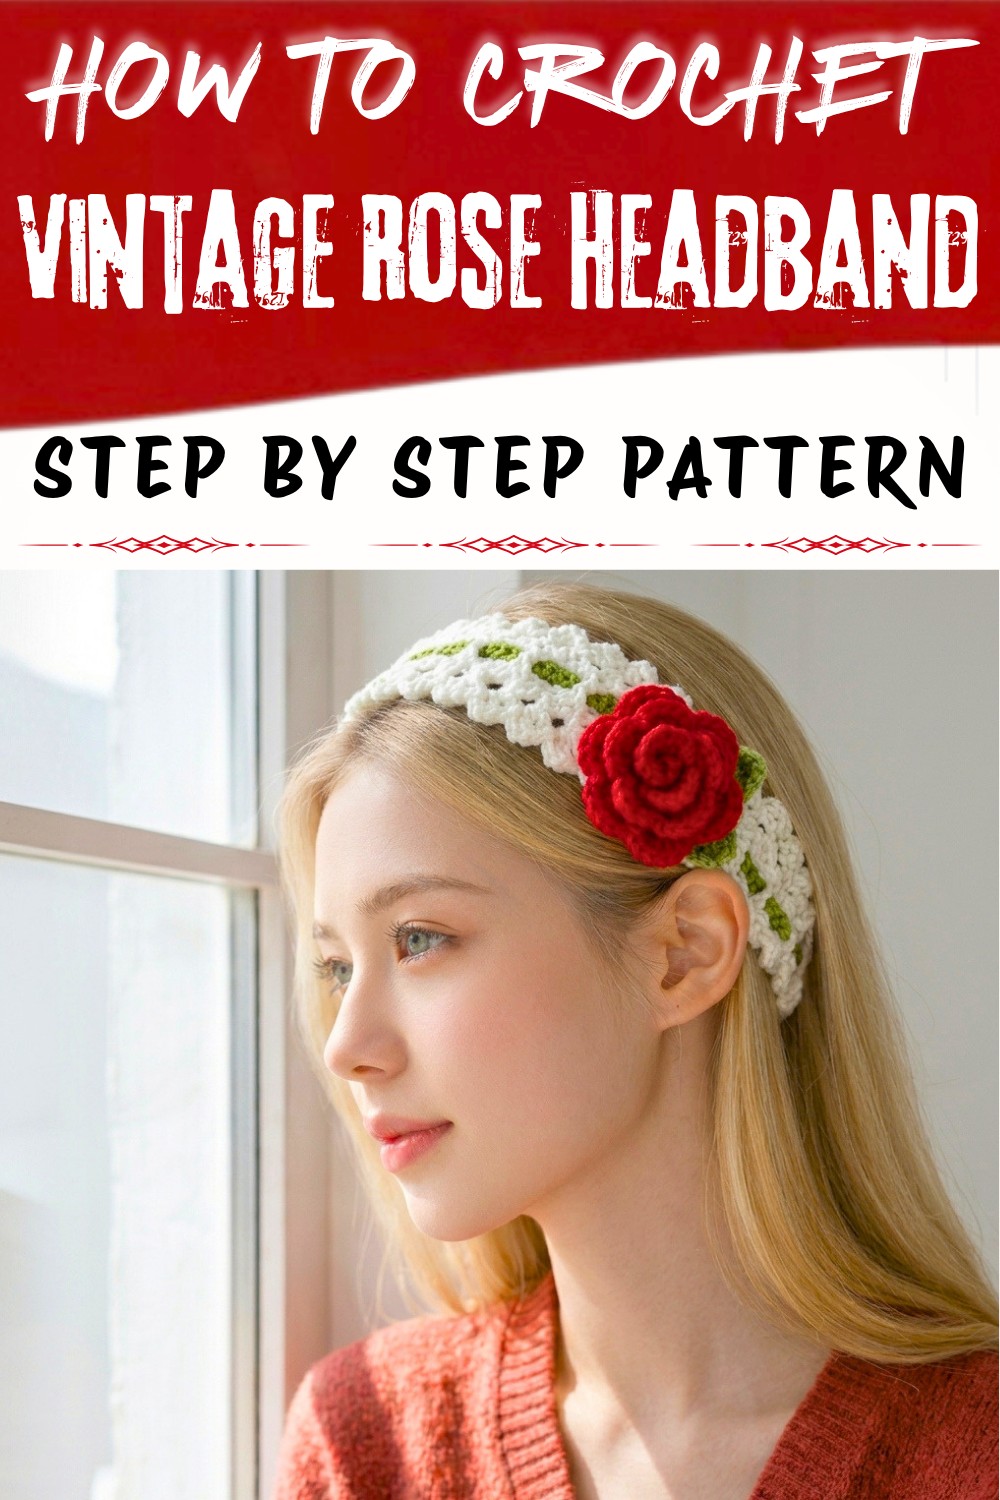
I've always loved adding a handmade touch to my accessories, and this vintage rose headband pattern is truly one of my favorites. Not only is it beautiful and versatile, but it has just the right blend of timeless charm and modern flair to complement any outfit. The intricate rose, paired with soft green leaves and a delicate yet sturdy headband, creates an accessory that's perfect for weddings, casual outings, or even gifting to someone special. The best part is that you get to customize the color combinations! While the classic red rose with green leaves is stunning, you can experiment with other colors like pink, white, or even lavender.
Soft and Stylish Crochet Vintage Rose Headband Pattern
This pattern uses simple yet elegant stitches such as double crochets, slip stitches, and a modified half double crochet puff stitch to create the headband, rose, and leaves. These elements are seamlessly connected to form a cohesive design. It's beginner-friendly, with repetitive rows you can easily master, making it perfect for anyone just starting out with crochet. Whether you're making the pattern as presented or using these versatile stitches to create other projects like crochet hair ties, brooches, or embellishments for scarves, the possibilities are endless.
What You'll Learn From This Pattern
By following this step-by-step pattern, you'll learn not only the basics of crochet stitches but also how to apply techniques like shaping flowers and leaves, creating puff stitches, and assembling multiple elements into a single accessory. These skills aren't just limited to headbands; you can use them to crochet standalone roses as pins or clips, decorative trims for bags, or even elegant garlands for home decor!
What You Can Make With These Skills
- Hair clips, brooches, or pins using the rose and leaf design
- Floral garlands or bracelets by joining multiple roses and leaves
- Custom embellishments for scarves, bags, or hats
- Seasonal decorations or elegant accessories
Blooming Crochet Vintage Rose Headband Pattern
Materials Needed:
- Yarn: Medium weight yarn in colors of your choice (mainly for the headband, rose, and leaves). Choose soft yarns for comfort and durability.
- Hook: Crochet hook size as per the yarn label recommendation (commonly 4 mm to 5 mm).
- Accessories: A yarn needle for weaving in ends, crochet glue (optional), a pin back (optional for making the rose a brooch), and scissors.
- Gauge: Gauge is not critical for this project, but ensure that your stitches are even and the pattern maintains appropriate tension.
Finished Size:
- The final size of the headband can be adjusted according to personal preference, but the example in the video works up to approximately 19-21 inches (48-53 cm) in length. Ensure that the total number of rows for the headband is odd if you adjust the size. The rose and leaves can be customized in size depending on the length of stitches and chains used.
Pattern Instructions:
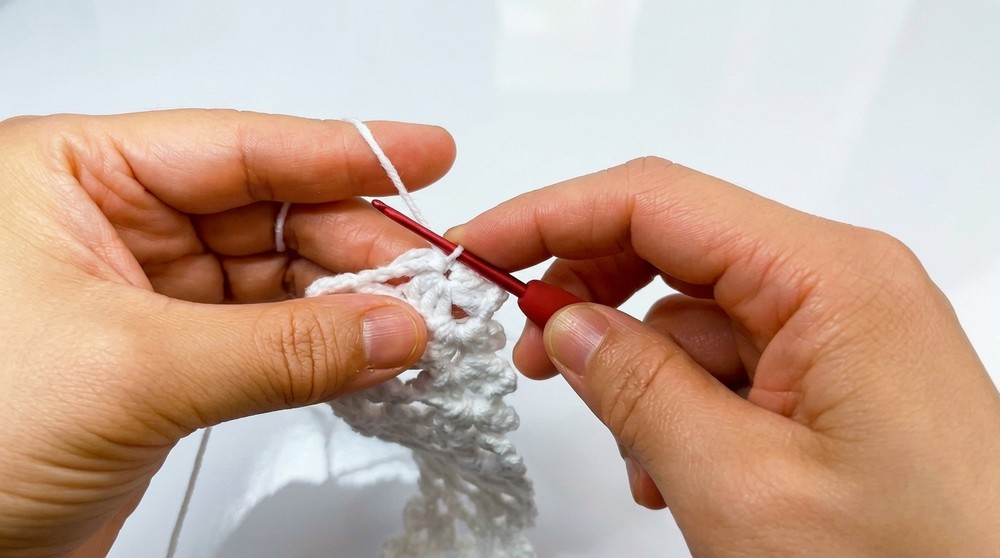
Step 1: Crochet the Main Body of the Headband
- Start with a Slip Knot: Create a slip knot on your hook.
- Chain 9: Foundation chain with 9 chains.
- Turn Chain:
- Return to the third back bump from the hook.
- Make 3 double crochets (dc) in this back bump.
- Chain 2: Once completed, continue by making 3 double crochets in the same back bump.
- Skip 5 Chains: Skip the next 5 chain stitches on your foundation chain.
- Last Back Bump: In the last back bump, make:
- 3 double crochets, then
- Chain 2, and 3 more double crochets.
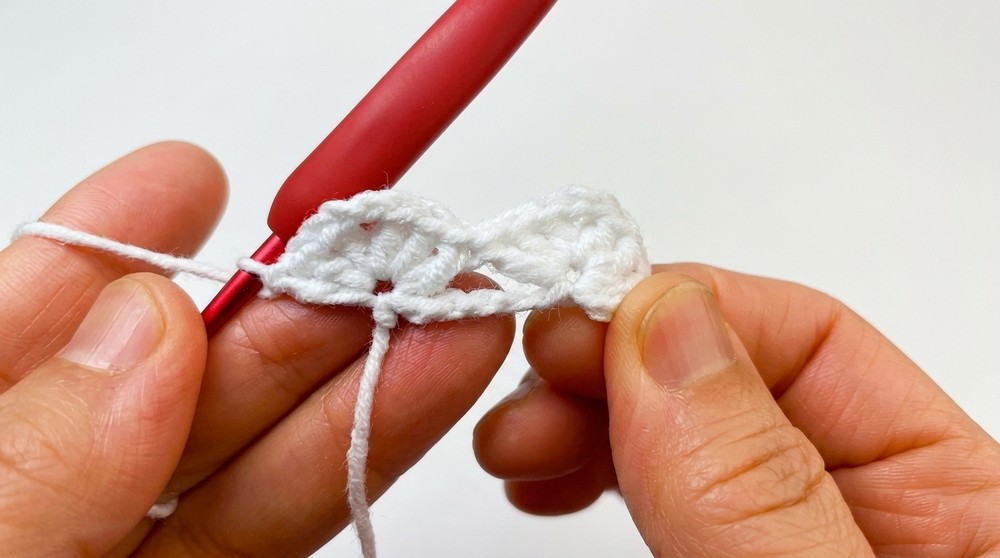
- Row 2 (and onwards):
- Chain 1 to start the row.
- Turn your work.
- Skip the first stitch.
- Work 1 slip stitch into each of the next 2 stitches.
- Work 1 slip stitch into the first chain 2 space.
- Chain 3 (counts as a double crochet), followed by 2 double crochets in the same chain 2 space.
- Chain 2, and add 3 more double crochets into the same chain 2 space.
- Continue this pattern across the rest of the row.
- Repeat Rows 3 to 29 (or Adjust):
- Follow the same pattern of row 2 for subsequent rows. Adjust the length of the headband by adding or subtracting rows but ensure the total rows are odd.
- Follow the same pattern of row 2 for subsequent rows. Adjust the length of the headband by adding or subtracting rows but ensure the total rows are odd.
- Final Row:
- Complete the last row with slip stitches and chain 5 as described in the video to form the edge for attaching ties.
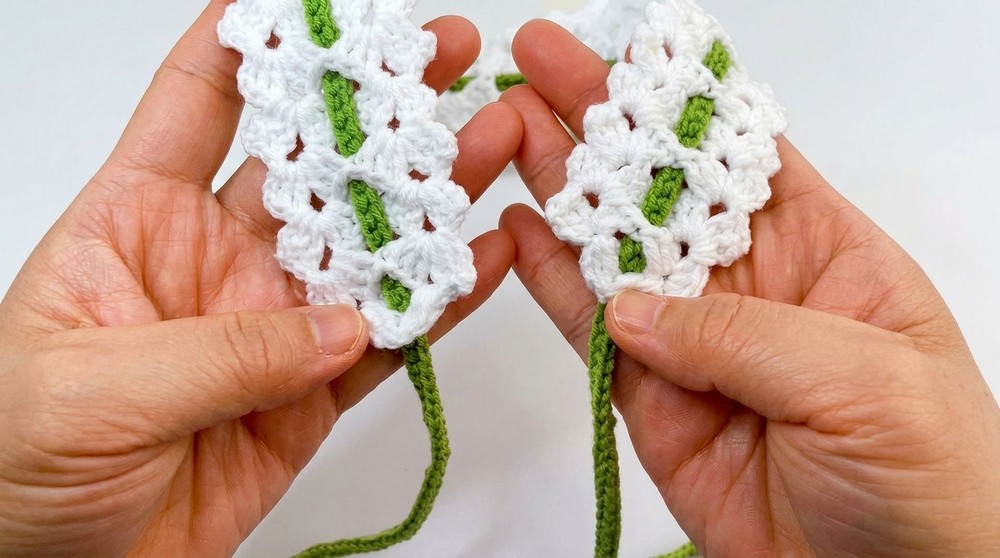
Step 2: Crochet the Headband Ties
- Make a Slip Knot: Start with a slip knot.
- Chain 4: Work a foundation chain of 4.
- Return to Fourth Back Bump:
- Make a puff stitch: 4 half double crochets (made together).
- Chain 3 and repeat another puff stitch in the same back bump.
- Chain 3 for Edging:
- End with a slip stitch in the same back bump.
- Chain 180 for the Tie Length: You may adjust the number of chain stitches based on personal preference for tie length.
- Repeat Puff Stitch at the End: Create another puff stitch to finish the tie.
- Attach the Ties:
- Follow the video instructions to sew or attach the ties to the headband securely.
- Follow the video instructions to sew or attach the ties to the headband securely.
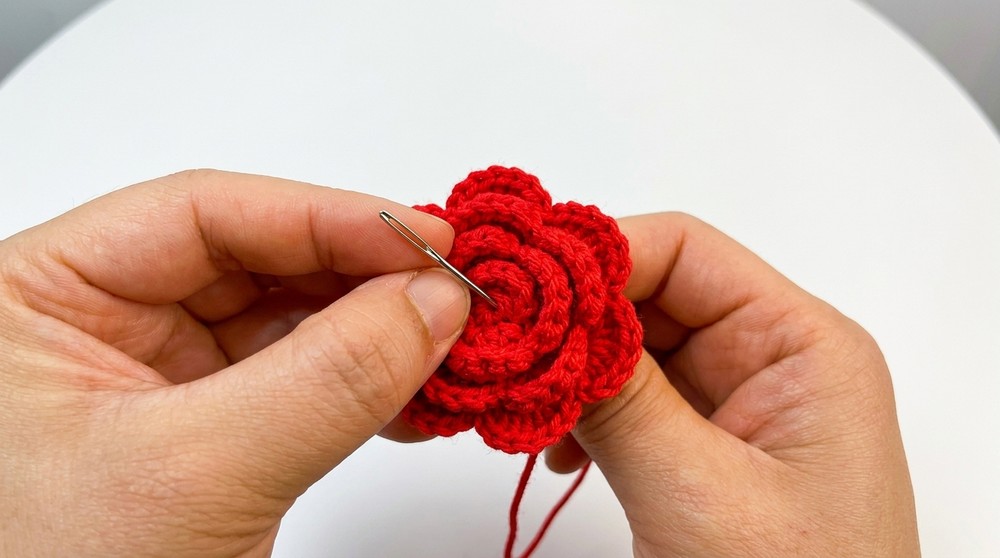
Step 3: Crochet the Rose Flower
- Make a Slip Knot: Start with a slip knot.
- Chain 34: Work a foundation chain of 34.
- Return to Fourth Back Bump:
- In the fourth chain, make 2 double crochets.
- Chain 1, skip 1 chain, and make 3 double crochets in the next back bump.
- Continue this pattern until the end of the chain.
- Row 2:
- Chain 1, turn your work.
- In the first stitch, make 1 double crochet, then 2 double crochets in the next stitch, then 1 double crochet in the next stitch.
- Repeat this pattern to form the ruffles of the rose.
- Final Shaping:
- Roll the strip from one end to form a rose shape.
- Use craft glue for temporary fixation or secure it with sewing.
Step 4: Crochet the Leaves
- Make a Slip Knot and Chain 9: Start the leaf pattern with 9 chains.
- Work Down the Chain:
- Make a slip stitch in the 2nd back bump.
- Make a single crochet in the 3rd back bump.
- Make a half double crochet in the 4th back bump.
- Work double crochets in the next 2 back bumps.
- Make a half double crochet, then a single crochet, and finish with a slip stitch in the last back bump.
- Turn and Work on the Other Side:
- Repeat the same stitches in reverse order on the opposite side of the chain.
- Make the Second Leaf:
- Create another leaf using the same pattern.
- Attach the Leaves:
- Place the leaves behind the rose and secure them using sewing or glue.
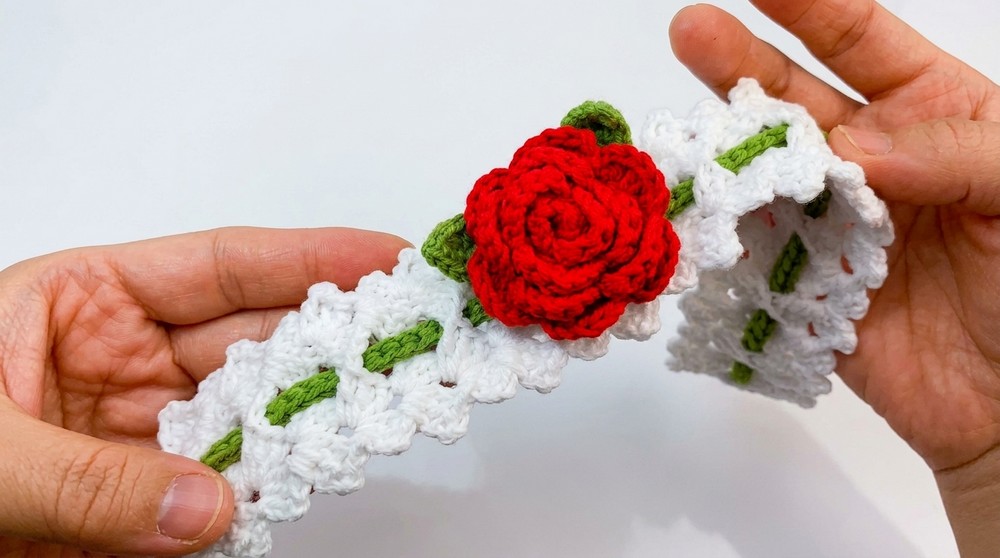
- Place the leaves behind the rose and secure them using sewing or glue.
Special Techniques:
- Modified Puff Stitch: Combines multiple half double crochets into a single puff for a dimensional look.
- Back Bump Stitching: Provides additional texture to the edges and makes the pattern sturdier.
Tips & Customization Ideas:
- Adjustable Size: Modify the length of the headband by increasing or decreasing rows as desired.
- Color Combinations: Experiment with contrasting or complementing colors for the rose, leaves, and headband.
- Decoration: Add beads, sequins, or buttons to the flower center or along the headband for extra embellishment.
- Multi Purpose Use: Use the rose as a brooch or hairclip by attaching a pin back or a hair clip.
Conclusion:
Your beautiful vintage rose headband is now ready to be worn or gifted. This project combines elegance and functionality, making it an excellent handmade accessory for casual or formal occasions. Follow these detailed steps and enjoy the process of creating a lovely crochet pattern.
Overcoming Difficulties in the Pattern
While this vintage rose headband pattern is beginner-friendly, there are a few areas where you might run into challenges, especially if you're just starting out. One of the trickiest parts is shaping the rose petals using the puff stitch technique, as it requires attention to tension and consistency to get the petals looking neat and uniform. If you're not used to working with puff stitches, it might feel a bit fiddly at first, but don't worry-practice makes perfect! I recommend starting each petal slowly and counting your loops carefully to avoid mistakes.
Another area where beginners might face difficulty is attaching the rose and leaves to the headband. Sometimes securing these pieces snugly while maintaining their shape can take a bit of patience. To overcome this, use stitch markers or pins to hold the pieces in place before sewing them. It also helps to lay the components flat and double-check their alignment before final assembly.
The good news is, the pattern itself is repetitive and forgiving, so even if your stitches are a little uneven in the beginning, the pattern will still turn out lovely.