
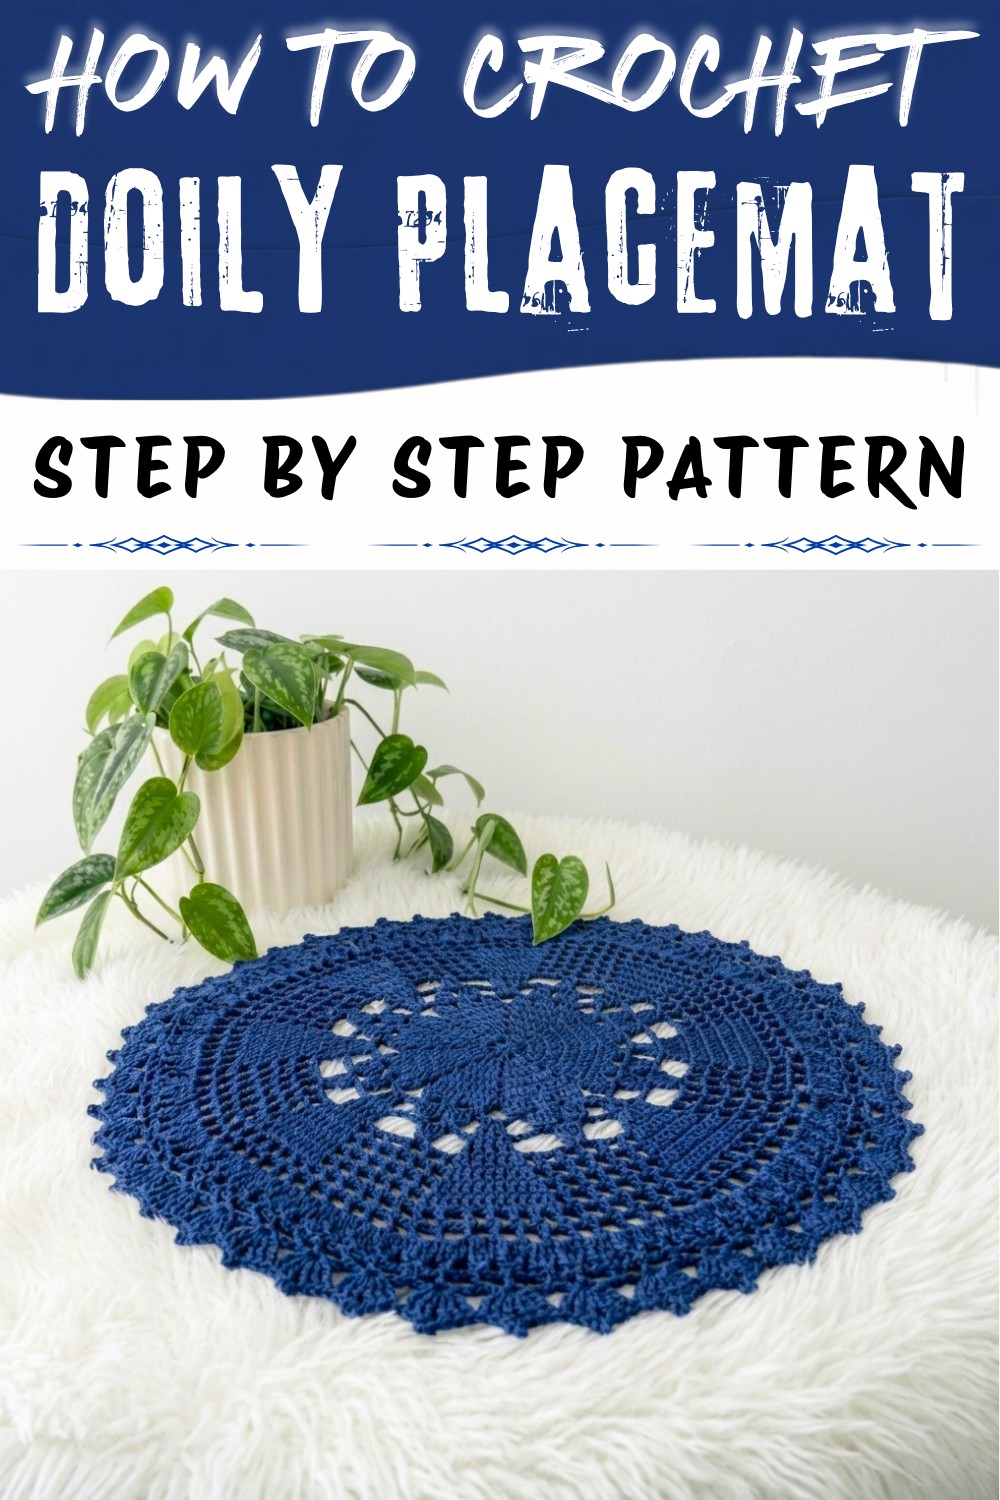
Revamp your table decor effortlessly with this Free Crochet Doily Placemat Pattern, offering elegance and charm for any occasion.
There's something about the classic charm of crochet doilies that always catches my eye-delicate yet durable, they add elegance to any space. When I learned about this free crochet doily placemat pattern, I couldn't resist giving it a try! It measures approximately 12 inches (30 centimeters) in diameter, making it the perfect centerpiece for dining tables or even as decorative accents on coffee tables. Using Hobby India size 1 super fine acrylic crochet thread and a 2mm hook, the pattern creates a stunning combination of texture and intricate detail. The soft acrylic yarn showcases the pattern beautifully, and you can customize the colors to match your home decor, think calming pastels for spring, classic white for timeless beauty, or vibrant hues for statement pieces.
Simple Free Crochet Doily Placemat Pattern for Handmade Gifts

What I loved most about crocheting this doily was how it teaches you foundational stitches while still offering variety. Starting with a magic circle, the pattern builds using double crochet, treble crochet, and slip stitches, with increases and picots sprinkled in. The treble crochet clusters particularly stand out, adding a gorgeous lacy effect to the edges. These versatile stitches allow you to take the techniques further into other projects, like crochet flowers, intricate borders for garments, or even table runners.

What You Can Make With These Skills
- Elegant placemats for everyday use or special occasions
- Table runners with similar lace detailing
- Decorative coasters for small tables and gatherings
- Intricate appliqués for pillows, bags, or garments
What You Will Learn
- Mastering the magic circle to create a strong and polished beginning
- Treble crochet clusters for elegant lacy designs
- Adding picots for decorative flair
- Incorporating increases and chains to form larger, intricate shapes
Special Techniques and Notes
- Magic Circle: Gives a neat, closed center.
- Rounds: Pattern is worked in joined rounds; pay attention to chain heights and counts.
- Picot Technique: Adds decorative points in the final round.
- Cluster (4 Treble Together): Cluster explained in pattern - do not finish each treble until final yarn over through all loops.
Materials and Yarn Choices
- Yarn: Acrylic crochet thread bright blue color is used
- (such as Hobby India, size 1, super fine, 100% acrylic); you may substitute with any fine cotton or acrylic thread.
- Crochet Hook: 2 mm crochet hook
- Tapestry/Yarn Needle: for weaving in ends
- Scissors
Recommended Yarn Colors:
Traditionally, white or cream is classic for doilies, but you can use any color to match your decor or make your project modern and unique.
Customization Ideas
- Use multicolor thread for a gradient or ombre effect
- Use metallic thread for a festive holiday doily
- Block your finished doily with light starch and pins for a crisp, professional look
- Add beads to the edging for a delicate sparkle
Finished Dimensions
- Width: Approx. 30 cm (12 inches) in diameter
Step-by-Step Doily Pattern
Step 1: Foundation Center
Round 1:
- Make a magic circle.
- Chain 3 (counts as a double crochet - dc).
- [Chain 2, dc into magic circle] - repeat until you have 8 dc, each separated by chain 2.
- Pull magic circle closed.After last ch 2, join by slip stitching to the third chain of your initial chain 3.

Begin with a neat closed circle by making a magic ring. Chain 3 stands as your first post. Alternate 1 dc & ch 2 until you have 8 dc and spaces. The ch-2 spaces will be used next round.
To Simplify: Make a loop, chain 3, do a double crochet, chain 2, repeat until you have 8 tall stitches connected by gaps, close up the loop.
Step 2: Radiant Petals
Round 2:
- Slip stitch into next ch-2 space.
- Chain 3 (counts as dc), 2 dc into same space.
- Chain 1.
- In each ch-2 space around: 3 dc, ch 1.
- Join to the top of the initial chain-3.
This makes a set of three double crochets (a "petal") in each gap, with a single chain gap in between. This forms the radiating petals.
In each space, do three tall stitches, separate with chain one - you'll see eight petals around when round finishes.
Petal Expansion
Round 3:
- Chain 3 (counts as dc), dc in same stitch (increase).
- Dc in next st.
- 2 dc in next st (increase). (5 dc in group)
- Chain 2, repeat [2 dc in first st, dc in next, 2 dc in last], ch 2, around.
- Join by slip stitch.
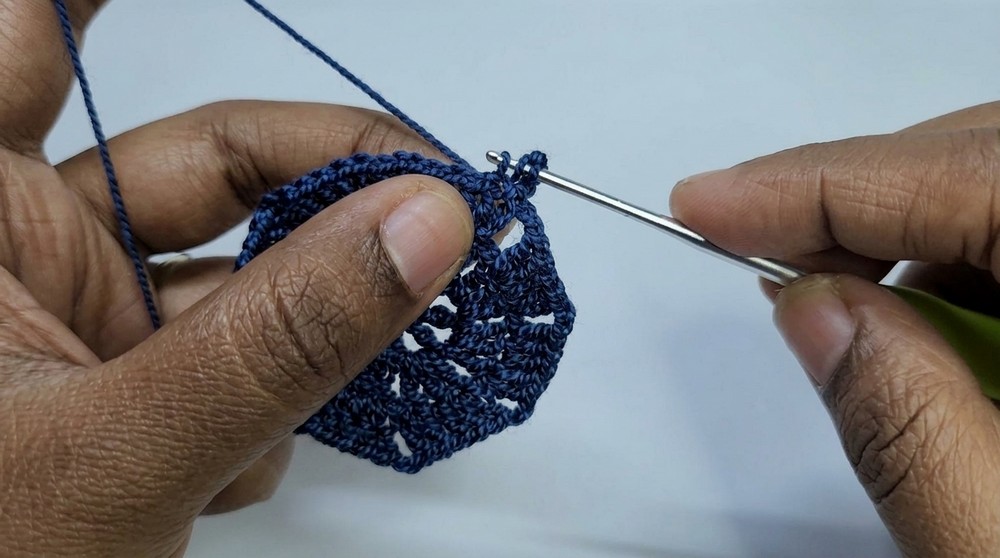
You're making each petal group larger by increasing at both ends. Chain 2 spaces create a framework for the round lace.
At the start and end of each petal, make two double crochets in one stitch, with a single dc in the middle; keep chain-2 gaps between petals.
Further Expansion
Round 4:
- Chain 3 (counts as dc), dc in same stitch (increase).
- Dc in each of next 3 sts.
- 2 dc in last st (increase). (7 dc in group)
- Chain 2, repeat [2 dc, 3 dc, 2 dc], chain 2, around.
- Join by slip stitch.
Adds one row to each petal for greater doily spread. Pattern is symmetrical, so the doily lays flat.
The start and end of every group gets two stitches in one place, fill the middle with singles; you'll see petals grow wider.
Building Out the Lacework
Round 5:
- Chain 3 (counts as dc), dc in same st.
- Dc in each of next 5 sts.
- 2 dc in last st (increase). (9 dc in each group)
- Chain 2, repeat [2 dc, 5 dc, 2 dc], ch 2, around.
- Join by slip stitch.
Keeps lacy, petaled effect expanding.
To Simplify: Same idea-inc at both ends, more single dc in between.
Cluster Feature Round
Round 6:
- **Chain 4 (counts as tr), work 3 more unfinished tr in next 3 sts, yo and pull through all loops (4 tr cluster).
- Chain 3.
- [4 tr cluster across next 4 sts, ch 3, 4 tr cluster, ch 3, 4 tr cluster] in following sets.
- Chain 7 between section repeats.
- Continue, then join to top of first cluster.**

Makes puffy clusters for visual "pop." Work each treble but don't finish until the end, then pull through all loops.
Make four tall, loose stitches (don't finish each one); then pull through all at once for a round shape. Works like a bobble!
Shaping the Doily (Mesh & Fan Section)
Round 7:
- Slip stitch into first ch-3 space.
- [4 tr cluster in ch-3 space, ch 3] across next 2 gaps.
- Chain 4, then 3 tr in 4th ch of every ch-7 space, ch 4.**
- Repeat pattern; join with slip stitch.
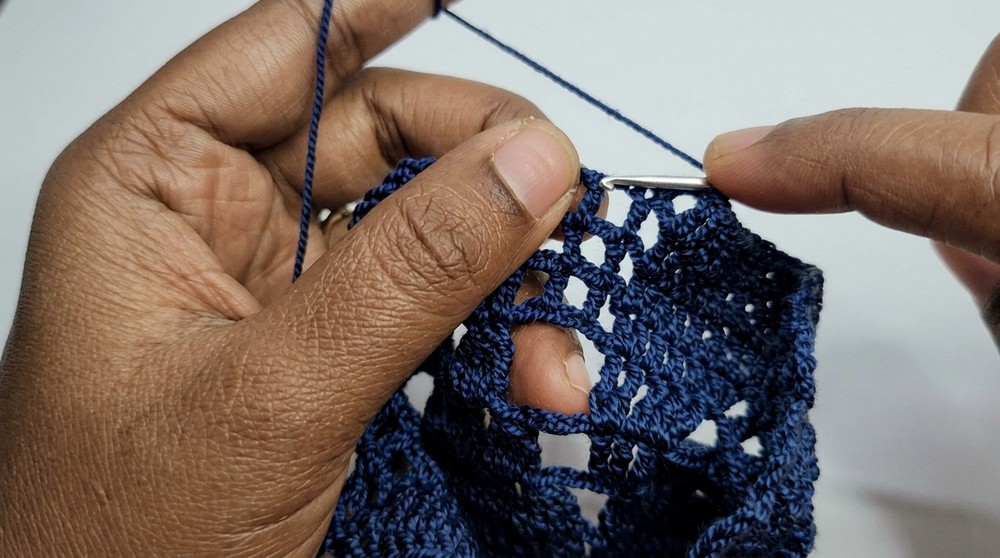
Begins to form spaced fans and mesh lattice structure (beautiful "open" rounds of doilies).
Continue making clusters in each small gap, chains in between. In the long chain space, fill with three tall stitches for a fancy look.
Mesh Expansion
Round 8:
- Slip stitch into first ch-3 space, chain 4 (tr), work 3 more tr into same space (4 tr cluster).
- Chain 6.
- [Two tr into first tr of ch-3, tr in each of next two sts, inc in last st (two tr), chain 6].
- 4 tr cluster in next ch-3 space.
- Repeat around, join with slip stitch.
Increases mesh, creating more openwork and giving the doily "points."
Keep working clusters in small gaps and chains, sometimes putting extra stitches for shape at the ends.
Framing the Openwork
Round 9:
- Chain 3 (counts as dc), chain 2, skip one chain, dc in next chain. Repeat: [ch 2, skip ch, dc].
- At cluster edge, work inc (2 dc in first st), dc in each of next three, inc in last st (2 dc).
- Repeat steps; join with slip stitch.
Forms the frame base and begins the "squared off" mesh background for the final border.
To Simplify: Make double crochets separated by chain-2, skipping a chain between, with increases to keep the lace growing.
Mesh Framework & Expansion
Round 10:
- Chain 3 (counts as dc), chain 2, dc in next st.
- Continue: [ch 2, dc], working (increase: 2 dc in first, five dc across, 2 dc in last) at petal points.
- Continue around; join with slip stitch.
Keeps the doily flat and adds space for the final lacy edge.
Similar to last round but with more regular dc/ch-2/dc repeats. Place increases for "fan" shapes in the same spot each time.
Decorative Border Build-Up
Round 11 & 12:
- Continue as previous, adding two more increase rounds. Increases are: [2 dc in first st, 7 dc, 2 dc in last st] then [2 dc in first st, 9 dc, 2 dc in last st].
- Chain 2, dc as above between groups.
These build the beautiful, lacy edge out to full size, giving it the ruffled look we love in doilies.
Add two dc at start and end of each large petal; chain 2 between all other dcs. Each round, more dcs per petal.
Lattice Mesh Rounds
Round 13 & 14:
- **Continue pattern: chain 3, chain 2, dc in next st, repeat around, working into each dc from prior round, with chain-2 spaces throughout.
- At the "petals," continue to space out and skip stitches as needed to maintain circle.**
These rounds maintain the structure and show off your lacework.*
Continue making double crochets with chain-2 between, keeping your doily flat with no rippling or cupping. It's okay to count or fudge a stitch to keep it round!
Elegant Clusters & Final Picot Edge
Round 15:
- Slip stitch into first chain-2 space.
- In each chain-2 space all around:
- Work 4 treble crochet cluster (chain 4, 3 more tr in same space, pull through all loops), chain 3 between.
- Join with slip stitch.
Gives a bold, architectural edge-classic in crochet doilies.
Final Round - Scallop, Picot, and Finish!
Round 16 (Last Round):
- Chain 4 (counts as tr), 2 tr in same stitch (3 tr total).
- Chain 5, then make a picot by sl st into the base of ch-5.
- 3 more tr in same stitch (6 tr cluster in total).
- Skip one st, in next: [3 tr, picot, 3 tr], repeat.
- Continue pattern, join to first chain-4 with slip stitch, fasten off.
Creates a luxurious scalloped, picot edge. This is the "crown" that finishes your doily! Secure and weave in all ends.
To Simplify: In each main gap, do three tall stitches, a five-chain picot (for a point), and three more tall stitches-all in the same loop! Skip the next stitch, and repeat.
Important Remarks
- Count stitches regularly-place a marker if needed!
- If your doily starts to ruffle, try using a slightly smaller hook.
- Blocking is key for symmetry and professional finish; pin out every scallop when damp.