
Pretty Crochet Christmas Wreath Free Pattern to Hang Around Your Home
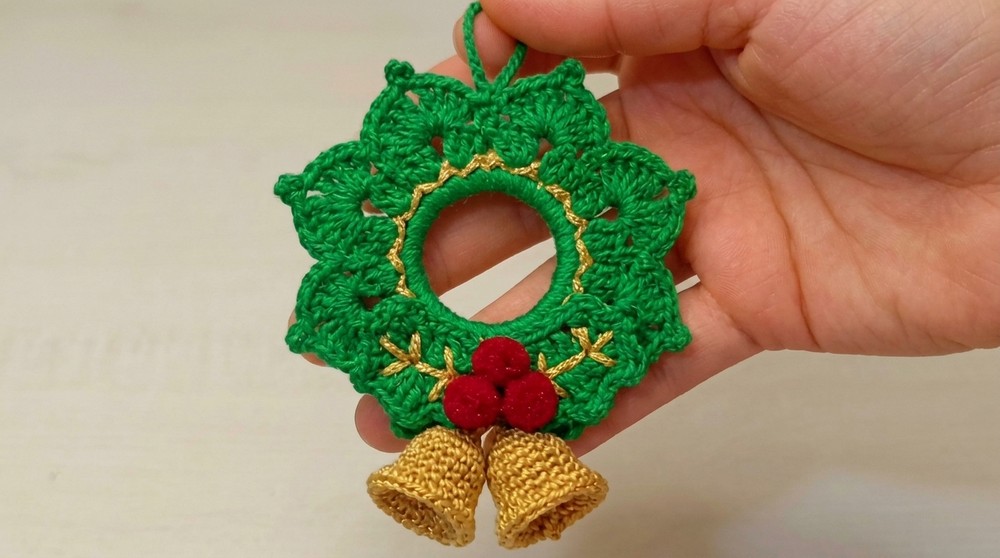
This wreath features a lovely circular shape, layered with lush, fluffy textures that mimic the fullness of winter greenery. The tactile quality of the yarn gives it a comforting softness, while the structure holds its form perfectly, making it a versatile decoration for your home. One of the joys of this particular project is how versatile it can be-you can easily customize it with your choice of colors or even add small embellishments like buttons or tiny bells to fit your unique holiday style.

Whether you're fairly new to crocheting or have some experience, this wreath pattern offers a delightful challenge that strikes a great balance between simple and satisfying. Working through the rounds helps hone your stitch consistency, and the shaping skills you'll practice are useful for many other projects down the line. Plus, finishing with a festive wreath is incredibly rewarding.
If you've been searching for a sweet, approachable way to celebrate the season with your yarn, this project is a wonderful pick. Dive into the warmth and fun of making a piece that will brighten your holidays for years to come. When you're ready to get started, you can check out the free pattern to guide you every step of the way.
Crochet Ring Garland - Step-by-Step Pattern
A crochet ring wreath featuring a decorative mesh grid, cluster edging, and festive shell border serves as both a functional and ornamental piece, making it a thoughtful and creative accent for holidays and celebrations. Beginning with a simple upcycled plastic ring base, the design employs accessible stitches and layering techniques to ensure a complete finish. Combined with embellishments such as ribbons, beads, bow or a bell, the result is an elegant yet resourceful decoration that highlights both colorwork and textured detail. This pattern draws from classic crochet skills, guiding every stage to assemble a refined wreath suitable for seasonal use, gifts, or general decor.
Quick Overview of Pattern
- The base layer covers a plastic ring with neat single crochet stitches.
- A mesh grid is constructed with linked chain and double crochet, forming open squares.
- Cluster edging is worked into mesh spaces to add coordinated texture.
- Chain loops create an outer scalloped foundation round.
- The festive shell border is established in a contrasting color, bringing both fullness and vibrancy.
- A hanging loop is created for versatile display options.
- Decorative assembly utilizes beads, faux stones, a bow, and optionally, a tiny crochet bell for a finishing touch.
Notes
- For the best effect, select contrasting or complementary colors for the shell border and main ring cover.
- A recycled plastic ring (bottle/can base) provides structure and reusability; ensure the ring is clean and smooth.
- Gauge is not strict; adapt the hook and yarn weight as desired to match your style.
- Hot glue ensures a secure hold for beads and bows but use in well-ventilated areas.
- Every crochet round is continuous; mark the beginning of each round to keep your place.
- Adjust the length of the hanging loop to fit your intended use or recipient.
- Embellishments are optional but recommended for festive flair.
Skill Level
- Advanced Beginner:
- Participants should feel comfortable with basic stitches (single, double, half double crochet), working in the round, and simple stitch repeats. Basic assembly knowledge is helpful.
Materials
- Plastic bottle/can ring base (clean and smooth for best results)
- 1 mm yarn (green and white, or replace with any two contrasting shades)
- 1.75 mm crochet hook
- Scissors
- Decorative beads or faux stones (for embellishing the outer border)
- Ribbon or bow (store-bought or crocheted)
- Small crochet bell (optional for extra festivity)
- Strong adhesive or hot glue (for assembling beads and bows)
Measurements / Sizing
- Finished diameter: Varies by base ring size; typically 7-10 cm (3-4 inches) across.
- Outer circumference (with border): May reach up to 15 cm (6 inches), depending on yarn, hook, and tension.
- Hanging loop: Standard length of 40 chains; adjust for shortened or longer display options.
Gauge
- No precise gauge is required for this project.
- Ensure your single crochet stitches snugly cover the ring so that no background is visible.
Stitch Abbreviations
- ch = chain
- sc = single crochet
- dc = double crochet
- hdc = half double crochet
- sl st = slip stitch
Special Stitches
- Cluster: Chain 3, then 3 double crochets in designated space-this combination produces a raised cluster.
- Shell: 5 double crochets, chain 3, 5 double crochets-all worked within the same space for a full, rounded shell.
The Crochet Pattern
Base Layer: Ring Foundation
- Round 1: Covering the Base
- Attach your chosen yarn to the plastic ring.
- Work single crochet stitches (sc) around the entire ring, keeping stitches packed closely together-ensure no plastic is visible.

-
- Continue around until the base is fully covered.
- Slip stitch (sl st) to the first stitch to join and finish this round.

Round 2: Mesh Grid
- Begin Mesh Grid:
- Chain 5 (counts as the first double crochet [dc] plus a chain-2 space).
- Skip 2 stitches, then dc into the 3rd stitch.
- Repeat the following sequence all the way around:
- [Chain 2, skip 2 stitches, double crochet in next stitch]
- Continue this repeat to form approximately 17 mesh squares around the ring (adjust if necessary for your ring size).
- At the end of the round, sl st into the 3rd chain of the starting chain-5 to close.
Round 3: Cluster Edging
- Start Edging:
- Chain 3, then work 3 double crochets into the same space.
- Slip stitch into the center of the next mesh square (the chain-2 space).
- Repeat for the round as follows:
- [Chain 3, 3 dc in the same space; sl st to next mesh center]
- Continue all the way around the ring until each mesh square sports a cluster.
- Sl st into the first stitch to join, then slip stitch (or weave) up to the tip of the first cluster to begin the next round.
Round 4: Outer Chain Loops
- Begin Chain Loops:
- Chain 4, slip stitch into the tip (top) of the next cluster.
- Repeat this sequence:
- [Chain 4, sl st to next cluster tip]
- Move around the entire outer edge.
- On completion, fasten off yarn and weave in the ends for a neat finish.

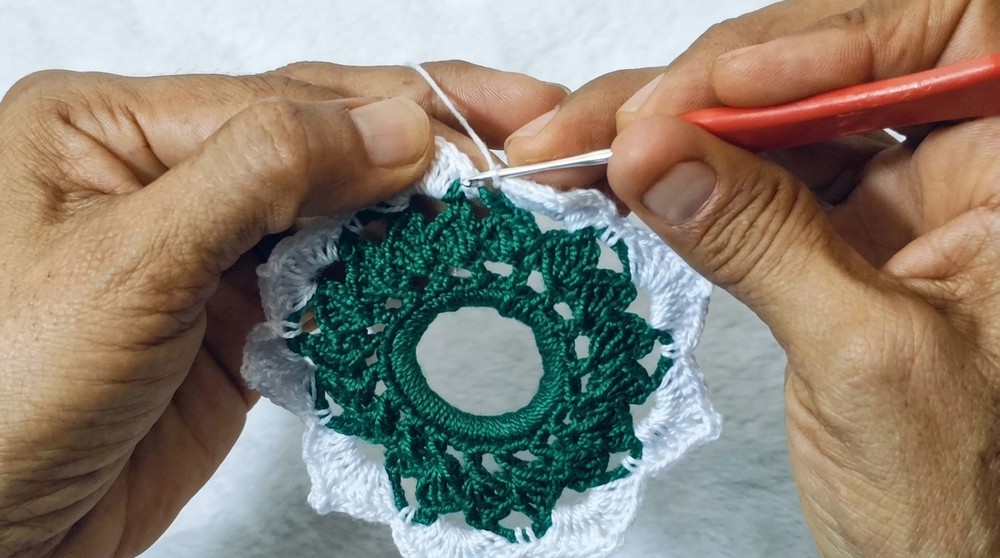
Round 5: Festive Shell Border (White Yarn)
- Attach White Yarn:
- Join white yarn (or contrasting color) in any chain 4-loop with a half double crochet (hdc).
- In the next chain-loop, work: 5 dc, ch 3, 5 dc all in the same space.
- In the following chain-loop, hdc again.
- Repeat for the entire round:
- [5 dc, ch 3, 5 dc in next loop; hdc in following loop]
- Proceed until every alternate loop has a full shell with half-double crochet in between for spacing.
- Sl st into the first hdc to close the round.
Hanging Loop
- Start Loop:
- Select any stitch along the border to attach.
- Chain 40 (or chain 25-30 for a shorter loop).
- Slip stitch back down the chain to return to the base.
- Fasten off securely and pull yarn tail through to finish neatly.
Assembly & Finished Size
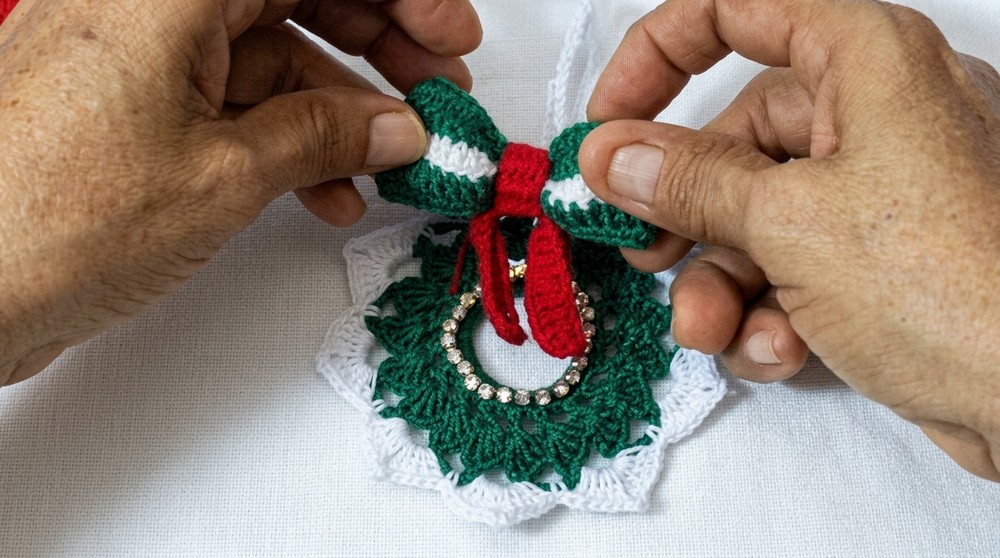
- Bead & Ribbon Attachment:
- Carefully glue beads or faux stones around the finished outer shell border. Apply small amounts of strong adhesive/hot glue so the yarn does not saturate.
- Attach a decorative bow or ribbon at the top or bottom, sewing or gluing securely.
-
- For additional charm, include a small crochet bell either at the center or bottom, if desired.
- Finished Dimensions: The wreath should now measure approximately 15 cm (6 inches) across at the border, with a hanging loop extending as you prefer. The structure remains lightweight and firm thanks to the upcycled ring base.
Conclusion
Constructing this crochet ring wreath provides a valuable opportunity to practice foundational rounds, decorative meshwork, and refined border techniques. Through careful assembly, the motif achieves both visual richness and structural integrity, allowing for repeated seasonal use or year-round display. Layered stitching enhances the tactile appeal, while crystal beads, ribbons, and bells allow for limitless individual adaptation. Tailor your wreath with unique colors and embellishments to suit any festive theme or personal taste. The resulting piece combines accessible materials and satisfying processes, instilling confidence and ensuring a pleasing final ornament that brightens any space. 