
Keep your Easter treats organized and stylish with a Free Crochet Bunny Basket Pattern that's irresistibly cute and easy to make.
If you're searching for a project that's as adorable as it is useful, let me introduce you to the magic of a free crochet Bunny Basket pattern. Crocheting this basket feels like crocheting a little piece of happiness, imagine big, floppy bunny ears peeking out from a soft, hand-made basket, ready to store everything from Easter eggs to crochet supplies or little treasures on your desk. Whether you want a sweet springtime centerpiece or just a cute way to keep your things organized, this project brings instant smiles.
Quick and Easy Free Crochet Bunny Basket Pattern

What I love about the Bunny Basket is how it starts with the simplest of stitches and spins them into something special. You'll work with the single crochet stitch and learn the magic ring (yes, it does feel a bit magical!). These techniques not only make the basket sturdy enough to hold jellybeans and goodies but also give it a close-knit, plush look that's perfect for showing off those bunny features. You'll be amazed at how just a few basic moves can shape 3D ears and a round, cheerful bunny face.
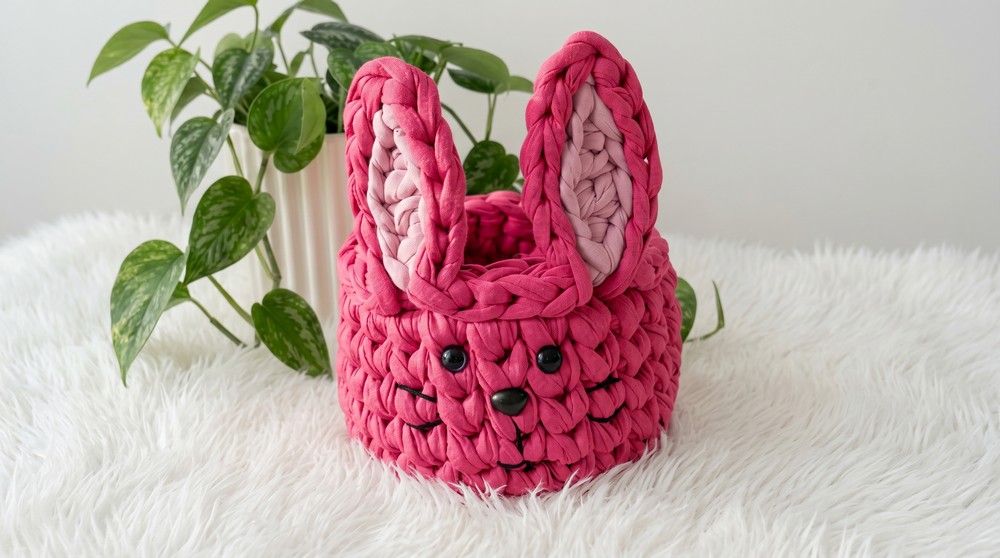
By making this Bunny Basket, you'll learn much more than following a pattern. You'll discover how to work in the round, how to shape soft-sculpted pieces, and how tiny details can bring your creations to life. These skills don't stop at baskets-you'll soon be whipping up amigurumi creatures, little bowls, or cozy hats, all using the same building blocks you master here. So, grab your yarn and hook, and get ready to crochet a Bunny Basket that's not just a container, but a charming start to so many creative adventures!
What You Learn by Using This Pattern
By following this pattern, you'll discover:
- How to add decorative elements (bunny ears) to a basic crochet basket, broadening your creative skills.
- Mastery of shaping-using different stitches to create dimension (such as "plump" ears).
- How to create a neat finish with slip stitch borders and learn to join pieces seamlessly.
- Practice in placement and symmetry for embellishments, vital for professional-looking projects.
- Techniques for beginner-level color changes or using yarn leftovers, great for reducing waste and encouraging eco-friendly crocheting.
Who Can Use This Pattern?
- Absolute beginners looking for a first taste of "3D" crochet beyond flat pieces.
- Parents and grandparents wanting to create Easter gifts for little ones.
- Teachers, volunteers, and crafters who need quick, charming items for holiday bazaars or school events.
- Anyone who has a crochet basket base ready and wants to give it a seasonal twist!
Materials & Tools
- Yarn: Medium-weight (worsted) yarn in your preferred colors. Recommend bright pink for the basket body and light pink shade for the bunny ears.
- Hook: Size H/8 (5 mm) crochet hook
- Tapestry Needle: For sewing and finishing
- Scissors: For cutting yarn
- Glue (optional): To secure knots and finishes
Easter Basket Bunny Ears (Add-On for Crochet Basket)
Basket Measurements
- Base: 12 cm diameter
- Height: 8 cm
Step 1: Preparation
- Finish your basket and its final round (typically in slip stitches).
- Use the front (not the seam/amendment side) for ear placement.
- Mark where you want the bunny ears-leave 3 stitches between ears.
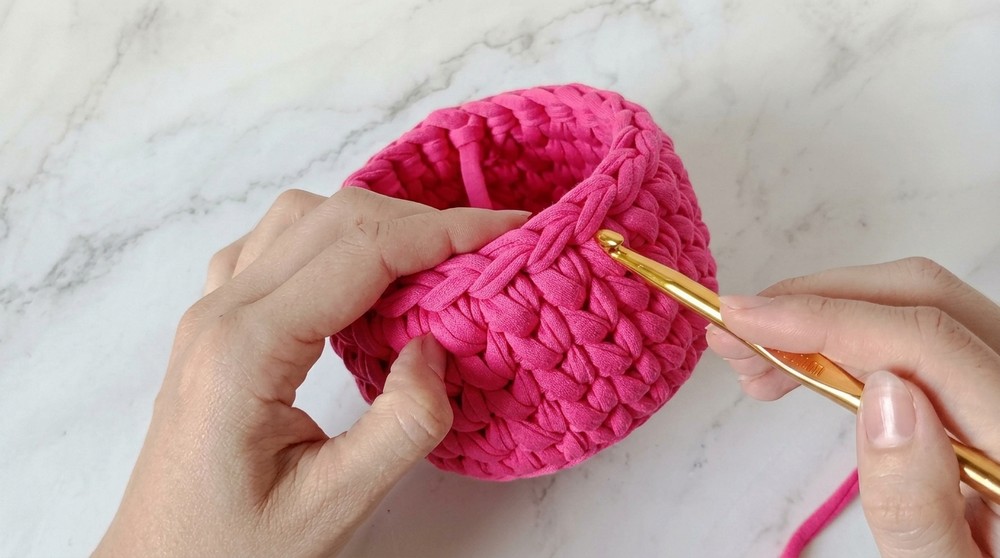
With a simple, sturdy crochet basket in hand, you're about to transform it into something special. The magic lies not just in the stitches, but in the imagination-you're dreaming up a spring scene, waiting to appear under your fingers.
Explanation:
You'll be adding two ears to the front edge of your finished basket, making sure they're centered with equal spacing.
Step 2: First Bunny Ear
- Attach Yarn:
- With basket facing you, use a yarn tail near intended ear placement (or attach a new yarn).
- Chain 7:
- Chain 7.
- Skip last chain (do not work back into it).
- Starting in the second chain from hook:
- Slip stitch (makes the tip).
- Single crochet in the next chain.
- 2 double crochets in the next chain (for a plump middle).
- Single crochet in the next chain.
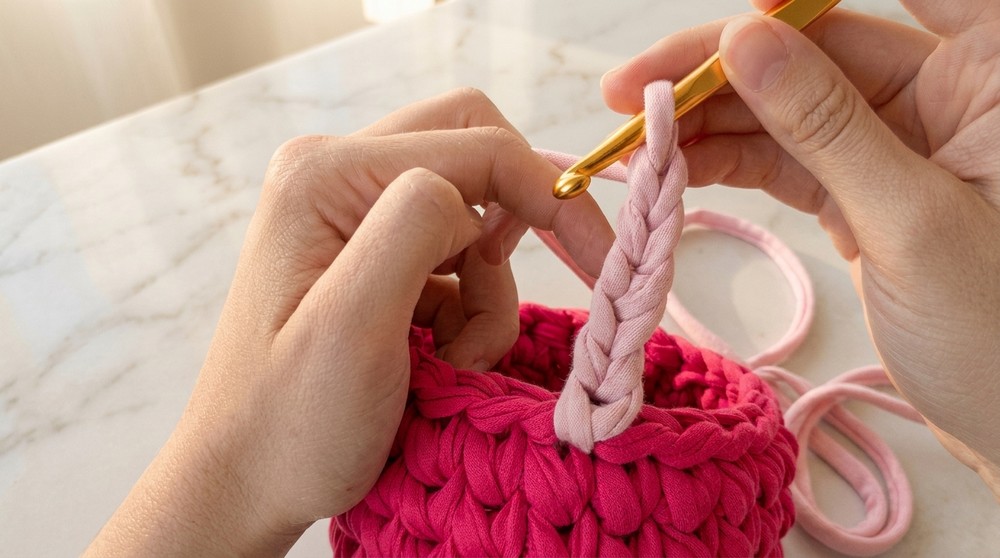
- Slip stitch in the next chain.
You have now worked back down the chain - ear shape is forming.
- Starting in the second chain from hook:
With playful chains and swift rounds, you bring bunny ears to life, shaping each curve and tip. As you attach them, your basket takes on a personality-a joyful companion perfect for holding Easter eggs or sweet spring surprises.
- Secure Ear:
- Slip stitch into the same basket stitch where you started the ear.
- Slip stitch once more for extra security.
- Cut yarn, pull tail to inside of the basket.
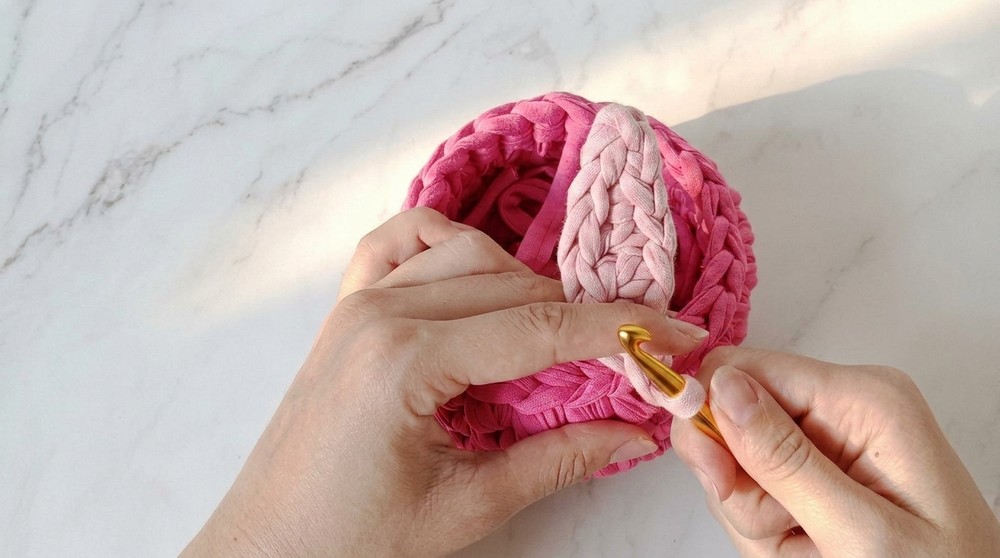
Explanation:
By working up (chain) and back down (stitches), you shape one bunny ear with a plump center. Secure with two slip stitches so the ear stays upright.
Step 3: Second Ear
- Skip 3 stitches (for ear spacing).
- Repeat Step 2 for the second ear, attaching yarn and working exactly the same pattern: chain 7, slip, sc, 2 dc, sc, slip on the way back.
- Secure ear as before.
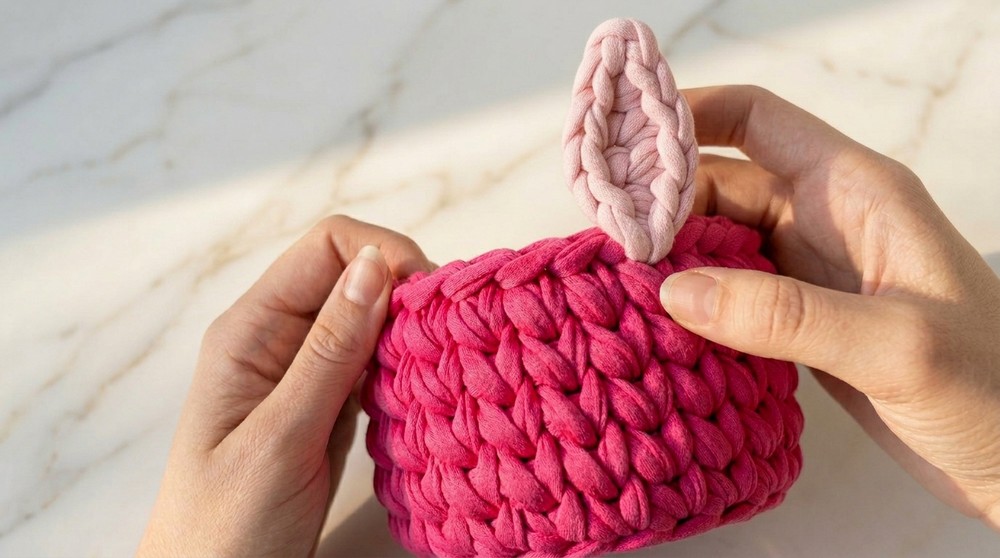
The second ear is spaced for symmetry, so your basket looks cute and balanced.
Step 4: Finishing
- Tie off yarn at the back inside for both ears.
- Knot ends securely.
- Optional: add a drop of glue to knots for extra security (especially with child use or heavy eggs).
- Adjust ear shape so they're perky. If you want, gently bend or curve ears in place.
By tying and maybe gluing the ends, your ears won't unravel. Final shaping makes them stand up or curve as you like.
Step 5: Edging Around Ears
- Work slip stitches ("very low points") or single crochets around the edge of each ear to create a stripe effect and give structure:
- For each stitch, pick up only the back loop.
- When you reach the ear tip, chain one to hop over, then continue down the other side.
- Skip the last stitch at the base and attach in the same basket stitch as the ear started.
The edging makes your bunny ears look neat and adds a subtle stripe (great for realism).
Step 6: Repeat For Both Ears
- Follow Steps 4 & 5 for both ears.
Fasten the last knot, tweak those ears, and marvel at your creation! The basket is no longer plain, but festive, whimsical, and full of charm. Whether you gift it or keep it, you'll savor the feeling of having made something both beautiful and useful with your own hands.
Explanation:
Repeating ensures symmetry and cuteness-your bunny basket will look handmade and polished!
Step 7: Final Adjustments
- Position ears as desired (upright or floppy).
- Tuck in any loose threads securely.
- Fill basket with eggs, treats, or gifts!
Customization Ideas
- Add an inner "ear": Use a different-coloured yarn for the center, whipstitch it on for realism.
- Make them floppy: Use a softer yarn or add more chains at the start for longer, bendable ears.
- Decorate with bows or flowers for a girly touch.
- Sprinkle on some glitter or sew on felt spots, hearts, or sequins.
- Try striped, speckled, or variegated yarn for an artisan Easter look.
Special Techniques & Stitches
- Chains (ch), slip stitches (sl st), single crochets (sc), and double crochets (dc).
- Elongated single crochet: Provides a "plump" look-try inserting your hook in the row below for extra length.
- Back loop only: Edges and borders are worked in the back loop for pretty ridges.
- Invisible finishes: Use weaving or glue for super neat insides.
- Mastering shaping with increases-placement of 2 dc in one spot gives dimensionality.
Important Remarks & Tips
- Keep ears symmetric! Use stitch markers when in doubt, so both ears are spaced and shaped identically.
- Don't crochet too tightly, especially if you want ears to stand up.
- For a firm basket, cotton yarns often provide better shape than soft acrylics.
- Glue is optional, but recommended for basket gifts for small children.
- Practice first: Try working the ear shapes separately on a swatch, then attach to your final basket.
Beginner-Friendly Explanation for Each Round/Section:
- Chain & stitch sequence: Builds ear shape simply.
- Slip stitch & single crochet: Make ear tip and base sturdy.
- Double crochet in the middle: Makes the ear look plump and realistic.
- Edging: Back-loop only gives striped detail and firmness.
- Spacing: 3 stitches between ears keeps them even.
- Finishing: Secure knots and glue keeps basket safe for use.
Your adorable bunny basket is now Easter-ready!
Congrats! Adjust for more ears or add embellishments (bows, felt, etc.) as desired.