
In warm, sunlit afternoons or breezy evenings, there's something special about wearing a piece that feels lightweight yet stylish, something like a crochet blouse. Made with intricate stitching techniques, a crochet blouse pattern offers both beauty and practicality. Perfect for summer outings, it pairs wonderfully with high-waisted skirts or denim shorts for a casual vibe, or under tailored blazers for a polished look. You can use this pattern to make a poncho, a lacy cardigan, or a summer dress.

The breathable texture provides comfort in warmer weather, while its handmade charm makes it unique to your wardrobe. Not only does it allow you to experiment with designs and textures, but it also serves as a sustainable alternative to fast fashion. Versatile, elegant, and personal, a crochet blouse is more than clothing, it's an effortless statement.
Quick Summary of the Crochet Blouse Pattern
- Step 1: Make the Neckline Base
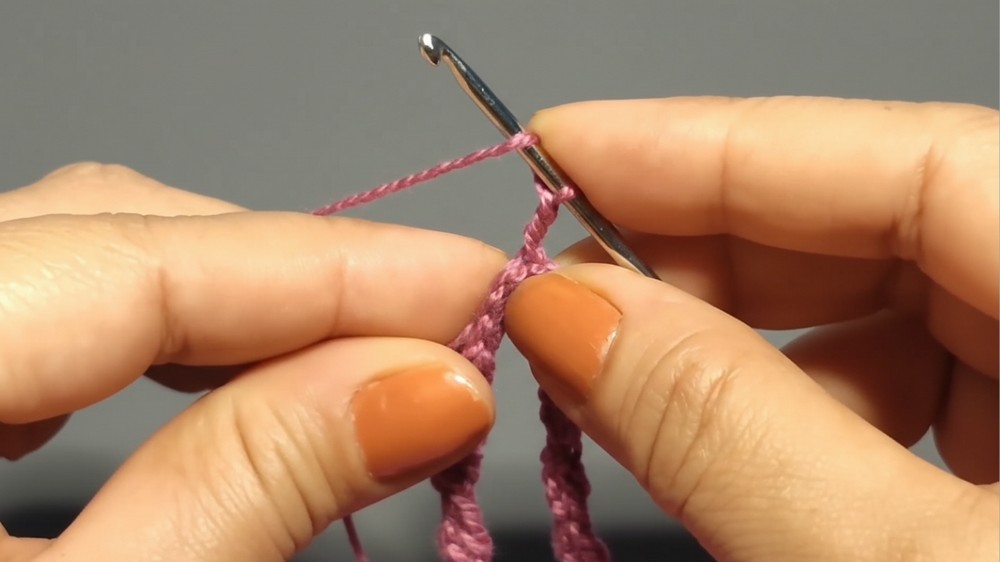
Begin by chaining 80 stitches with your aqua-colored cotton yarn and metal number zero hook (adjust the number of chains if you want a different size). Join the chain with a slip stitch to form a ring, making sure it is not twisted. - Step 2: Crochet the First Round of Fans
Start by creating your first fan (2 double crochets, 2 chains, 2 double crochets in one stitch). Then, chain three, work a half double crochet in the next stitch, chain three, and make another fan. Continue this sequence around the circle, ending with a total of 40 fans. - Step 3: Build the Blouse Rounds
For each following round, work into the spaces between the fans: slip stitch to the center of the next fan, work a new fan, and continue alternating fans and chains as established. Increase the chain spaces to five as you move into later rounds to allow the blouse to widen. Repeat this pattern until you reach 13-20 rounds or your desired body length. - Step 4: Shape the Sleeves and Body
At the correct round, separate stitches for sleeves: use markers or yarn to section off 12 fans for each sleeve. Continue working the fans and chain pattern across both the sleeves and the body, adjusting chains as needed for shape and fit. Add additional rounds if you want longer sleeves or body. - Step 5: Add Finishing to Neckline
For a neat neckline finish, switch to a smaller hook. Work a round of delicate stitches along the neck (such as double crochet and chains), then finish with a slip stitch to close. Hide any loose ends by weaving them in on the reverse side. - Step 6: Final Touches
If desired, add a border to the ends of the sleeves in the same style as the neckline. Adjust the length by adding more rounds if you want the blouse longer. When finished, trim and weave in all yarn ends securely for a polished look.
Materials
- Yarn: Swan Fisherwoman Thread (100% cotton, 100g/skein, Dark blush pink color). Approximately 300-400g is needed.
- Crochet Hook: Metal hook, size 0.
- Scissors: For trimming excess yarn.
- Tapestry Needle: For weaving ends.
- Measuring Tape: To ensure proper gauge and measurements.
- Optional Accessories:
- Stitch markers for tracking stitches.
Gauge
- Fan Pattern Gauge: 40 fans distributed evenly across the neckline.
- Finished Square Gauge: Each fan sits neatly within a ring of 80 eyelets.
Finished Size
- Designed for an average adult, fitting a height of 1.60 meters. Length and width can be adjusted with chain increases and extra rounds.

Techniques Used
- Fan Stitch: Cluster of double crochet stitches to create a textured design.
- Half Double Crochet (HDC): Compact stitch for transition spaces.
- Slip Stitch (SS): For joining rounds and adding a polished finish.
- Adjustable Neckline: Custom alterations for neckline size.
- Batwing Sleeves: Expansion technique for wide flared sleeves.
This step-by-step pattern helps create a gorgeous crochet blouse with fan stitches, batwing-style sleeves, and a delicate finish. Using Dark blush pink cotton yarn, this design offers both elegance and versatility.
Pattern Instructions
1: Creating the Foundation Ring
- Chain 4 and slip stitch into the first chain to form a ring.
- Chain 80 additional stitches, evenly spaced, creating eyelets for the pattern foundation.
2: Round 1 (Fans and Neckline Setup)
- Begin by joining the ring with a slip stitch, ensuring it isn't twisted.
- Work the following in sequence:
- Fan: 2 double crochet (DC), 2 chains, and 2 DC into an eyelet.
- Chain 3.
- Skip one eyelet and work a half double crochet (HDC) in the next.
- Chain 3 and skip another eyelet, then repeat the fan stitch.
- Continue this sequence until completing the round, finishing with 40 fans.
- Close with a slip stitch at the end.
3: Round 2
- Begin with a slip stitch into the center of the nearest fan.
- Work 1 fan (2 DC + chain 2 + 2 DC) in each fan-space.
- In the chain spaces between fans:
- Chain 2, then join with HDC stitches.
- Repeat this fan and chain pattern around. Close the round.

4: Rounds 3-7
- Continue with the fan stitch pattern:
- Fan stitches into fan spaces.
- HDC stitches in chain spaces between fans.
- Increase chain spaces to 3 chains across Rounds 4-7.
5: Expanding the Yoke (Rounds 8-20)
- In Round 8, increase the chain spaces to 5 chains.
- Maintain the fan stitch across all rounds, ensuring even spacing:
- Fans into fan spaces.
- HDC stitches into chain spaces.
- Repeat until reaching round 20 for yoke expansion.

6: Separating the Sleeves
- At Round 21, mark 12 fans on each side for the sleeves.
- Continue crocheting in the round:
- Skip over the marked sleeve sections.
- Connect the body fans together at the underarm with chain 1.
- For bell sleeves:
- After completing the body, work separately on sleeve sections using the same fan stitch pattern.
7: Building the Body
- Continue the fan stitch and HDC pattern (as previously established).
- Maintain chain spaces with 5 chains between fans.
- Crochet rounds until reaching your desired blouse length.
8: Adding Batwing Sleeves
- Work around each marked sleeve section.
- Use the established fan pattern to expand sleeves and create a flare:
- Increase fans across every 6-8 fans for a batwing effect.
- Adjust sleeve length as preferred.
9: Edging and Finishing
Bottom Edge
- Switch to a smaller hook for finer detail.
- Work 1 single crochet (SC) + chain 2 in each chain-space.

Neckline
- Add SC stitches for tightening or follow a neckline reduction guide for custom fits.
- Repeat edging (SC + chain 2).
Sleeves
- Add edging to sleeve cuffs for consistency with the blouse design.
Step 10: Last Round
- Move to fan centers, making the final round with delicate petals:
- Work 2 chains, followed by 2 incomplete double crochets. Close them together.
- Join the petals with half double crochets (HDC).
- End the round with a slip stitch.

- Leave a long thread for finishing, securing all loose ends with the tapestry needle.
Customization Options
- Size Adjustments:
- Modify the foundation chain (multiples of 2 for 80 eyelets).
- Bell Sleeve Enhancements:
- Add decorative colors, lace edging, or pom-pom trims.
- Color Combinations:
- Mix gradients or bold contrasts for dynamic designs.
Conclusion
The fan-stitched blouse is an elegant and versatile creation, perfect for casual wear or special occasions. It combines the charm of lightweight cotton yarn with an intricate fan pattern, bell sleeves, and a delicate neckline finish. With clear steps and customizable elements, this blouse can reflect your unique style and creativity.