
Stepping into a sunny summer market, carrying a delicate yet functional accessory that turns heads-your very own handmade crochet lace bag. Crafted with intricate patterns and lightweight yarn, this bag perfectly balances practicality and elegance, making it ideal for beach outings, casual brunches, or even as a charming eco-friendly shopping tote.
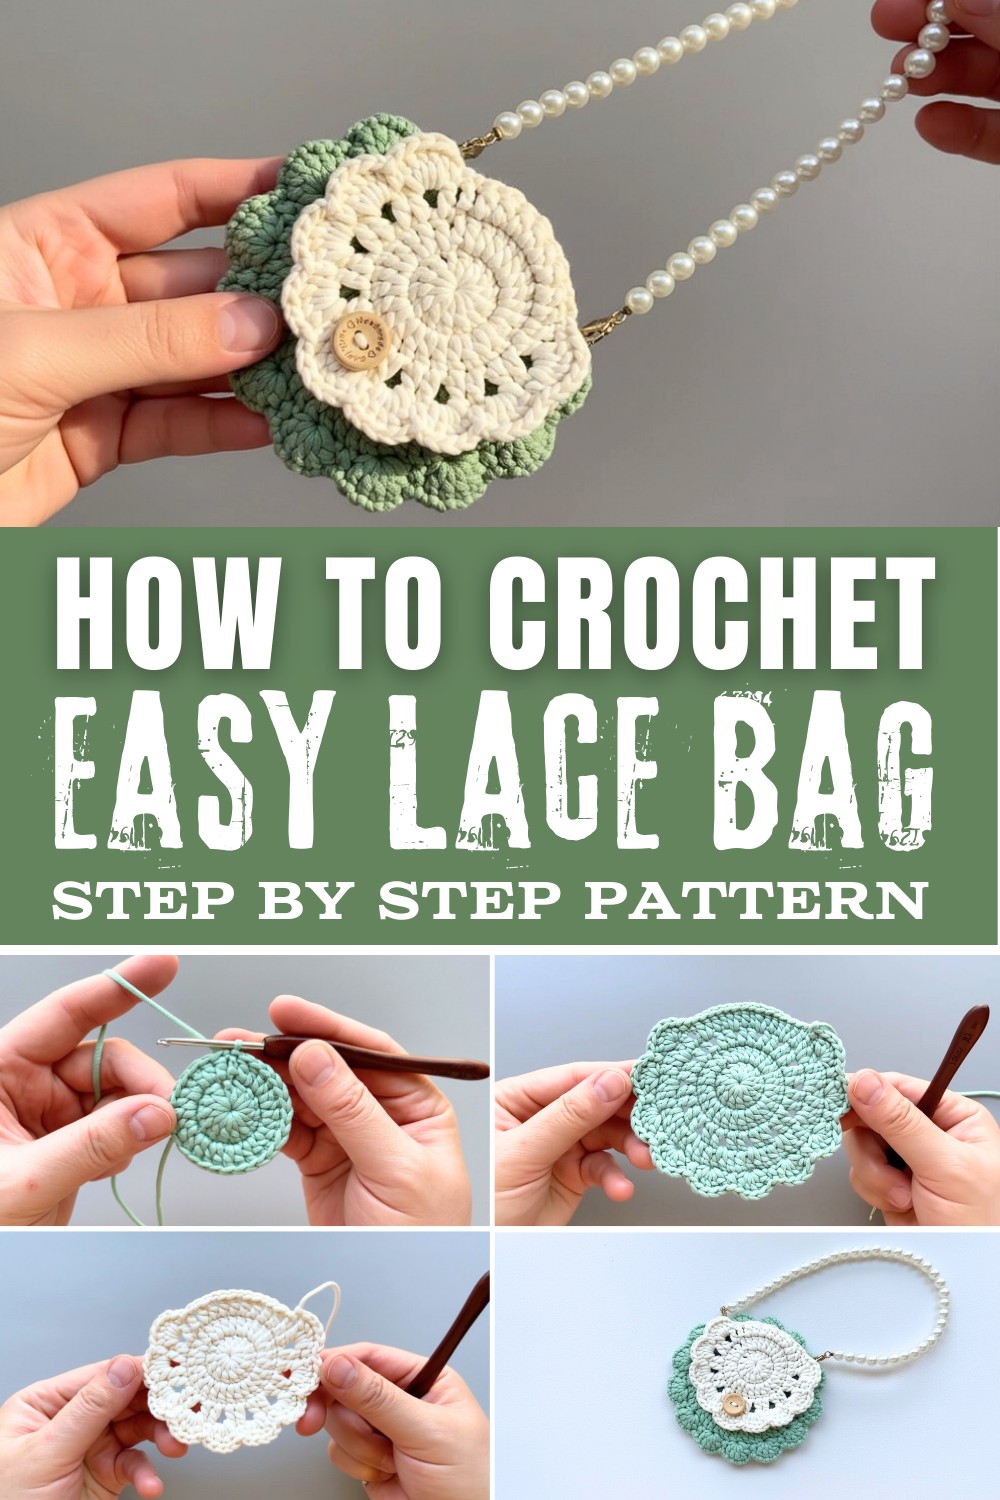
Easy Crochet Lace Bag Pattern to Create Stylish Bags
he beauty of creating a crochet lace bag pattern lies in its versatility; you can choose the size, colors, and design to match your personal style. Pair it with a breezy dress or jeans for a laid-back boho vibe. It's not just fun to make but also rewarding, as it promotes sustainability while enhancing your crochet skills. Plus, it becomes a timeless, unique piece that's truly yours.
Materials Needed
- Yarn:
- Pistachio tubular yarn (2.5mm thickness) for the base (Layer 1).
- classic White tubular yarn (2.5mm thickness) for the top layer (Layer 2).
- Hook: 3.0mm crochet hook.
- Tapestry Needle: For sewing and weaving in ends.
- Scissors: For cutting the yarn.
- Stitch Markers (Optional): For marking beginning stitches.
Gauge
Gauge is not essential for this design, but to achieve a similar finished size:
- 1 Round of Double Crochet (R1): Approximately 4cm (1.5 inches) in diameter.
Finished Size
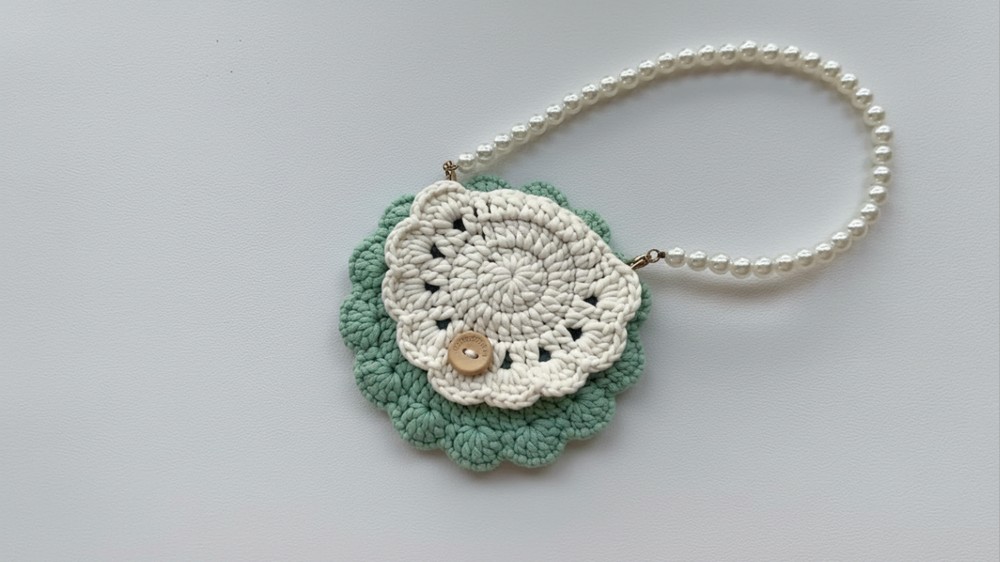
- Completed flower (Pistachio base + classic white top layer):
- Approximately 7-8 cm (3 inches) in diameter.
- Height of petals: ~2.5cm (1 inch).
Pattern Notes
- Terminology: This pattern uses US crochet terms.
- Abbreviations:
- ch: Chain
- sc: Single Crochet
- dc: Double Crochet
- sl st: Slip Stitch
- dc-inc: Double Crochet Increase (2 dc in 1 stitch)
- Structure: The flower works in two separate pieces:
- Pistachio base with 10 petals.
- classic White top with 9 petals.
- Layering: The two pieces are sewn together at the end to create a layered flower.
Step-by-Step Instructions
This is a detailed and easy-to-follow crochet pattern for a 3D layered flower with a Pistachio base and a classic white top layer. The flower has beautifully crafted petals with two layers for depth and dimension, making it perfect for embellishing your projects like bags, hats, or home decor items.
Pistachio Base Layer
Round 1: Create the Base
- Start with a magic circle (or chain 4 and join with a sl st to form a ring).
- Chain 3 (counts as the first dc), then work 13 dc into the circle.
- Total: 14 stitches (13 dc + 1 ch-3 as dc).
- Pull the yarn tail to tighten the magic circle.
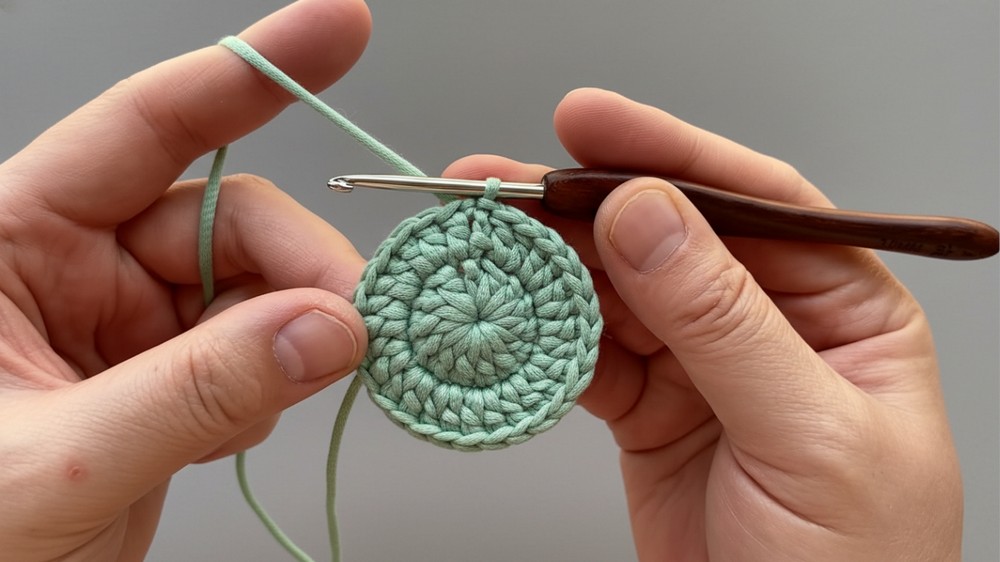
- Slip stitch into the 3rd chain of the beginning ch-3 to join the circle.
Round 2: Increase
- Chain 3 (counts as the first dc), and work 1 dc in the same stitch (dc-inc).
- dc-inc in each stitch around, placing 2 dc in each stitch from R1.
- Total: 28 stitches (14 pairs of dc).
- Slip stitch into the 3rd chain of the starting ch-3 to join.
Round 3: Foundation for Petals
- Chain 3 (counts as the first dc), then 1 dc in the next stitch.
- Chain 1, skip 1 stitch. 1 dc in the next 2 stitches, chain 1, skip 1 stitch.
- Repeat the sequence: (1 dc, 1 dc, 1 ch, skip 1) around the circle.
- Total: 14 dc groups and 14 chain spaces.
- Slip stitch into the 3rd chain of the starting ch-3 to join.
Round 4: Build Petal Edges
- Chain 3 (counts as dc), then 1 dc in the next stitch.
- Work 2 dc in the chain-1 space.
- 1 dc in the next 2 stitches, 2 dc in the next chain-1 space.
- Repeat: (2 dc, 1 dc, 1 dc, 2 dc) around the circle.
- Total: Groups of dc creating a base for petal shaping in R5.
- Slip stitch into the 3rd chain of the starting ch-3 to join.
Round 5: Shape the Petals
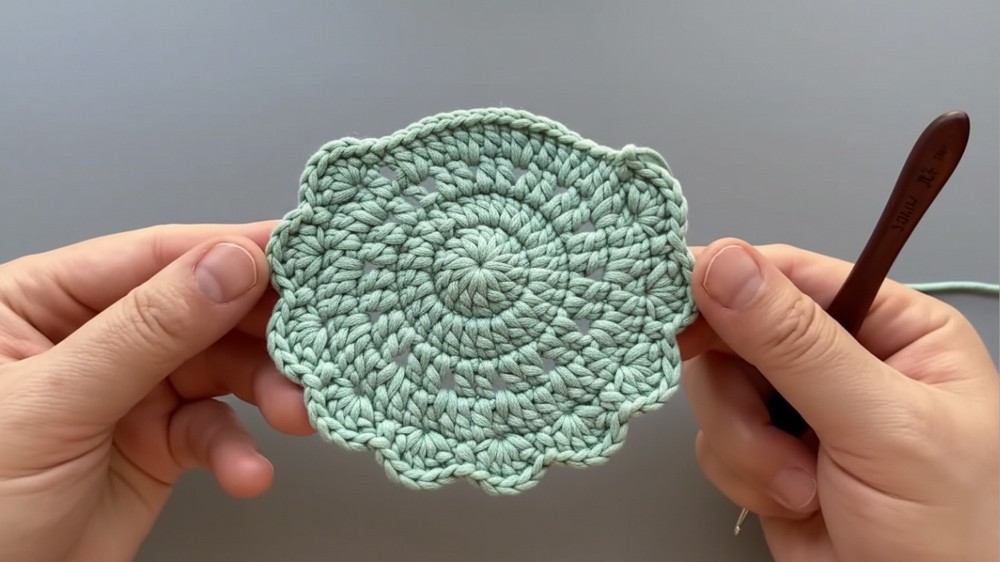
- Chain 1 (does not count as a stitch), 1 sc in the same stitch.
- Skip 1 stitch, then work 5 dc in the next stitch.
- Skip 1 stitch, and sc in the next stitch.
- Repeat: (skip 1, 5 dc in next stitch, skip 1, sc in next stitch) around the circle.
- Total: 10 petals (clusters of 5 dc with sc stitches in between).
- Fasten off, leaving a long tail for sewing.
Classic White Top Layer
Round 1-3: Same as Pistachio Base
- Follow Rounds 1 to 3 of the Pistachio base exactly, stopping at the end of R3.
- R3 will have 14 dc groups and 14 chain spaces.
Round 4: Petal Edges
- Chain 1, sc in the same stitch.
- Work 5 dc in the next chain-1 space.
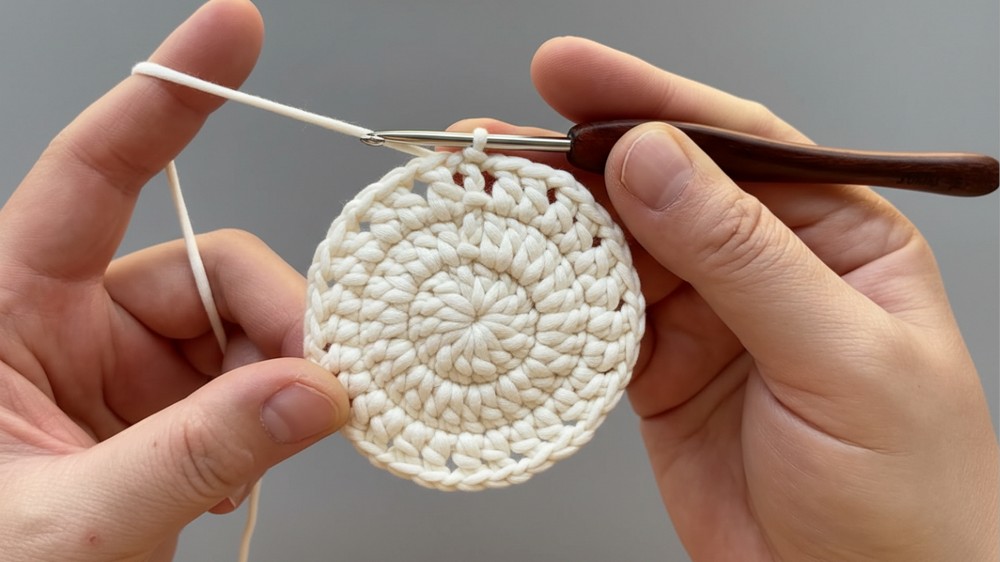
- Skip 1 stitch, sc in the next stitch.
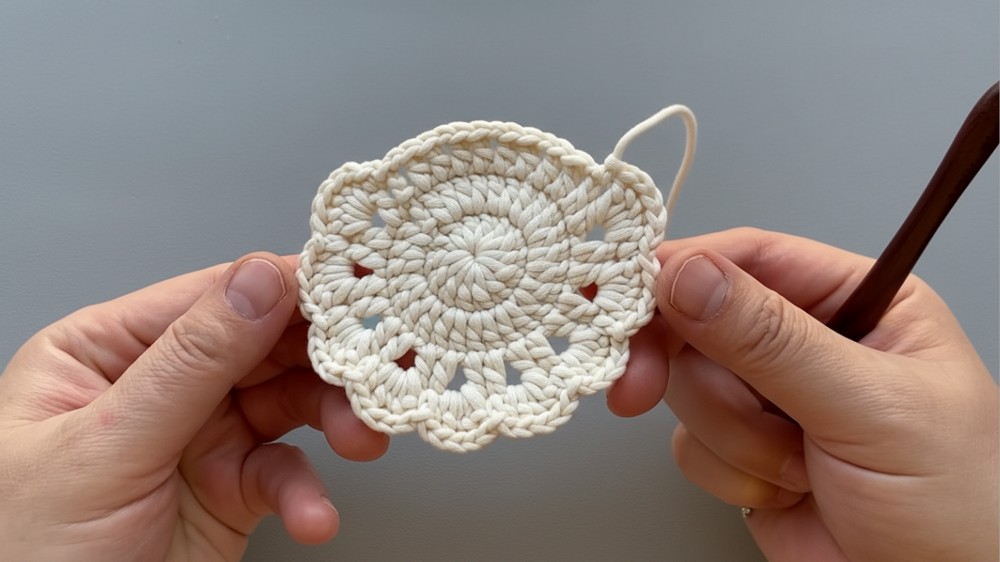
- Repeat: (5 dc in ch-space, skip 1, sc in next stitch) around.
- Total: 9 petals.
- Fasten off, leaving a long tail for sewing.
Assembly: Sewing Layers Together
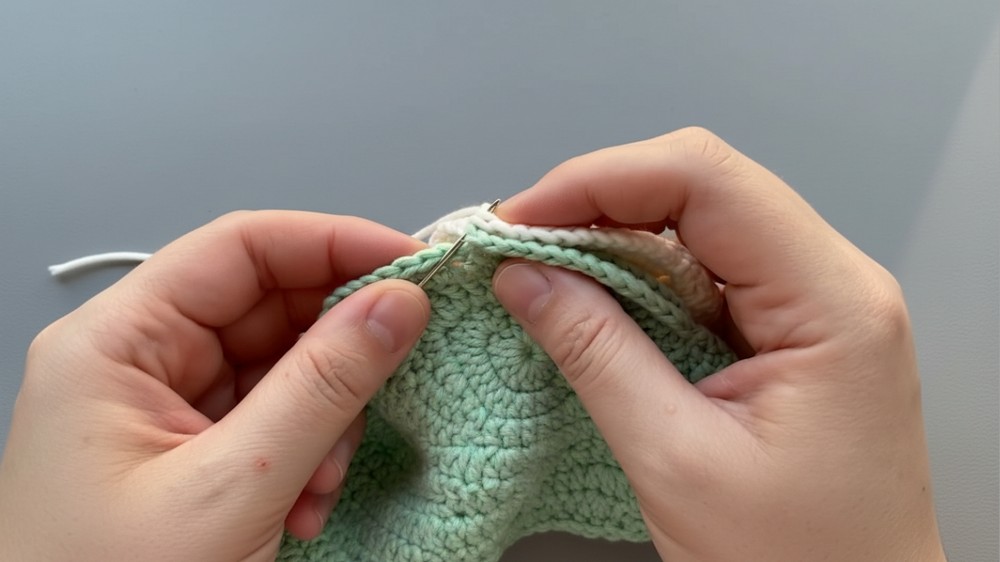
- Place the classic classic white top layer over the Pistachio base layer, aligning the petals so the classic white petals sit slightly off-center from the Pistachio petals.
- With a tapestry needle and one of the long tails, sew the two layers together at the center.
- Ensure the petals are secure, and adjust them as necessary for symmetry.
- Weave in all ends to neaten up the work.
Tips for Success
- Symmetry in Petals: Make sure the petals of the classic white and Pistachio layers are positioned slightly off-center from each other. This creates a fuller, more layered effect.
- Experiment With Colors: Replace Pistachio and classic white with colors that match your project-soft pastels for baby items, or bold shades for vibrant decor.
- Blocking: Lightly block the flower to ensure the petals lay flat and have a crisp, neat shape.
Customization Ideas
- Larger Flower: Add extra rows to the Pistachio and classic classic white layers:
- In Round 4, add another dc group increase.
- In Round 5, add an extra petal row for more layers.
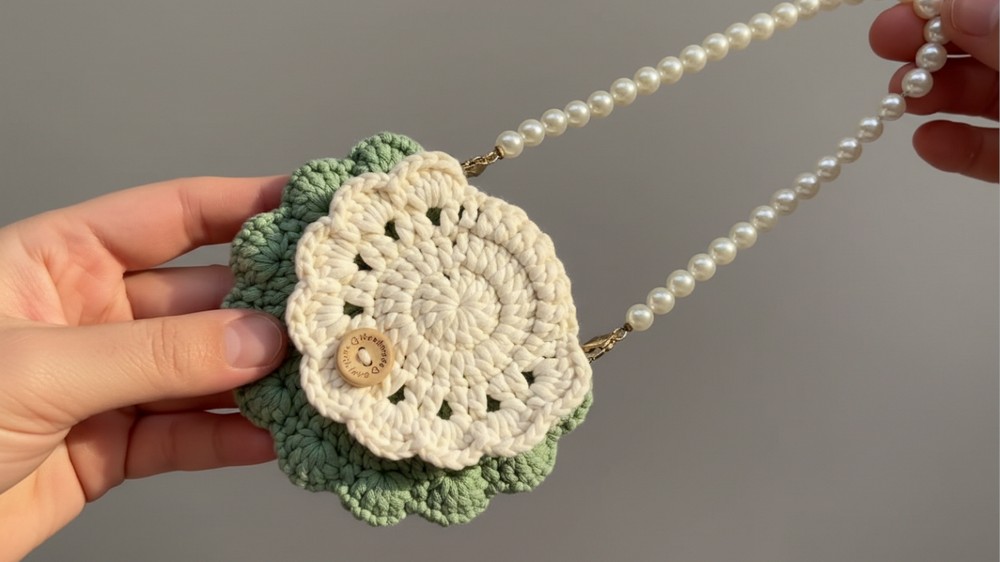
- Beads or Pearls: Sew a bead, pearl, or button at the center for a decorative touch.
- Leaves: Add green leaf shapes around the edges to create a complete floral look.
Conclusion
Your completed 3D layered flower is a charming and versatile embellishment. With its dimensional petals and striking layered design, this flower can be used in countless ways. Experiment with colors, textures, and sizes to make it your own. Whether intended as decor or a thoughtful gift, this flower showcases both beauty and skill.