
Creating a free crochet Winter Hat is such a rewarding way to blend creativity with functionality. There's something special about crafting an accessory that not only keeps you warm but also reflects your unique style. Yourself finishing a soft, colorful hat that you'll love wearing or gifting during the colder months. This project stands out for its blend of practical use and handmade beauty, bringing both confidence and comfort to your winter wardrobe.
Free Crochet Winter Hat Pattern with Ribbed Brim for Extra Warmth
Designed for beginners, this pattern guides you with simple steps and uses the versatile double crochet stitch as its foundation. The double crochet not only gives your hat a plush, stretchy feel, but also builds up quickly, so you can see progress right from the start. Once you get comfortable with this basic stitch, a world of possibilities opens up try making cozy scarves, chunky blankets, or even infinity cowls, all using the same technique.
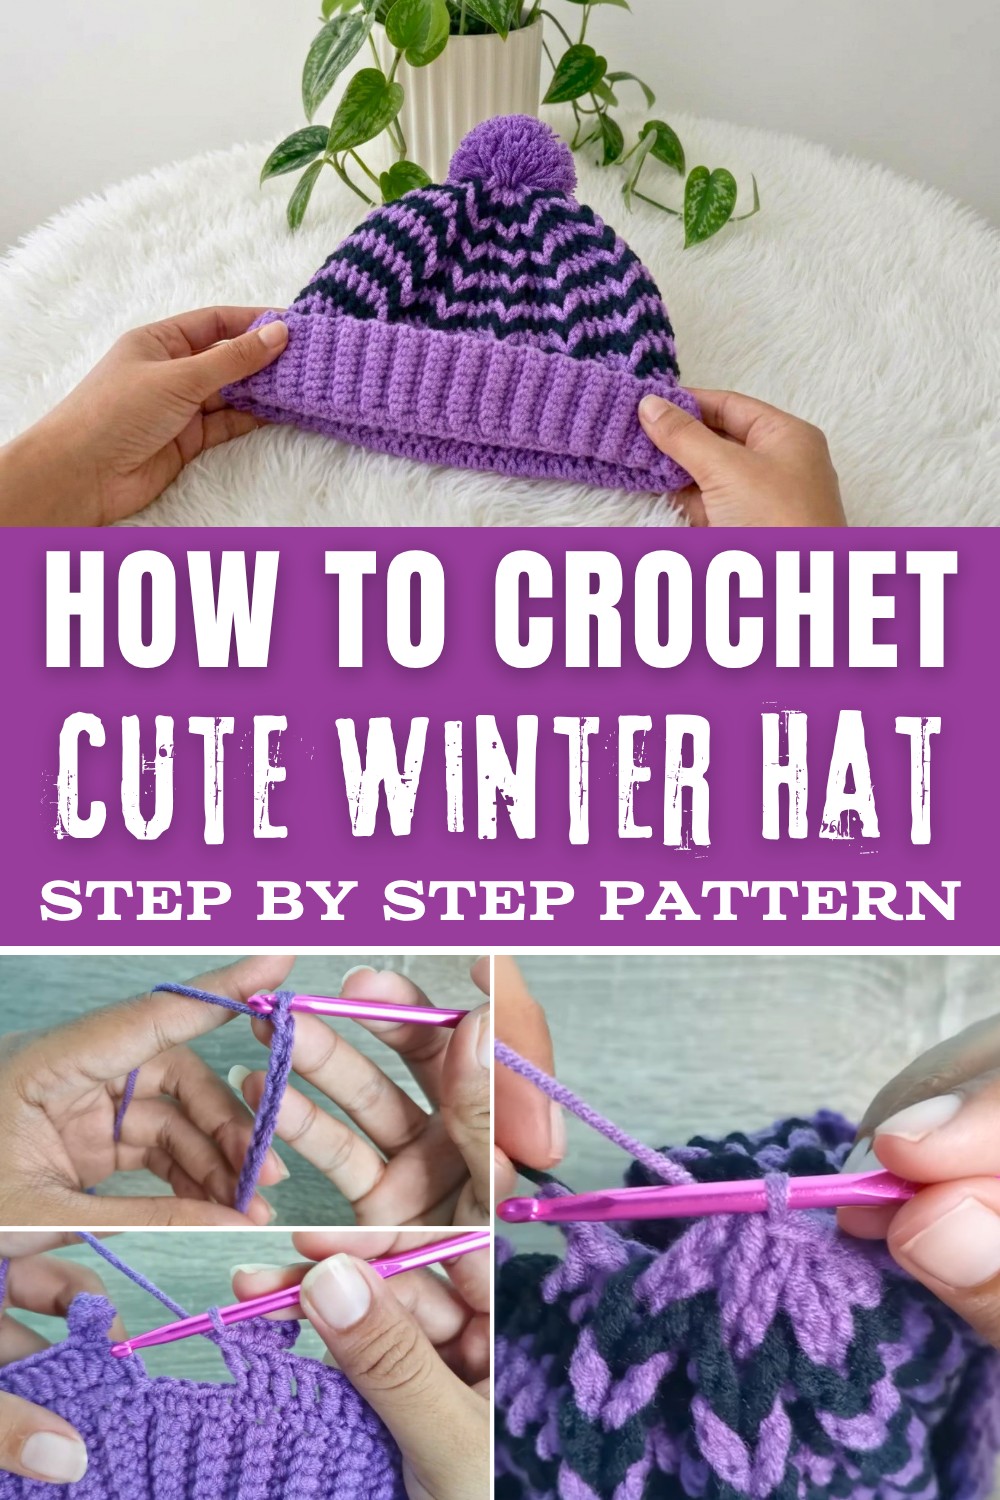
The instructions take you through each phase of hat-making, including working in the round and shaping the crown. Along the way, you'll pick up essential crochet skills, from keeping consistent tension to adding delightful finishing touches like ribbed brims or fluffy pom-poms. These techniques are the building blocks for many other projects.
Special Techniques & Stitches
- Single Crochet (sc): Used for the soft, stretchy brim.
- Back Loop Only (BLO): Creates the ribbed effect, adding more flexibility.
- Double Crochet (dc): Forms the open mesh body quickly.
- Chain Stitch (ch): Creates the lacy mesh ladders.
- Slip Stitch (sl st): For seam and round joins.
- Decreases: Skipping stitches shapes the crown.
- Pom-Pom Making: Classic finishing or use a faux-fur topper.
By completing this winter hat, you'll gain confidence and experience that can be applied to a variety of accessories. The know-how acquired here makes it easy to branch out into making beanies, headbands, snoods, or adorable baby hats. With just a bit of yarn and your crochet hook, you're opening the door to a whole new creative journey, where every project adds to your growing skills and imagination.
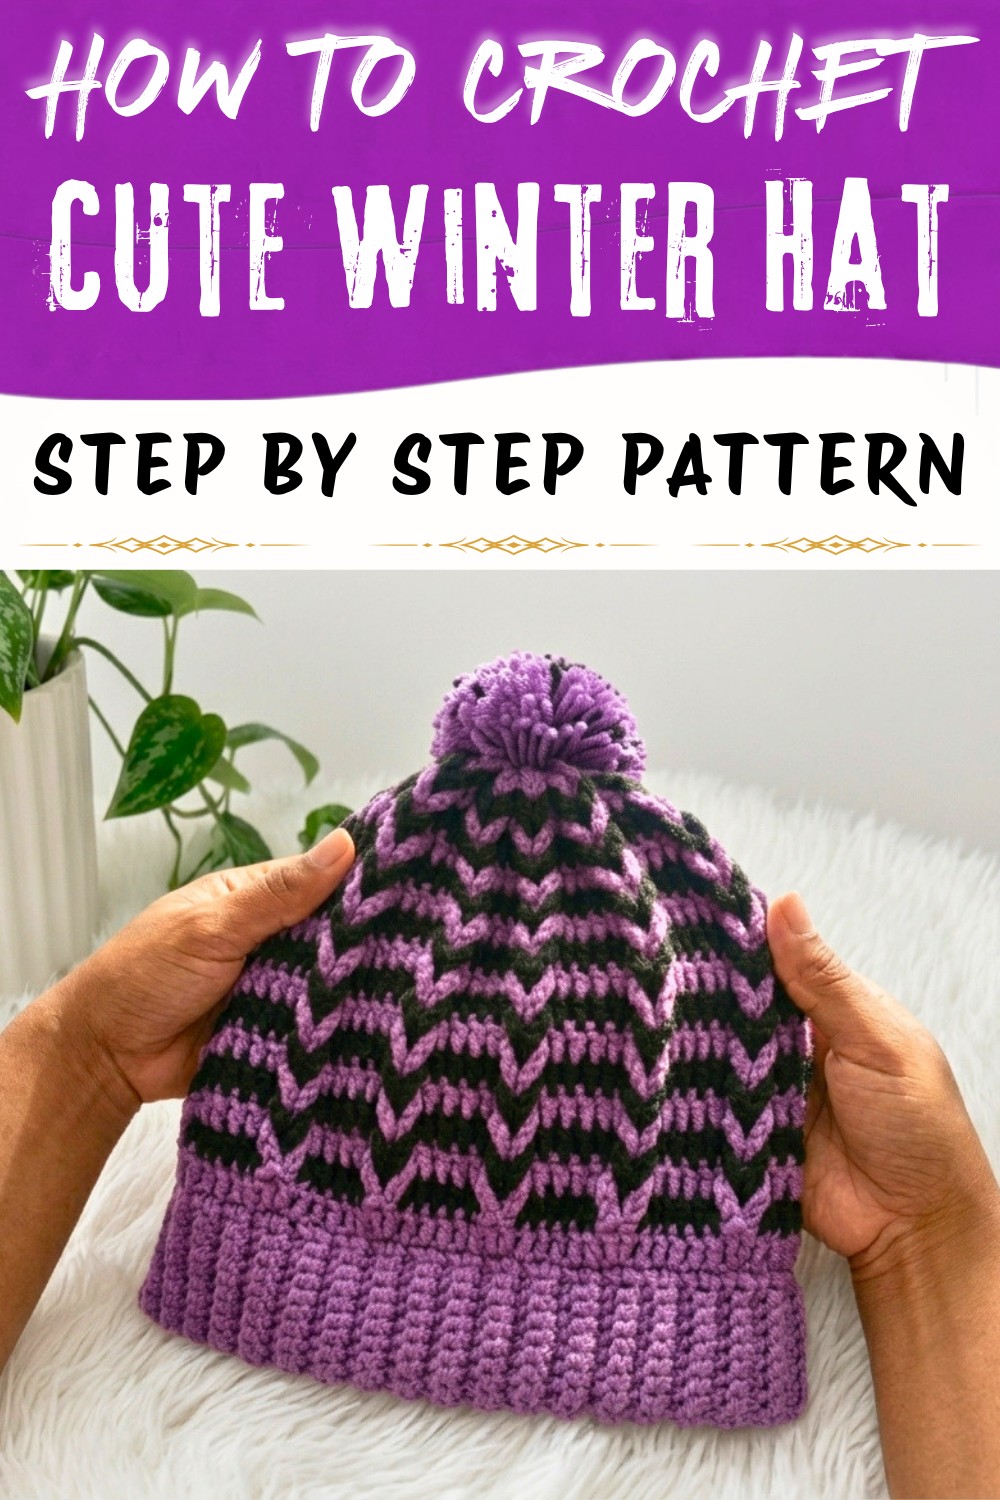
Crochet Mesh Beanie Hat (with Pom-Pom)
Yarn: 5 ply milk cotton or Korean cotton
Hook: 4.5 mm
Colors: Two (e.g., black & purple)
Step 1: Crochet the Hat Brim (Ribbing)
- Foundation:
Chain 10.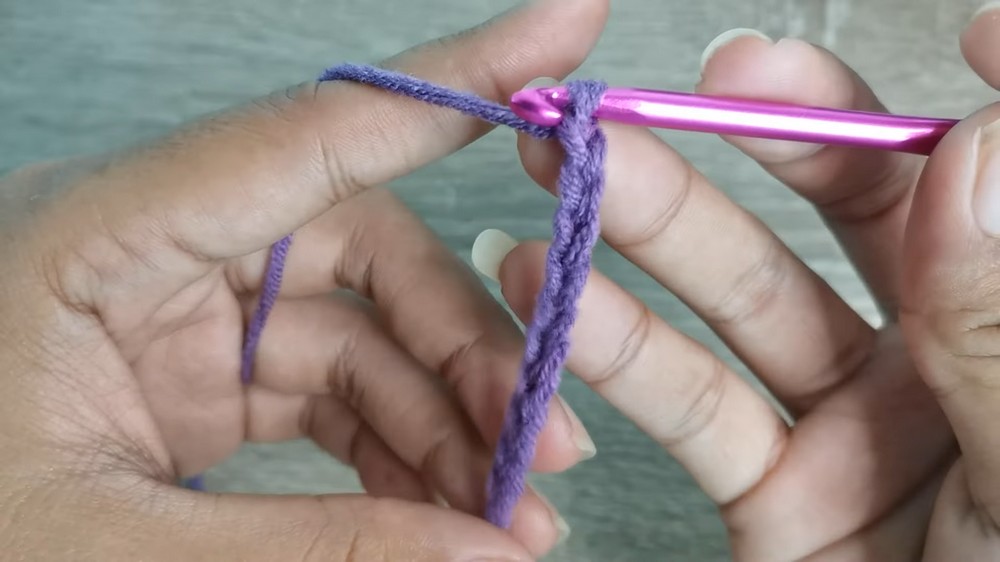 This chain will be the width of the ribbed brim.
 - Row 1:
Single crochet (sc) in the 2nd chain from the hook and each chain across. (9 sc)This is the first strip of the brim. - Rows 2 onward:
Chain 1 & turn. Work sc in the back loop only (BLO) of each stitch (9 sc).
Repeat for 60 rows (for adult size).Back loop gives the ribbed look. Rows = circumference.
The anticipation as you create the first soft chains forming the brim, every stitch building the foundation of something cozy and beautiful. With each pass of your hook through the back loop, you're not just making rows-you're infusing stretchy comfort and elegant texture.
Step 2: Join Brim into a Circle
- Slip stitch the short ends together through both layers to form a loop.
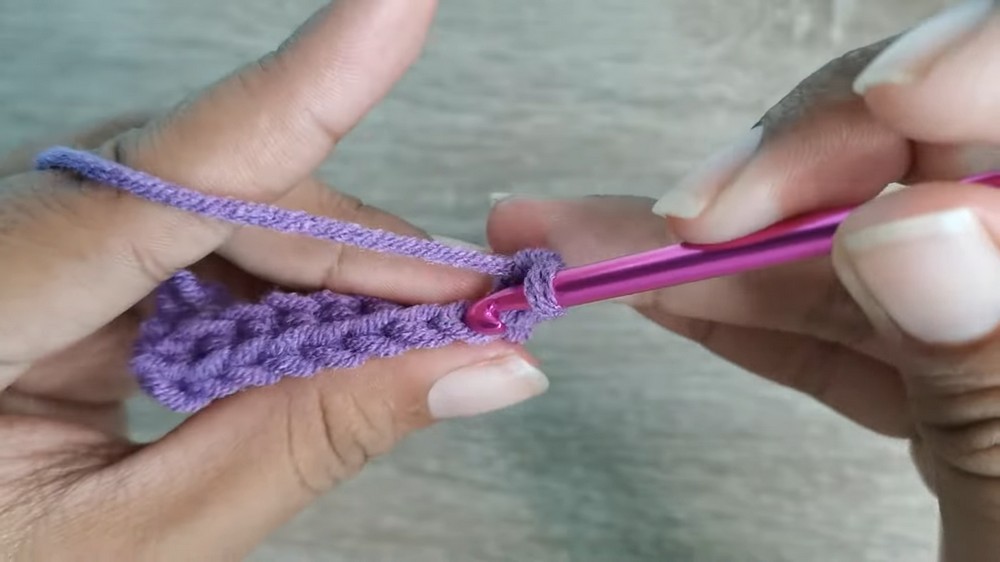 Forms the circular band for the base of the hat.
Step 3: First Mesh (Body) Row
- Chain 1.
Work two sc into the first "seam" of the brim, and continue placing 2 sc in each "valley" across to form your mesh setup round.
Join with a slip stitch.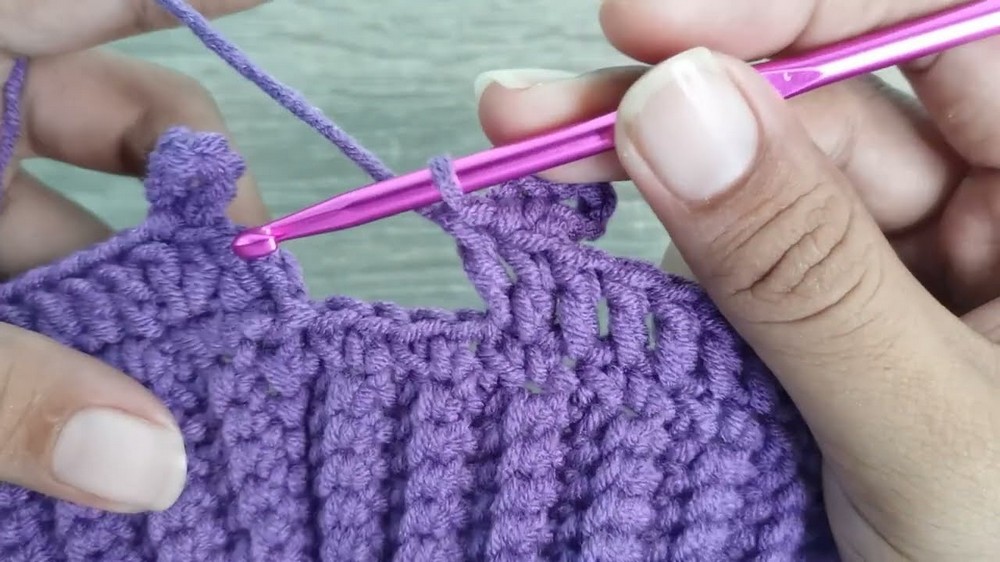 Creates the setup for the mesh rounds.
Step 4: Start Mesh Pattern
- Chain 2 (counts as first dc).
In the same stitch, double crochet (dc) again.Starts the mesh body with extra height.
Step 5: Making Mesh Ladder (First Mesh Round)
- Mesh Round:
Chain 8; dc in same stitch.
Skip 6 sc, dc in next stitch.
Repeat: (Chain 8, skip 6, dc in next) all the way around.
Join with slip stitch to top of first ch-2.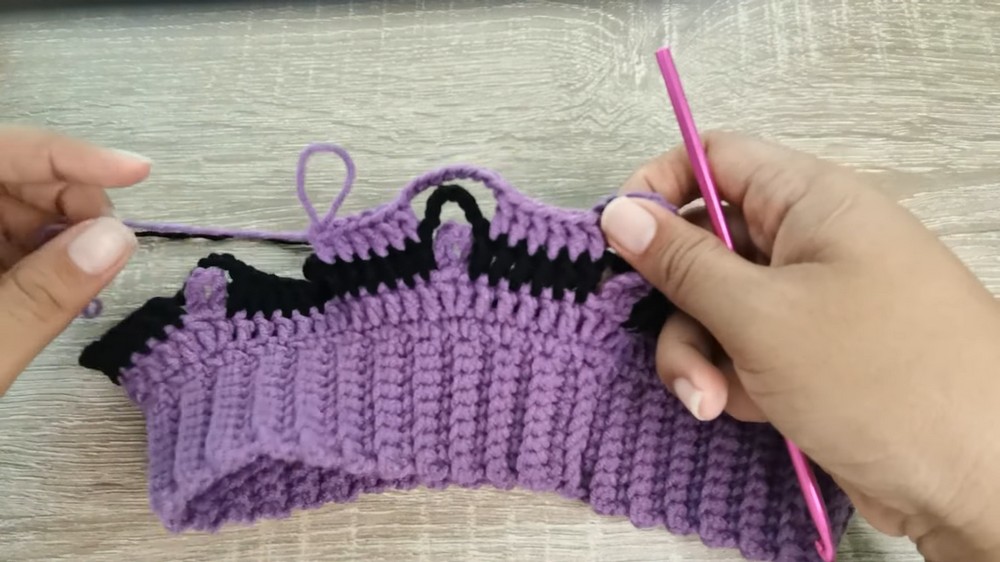 Creates big mesh ladders all around the hat body.
Step 6: Continue Mesh Rounds
- Repeat mesh rounds:
For each new round, Ch 2 (counts as dc), dc in same space if needed
Chain 8, dc into each previous round's dc
Repeat for a total of 11 mesh rounds or desired depth.Stacking mesh rounds builds the height of your hat.
When the pattern unfolds into open mesh rounds, you'll find a rhythmic dance in the repetition. Each chain arches gracefully, each double crochet anchoring the airy ladders that define the hat's character. You might lose yourself in the meditative process, watching the beanie rise and the color interplay become more vivid with each round. Here you decide-slouchy, fitted, dual-colored, or bold and classic.
Step 7: Mesh Decreases (Crown Shaping)
- Decrease Rounds:
For the next rounds: After each ch 8 & dc, skip one extra stitch each round so you now:- Go to 5 dcs between mesh sections,
- Next round, 4 dcs,
- Next, 3 dcs,
- And in last rounds, only 2 dcs between mesh sections.
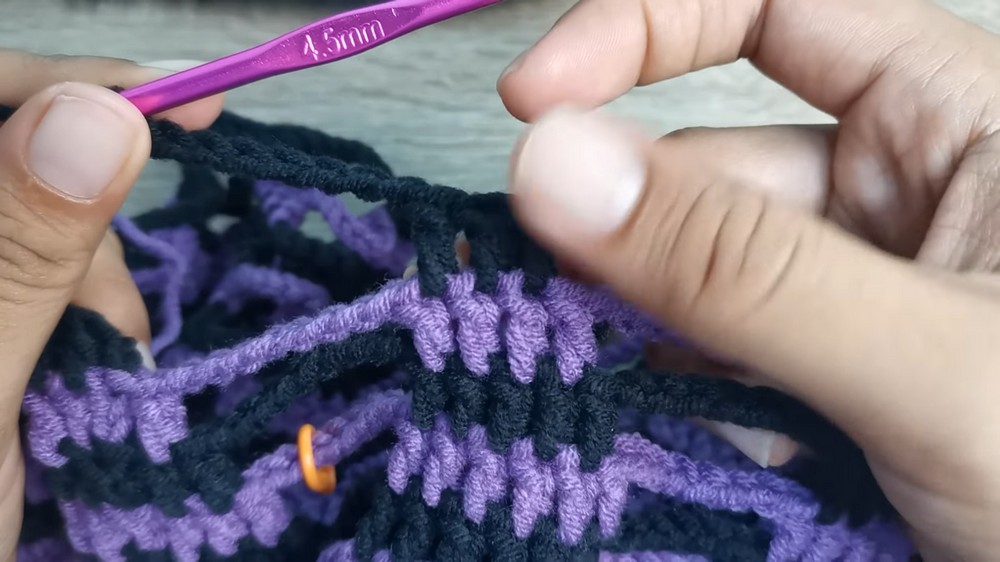
Reduces stitches to shape top of the hat and closes crown.
Step 8: Finish and Gather Top
- At crown, after a round with only 2 dcs between mesh,
Join with slip stitch, leave a long tail.
With a yarn needle, weave tail through each remaining stitch at top. Pull tight and sew to secure.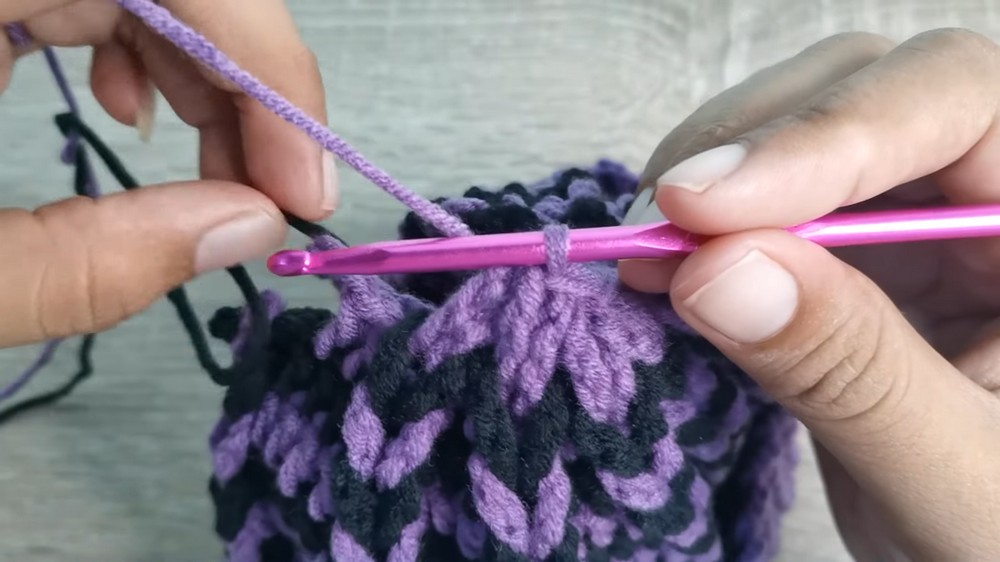
Gathers the hat top like a drawstring.
Step 9: Add Pom-Pom (Optional)
- Attach pom-pom securely to the top center.
As the mesh closes into the crown, there's satisfaction in the gentle gathering, pulling it all together like the last threads of a cozy story. Perhaps you'll top it with a joyful pom-pom or an elegant knot, then finally try on your creation: unique, stylish, and unmistakably handmade. Sharing or gifting this beanie brings the circle full-crafted by your hands, ready to warm another.
Important Remarks
Work gently, aiming for even tension-especially in the mesh for balance and elegance. Use stitch markers or scrap yarn to track your rounds if you're new to working in the round. The pattern is quite adaptable, and even slight miscounts in mesh sections blend invisibly, making this a stress-free, beginner-friendly hat. Always measure your ribbing to ensure a comfortable fit around the head before proceeding.
Customization Ideas
- Personalize Colors: Alternate colors each mesh round for a striped effect, or use a gradient or ombré yarn for a soft, blended look.
- Make it Slouchy or Fitted: Add more mesh rounds for a relaxed, slouchy beanie or skip a few for a secure, close fit.
- Accent Brim/Crown: Use a contrasting color for the ribbed brim or the crown gathering for standout detail.
- Pom-Pom Fun: Top off with a single large pom-pom, multiple mini pom-poms, or even a faux fur accent.
- Add Embellishments: Sew on buttons, beads, or a leather tag for a personalized finish.
- Extra Warmth: Use bulkier yarn and a larger hook for a cozy winter version.