
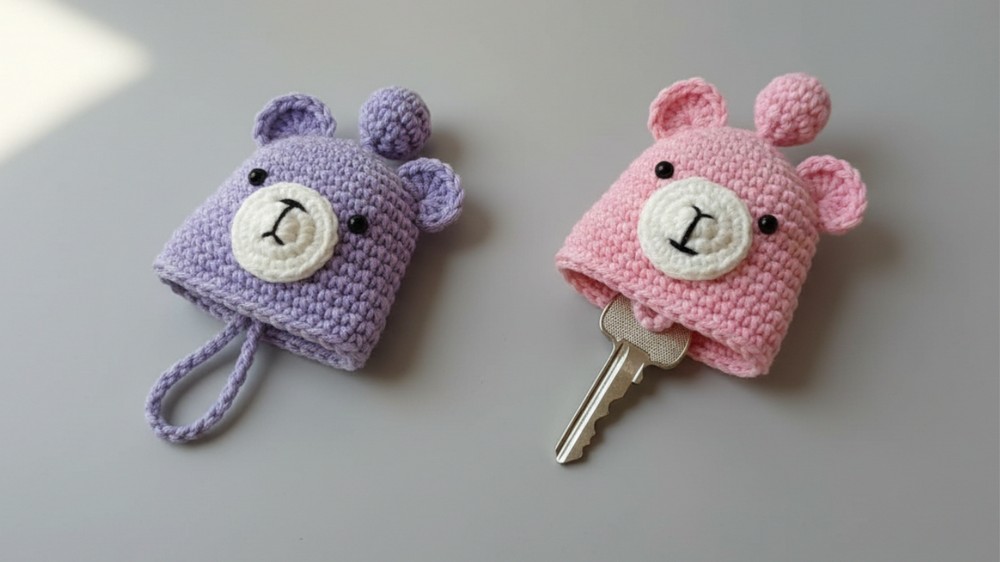
Try a simple fix for boring keys with the Free Crochet Bear Key Cover Pattern, adding playful charm and trendy vibes to your keychain.
Tired of the same boring keyrings that lack personality? This delightful crochet project brings life to your everyday keys with an adorable bear-shaped key cover. Made using soft 4-ply cotton yarn and a 2.5mm hook, this pattern is both practical and charming, perfectly blending function and fun. The snug pattern not only keeps your keys safe and easy to grab but also adds a playful twist to a daily essential.
Free Crochet Bear Key Cover Pattern Perfect for Beginners
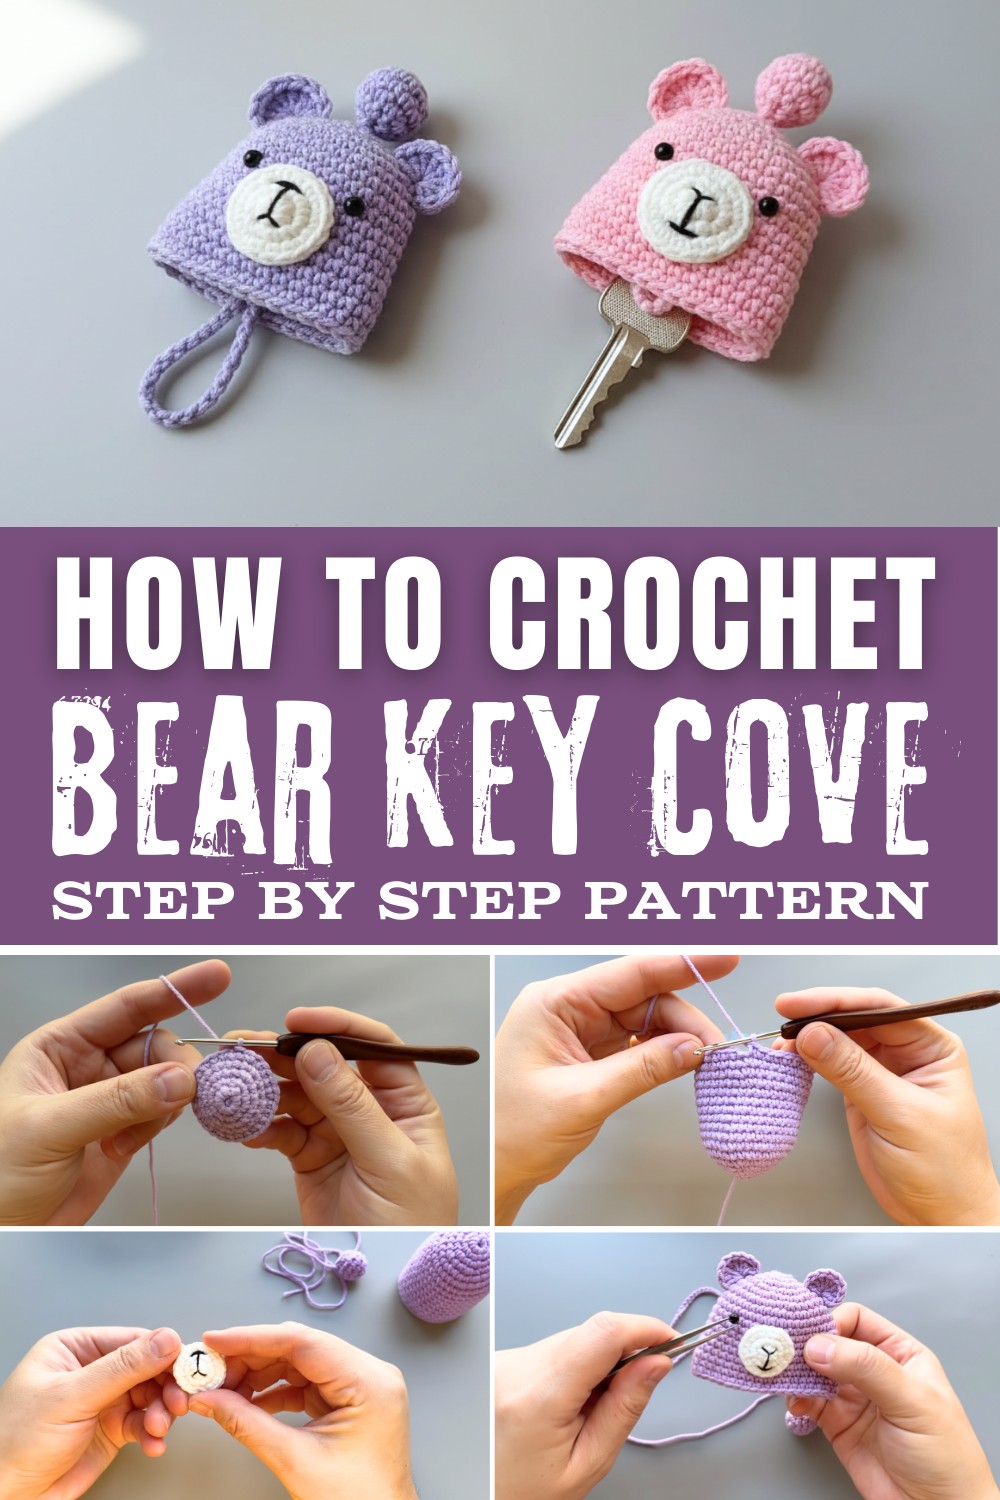
Through simple techniques like single crochet, increasing, and decreasing, you'll create a seamless and compact bear design that fits perfectly over your keys. Perfect for beginners or seasoned crocheters, this quick and rewarding project offers endless room for creativity. Customize the pattern by choosing fun colors, adding facial details, or experimenting with different textures to make it truly your own.
Ideal as a cute accessory for yourself or as a thoughtful handmade gift, this key cover adds a layer of comfort to your everyday life by covering sharp edges and organizing your keys stylishly. Whether for your home, office, or car keys, this little project proves that even the smallest things can bring big smiles.
What You Can Make With These Skills
- Key Covers in New Shapes: Once you've mastered the bear design, you can experiment with other animals like cats, owls, or rabbits. Let your imagination run wild with unique designs!
- Mini Amigurumi Creatures: The skills gained here translate perfectly to creating adorable mini crochet toys or figurines, ideal for kids or as quirky decorations.
- Bag Charms and Accessories: Turn the basic pattern into bag charms by adding loops or keychains. Customizing these charms can make them a perfect gift.
- Holiday-Themed Décor: Use the shaping techniques to crochet cute seasonal pieces like pumpkins, snowmen, or even heart-shaped covers for Valentine's Day.
- Personalized Gifts: These small patterns can be adapted into gift toppers, party favors, or keepsakes, adding a personal and handmade touch.
By building on the foundational skills learned here, you're unlocking the potential to crochet a variety of tiny treasures that are both fun to make and functional. The only limit is your creativity!
Necessary Materials
- Yarn:
- 4-ply cotton yarn (soft, durable, and enhances stitch definition).
- Crochet Hook: Size 2.5mm hook
- Stitch Marker: Optional, to keep track of rounds.
- Scissors
- Threading Needle: For sewing and weaving in ends.
Gauge
For a 2.5 mm hook and 4-ply cotton yarn, gauge will be approximately:
- 6 Single Crochet (SC) rounds = 2 inches in diameter.
Adjust hook size if your tension is too tight or loose.
Step-by-Step Crochet Bear Key Cover
This pattern has been carefully transcribed and formatted into an easy-to-follow crochet guide from the given video. Designed for small decorative items, the pattern utilizes basic stitches and straightforward construction techniques.
The pattern is divided into three separate sections for the Main Body (Head/Cover), Piece Between Two Ears, muzzle and Ears.
Main Body (Head/Cover)
This section forms the main circular structure.
Foundation Chain and Round 1:
- Chain 4.
- Slip Stitch (SS) in the first chain to form a loop.
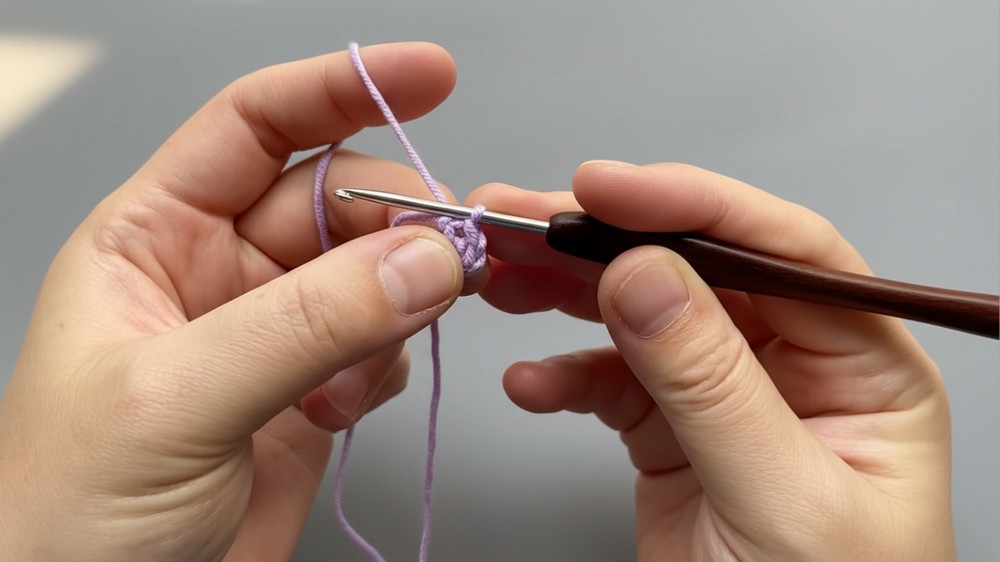
- Chain 1.
- Round 1: Work 6 SC into the loop. (6 stitches total).
- Tighten the yarn to secure the loop.
- Slip Stitch into the first stitch and Chain 1.
Round 2-6:
Round 2: Work [Inc] ×6 (Increase with 2 SC in each stitch around). (12 stitches total).
Round 3: Work [SC, Inc] ×6 (SC in one stitch, then 2 SC in the next stitch). (18 stitches total).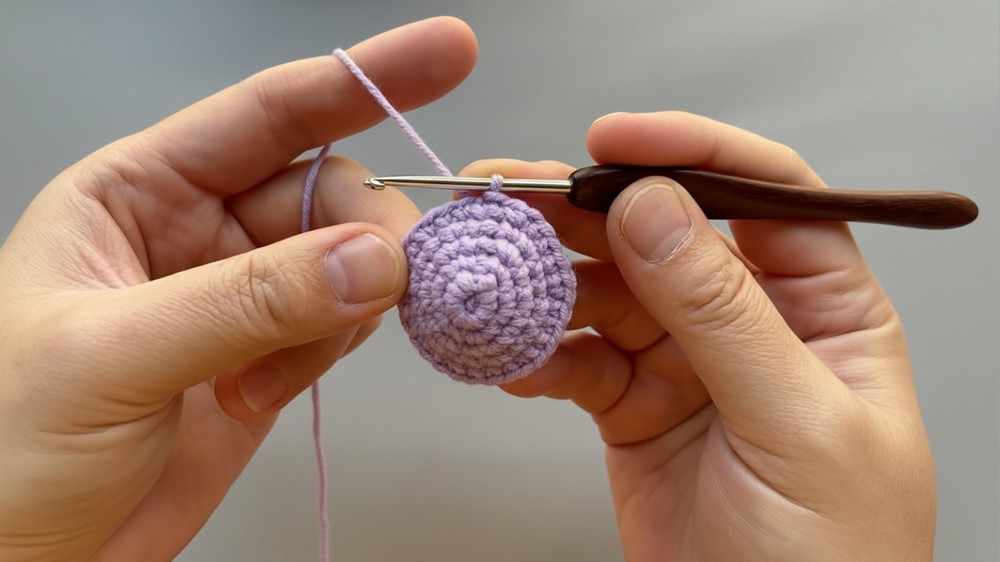
Round 4: Work [SC, Inc, SC] ×6 (SC in one stitch, 2 SC in the next stitch, SC in the following stitch). (24 stitches total).
Round 5: Work [3 SC, Inc] ×6 (SC in the next 3 stitches, then 2 SC in the 4th stitch). (30 stitches total).
Round 6: Work [2 SC, Inc, 2 SC] ×6 (SC in the next 2 stitches, 2 SC in the 3rd stitch, SC in the next 2 stitches). (36 stitches total).
Round 7-17:
Work SC in each stitch around (36 stitches per round).
These rounds provide length to the circular structure.
At the end of Round 17, Slip Stitch, and Chain 1. Cut yarn.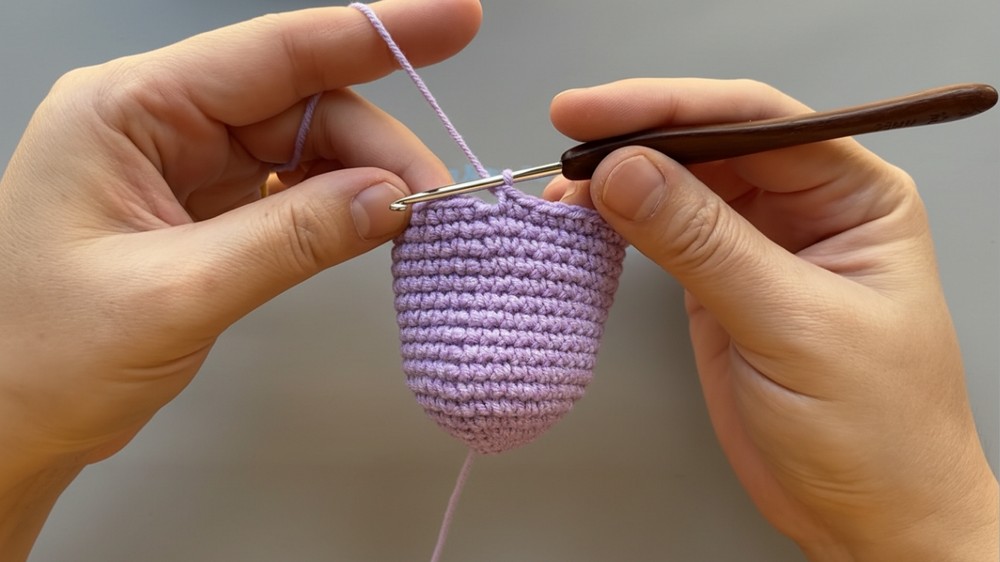
Piece Between Two Ears
These parts will be added later for decoration or functionality.
Rounds 1-5 create a smaller circular piece:
Round 1: Work 6 SC into Magic Circle. Tighten the loop and SS into the first stitch.
Round 2: Work [Inc] ×6 (12 stitches total).
Rounds 3-4: Work SC into each stitch (12 stitches per round).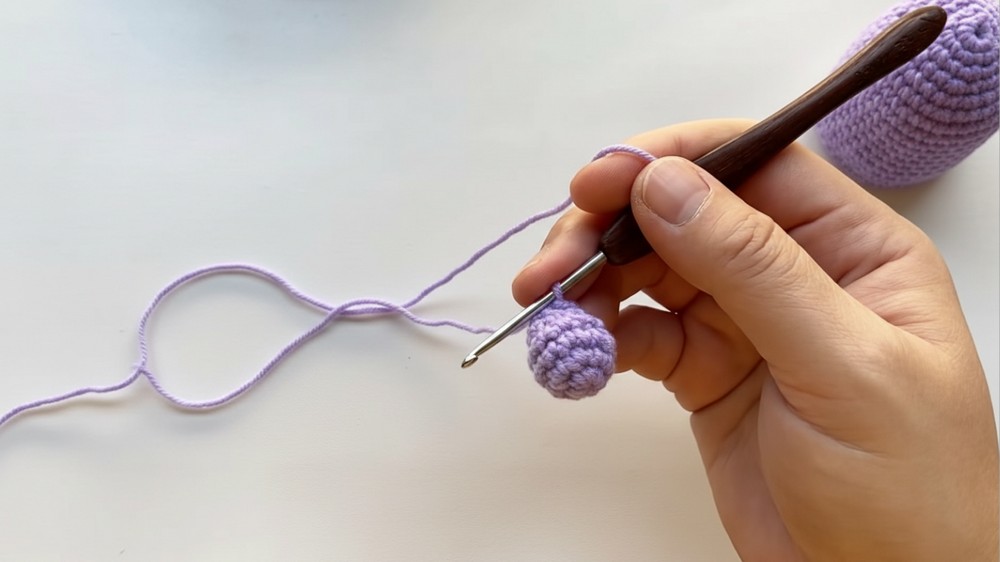
Round 5: Work [Dec] ×6 (Decrease by working SC2tog). SS and leave a long tail for sewing.
Muzzle
Rounds 1-3 expand a slightly larger piece:
Round 1: Work 6 SC into Magic Circle. SS into the first stitch.
Round 2: Work [Inc] ×6 (12 stitches total). SS and Chain 1.
Round 3: Work [SC, Inc] ×6 evenly around (18 stitches total).
Finish with an Invisible Slip Stitch for a seamless look.
Ears
- Chain 3.
- Work 8 DC into the loop for a flared effect.
Finishing Touches
The decorative edge and detailed finishing steps are essential for enhancing your project visually.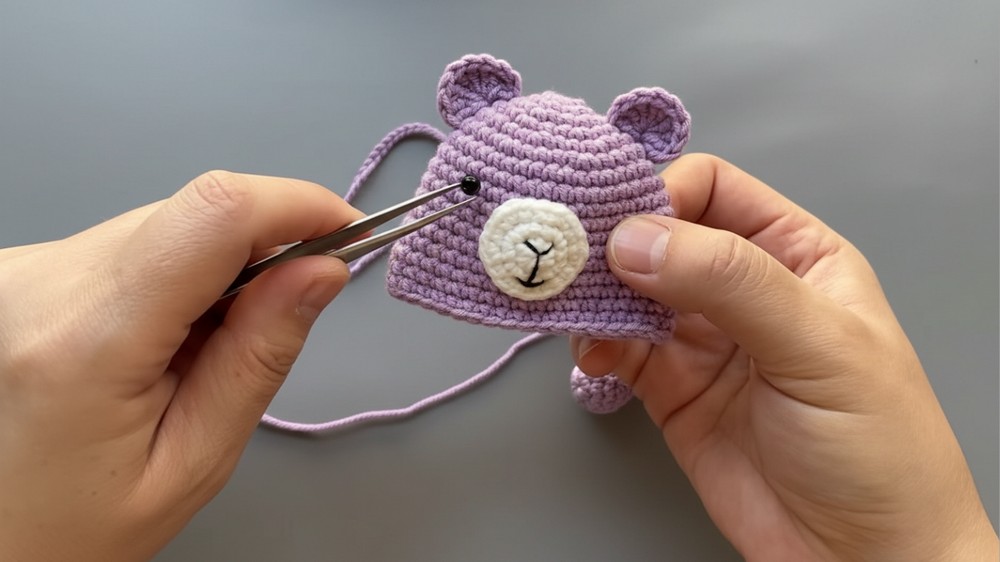
Finished Size
- Approximate Dimensions: With a 2.5 mm crochet hook and 4-ply cotton yarn, the finished piece will measure approximately 3-5 inches, depending on tension and adjustments.
Tips for Better Results
- Relax Your Tension: Small hooks like 2.5mm can strain the hands. Take breaks to ensure comfort while crocheting.
- Use Stitch Markers: Keeping track of spiral rounds is critical in continuous spiral designs.
- Shape Manipulation: Gently shape and stretch the finished pieces to ensure proper appearance (especially circular elements).
Customization Ideas
- Alternative Yarn Colors: Experiment with palettes like pastel shades or bold contrasts.
- Add Embroidery: Embroider designs, initials, or patterns to make the project personal.
- Attach Functional Components: Use metal key rings or fabric loops for utility or decoration.
Optional Add-ons
- Glitter Yarn: Incorporate metallic/glitter yarn for shine and texture.
- Beads or Sequins: Add at stitch junctions for sparkle.
- Fringe Edging: Extend decorative edges by chaining longer loops for visual impact.
Conclusion
With a combination of foundational techniques like SC and Inc along with special decorative edges, this pattern delivers a beautifully structured Crochet Bear Key Cover. Customize it to your liking by incorporating different elements or colors, making it a versatile skill-building project. Admire your work and consider gifting or using it creatively.
Challenges and Solutions of the Pattern
Every pattern has its tricky spots, and this one is no exception. Beginners might find it challenging to maintain consistent stitch tension, which is crucial for achieving a neat and snug fit for the key cover. To overcome this, practice your stitches beforehand on scrap yarn and ensure you're not crocheting too tightly. Another common difficulty lies in working small, tight rounds, especially when starting from a magic circle. If the magic circle technique feels intimidating, you can substitute it with a simple chain loop to ease the process. Attaching the small details, like the ears and facial features, might also seem overwhelming at first, but using sewing pins to secure them before stitching ensures they stay symmetrical. With patience and a step-by-step approach, these challenges can easily be tackled!