
Solve your search for quirky crochet with this Free Crochet Grumpy Crow Amigurumi Pattern, designed to bring laughter and charm to life.
I've always loved crocheting unique and quirky characters, so when I stumbled upon the Grumpy Crow Amigurumi pattern, I knew it was a must-try! This charming little crow has a personality all its own, from its adorably grumpy expression to its perfect scarf and tiny wings. I used dark brown for most of the body, paired with a thinner yarn for the scarf, which added a splash of texture and contrast. The clever details like its three-dimensional beak and tiny legs make it a fantastic handmade keepsake or thoughtful gift.
Free Crochet Grumpy Crow Amigurumi Pattern for All Levels

To make the Grumpy Crow, the pattern uses beginner-friendly stitches such as the magic ring, single crochet (sc), half double crochet (hdc), double crochet (dc), and slip stitches (sl st). The body stitches come together seamlessly, forming a plump shape with character. Special techniques like crocheting in the back loop only add depth, ensuring features like the wings and scarf really stand out. The versatility of these stitches didn't just make the process smooth-it also unlocked ideas for future crochet projects like scarves, appliqués, and mini decorations. And the fun part is Switching yarn sizes leads to delicate details like the tiny legs and beak that really bring the crow to life.

What You Will Learn
This pattern teaches essential techniques for working with amigurumi, including:
- Creating shapes with increases and decreases for a polished and cohesive look
- Using back-loop stitches to add texture and definition
- Crocheting delicate features such as wings, legs, and a three-dimensional beak using smaller hooks
What You Can Make With These Skills
- Small animal figurines for gifts or decor
- Miniature accessories like scarves or hats for amigurumi dolls
- Keychains or bag charms with quirky designs
- Simple appliqués to add character to bags and clothing

Colours, Yarn Selection, Customisation
- Try classic black/dark brown for crows, but experiment with blues, purples, or multicolors for fantasy birds.
- Scarf and beak in a bright contrast will make your crow pop!
- Use cotton, acrylic, or sock yarn for best results.
- Add safety eyes, embroidery, or felt for extra expression.
Special Techniques and Tips
- Work in continuous rounds, use a stitch marker
- For 3D parts (beak, wings) focus on accurate shaping and finishing
- If working in back loop only: Insert hook under the back loop (furthest from you), makes nice surface details
- Stuffing gently-shape as you go for best results
- Use smaller hook with thinner yarn for accessories
Grumby Crow - Beginner-Friendly Crochet Amigurumi Pattern
Materials
- Yarn:
- Main dark brown color for body (brand and size about 2.5-3 mm)
- Thinner yarn (size 1.5 mm) for scarf and legs, in a contrasting color (recommended black for legs)
- Hooks:
- 2.5 mm hook for body
- 1.9-2 mm hook for scarf and legs
- 1.5 mm hook for tiny beak (suggested)
- Needle: For sewing parts and closing gaps
- Scissors
- Stuffing: Fiberfill or scrap yarn for the body
- Stitch marker (optional but very helpful)
Finished Size
- Roughly 12-16 cm (5-6.5 inches) tall, depending on yarn and hook choice
Step-by-Step Crow Pattern
1. Crow Body
Round 1:
- Make a magic ring.
- Work 6 single crochets (sc) into the ring.
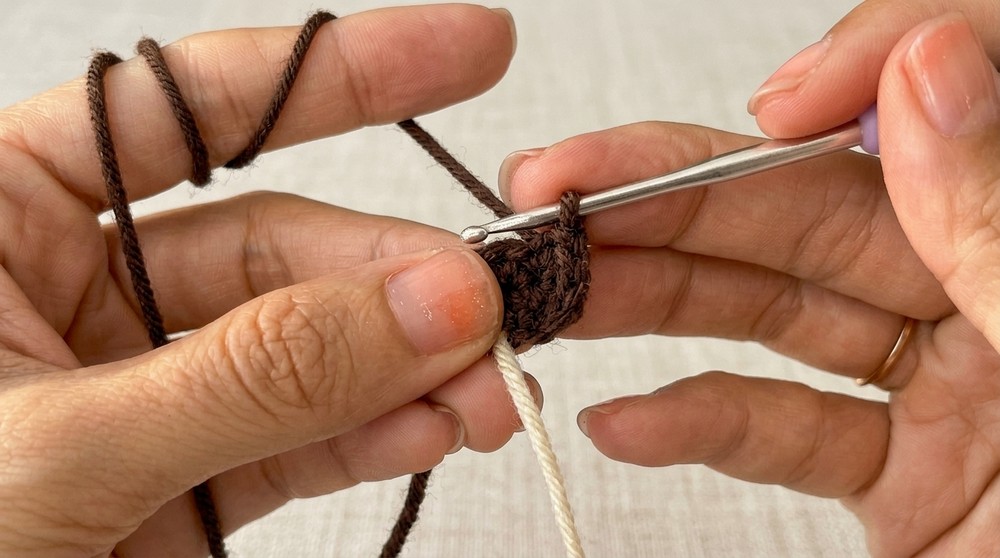
- Close ring tightly.
Make a loop, then do 6 sc inside. This forms a tight, neat start to your crow's body.
Round 2:
- Work 6 increases:
- 2 sc in each stitch around (12 sts).
Do 2 stitches in every one - you'll have 12 after this round.
Round 3:
- (sc in next stitch, increase in next) x6 (18 sts).
Alternate: one single crochet, then two in next. Repeat until round ends.
Round 4:
- (sc, increase, sc) x6 (24 sts).
Pattern: single, two in next, single; repeat for fuller shaping!
Round 5:
- (3 sc, increase) x6 (30 sts).
Three singles, then two in next; this gives a wider, rounder belly.
Round 6-11:
- 30 sc around for each round.

Work one in every stitch. Your crow's body grows taller-easy amigurumi technique!
Round 12:
- 30 sc in back loop only.
Insert your hook only into the loop furthest from you-creates a helpful line for attaching the scarf.
Round 13:
- (2 sc, increase, 2 sc) x6 (36 sts).
Pattern: two singles, two in next, two singles.
Round 14:
- (5 sc, increase) x6 (42 sts).
Five singles, two in next; repeat the process for a slightly longer tube.
Round 15:
- 2 increases, 38 sc, 2 increases (46 sts).
Quick increases at start and end, then fill in the middle.
Round 16:
- 46 sc.
Work one in each; your crow is nearly stuffed and shaped!
Round 17:
- 2 increases, 42 sc, 2 increases (50 sts).
More increases for a slightly bigger top.
Round 18:
- (3 decreases), 8 sc, 1 decrease, 18 sc, 1 decrease, 8 sc, (3 decreases).
Now begin decreasing to shape the neck and head (decrease = sc 2 together).
Round 19:
- (5 sc, 1 decrease) x6.

Makes the neck taper slightly. Repeat throughout the round.
Round 20:
- (2 sc, 1 decrease, 2 sc) x6.
Pattern: two singles, one decrease, two singles.
Round 21:
- (3 sc, 1 decrease) x6.
Three singles, one decrease. Begin stuffing the crow firmly here!
Round 22:
- (1 sc, 1 decrease, 1 sc) x6.
Pattern: single, decrease, single. Shape the head.
Round 23:
- (1 sc, 1 decrease) x6.
Repeat until head closes up. Use a needle to sew shut if preferred.
Tip:
Begin stuffing lightly after round 21 for best shaping!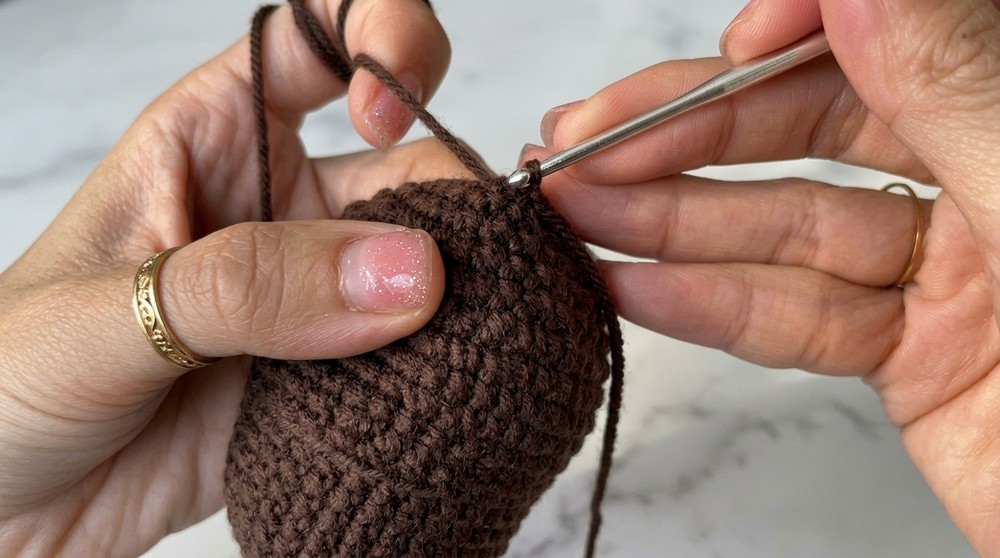
2. Left Wing
Magic ring. Chain 7.
Row 1:
- sc in second chain from hook
- hdc in next stitch
- dc in next two stitches
- hdc in next stitch
- sc in last stitch
Into the magic ring:
- 3 sc
Continue working along the other side of the chain:
- sc at the base, 4 hdc, sc
Slip stitch into first chain. Fasten off.
The chain forms the wing's top, with sc and hdc shaping the curved edge. Work down one side, then up the other for symmetry.
3. Right Wing
Magic ring. Chain 7.
Row 1:
- 2 sc in second chain from hook
- sc in next stitch
- hdc in next stitch
- dc in next two stitches
- hdc in next
- sc in magic ring, ch 1, sc in ring again
Continue along opposite side:
- 4 hdc, sc, sc
Slip stitch into first chain. Fasten off.
4. Scarf
Use thinner yarn; hook size about 1.9-2 mm.
Work into the front loops left in Round 12 of the body.
- Start in the second stitch before join.
- 30 slip stitches around in back loops only (creates the foundation for the scarf).
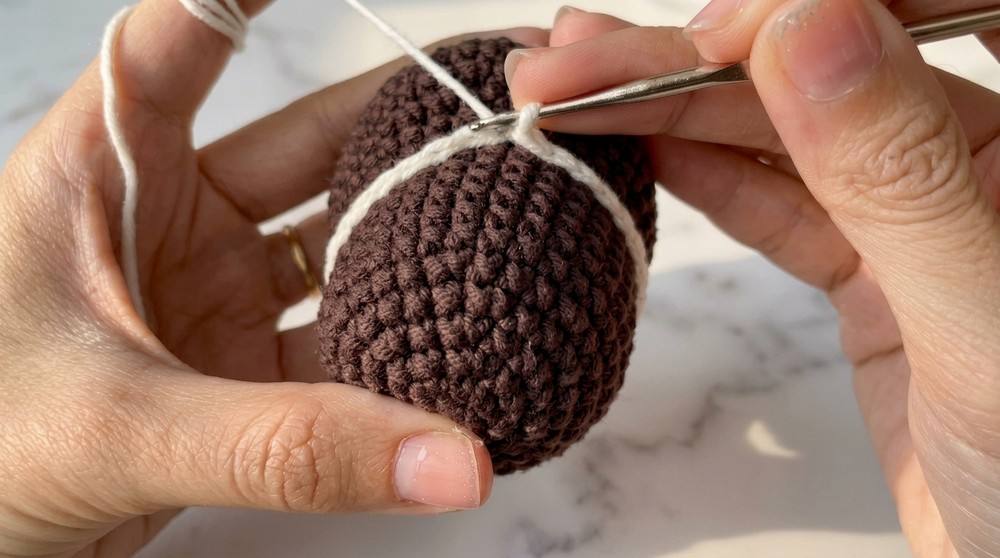
Next round:
- [4 dc in one stitch (cluster), 1 slip stitch in next] x30
Make a cluster of four double crochets in one space, then a slip stitch. Repeat all around the neck for a cozy scarf look!
5. Legs
Magic ring.
Round 1:
- 5 sc in ring. Slip stitch to first st.
Round 2:
- 5 sc.
Chain 3, sc in second chain from hook, sc in next, slip stitch to base. Repeat two more times.
Slip stitch, chain 2, sc in second chain, slip stitch to first st.
This creates one full leg with three toes and a spur.
6. Beak (Easy Version)
Use same yarn as legs.
- Chain 4. sc in second chain, hdc in next, dc in last. Fasten off.
Quick and easy, but a flatter shape.
7. Beak (3D Version)
Magic ring.
Round 1:
- 5 sc in ring. Slip stitch to first st.
Round 2:
- (sc, inc) x3, sc (7 sts total)
Round 3:
- 3 sc, inc, 3 sc.
This builds a rounded, shaped beak-best for embroidery and detail.
Final Assembly & Customization
- Attach wings at sides, legs at bottom, beak at face, scarf around neck.
- Customize with felt or safety eyes, embroidery, blushing cheeks, or wild colors for extra personality!
Special Techniques & Important Remarks
- Magic ring creates tight amigurumi starts.
- Work in back loop for neck detail and scarf attachment.
- Clusters make fluffy, dimensional accessories.
- Use smaller hook for detail work; stuff as you go for even shaping.
Pattern Experience
"It's exciting to watch your crow come to life as you shape the head and body, add accessories, and attach each feature. Try different yarns, personalize your scarf, and share your results!"