
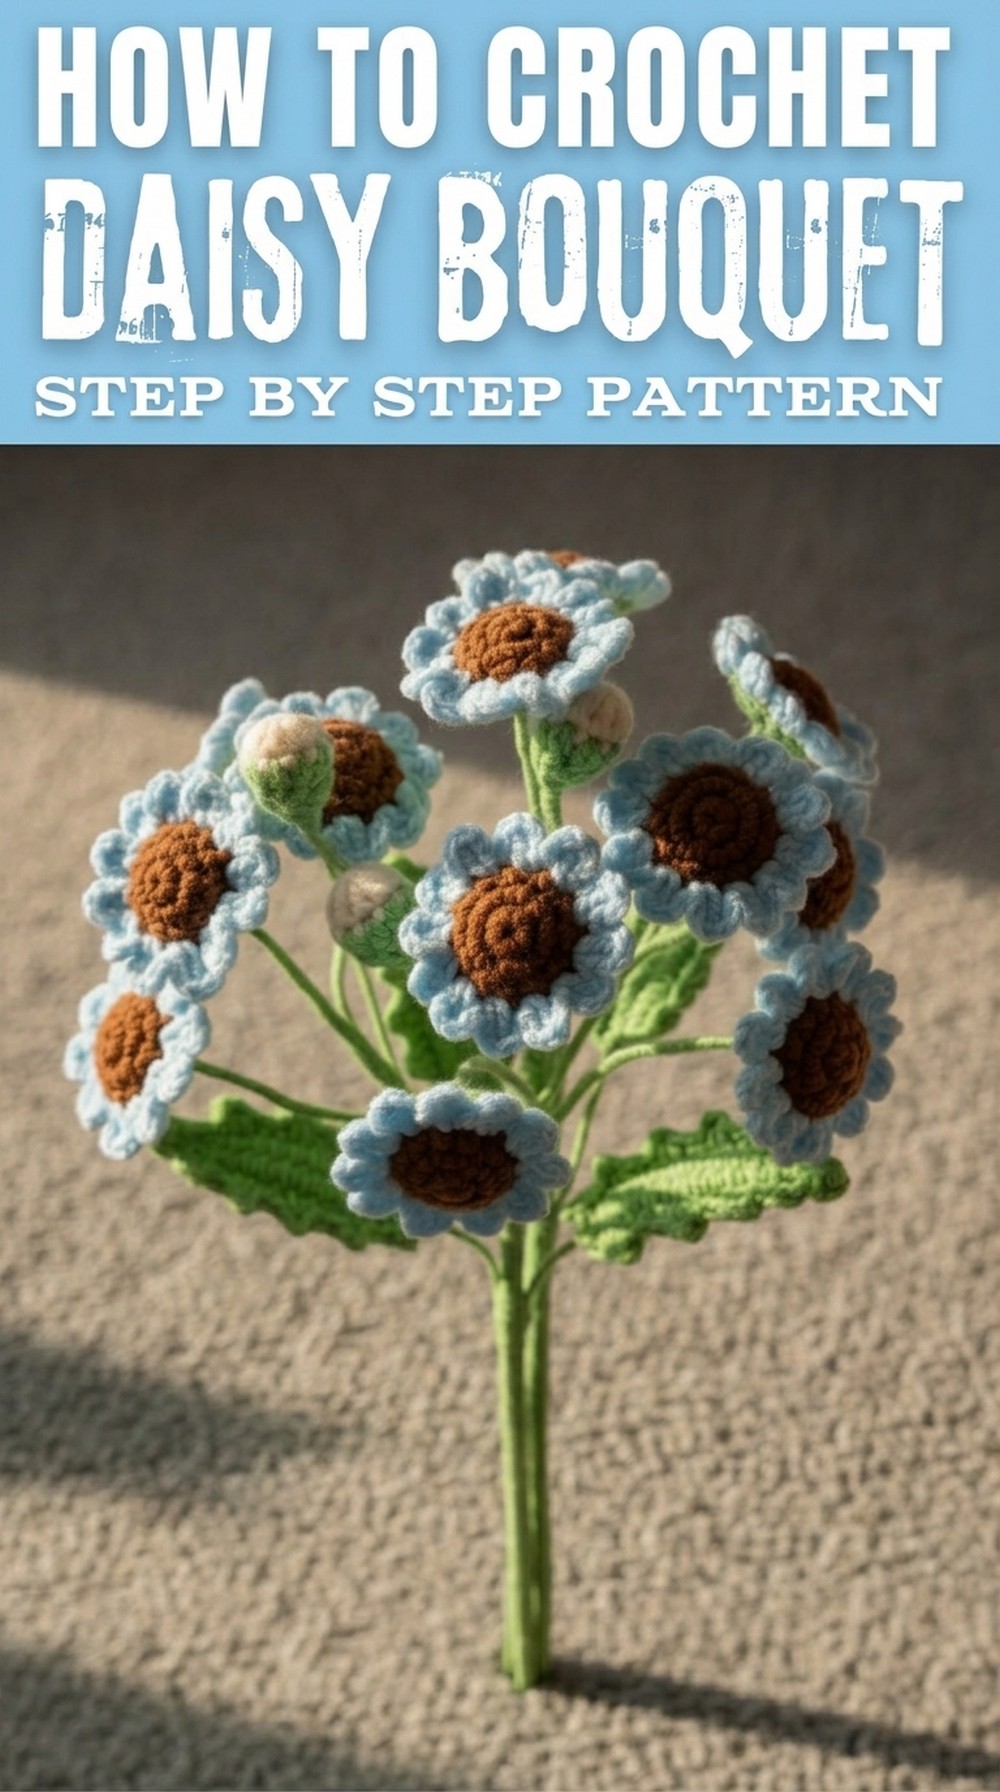
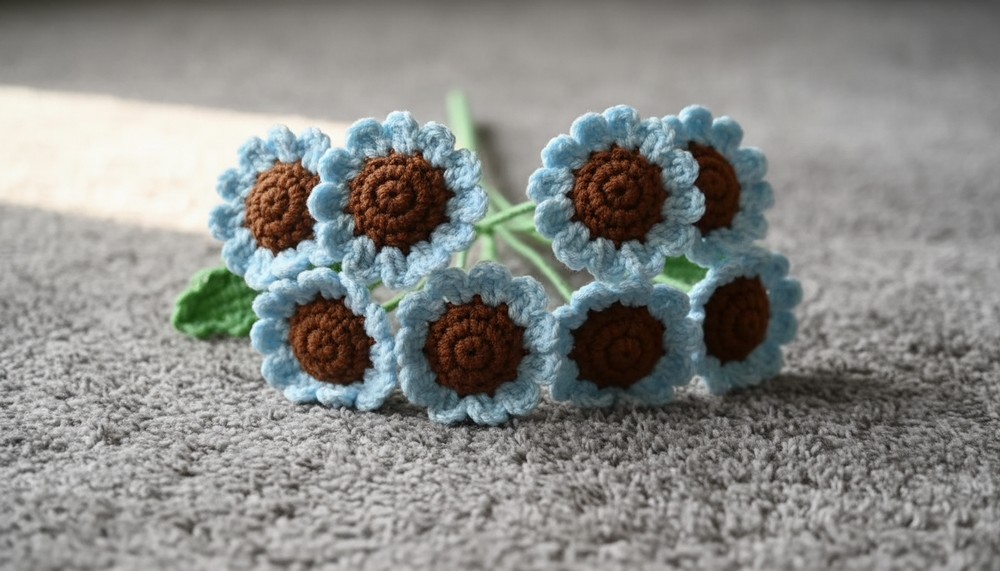
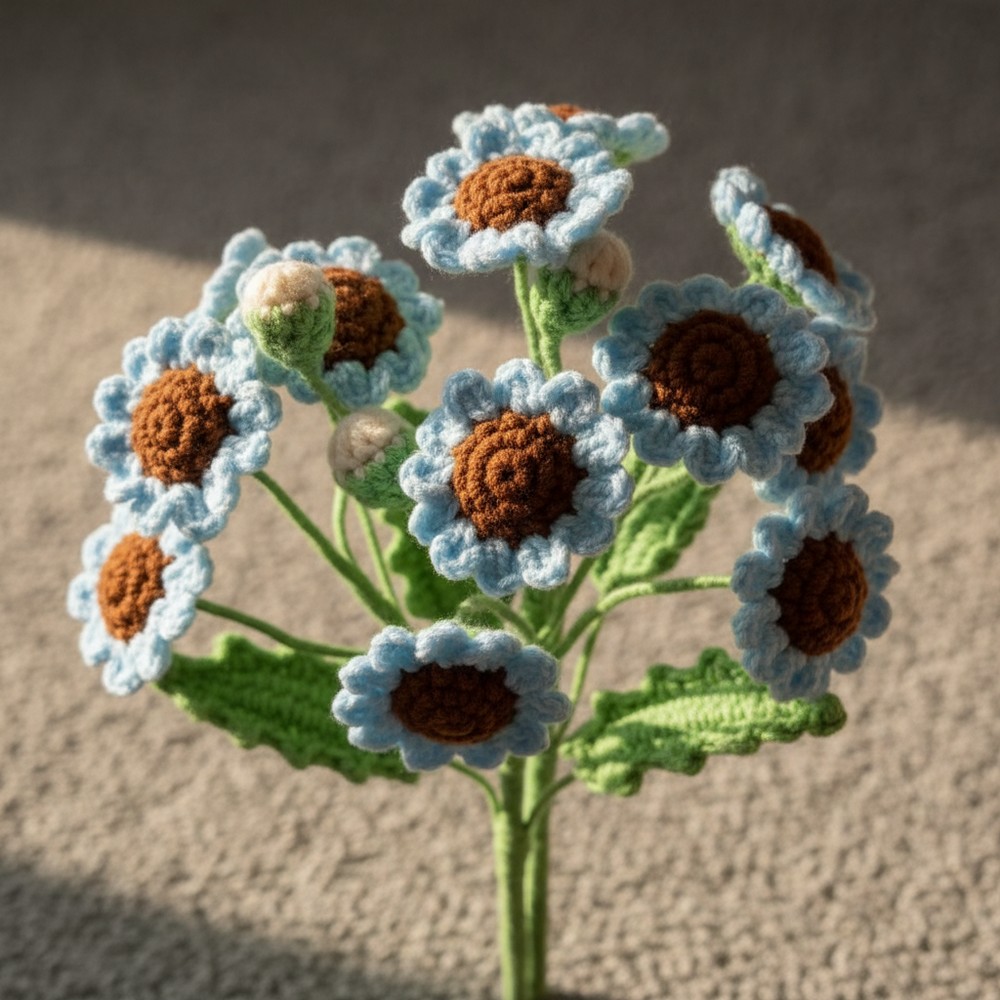
Gather cute and stylish blooms with the Free Crochet Daisy Bouquet Pattern, turning easy steps into a charming floral accent.
A little touch of crochet magic can turn simple yarn into a charming bouquet of daisies that lasts forever. This free crochet pattern lets you create delicate, heartwarming flowers that are perfect for brightening up any space. With their classic white petals, sunny yellow centers, and lively green stems, these daisies bring a sense of warmth and nature wherever they're placed. Best of all, they're beginner-friendly, requiring no glue, stuffing, or complicated tools-just a crochet hook, some colorful yarn, and your enthusiasm for crafting.
Charming Crochet Daisy Bouquet Pattern Perfect Spring Decor
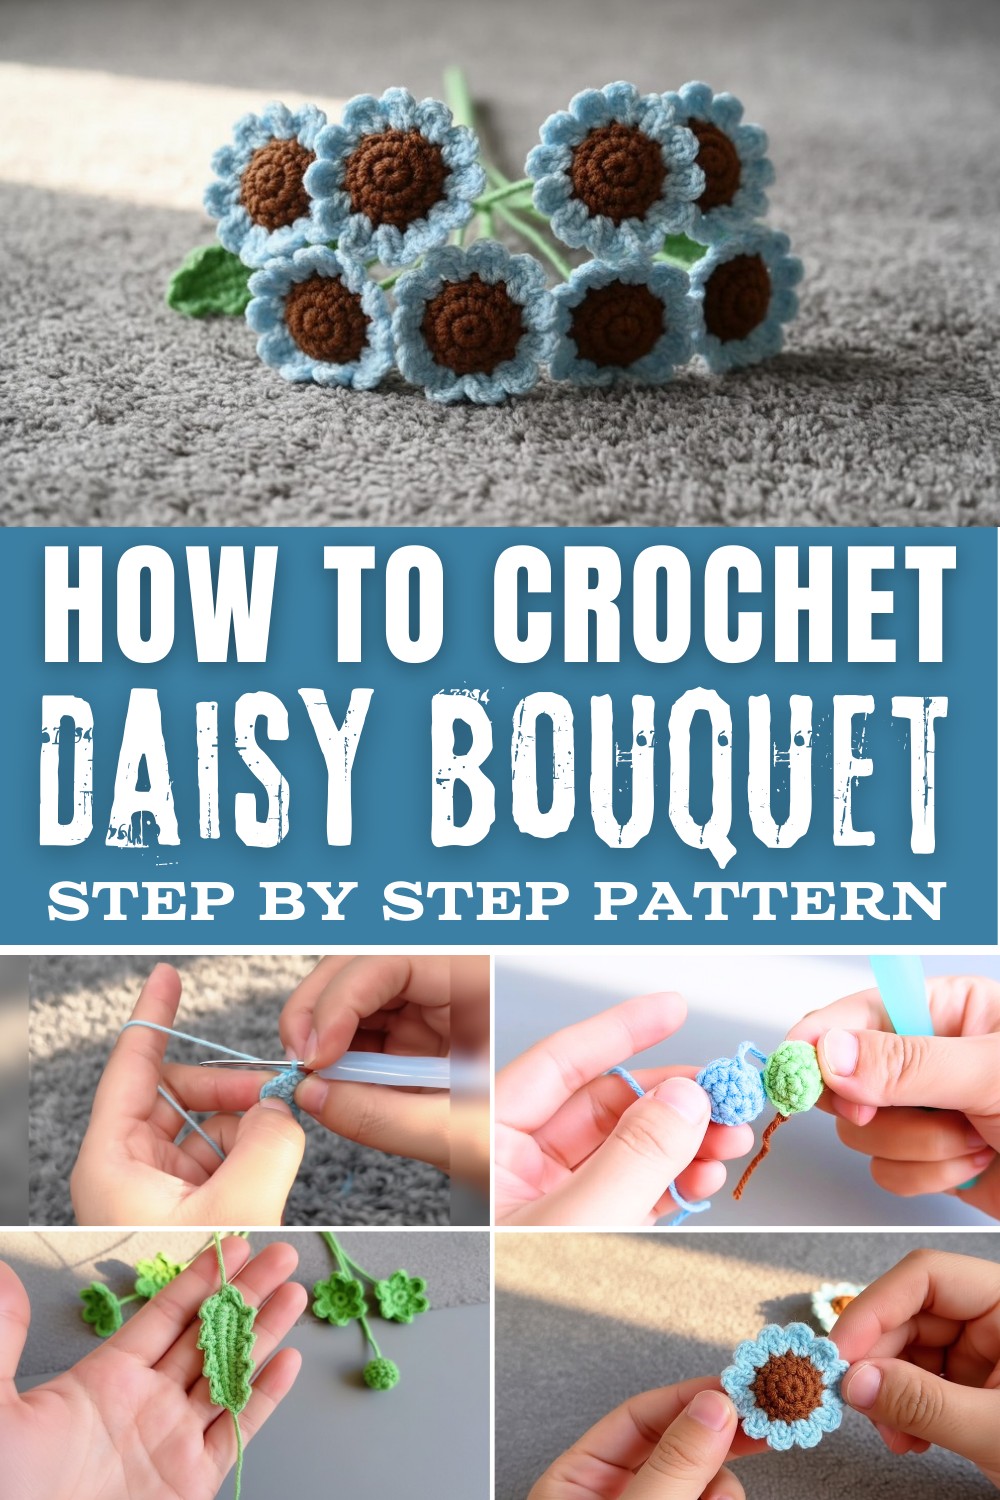
What makes this pattern special is its simplicity combined with creativity. Using stitches like single crochet, double crochet, and slip stitches, you'll create petals and buds that look effortlessly elegant. Beginners will appreciate learning the magic ring method, which opens the door to countless crochet projects like appliqués, coasters, and intricate floral designs. With the addition of a pico stitch, you'll give the leaves a beautiful, realistic edge, adding depth and texture to your handmade bouquet.
Creative Ways to Enjoy Your Daisy Bouquet
- Home Styling: Use as a centerpiece or to brighten up a shelf.
- Handmade Gifting: Show your care and effort with a heartfelt handmade present.
- Special Event Décor: Add charm to weddings, birthdays, or baby showers.
- Unique Keepsakes: A floral arrangement that never fades, holding forever beauty.
- Custom Accessories: Add individual flowers to hats, bags, or even gift wraps.
This daisy bouquet pattern is a wonderful blend of simplicity, creativity, and lasting beauty-perfect for any crocheter to enjoy.
Materials Needed
- Yarn:
- Baby Blue 4-ply yarn for the petals (cotton is recommended for smoother texture).
- Green 4-ply yarn for leaves and stem.
- Brown or Cream yarn for the flower center and bud.
- Crochet Hook: 2.0mm.
- Floral Wire (or Craft Wire): Thin flexible wire, approximately 20-24 gauge, for shaping petals, leaves, and stems.
- Glue (Optional): Craft glue for securing yarn ends during assembly.
- Tapestry Needle: For weaving in ends.
- Scissors: For precise yarn cutting.
- Pliers: To cut and fold the floral wire.
Skill Level:
- Intermediate to Advanced.
Key Abbreviations (US Terminology)
- st: Stitch.
- ch: Chain.
- sc: Single Crochet.
- hdc: Half Double Crochet.
- dc: Double Crochet.
- ss: Slip Stitch.
- MR: Magic Ring (Magic Circle).
- inc: Increase (2 sts in one st).
- dec: Decrease (combine two sts into one).
Special Notes
- This pattern is worked in rounds to create a neat, seamless structure.
- Make sure to crochet through both the front and back stitches (when noted) to ensure a sturdy design.
- Incorporating wire: Wire is used to shape petals, leaves, and the stem. Ensure to carefully wrap yarn over the wire to secure it while crocheting.
Skills You'll Gain from This Pattern
- How to use the magic ring technique to crochet a flawless daisy center.
- Methods to shape petals and build lifelike buds step-by-step.
- Crocheting sturdy and detailed leaves using simple yet visually striking stitches.
- Assembling and arranging pieces into a cohesive bouquet with clean finishes.
Pattern Instructions
Daisy Center (Brown Yarn)
- Round 1: Create a MR, work 6 sc into the ring.
- Pull the loop tight to close.
- Join with a ss into the 1st sc. (6 sts total)
- Round 2: Chain 1. Work 1 sc inc into each stitch (2 sc per stitch).
- Join with a ss into the 1st sc. (12 sts total)
- Round 3: Chain 1. Work 1 sc in each st (no increases).
- Join with a ss into the 1st sc. (12 sts total)
- Cut Yarn: Fasten off and weave in all ends.

Green Backing (Green Yarn)
- Repeat Rounds 1 to 3 (same instructions as the Daisy Center).
- You will have a matching green circular piece.
- Cut Yarn: Fasten off and set aside.
Join Daisy Center & Backing
- Place the wrong sides of the two pieces together (yellow center facing forward).
- Fold slightly to align the stitches from both pieces.
- Attach Petal Yarn (White or Cream): Insert your hook into the first stitch (through both layers).
- Pull through white yarn to join and ch 3.
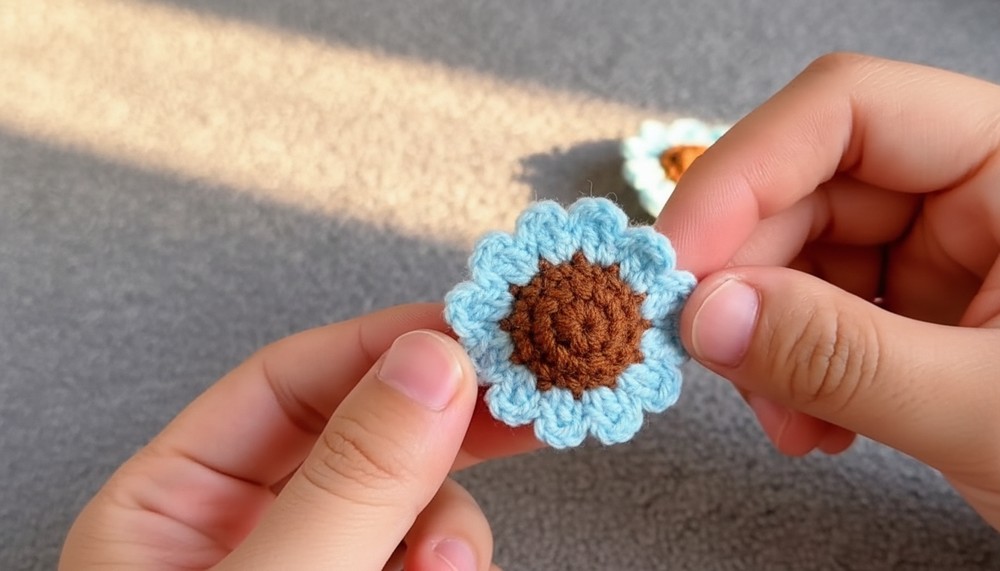
Daisy Petals
- First Petal:
- In the same stitch, 1 dc, ch 3, then ss into the same stitch.
- Move to the next stitch and work a ss through both layers.
- Repeat the petal pattern (ch 3, 1 dc, ch 3, ss) around the entire flower. Each stitch will create one petal for a total of 12 petals.
- Weave in Ends: After completing the 12th petal, chain 3 and ss into the base of the first petal.
- Cut yarn and weave the tail into the middle of the flower.
- Cut yarn and weave the tail into the middle of the flower.
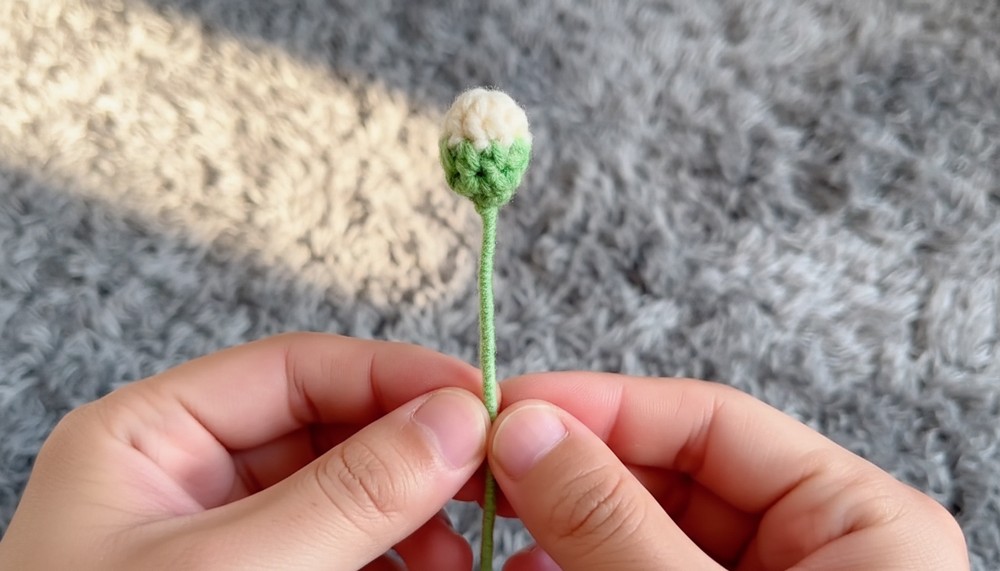
Flower Bud
- Round 1: Create a MR with cream-colour (or yellow) yarn, ch 3, and work 9 dc into the ring. (9 sts total)
- Pull the loop tight and join with a ss into the 1st dc.
- Round 2: Change to green yarn and ch 1, work 9 hdc (one in each st).
- Join with a ss into the 1st hdc.
- Round 3 (Shaping the Bud):
- Work [1 sc, 1 dec] x 3 times. (6 sts total)
- Join with a ss, then fasten off.
- Tuck the yarn tails inside the bud for shape.
Leaf (Green Yarn)
- Foundation Chain: Start by chaining 14.
- Begin single crochets into the 2nd chain from the hook.
- First Side:
- Work 12 sc along the chain, then 3 sc into the last stitch to create a rounded tip.
- Opposite Side:
- Rotate to work along the other side of the foundation chain.
- Work 12 sc symmetrically into each stitch.
- Attach Wire: Enclose a piece of floral wire along the leaf edge as you crochet.
- Decorative Edge:
- Start Round 2 with a sc decrease, then ch 2, slip stitch into the back loop of the chain.
- Repeat this picot stitch pattern (decrease, ch 2, ss) around for a total of 9 repeats.
- Fasten Off: Once complete, wrap the yarn tail around the wire end to secure.
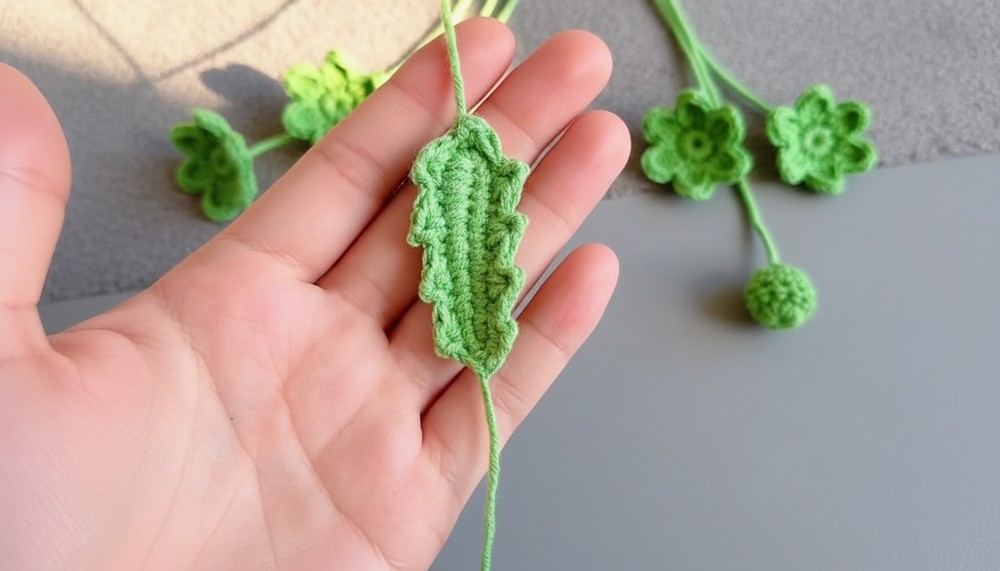
Tip: Make two leaves for one flower stem.
Stem (Green Yarn)
- Foundation: Chain 14, then crochet 12 sc along the chain in the front loops only.
- Insert a floral wire into the chain base and crochet around the wire to hide it.
- Wrap the yarn tightly around the bottom section of the floral wire for extra durability.
Assembly
- Attaching Buds and Flowers:
- Thread the stem wire of each flower or bud into the daisy's center (or connect them manually near the stem's base).
- Secure the wire tightly by twisting it into the desired shape.
- Wrapping Stem: Take green yarn and wrap it around the combined wires of the flower stem, buds, and leaves.
- Final Touches: Add glue at the bottom or where needed for extra security. Trim excess wire ends if required.
Conclusion
Congratulations! You've completed a beautiful crochet daisy flower. This versatile pattern enables you to crochet gorgeous daisies for keychains, home décor, or bouquets. With a combination of petals, buds, and leaves, you can create as many flowers as desired for just the right look.
Pattern Corrections
- Ensure stitches are worked through both layers when connecting the daisy backing and center.
- Always secure the wire tightly when wrapping yarn to prevent unraveling over time.
Tips
- For larger flowers, consider using thicker yarn and a larger hook.
- To keep petals evenly shaped, adjust wire slightly after assembly.
- Experiment with stem arrangements for a spontaneous, natural look.
Common Challenges and Solutions
Some beginners may find working with the magic ring method a bit tricky, as it can feel fiddly at first. The key is to maintain gentle tension in your yarn and practice a few times until it feels natural. Another potential challenge is creating uniform petals-this can be resolved by counting stitches carefully and maintaining consistent tension throughout. For those having difficulty with arranging and assembling the bouquet, try laying out all the pieces on a flat surface first to plan your placement before attaching them.