
Revaming simple yarn into a beautiful flower hairclip is a wonderfully creative way to elevate your crochet game. A Crochet Flower Hairclip Pattern combines style and practicality, allowing you to crochet unique hair accessories brimming with handmade charm. It's lightweight, customizable, and perfect for experimenting with vibrant colors or delicate pastels to match any outfit or season.
Free Crochet Heart Pattern For Accessories

This Crochet Heart is ideal for using up small bits of leftover yarn, making it both eco-friendly and budget-conscious. From adding a playful vibe to a casual hairstyle to crocheting thoughtful gifts, it's a small project with big potential. Crocheters love how versatile it is, with endless ways to personalize, ensuring every finished piece truly blooms with individuality.
Quick Summary: Crochet Oval Flower Base Steps
Shaping the Oval (Round 1)
- Chain 16 stitches.
- Single crochet 6 times from the second chain.
- Work 3 single crochets into the next chain (increasing).
- Single crochet into the next 5 chains.
- Work 3 single crochets into the last chain (other end increase).
- Crochet evenly along the opposite side: single crochet in next 6, 3 single crochets in next, single crochet in next 6, 2 single crochets in next.
- Slip stitch to the first stitch to close the round.
- Chain one to start the next round.
Rounds 2-4 (Forming the Shape)
- Continue working single crochets, with increases at the rounded ends on each round.
- For Round 2, some increases are done in the back loop only.
- Each round increases stitch count at the ends to expand the oval smoothly.
- Follow the pattern of single crochet and increases as directed for each round, ending each with a slip stitch and chain one.
Petal Preparation
- After completing the last round, repeat: single crochet, then chain 3 (using front loop only) to prepare for attaching or making petals.
Materials
- Yarn: 4-ply cotton yarn in your desired color.
- Hook: 2.5 mm crochet hook.
- Tapestry Needle: For weaving in the loose ends.
- Scissors: To cut the yarn.
Abbreviations Used
- ch: chain
- sc: single crochet
- sl st: slip stitch
- inc: increase (2 single crochets in the same stitch)
- sc3tog: single crochet 3 together (a decrease that combines three stitches into one)
- BLO: back loop only
- FLO: front loop only
Special Notes
- Shaping the Heart: This heart pattern uses increasing and decreasing techniques to create the curves and the pointed bottom of the heart.
- Back Loop Only (BLO): In some rounds, you'll work in the back loop to add texture and depth to the heart.
- Tension/Size: Maintain consistent tension for a neat finish. The size of your heart can vary depending on yarn weight and hook size.
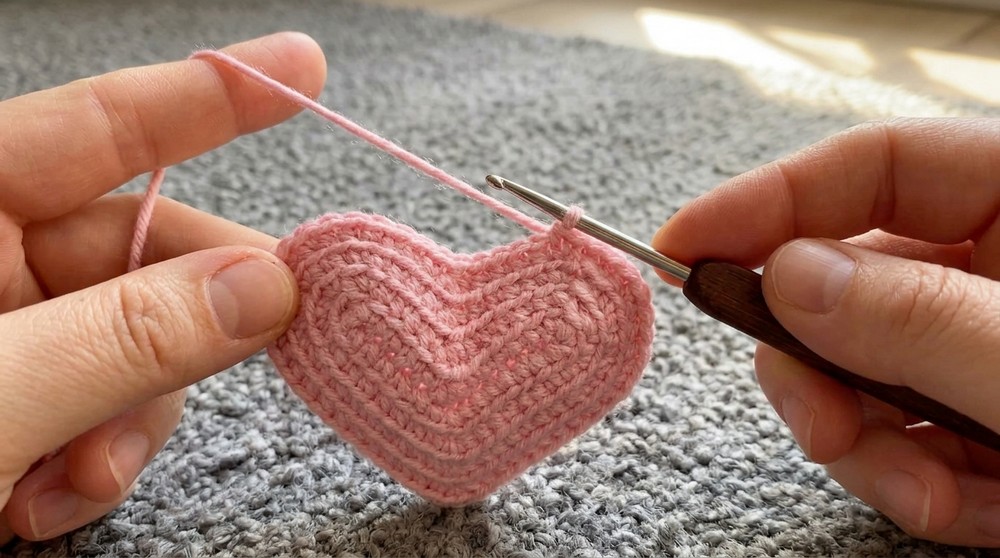
Finished Size
With 4-ply cotton yarn and a 2.5 mm hook, the heart will be approximately 2.5 inches (6.5 cm) wide.
Crochet Heart Pattern Instructions
Step 1: Foundation Row
- Starting with a slipknot, chain 16 (ch 16). This will act as the base for the heart's shape.
- Begin working along the chain as follows:
Step 2: First Side of the Heart (Row 1)
- Work 6 sc into the first 6 chains of the foundation.
- In the next chain, make a sc3tog (single crochet 3 stitches together) to shape the curve of the heart.
- Work 1 sc in the next 5 chains.
- In the final chain of the row, work 3 sc to curve around to the bottom side of the foundation chain.

Step 3: Other Side of the Foundation Chain (Row 1)
- Turn your work to the other side of the foundation chain.
- Work 1 sc into the next 6 chains along the bottom side.
- In the next chain, make 3 sc to round out the second curve of the heart.
- Continue by working 1 sc into the next 6 chains.
- In the last chain, make 2 sc.
- Join the round with a sl st into the first stitch of the row.
Step 4: Round 2
Note: This round is worked in back loop only (BLO).
- Start the round with 2 sc (inc) in the first stitch.
- Work 1 sc in the next 4 stitches.
- In the next stitch, work a sc3tog to shape the heart's curve.
- Work 1 sc in the next 4 stitches.
- Make 2 sc in each of the next 3 stitches to widen the curve.
- Work 1 sc in the next 7 stitches.
- In the next stitch, make 3 sc to round the top curve of the heart.
- Work 1 sc in the next 7 stitches.
- Make 2 sc in each of the next 2 stitches (increases).
- Join with a sl st into the first stitch and ch 1 to begin the next round.

Step 5: Round 3
- Work 1 sc in the first stitch, then 2 sc in the next stitch (increase).
- Work 1 sc in the next 3 stitches.
- Make a sc3tog in the next stitch.
- Work 1 sc in the next 3 stitches.
- Follow the increase pattern: (1 sc, 2 sc) × 3.
- Work 1 sc in the next 8 stitches.
- In the next stitch, make 3 sc to round out the curve.
- Work 1 sc in the next 8 stitches.
- Follow the pattern: (1 sc, 2 sc) × 2.
- Join with a sl st into the first stitch and ch 1 for the next round.
Step 6: Round 4 (Final Round)
- Work 1 sc in the first stitch, and 2 sc (increase) in the next stitch.
- Work 1 sc into the next 3 stitches.
- Make a sc3tog in the next stitch.
- Work 1 sc in the next 2 stitches.
- Continue with the pattern: (1 sc, 1 inc, 1 sc) × 3.
- Work 1 sc in the next 9 stitches.
- In the next stitch, make 3 sc for the final curve of the heart.
- Work 1 sc in the next 9 stitches.
- Follow the pattern: (1 sc, 1 inc, 1 sc) × 2.
- Join with a sl st into the first stitch to complete the heart.
Optional Edging
If desired, you can add a decorative edging:
- In the front loops only (FLO) of the final round, work a sc, ch 3 pattern to create a lacy texture.
- Fasten off and weave in the loose ends.
Finishing and Usage
- Cut the yarn and pull it tight to fasten off securely.
- Weave in loose ends with a tapestry needle to tidy up your heart.
- Optional: Block the heart slightly to enhance its shape.

Your crochet heart is now ready for use! You can attach it to keychains, cards, headbands, or other projects.
Tips for Maintaining the Pattern
- Keep Count: Ensure your stitch count is accurate on each round for a symmetrical heart.
- Tension Matters: Even tension creates a clean and polished final look.
- Use Contrasting Yarn for Edging: To enhance the heart's look, use a contrasting color for the optional edging.
Final Thoughts
This Crochet Heart is a timeless and versatile motif, perfect as an embellishment or a piece on its own. Its clean shape and simple design make it beginner-friendly yet satisfying for experienced crocheters. Experiment with yarn colors and sizes to create hearts for various projects like gifts, décor, or personal accessories.