
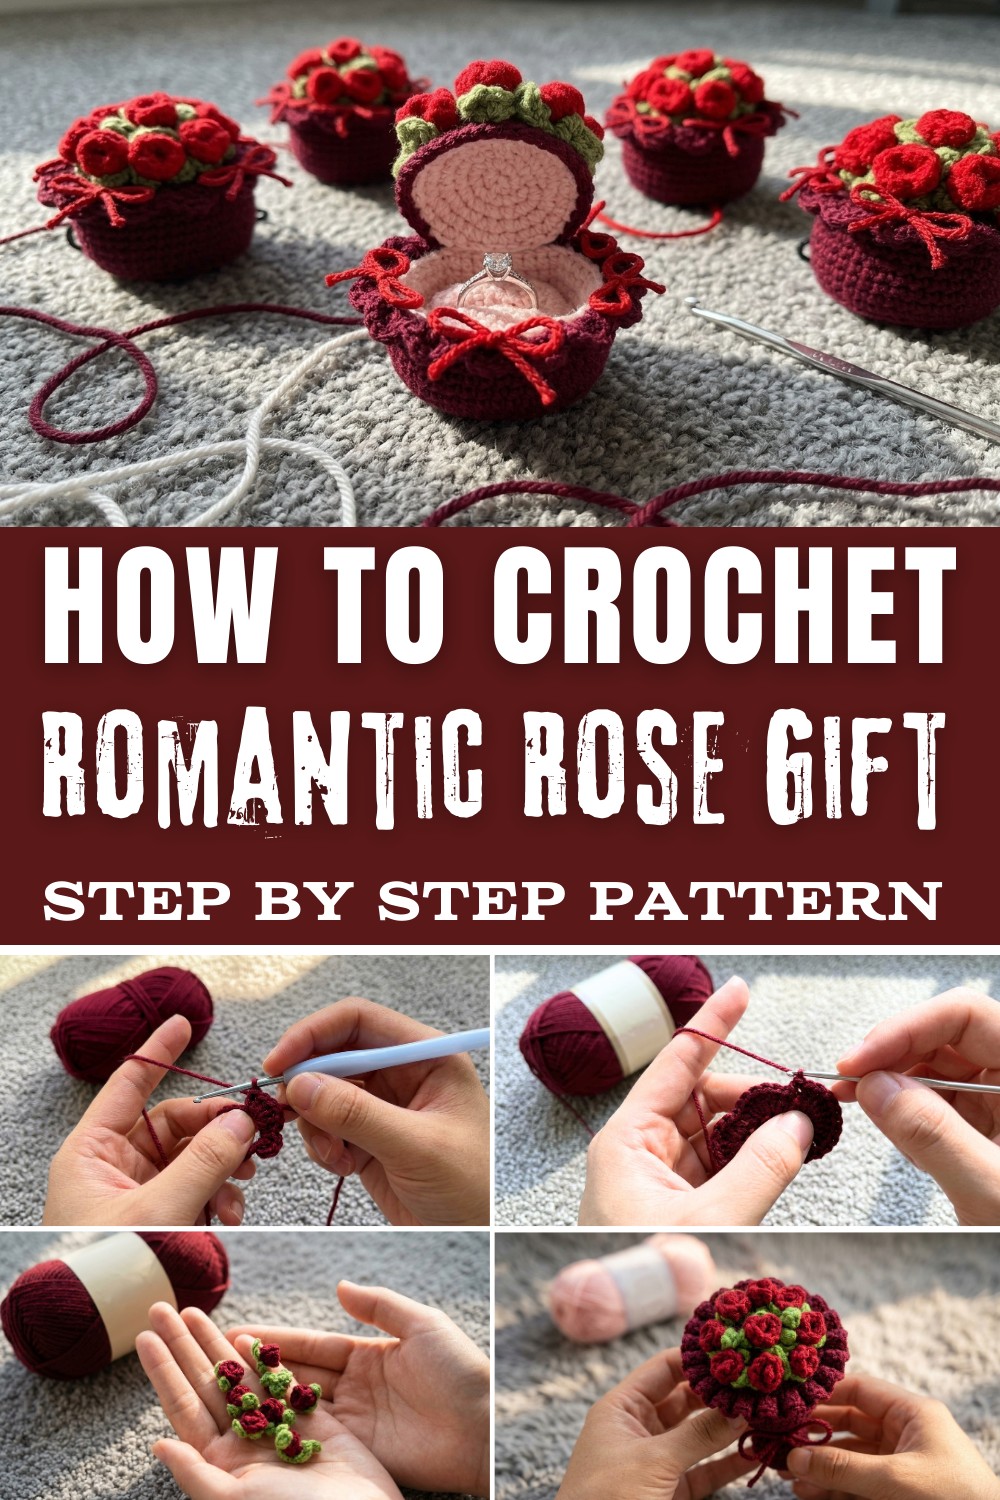
Imagine giving someone a unique handmade gift that feels special and full of love. This crochet Romantic Rose Gift helps you create a romantic flower bouquet with soft, colorful roses crafted entirely with yarn. The process begins with forming lovely round flowers and adding delicate green leaves to complete the design. The roses are carefully arranged in a charming bouquet, and the finishing touch is a small bow tied neatly around it, making it even more delightful.
Free Crochet Romantic Rose Gift Pattern
These roses have a soft and smooth texture, looking like real blossoms, and they never fade or wilt, making them perfect as lasting gifts for special occasions like Valentine's Day or birthdays. The bouquet is small, lightweight, and can fit beautifully inside a decorative ring gift box. Creating Romantic Rose Gift for anyone, and the result is a thoughtful, creative gift that stands out and feels meaningful.
Materials List
- Yarn:
- Main Yarn Colors (box and lid): Cotton or acrylic yarn in your choice of color.
- Flower Colors: Contrasting shades (e.g., red, pink, or white).
- Leaf Color: Green.
- Bow Accent: Black or another contrasting yarn.
- Crochet Hook: 2 mm or 2.5 mm (depending on yarn type).
- Fiberfill Stuffing: For adding softness to the box lid or flower center, if needed.
- Scissors: To cut yarn.
- Needle/Tapestry Needle: For sewing and weaving in yarn ends.
- Glue: Quick-drying fabric glue (optional for attaching flowers and leaves).
- Ring (Optional): The central piece for your box!
Skill Level
Intermediate to Advanced
You will need to be comfortable with working in the round and using both basic and decorative stitches, including various increases and decreases.
Key Abbreviations
The pattern uses US Crochet Terminology:
- CH: Chain
- SC: Single Crochet
- HDC: Half Double Crochet
- DC: Double Crochet
- TR: Triple Crochet
- SL ST: Slip Stitch
- INC: Increase (2 stitches in the same stitch)
- DEC: Decrease (crocheting stitches together)
- BLO: Back Loop Only
- FLO: Front Loop Only
Special Notes
- Work Tightly: Tight stitches create a sturdy box structure. Use a smaller hook if your tension is too loose.
- Stuffing: Add fiberfill when appropriate (headpiece or lid) to enhance shape and structure.
- Blocking: Blocking the flowers and leaves improves their appearance and allows them to lay flat.
- Color Changes: Use contrasting yarn colors for the flowers, leaves, and bows to make the design pop.
Pattern Instructions
Part 1: Box Lid (Top Circle)
- Round 1:
- Start with a magic ring. Work 6 SC into the ring.
- Pull the magic ring tightly closed and SL ST to the first SC to join. (6 stitches total)
- Round 2:
- Work INC (2 SC in each stitch) in every stitch around.
- SL ST to the first SC to join. (12 stitches total)
- Round 3:
- Pattern: 1 SC, 1 INC, repeat around 6 times. (18 stitches total)
- SL ST to the first SC to join.

- Round 4:
- Pattern: 2 SC, 1 INC, repeat around 6 times. (24 stitches total)
- SL ST to the first SC to join.
- Round 5:
- Pattern: 3 SC, 1 INC, repeat around 6 times. (30 stitches total)
- SL ST to the first SC to join.
- Round 6:
- Pattern: 4 SC, 1 INC, repeat around 6 times. (36 stitches total)
- SL ST to the first SC to join.
- Finishing Round:
- Cut the yarn, leaving a small tail. Weave in the tail to the wrong side of the lid to hide it.
Part 2: Box Base
Rounds 1 to 3: Follow the same instructions as the Box Lid.
Begin Round 4:
- Round 4:
- CH 3 (counts as the first DC). Work 1 DC in BLO into each stitch around. (36 stitches total)
- SL ST to the first DC to join.
- Round 5:
- Work DC2Tog (DC decrease) 9 times. (9 groups total) SL ST to the first stitch to join.
- Round 6:
- Alternate 1 SC (BLO) and 1 SC DEC. Repeat this sequence 18 times around. (18 stitches total)
- SL ST to the first SC to join.
- Round 7:
- Work 2 SC in each stitch around for a total of 6 groups. (36 stitches total)
- Rounds 8-12:
- Follow the same repetition sequence, alternating SC and SC INC patterns, gradually increasing the base size.
- Round 13 (Front Loop Only):
- Work 1 SC in FLO of every stitch. (36 stitches total)
- Rounds 14-17:
- SC in each stitch with no increases or decreases to build the box height.
- End with a SL ST, then cut the yarn.
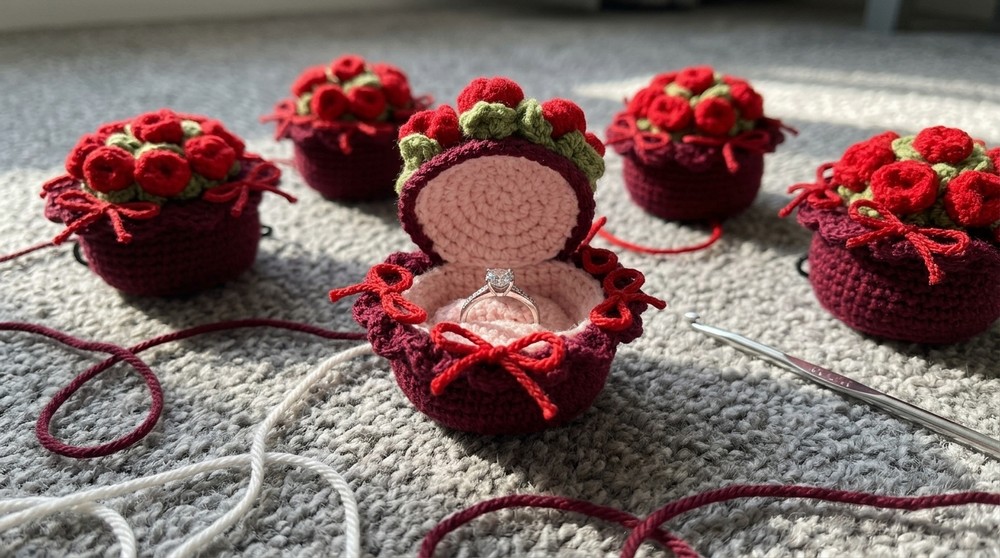
Part 3: Flower Border
- Attach New Yarn at the edge of the box base. Use the front loops from Round 13.
- CH 3 (counts as a DC), work 3 DC in the same loop, CH 2, and SL ST to secure the petal.
- Alternate between 3 DC petals in FLO and SK 1 ST for spacing. Repeat around the box rim.
Part 4: Ring Holder
- Foundation: CH 10. Work SC in the second chain from the hook and continue down the chain. (9 SC total)
- CH 1 and turn. Work SC into each stitch across for 5 rows total to form a flat rectangle.
- Fold in half lengthwise and SL ST to join the edges. This creates a small tube for holding the ring.
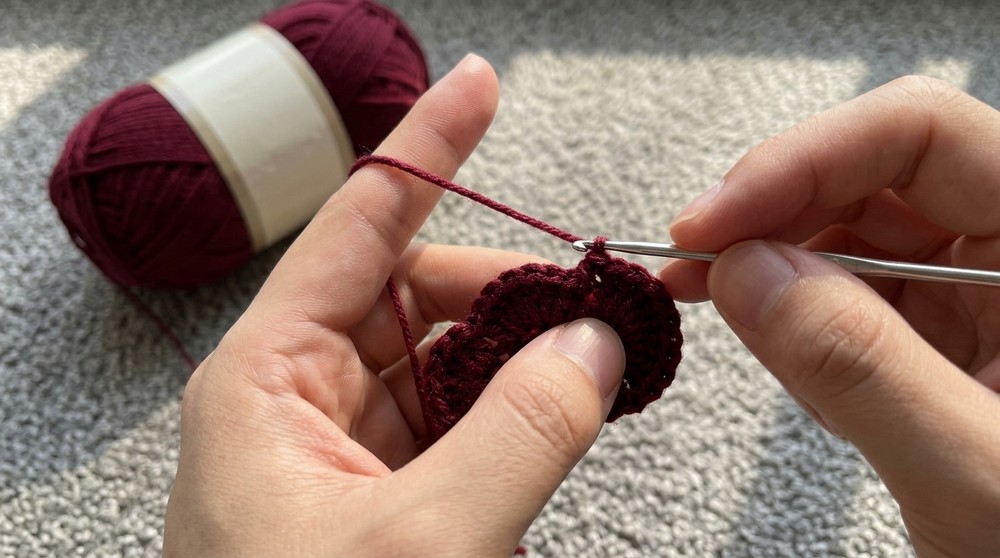
Part 5: Flowers and Leaves
Mini Roses:
- Start with a magic ring.
- Work 6 SC into the ring, pull tight, and close with a SL ST.
- Continue increasing (1 SC, INC) for several rounds until the rose size is to your liking.
Leaves:
- Start with a magic ring. Inside the ring: CH 3, SC, HDC, SL ST
- Repeat this leaf pattern 3 times around to create a pointed edge.

Finishing and Assembly
- Use glue or sew nine flowers around the lid of the box, ensuring equal spacing.
- Create black bows and attach them between the flowers for a lovely accent.
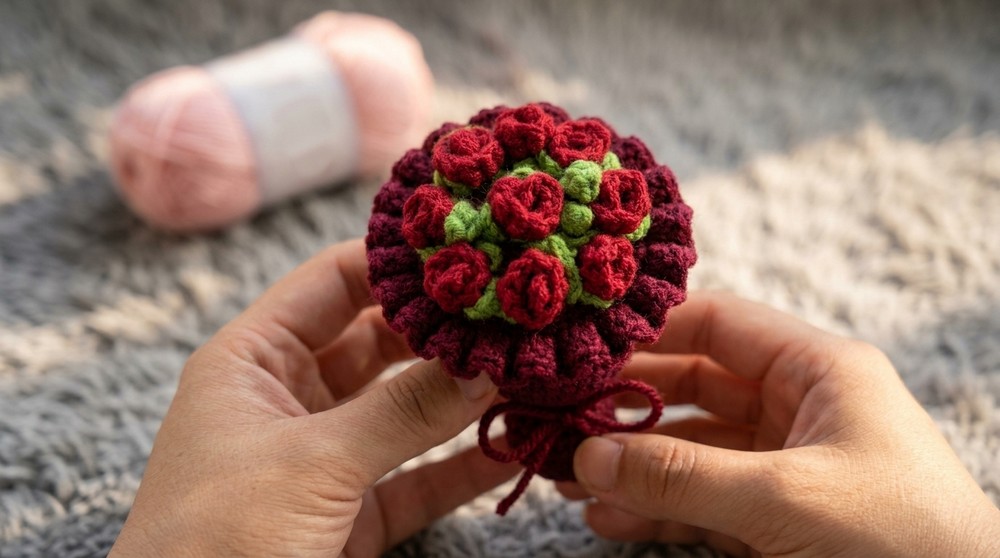
- Sew the ring holder inside the box. Stitch securely to the bottom base.
- Insert your ring in the holder and cover with the lid for a finished Valentine's gift box!
Conclusion
Congratulations! You've create Romantic Rose Gift with intricate flowers and details. Each component adds a personal touch, from the roses and border to the bow and leaf accents.
Pattern Correction
- Ensure that increases in the circular lid and base align properly for smooth edges. Count stitches at the end of each round.
- Adjust yarn tension to maintain structure, using a smaller crochet hook if necessary.
Tips for Success
- Color Play: Experiment with different color combinations for seasonal and occasion-specific boxes.
- Stitch Marker: Use one to mark the starting stitch in rounds, especially for the lid and base.
- Blocking: Gently block your flowers and leaves for polished, flat edges.
- Glue vs. Sewing: While glue works well for small details, sewing provides stronger, long-lasting attachments.