
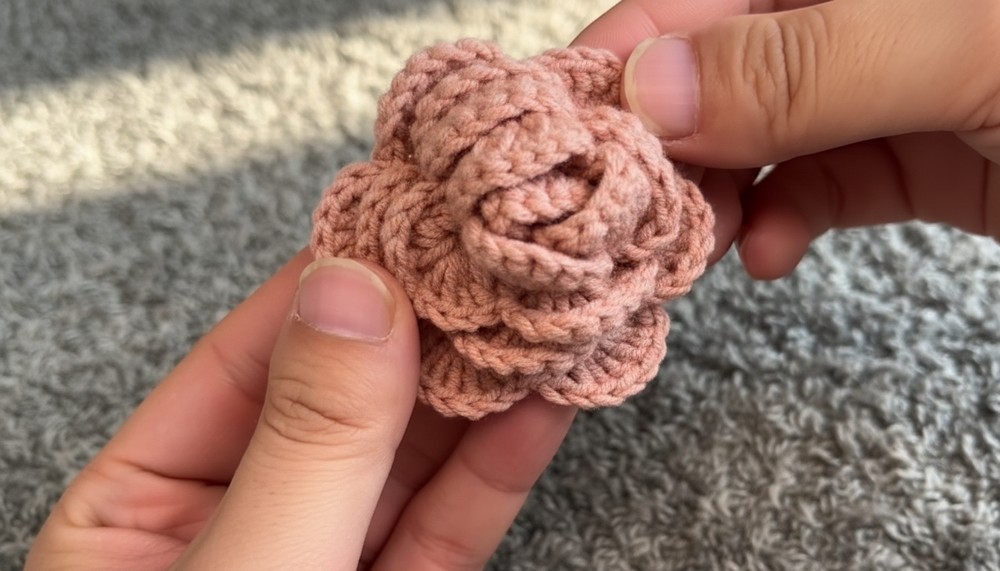
Holding a delicate flower that never wilts, crocheted with love and care. That's the magic of a crochet rose pattern, a handmade treasure that's as beautiful as it is versatile. This rose blooms in any color you choose, from soft pastels to vibrant tones, with intricate petals that look almost lifelike. Perfect for decorating your home or enhancing gifts, a crochet rose is a small yet stunning detail that can brighten anyone's day.
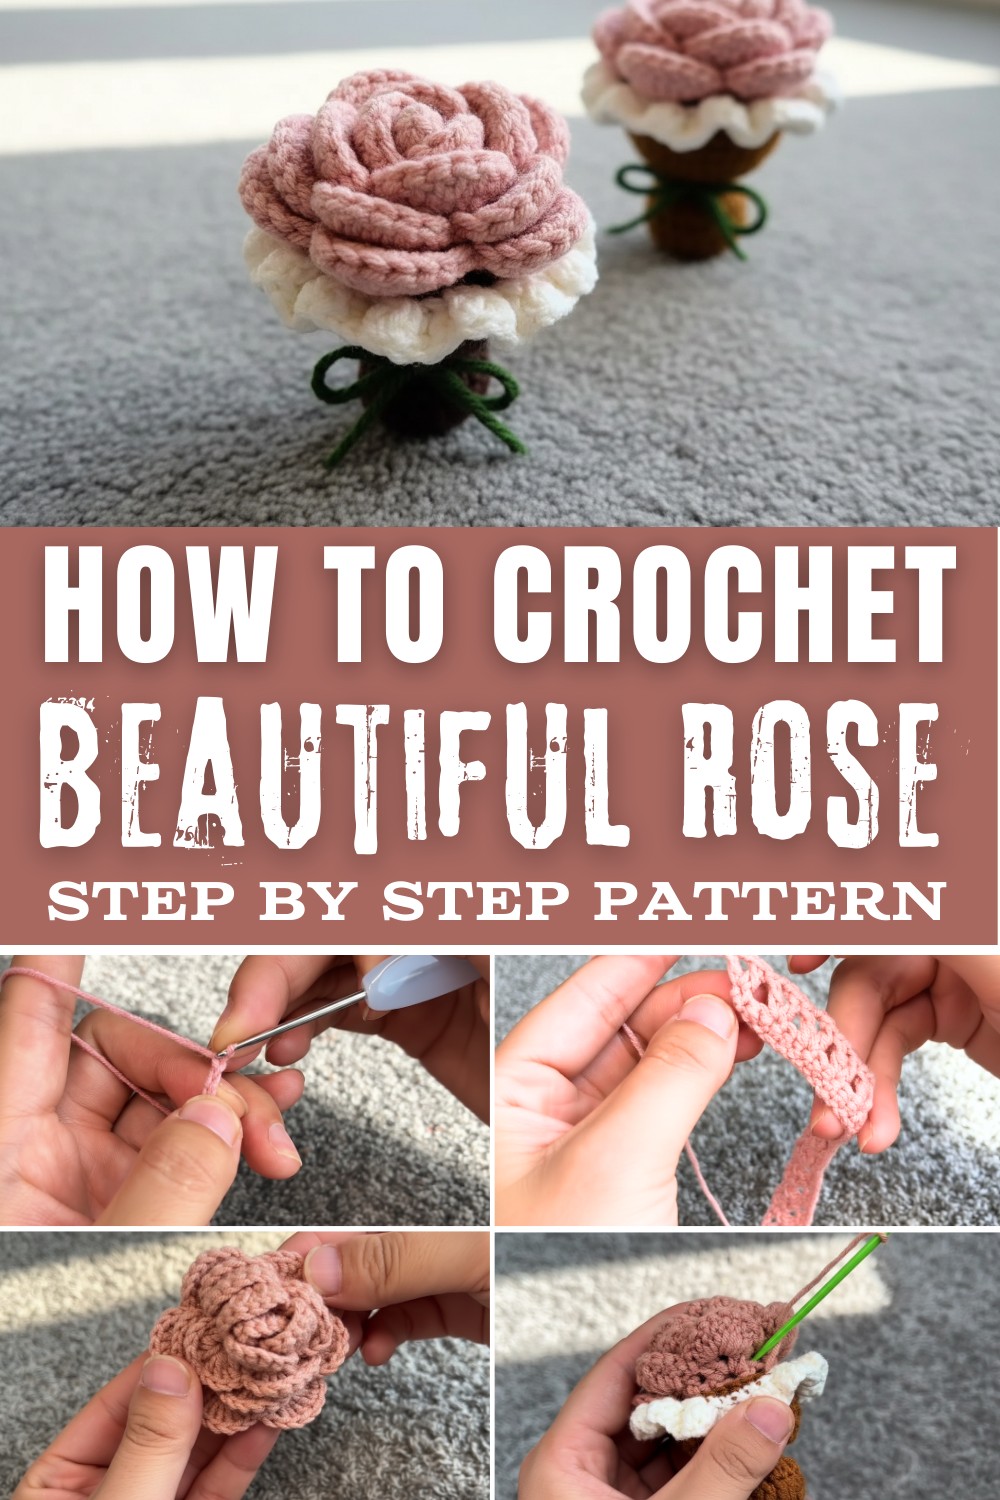
Its timeless charm makes it ideal for embellishing hats, scarves, or even creating a single elegant flower as a keepsake for special occasions like weddings or anniversaries. Despite its elegant appearance, a crochet rose is surprisingly simple to make, making it a favorite project for beginners and seasoned crocheters alike. Whether it's used as a hair clip, table décor, or lovingly gifted, a crochet rose brings warmth, creativity, and a truly personal touch.
Materials Needed
- Yarn: Four-ply yarn in rose color (Brown, Blush, or any preferred hue), green for the bouquet holder, and contrasting yarn for decorative lace.
- Hook: 2.0 mm crochet hook.
- Additional Tools: Tapestry needle, stitch markers, fiberfill stuffing, hot glue gun (optional).
- Gauge: While gauge is not critical, ensure your stitches are firm enough to hold the rose shape and bouquet structure tightly.
Special Techniques Used
- Magic Ring: A foundation technique that creates a tight center for circular crochet.
- V Stitch: (DC, CH 2, DC) - Worked into the same stitch to create a 'V' shape.
- Shell Stitch: A cluster of double crochets worked in the same space.
- Waste Coat Single Crochet: A variation of single crochet that's worked into the center of the 'V' from the previous row, creating a knit-like texture.
- Double Crochet 3 Together (DC3tog): Combining three incomplete DCs into one stitch.
Finished Size
Each rose measures approximately 2 inches in diameter when rolled, and the bouquet holder has a height of around 3 inches.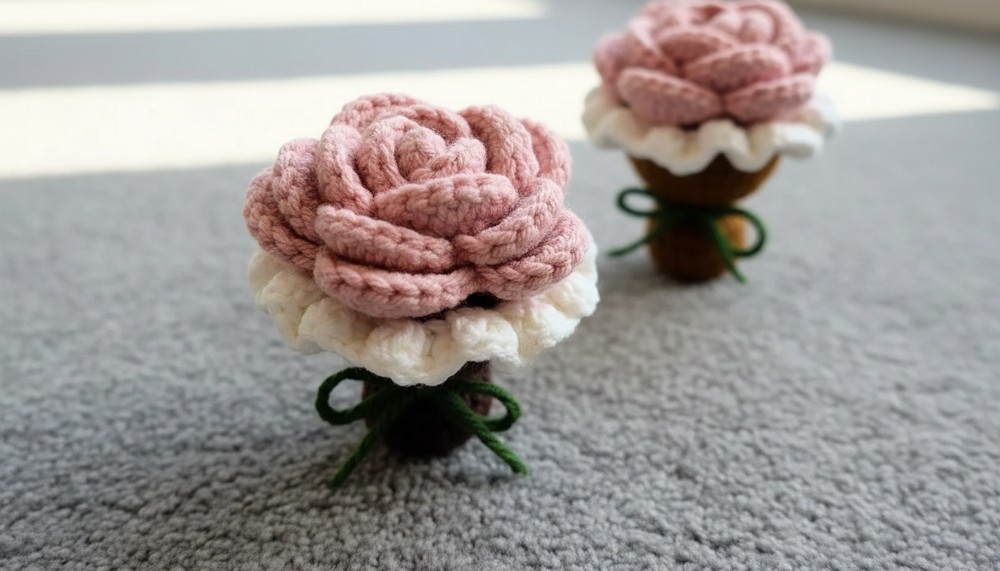
Pattern Instructions
Step 1: Rose Petal Strip
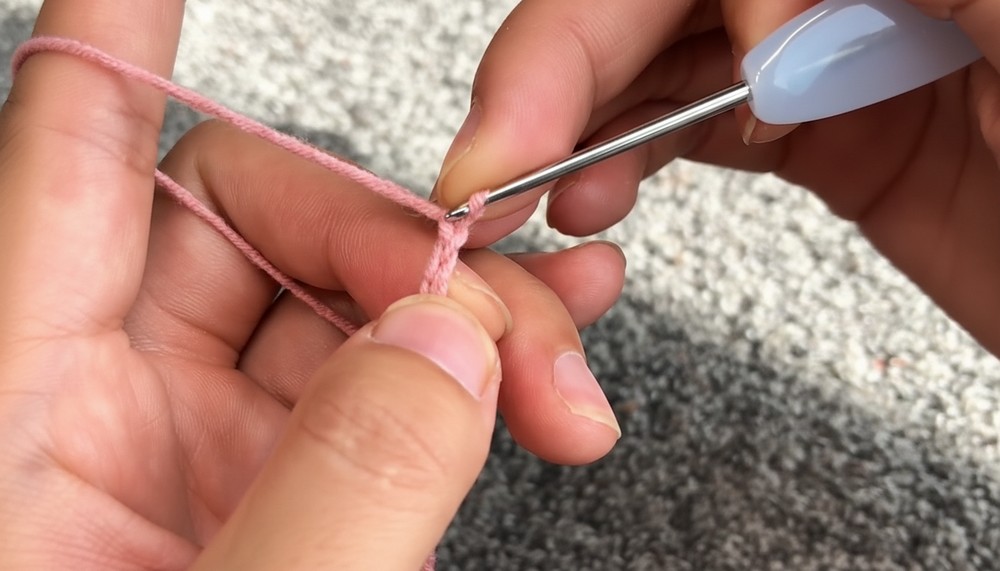
Foundation Chain:
- Create a slip knot.
- Chain 53 stitches.
Row 1: Single Crochet Base
- Skip the first chain, and work one single crochet into the second chain from the hook.
- Continue working single crochet stitches across for a total of 52 single crochets.
- Chain 5 and turn your work.
Row 2: V-Stitch Row
- Double crochet into the first stitch.
- Skip two stitches, and work a V-stitch (DC, CH 2, DC) into the next stitch.
- Repeat the pattern across the row.
- Chain 3 and turn your work.
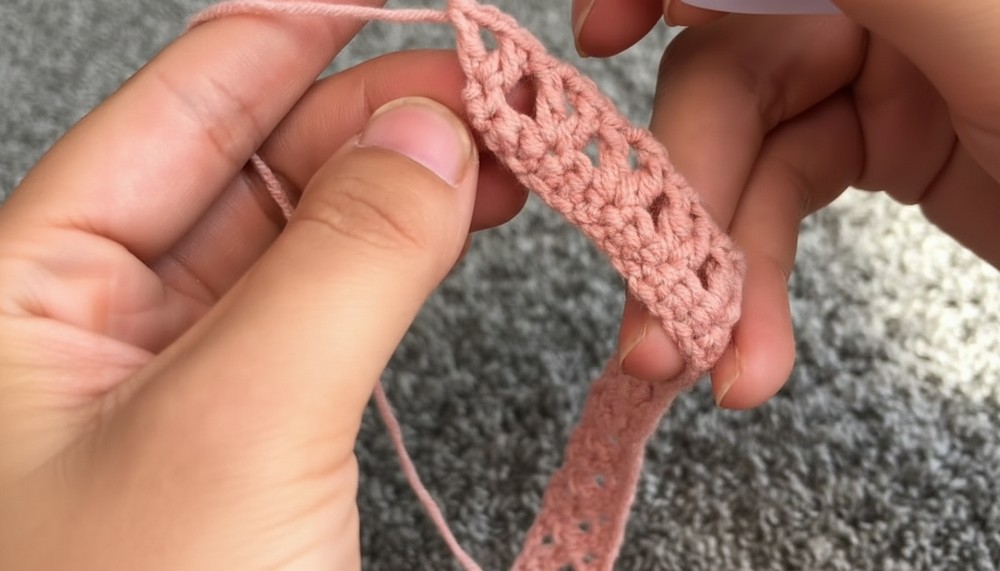
Row 3: Shell Stitch Row
- Into each chain-2 space from the previous row, work 2 double crochets, chain 2, 2 double crochets, forming a shell stitch.
- Repeat this shell stitch across the row.
- Chain 1 and turn your work.
Row 4: Petal Formation
- Into each large chain-2 space, work 8 double crochets.
- Slip stitch into the small space between the previous row's two double crochets.
- Repeat: 8 DC into the next large space, followed by a slip stitch into the small space.
- At the end of the row, chain 1, leave a long tail, and cut the yarn.
Rolling the Rose:
- Roll the crocheted strip tightly, starting from the opposite end of the long tail.
- Use the long tail to sew through the base of the rose using a tapestry needle. Sew firmly and evenly to secure the flower layers.
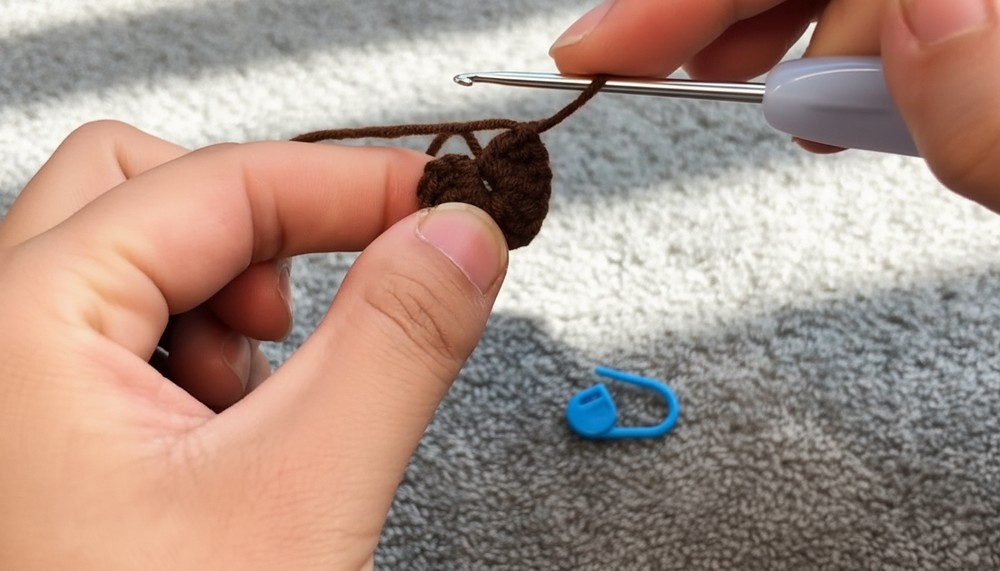
Step 2: Bouquet Holder
Round 1:
- Start with a magic ring.
- Chain 3 (does not count as a stitch), and work 12 double crochets inside the ring.
- Pull the tail to close the magic ring tightly. Slip stitch to the first double crochet to join.
Round 2:
- Chain 3.
- Work 1 double crochet into the same stitch.
- In the next stitch, work a double crochet increase (2 DC into one stitch).
- Alternate between 1 DC and 1 DC increase for six repeats.
- Slip stitch to the first DC to join.
Round 3:
- Chain 3.
- Work DC3tog in the next three stitches (three incomplete DCs combined into one stitch).
- Repeat the DC3tog stitch six times around.
- Before completing the final stitch, insert a small amount of fiberfill for shaping.
- Slip stitch to join the round.
Round 4:
- Chain 1.
- Work waste coat single crochet increases (2 single crochets in each stitch) around.
- Slip stitch to join.
Round 5 to Round 6:
- For Round 5, work waste coat single crochet increases in every stitch for a neat textured finish.
- Round 6 alternates between 3 waste coat single crochets followed by 1 increase.
- Continue until you reach a stable bouquet holder base.
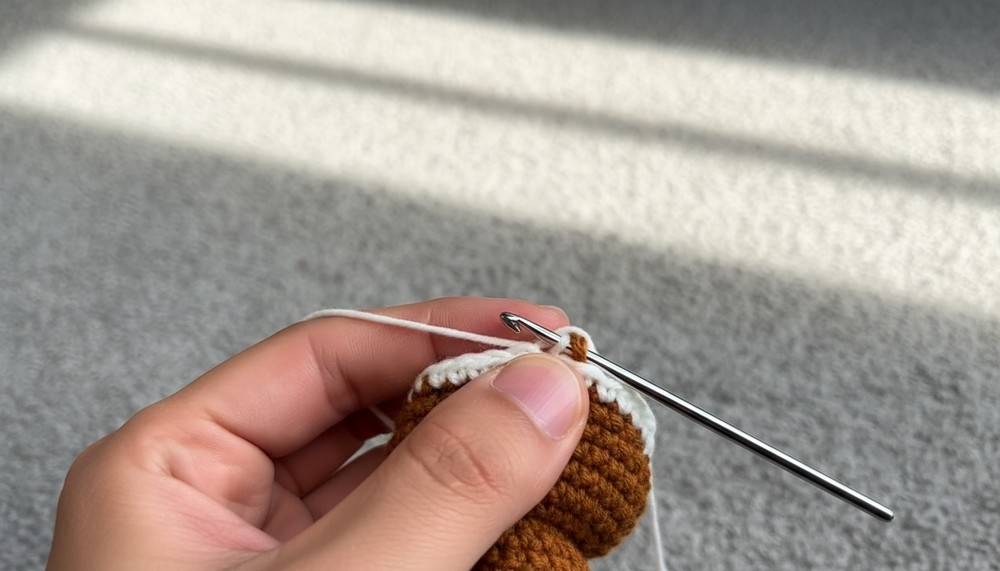
Finish the Holder:
- Switch to contrasting lace yarn.
- Work single crochets into front loops only.
- Slip stitch to join, then work alternating three double crochets into front loops and back loops, creating a decorative edge.
- Slip stitch to join, chain 1, and cut the yarn.
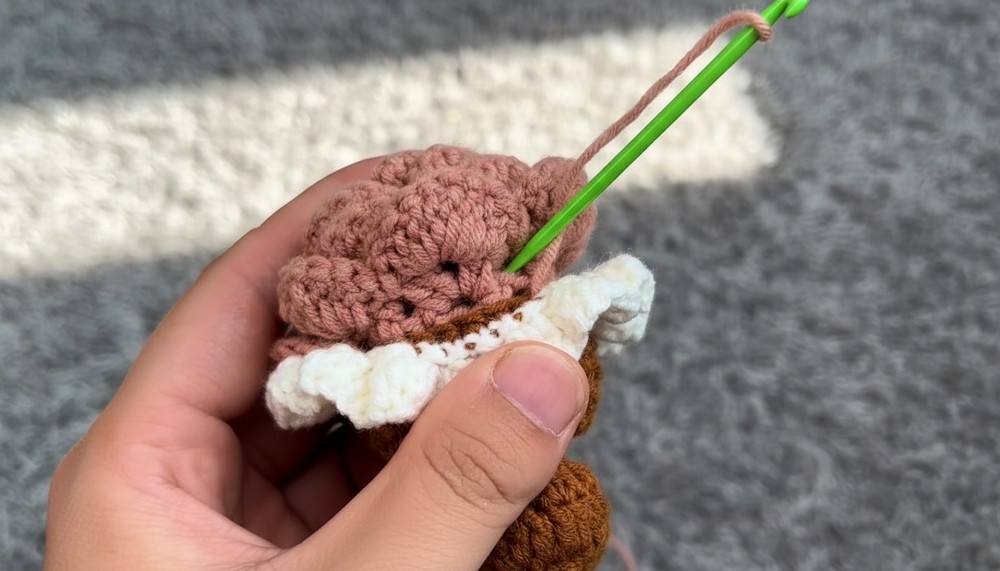
Step 3: Assembly
- Use hot glue or sewing with the long tail from the rose to attach the rose to the bouquet holder.
- Secure the flower base tightly into the holder with matching yarn.
Tips and Customization Ideas
- Color Variations: Use different colored yarns for a bouquet with various colored roses.
- Larger Size: Add more chains to your foundation strip and repeat the pattern to create a larger flower.
- Personalized Holder: Add beads or embroidery to the bouquet holder for extra detailing.
- Gift Idea: Pair the bouquet with handmade cards or wrap it in tissue paper for a thoughtful gift.
Conclusion
This crochet mini rose bouquet is a delightful project that combines beauty with simplicity. Whether you craft it as a gift or a decorative accent, its textured petals and elegant holder make it a versatile and charming creation. Show off your creativity by customizing the bouquet with different colors or embellishments.
Important Remarks
- Ensure the yarn tails are tightly woven to avoid unraveling.
- Properly secure the base of each rose for durability.
- This bouquet pairs well with crochet leaves or stems for an added botanical touch.