
Carry bright daisy blooms with free crochet purse pattern perfect for adding cheerful style and easy handmade charm to your daily adventures.
Positive feelings bloom when you carry a bag covered in pretty flowers with the crochet daisy purse pattern turning yarn and a hook into a cheerful accessory that stands out anywhere you go. This purse is roomy enough for daily essentials like coins snacks keys or small treasures so you never have to worry about leaving anything behind. Friendly daisy designs make the bag joyful and bright attracting smiles and compliments from those around you.
Free Crochet Daisy Purse Pattern for Unique Bags
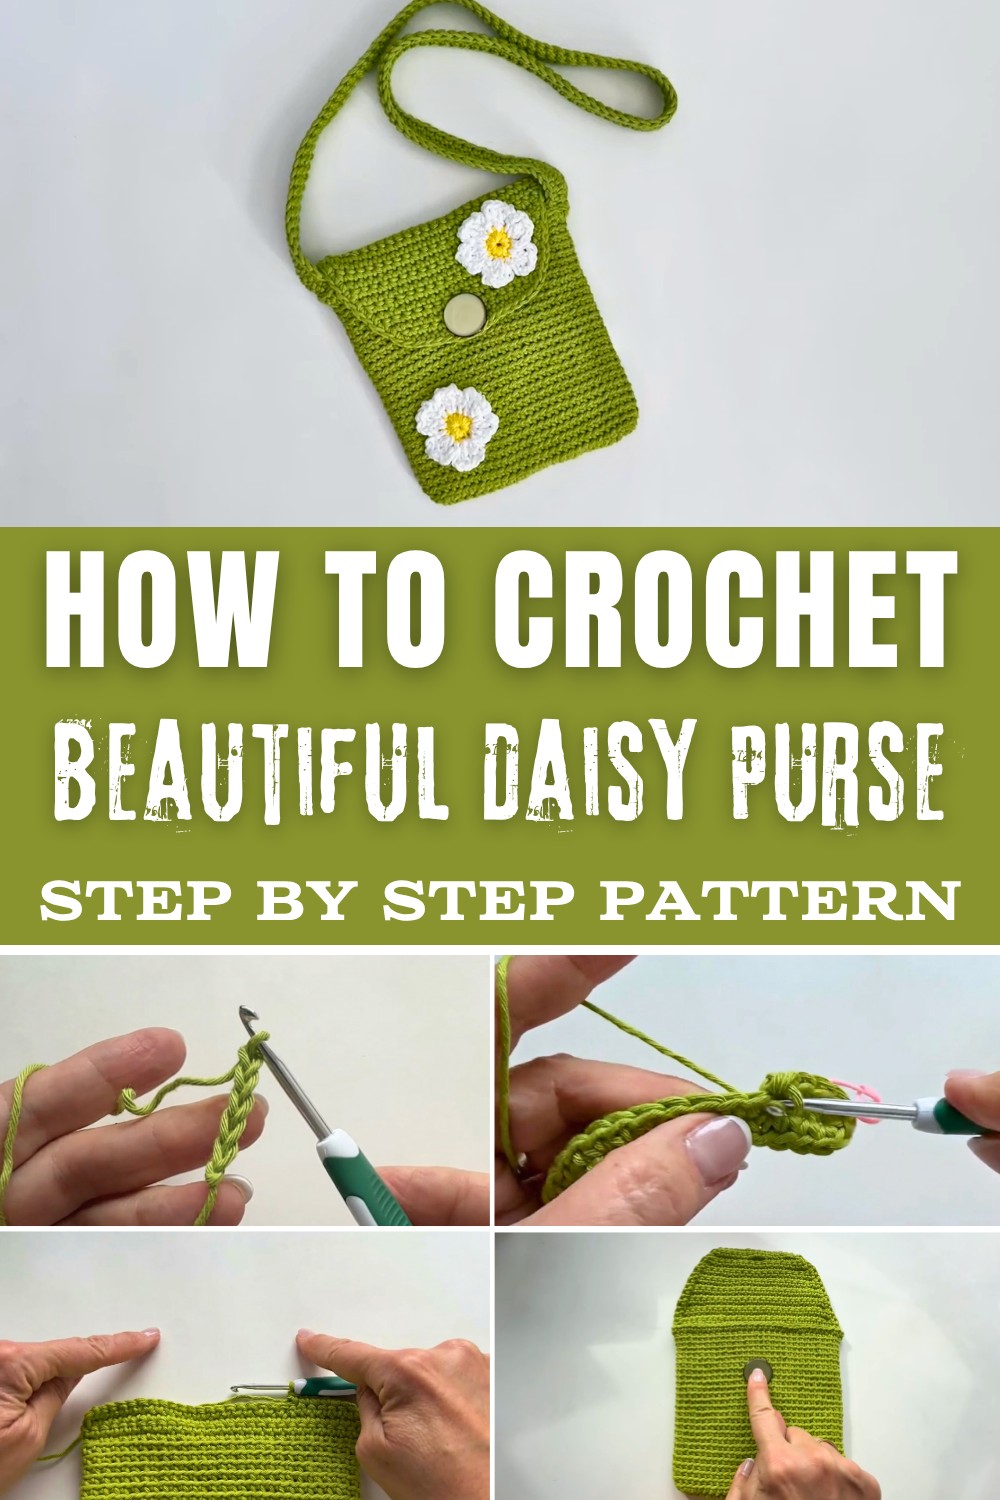
Making this purse is simple and fun since you can follow easy picture steps without needing to read lots of words. The crochet daisy purse pattern lets anyone pick their favorite colors to match what they like or wear. Using this purse shows your style celebrates happiness and lets you bring color wherever you travel whether it is the market or a friend's house. Safe and sturdy your purse will protect your belongings and last a long time making every day feel more exciting and beautiful with each use.
Crochet Mini Purse with Daisy Flower Appliqué
Materials
- Yarn: Medium weight (Category 4) yarn in desired colors. (About 1.5 balls for purse; scraps for flower)
- Hook: 4.5 mm (US 7) crochet hook
- Notions:
- Measuring tape
- Scissors
- Tapestry/darning needle
- Stitch markers (helpful but optional)
- Button (for flap closure)
Key Abbreviations (US Terms)
- ch = chain
- sc = single crochet
- dc = double crochet
- sl st = slip stitch
- st(s) = stitch(es)
- back bump = loop at the back of the chain (foundation row)
- back loop only (BLO) = work in the back loop of each stitch
Special Notes
- All rounds are worked continuously without joining unless specified.
- Stitches at corners are increased for shaping.
- Flap shaping is achieved by skipping the first stitch (decrease) of each row.
- Buttonhole can be adjusted for button size.
- Strap length is customizable.
- Magic ring is used for flowers.
Pattern Instructions
1. Purse Body
Foundation Chain
- With 4.5 mm hook, make a slip knot.
- Ch 25 loosely (approx. 6.5" / 17 cm for a 6" wide purse). Add more chains for a wider purse.

Round 1
- Sc in the second ch from the hook, working into the back bump.
- Sc in each back bump across until the last chain.
- In the last chain: Work 4 sc all into the same stitch (corner).
- Continue along the opposite side of foundation chain:
- Sc in each foundational stitch, going under the "V" (both loops).
- In the first stitch you worked (other end):
- Add 3 sc (so total of 4 sc on this end: 1 original + 3 added).
- Do not join. Place a marker after the corner to track the end of this round.

Rounds 2-? (Base & Sides)
- Sc in each st until you reach the four corner sts at one end.
- In each of the next four corner sts:
- Work 2 sc in each st (8 sc total on corner).
- Sc in each st along the side until you reach the other four corner sts.
- In each of these four corner sts:
- Work 2 sc in each st (8 sc total on corner).
- Continue stitching in a spiral.
- From next round onward:
- Work one sc in each st around (no increases).
- Back loop only (BLO): Insert in back loop of each st for purse sides.
- Continue in BLO without increasing, working around and around until the purse is the desired height.
- Sample: 6" (15 cm) tall.

- Sample: 6" (15 cm) tall.
2. Flap
- Decide which side will be the back.
- Place marker for flap, ensuring it's centered to the back.
Start the Flap
- Ch 1, turn.
- Sc through both loops in the very first st and each st across to the marker.
- Remove the marker and sc in the marked st as last st in row.
Repeat Rows
- Ch 1, turn.
- Sc in each st across, going under both loops.
- Repeat until desired flap length.
Flap Shaping (Decreases)
- Ch 1, turn.
- Skip the first st (decrease), then sc in next st and across.
- Repeat decrease rows (always skipping first st) until flap is desired length or shape.
3. Buttonhole
- Find the center (sample: 17 sts → st 8 is center).
- Place marker at center st.
- Ch 1, turn.
- Continue decreasing: skip first st, sc across until 1 st before center marker.
- Ch 4, skip 3 sts, sc in next st after skipped sts.
- Remove marker. Test button fit; adjust as needed.
- Complete row with sc to end.

Buttonhole Finishing Row
- Ch 1, turn.
- Decrease: Skip first st, sc across until you reach chain space.
- Sc 4 in chain space (or adjust to chain count).
- Sc in next st and to row end.
4. Purse Edging
- With RS facing, sc down the flap edge, around purse front, up the other flap edge.
- Sc 1 at end of each row (find the end and insert).
- At corners: sc in corner and in first st at front of purse.
- Continue sc around the entire edge until at the starting point.
- Fasten off and weave in ends.
- Invisible Join:
- Use needle to weave from front to back, then down into origin-creates a seamless finish.
5. Button & Final Weaving
- Sew button to purse, ensuring it aligns with buttonhole.
- Weave in all yarn ends securely.
6. Strap
- Leave a long tail for sewing.
- Slip knot, ch 120-150 (35-45" / 89-114 cm; adjust to desired length).
- Sc in back bump of second ch from hook, 2 sc in first st.
- Sc in each back bump to other end.
- 4 sc in last st.
- Turn, then sc in each st along opposite side (both loops) back to start.
- When back at the beginning: 2 sc in last st.
- Sl st to join in first sc.
- Ch 1. Start second row:
- Sc in first st.
- 2 sc in next st (corner).
- Sc in each st to next corner (four sc corner).
- At four corner sts: 2 sc in first, sc in next two, 2 sc in last.
- Continue along side with sc to beginning.
- At two end sts: 2 sc in first, sc in last.
- Leave a long tail, fasten off.
- Use darning needle to close strap end.
Attaching Strap
- Use tail to sew strap to purse side (about 4-5 stitches from edge under flap).
- Ensure strap is straight, stitch other end to opposite side.
- Weave in all ends.
7. Daisy Flower Appliqué
Center
- With scrap yarn, make a magic ring.
- Ch 1, then 11 sc in ring.
- Pull ring closed.
- Fasten off with invisible join (creates extra stitch for 12 total).
- Cut yarn and tie ends (don't need to weave).
Daisy Petals
- Insert hook in any center st, join petal color, ch 3.
- 2 dc in next st.
- Ch 3, sl st in next st.
- Repeat:
- Ch 3, 2 dc in next st, ch 3, sl st in next st.
- Continue until 6 petals are made.
- Last petal: Ch 3, 2 dc in last st, ch 3, sl st to very first st.
- Leave tail for sewing.
- Tie beginning and ending petals' ends together; cut off excess.
- Make as many daisies as desired.
- Sew flower(s) onto purse.

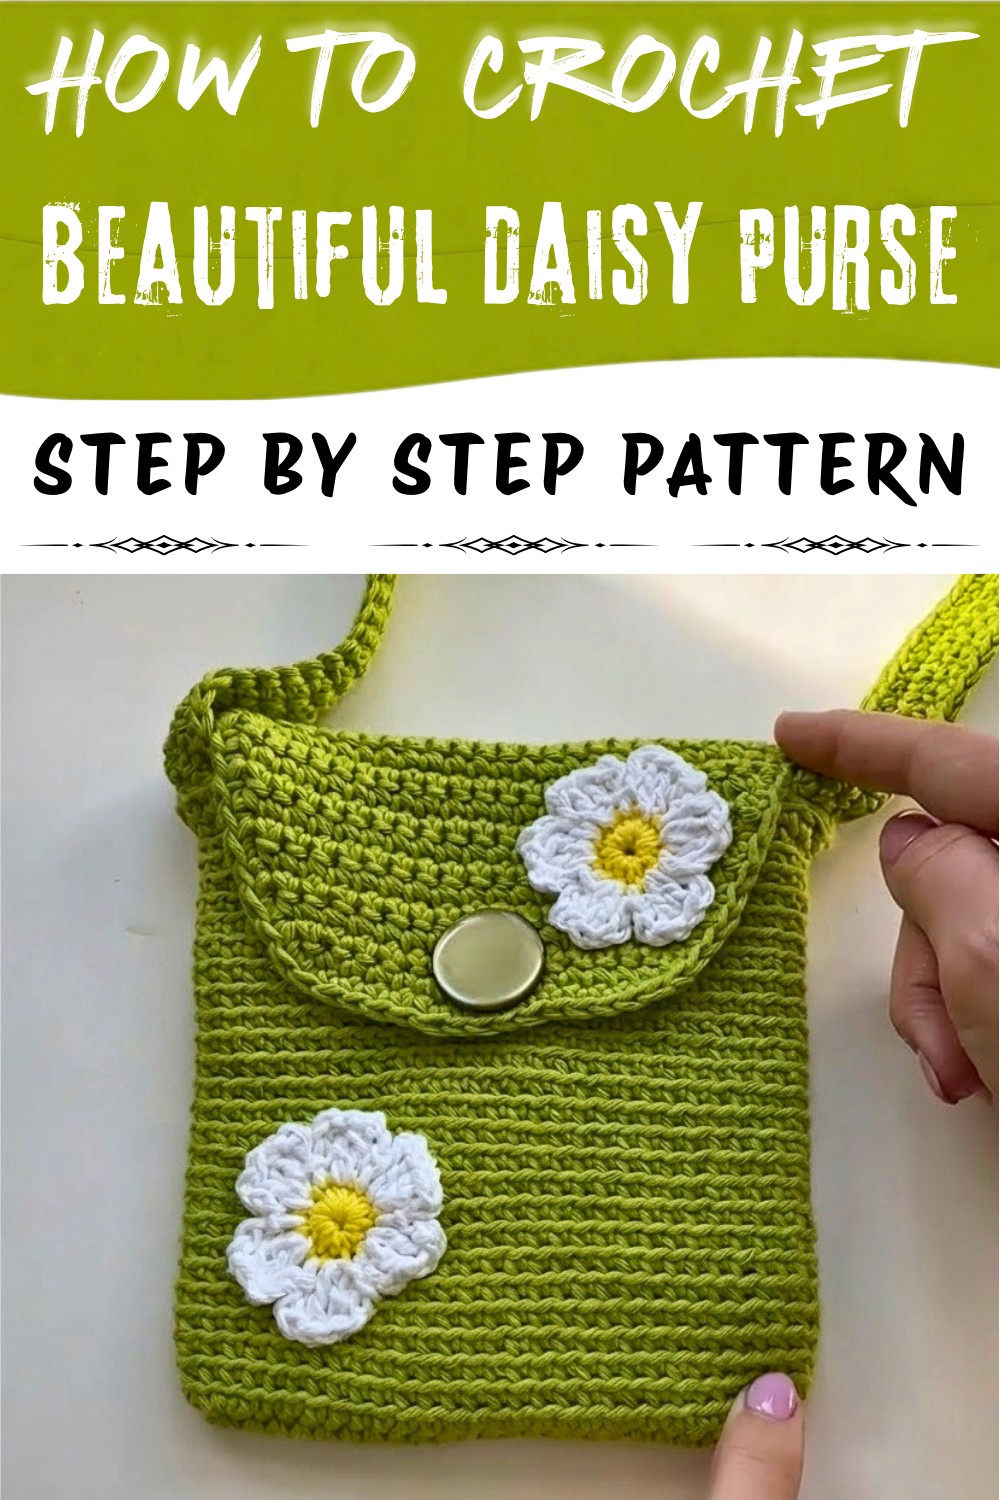
Conclusion
This pattern creates a charming and functional mini crochet purse, complete with a shaped flap, button closure, sturdy strap, and a whimsical daisy applique. The construction is seamless and beginner-friendly, with clear opportunities for customization in width, flap length, strap length, and decorations.
Pattern Correction & Tips
- Count your stitches after the foundation round to ensure symmetry.
- When forming the corners, be careful to distribute increases evenly for a rectangular shape.
- For a stronger purse, avoid overly loose stitches and use back loop only for sides.
- Strap length is customizable and can be reinforced by an extra row if preferred.
- Buttonhole opening must fit the button snugly; adjust chain and skip count as needed.
- Invisible join yields a tidy finish-do not skip this step!
- For flower petals, ensure even spacing by counting stitches carefully.
- Use a strong sewing technique when attaching the strap for durability.