
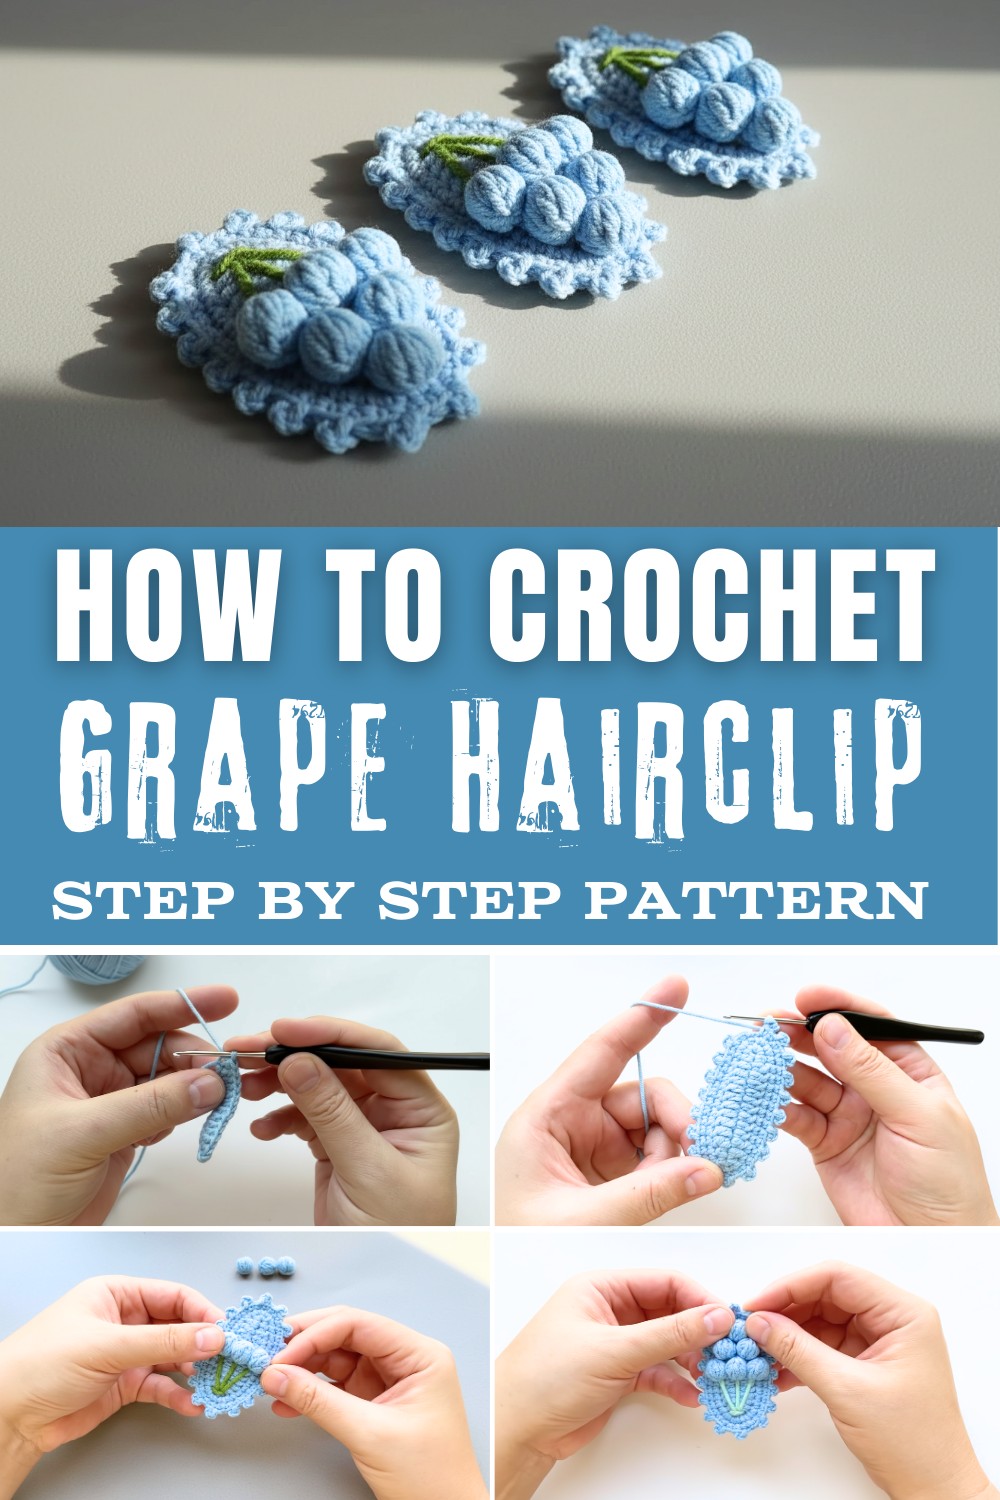
Crocheting allows you to create unique and personalized accessories, and the crochet grape hairclip pattern is no exception. This charming hairclip captures the beauty of a grape cluster, making it a fun and elegant way to style your hair for casual outings or special occasions like picnics or garden parties.
Pair it with loose waves, braided hairstyles, or even a messy bun to add a refreshing, nature-inspired touch to your look. Crocheted in rich purples or soft pastel tones, this accessory is lightweight and easy to customize. Beyond its stylish appeal, making this hairclip helps refine your crochet techniques and offers a meaningful, hand-crocheted gift option for loved ones who appreciate thoughtful and creative details.

Materials:
- Yarn: 4-ply cotton yarn (recommended colors: Baby Blue for the grape, green for the leaf).
- Crochet Hook: 2.0mm size.
- Hair Clip Base: A plain alligator or snap hair clip (optional, for attaching the project).
- Scissors: To cut yarn as needed.
- Tapestry Needle: For weaving in ends and sewing elements together.
- Stitch Markers: Helpful for marking the beginning of each round (optional).
Gauge:
Since this is a decorative piece, the gauge is not critical. The grape cluster and leaf should be tight and compact.
Finished Size:
Approximately 4 cm x 5 cm (depending on yarn tension and hook size).
Crochet Grape Hairclip Pattern
This guide walks you through creating a beautiful grape hairclip using 4-ply cotton yarn and a 2.0mm crochet hook. Designed to be both functional and decorative, this clip is a great quick project. The end product is a small grape-inspired applique that can be attached to a hair clip, headband, or even used as a brooch.
Step 1: Create the Grape Base
This pattern begins with an oval-shaped grape foundation.
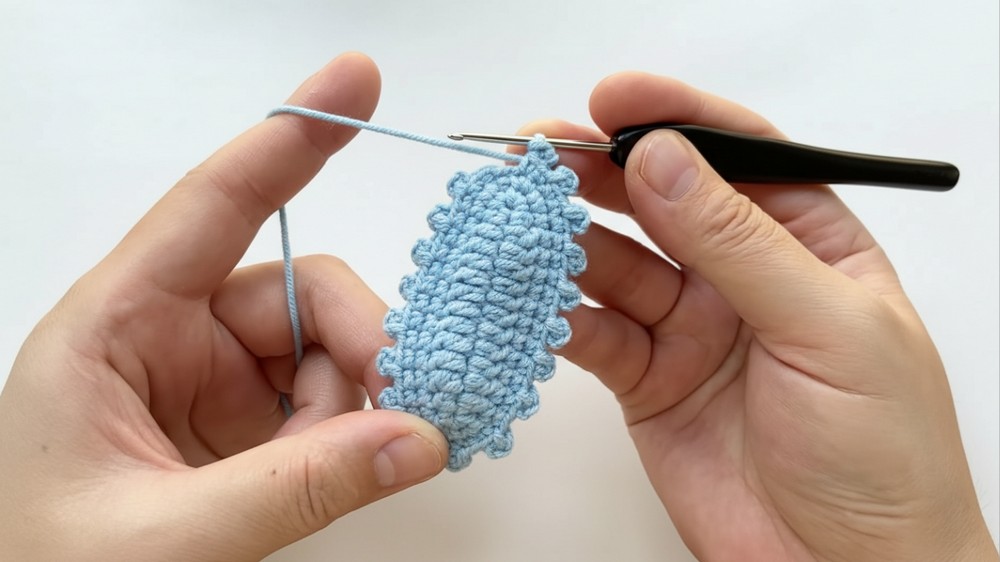
Round 1: Oval Base
- Make a slip knot and chain 15.
- Single Crochet (sc) in the second chain from the hook.
- Half Double Crochet (hdc) in the next chain.
- Double Crochet (dc) in the next 10 chains.
- Half Double Crochet (hdc) in the following chain.

- In the last chain, make 3 single crochets. This will curve your work to start crocheting on the backside of the foundation chain.
- On the other side of the foundation chain:
- Half Double Crochet (hdc) in the next chain.
- Double Crochet (dc) in the next 10 chains.
- Half Double Crochet (hdc) in the following chain.
- 2 Single Crochet (sc) in the last chain.
- Join to the first stitch using a slip stitch (slst).
- Chain 1 to begin the next round.
Round 2: Increasing the Shape
- 2 Single Crochet (sc) in the same stitch as the chain 1.
- Single Crochet (sc) in the next 12 stitches.
- 2 Single Crochet (sc) in the next 3 stitches.
- Single Crochet (sc) in the following 12 stitches.
- 2 Single Crochet (sc) in the last 2 stitches.
- Join to the first stitch using a slip stitch (slst).
- Chain 1 to begin the next round.
Round 3: Adding Decorative Bumps
- Single Crochet (sc) in the first and second stitch.
- Chain 2 and secure it with a slip stitch (slst) in the same stitch. This forms the first "bump."
- Repeat: 2sc → chain 2 → slst for every stitch around the edge.
- Join to the first stitch using a slip stitch.
- Chain 1, and cut your working yarn.
Step 2: Create Bobble Grapes
Each grape bobble is crocheted separately, working with a 4-double-crochet bobble stitch.
- Make a slip knot and chain 3.
- Work a 4dc-bobble stitch in the next space:
- Yarn over, insert hook into the desired space, pull up a loop (3 loops on hook).
- Yarn over and pull through the first two loops (2 loops left).
- Repeat 3 more times until you have 5 loops on your hook.
- Yarn over and pull through all 5 loops.
- Chain 3, and secure using a slip stitch.
- Chain 1, and cut the yarn.
- Repeat this process until you have 6 bobbles in total.

Step 3: Assemble and Finish
- Arrange the 6 bobble grapes into a cluster shape on the oval base you created in Step 1. The arrangement resembles a mini bunch of grapes.
- Sew or secure the bobble grapes in place using your tapestry needle and matching yarn.

- Weave in all loose ends to ensure a clean finish.
Optional: Attach the Grape to Hair Clip
- Use a hot glue gun or fabric glue to attach your finished grape cluster to a hair clip, headband, or brooch base.

Tips & Customization:
- Adjust the Size: To make a larger grape cluster, add more bobble grapes or use thicker yarn and a larger hook.
- Color Variations: Experiment with different grape colors such as green, deep red, or even pastel shades for a unique twist.
- Decorative Leaves: Crochet a small leaf or curly stem using green yarn to add detail to the grape cluster.
- Secure Attachment: When attaching to a clip or base, ensure your glue or sewing is sturdy to handle wear and tear.
- Experiment with Texture: Try other stitches like picots or puff stitches for variation.
Special Techniques
- 4dc-Bobble Stitch: This stitch creates the texture and 'pop' of a grape.
- Slip Stitch Join: Keep your stitches tight and precise to create clean edges.
- Assembling Components: Neatly arranging the bobble grapes onto the base is critical for an attractive result.
Conclusion & Final Look
The completed grape hairclip should feature a textured bunch of grapes in a compact cluster design. It's a versatile little project that is creative and fun. Whether you use it as a hair accessory, a decorative piece on clothing, or a brooch, this creation is guaranteed to catch eyes. With slight tweaks, such as adding different embellishments or increasing the cluster size, you can customize it to your liking.