
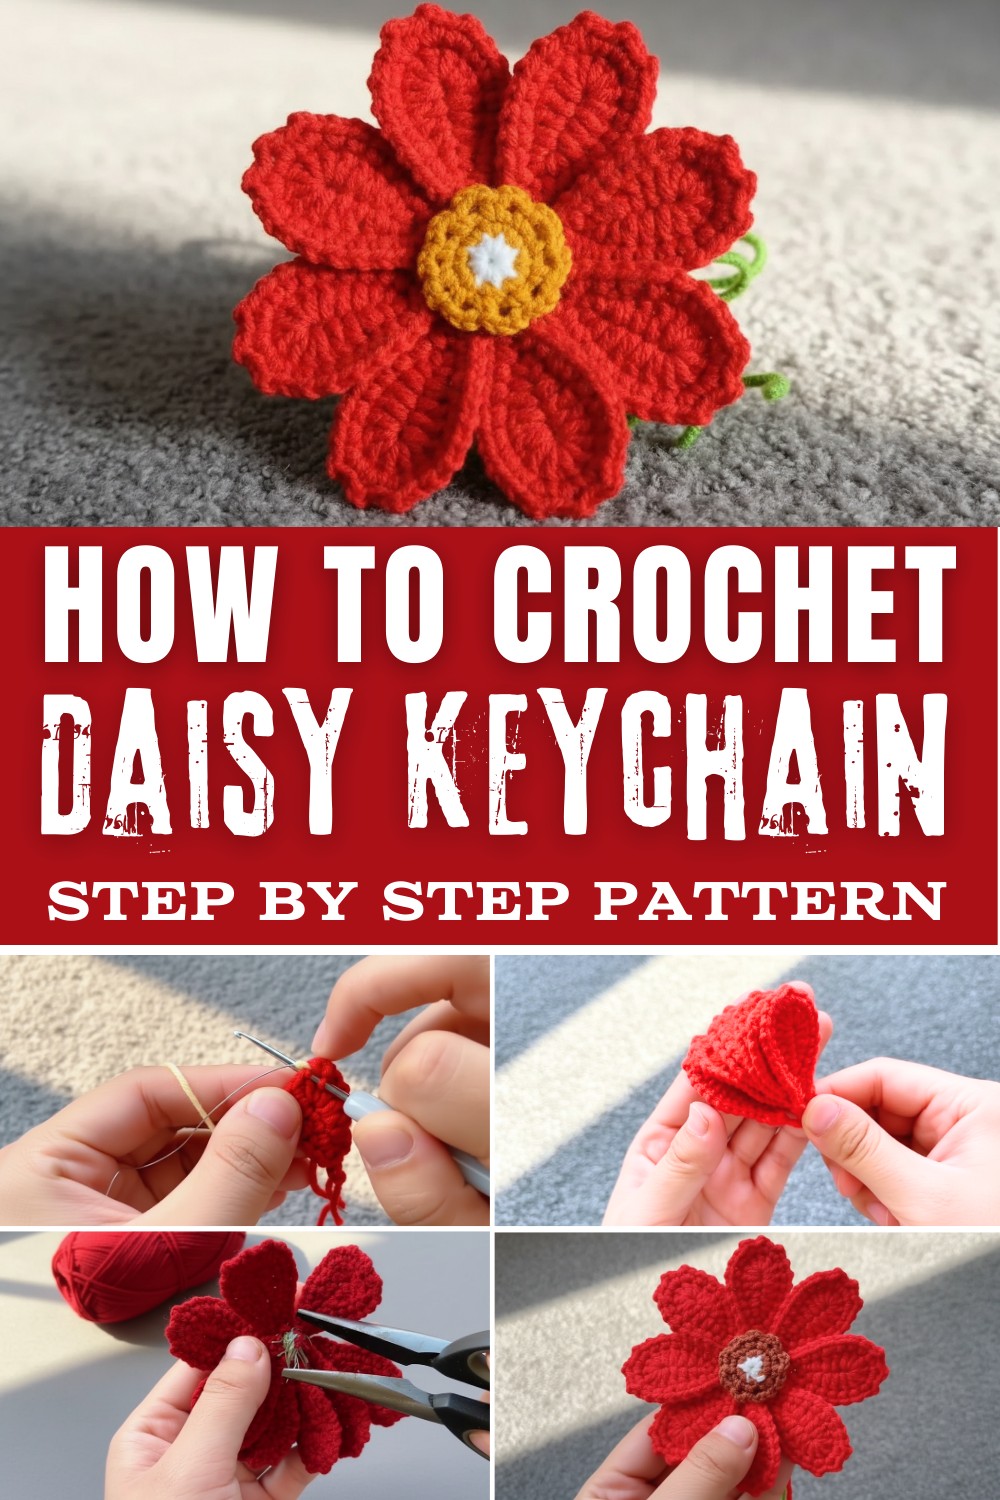
Holding a little daisy that will never fade or lose its beauty. That's exactly what you can create with the free crochet daisy keychain pattern. This simple yet charming project is perfect for those who love handmade projects. The daisy, with its soft white petals and bright yellow center, looks like a bit of sunshine you can carry with you everywhere.
Free Crochet Daisy Keychain Pattern for Quick Projects
It's not just a pretty accessory, it's also a great way to add a personal touch to your keys, bags, or even as a small gift. The pattern is beginner-friendly, using basic crochet stitches to create a neat and delicate flower design.
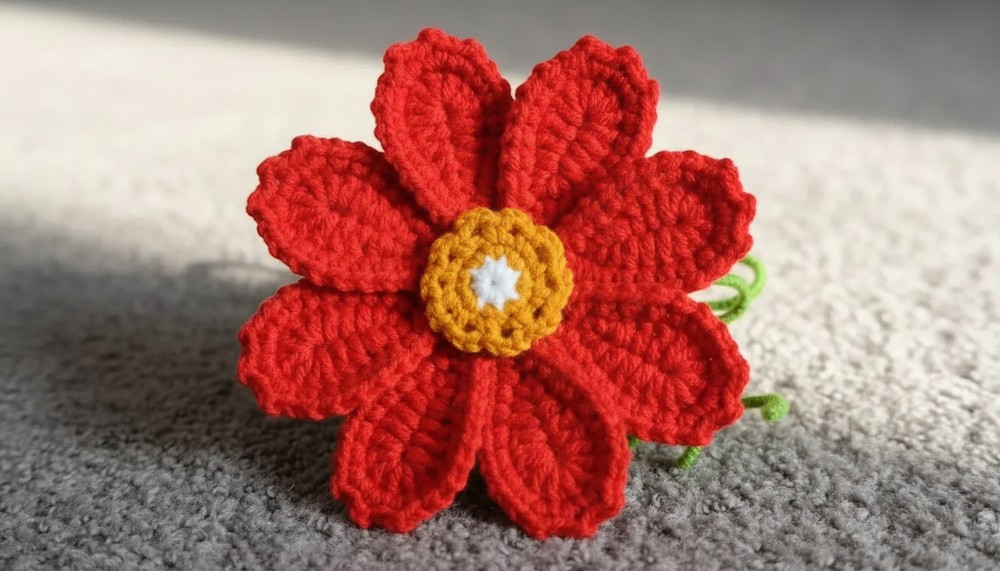
The keychain is light, durable, and small enough to fit perfectly in your pocket or purse. Making this daisy keychain is an enjoyable and creative experience that leaves you with something truly special to keep.
Materials Needed
- Yarn:
- Red 4-ply yarn for petals.
- Green yarn for leaves, stem, and flower base (kaix).
- Yellow or orange yarn for the flower center.
- Crochet Hook: 2.0 mm.
- Wire: Thin floral wire (flexible but sturdy, approximately 20-24 gauge).
- Glue: Craft glue for securing components.
- Pliers: For trimming and twisting the wire.
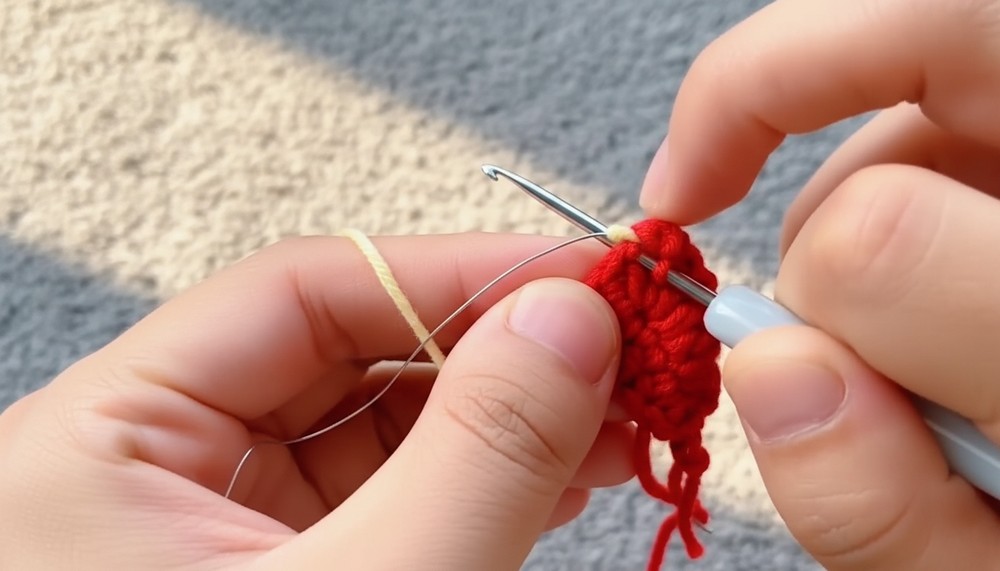
- Tapestry Needle: For weaving yarn ends.
- Scissors: For precise yarn cutting.
Gauge
- Gauge is not critical for this pattern. Using 4-ply yarn and a 2.0 mm crochet hook, each flower will measure approximately 2-2.5 inches in diameter, and the keychain will have a total length of about 6-8 inches.
Special Techniques
- Magic Ring (Adjustable Ring):
Used for starting rounds to create tight and seamless centers for flowers and buds. - Working Symmetrically:
Some stitches will be mirrored on the opposite side of a chain base for balanced shapes like petals. - Incorporating Wire:
Floral wire will be added inside petals, leaves, and stems to provide shape and stability. - Layering:
Petals will be layered for a 3D effect, and they can be spread and shaped manually after assembly for a natural look.
Pattern Instructions
Step 1: Crochet the Petals
Each flower will have 8 petals, crocheted individually.
- Foundation Chain:
- Make a slip knot and chain 7.
- Crochet Along the First Side:
- Skip the first chain (the one closest to the hook). Insert the hook into the second chain and work:
- 1 Single Crochet (sc).
- 1 Single Crochet (sc) into the next chain.
- 1 Half Double Crochet (hdc) into the next chain.
- 1 Double Crochet (dc) into each of the next 2 chains.
- In the last chain, work 7 Double Crochets (dc) to create the rounded tip of the petal.
- Skip the first chain (the one closest to the hook). Insert the hook into the second chain and work:
- Crochet Along the Opposite Side:
- Work symmetrically along the opposite side of the chain:
- 1 Double Crochet (dc) in the first two stitches.
- 1 Half Double Crochet (hdc) in the next stitch.
- 2 Single Crochets (sc) in the next two stitches.
- Work symmetrically along the opposite side of the chain:
- Slip Stitch to Join:
- Slip stitch into the first single crochet on the round's starting side to finish the petal.
- Add Wire for Structure:
- Insert floral wire along one side of the petal. Wrap the wire as you crochet over it to secure.
Tip: Repeat the process to make 8 petals for one flower.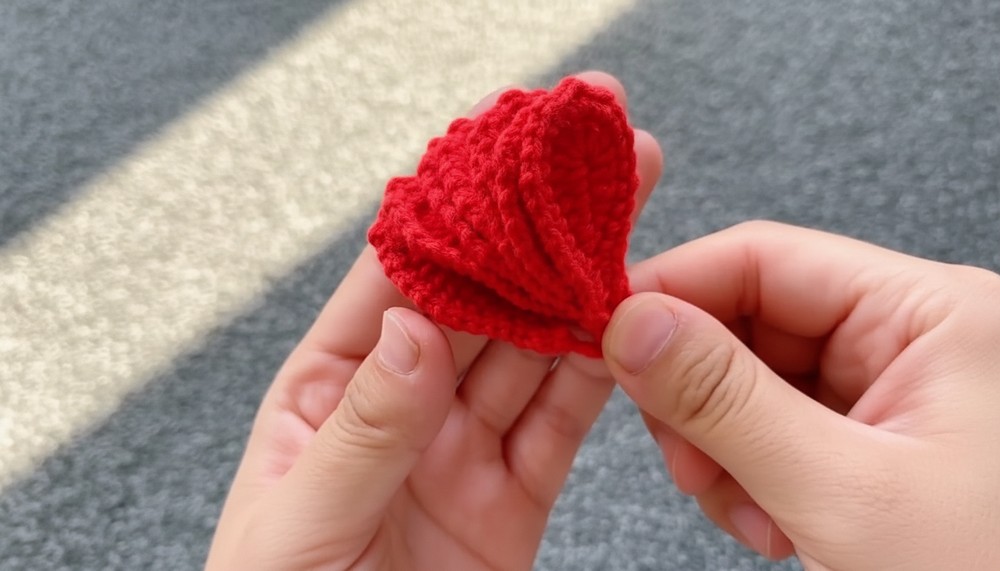
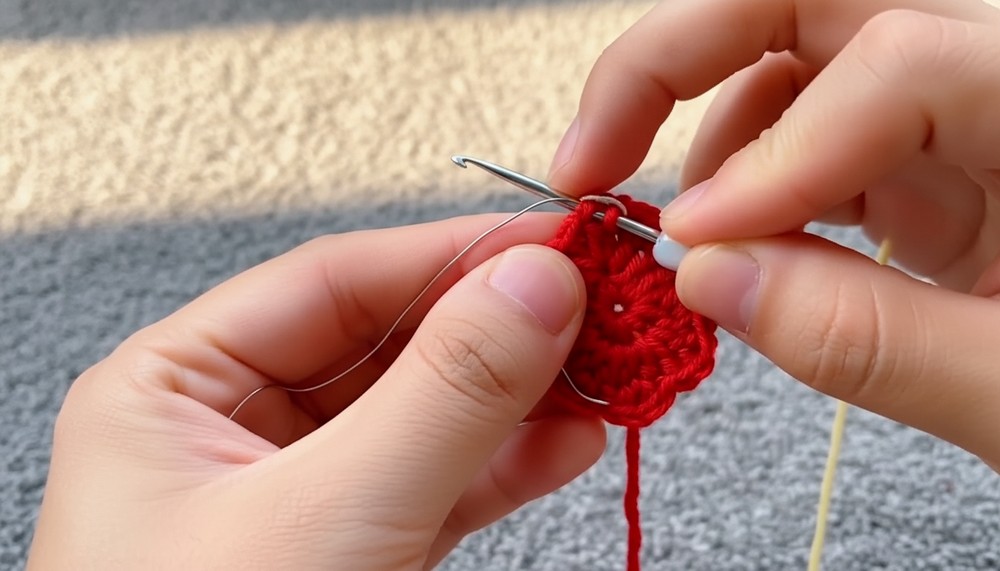
Step 2: Create the Flower Center
- Magic Ring (Round 1):
- Make a magic ring and crochet 6 Single Crochets (sc) into the ring.
- Pull the loop tight to close the ring, and slip stitch into the first stitch to join.
- Round 2:
- Chain 1 and work 1 Single Crochet Increase (2 sc in the same stitch) into every stitch. You will have 12 stitches at the end of this round.
- Round 3:
- Chain 1.
- Crochet 1 Single Crochet (sc) into the first stitch, then chain 3.
- Repeat the pattern-one single crochet, chain 3-for a total of 6 sets evenly spaced around the round.
- Slip stitch to join.
Tip: Weave in and clip excess yarn tails on the back for a clean finish.
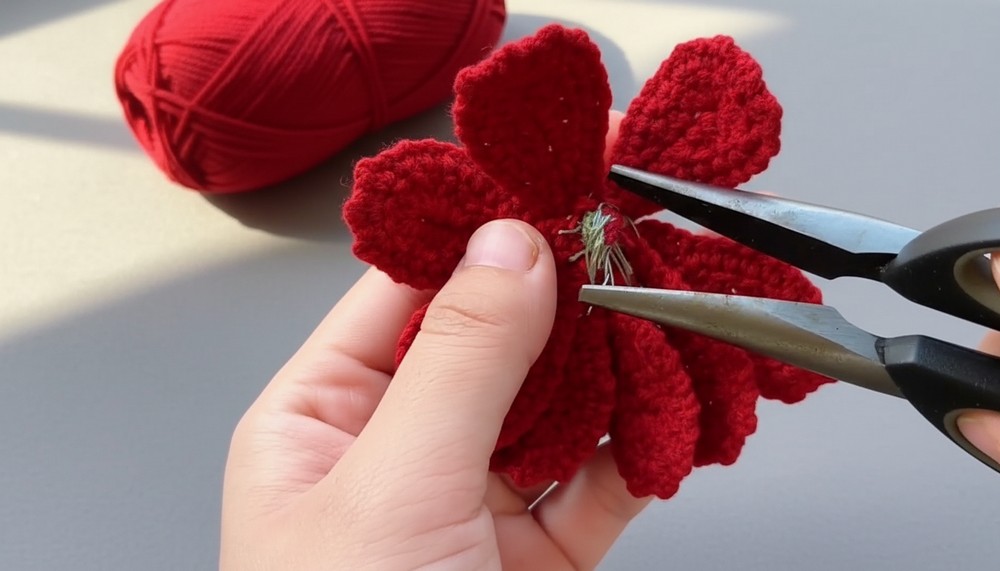
Step 3: Assemble the Flower
- Layering Petals:
- Stack all 8 petals neatly on top of each other. Align the bases to create a layered, staggered look.
- Wrap the Petal Base:
- Use floral wire to secure the bases of the petals together. Wrap tightly with cream-yellow yarn several times to hold everything in place.
- Attach the Flower Center:
- Glue the crocheted center to the middle of the layered petals on top. Hold it in place until the glue sets.
Step 4: Crochet the Flower Bud
A cosmos flower bud can enhance the overall design.
- Magic Ring (Round 1):
- Start with a magic ring and work 6 Single Crochets (sc) into the ring.
- Round 2:
- Work Single Crochet Increases (2 sc in each st) around for a total of 12 stitches.
- Round 3:
- Crochet 12 Single Crochets (sc) with no increases.
- Round 4 (Decreases):
- Work 6 Decrease Sets: Insert hook into front loops of the next 2 stitches, yarn over, and pull through both loops to create a single crochet decrease.
- Stuff the Bud with Ends:
- Use leftover yarn tails to fill the bud for a more structured look.
- Use leftover yarn tails to fill the bud for a more structured look.
Tip: Wrap green yarn around a small wire to create the bud stem.
Step 5: Create the Hanging Loop
The keychain loop is created using seamless crochet techniques.
- Chain Foundation:
- Chain 3. Insert the hook into the third chain and work 3 Unfinished Half Double Crochets (hdc) in the same space. Yarn over and pull through all loops on the hook.
- Repeat:
- Chain 3 and repeat the same 3-half-double-crochet cluster. Repeat the pattern for 20 clusters.
- Join the Loop:
- Fold the cluster strip in half and slip stitch into the first cluster to form a loop.
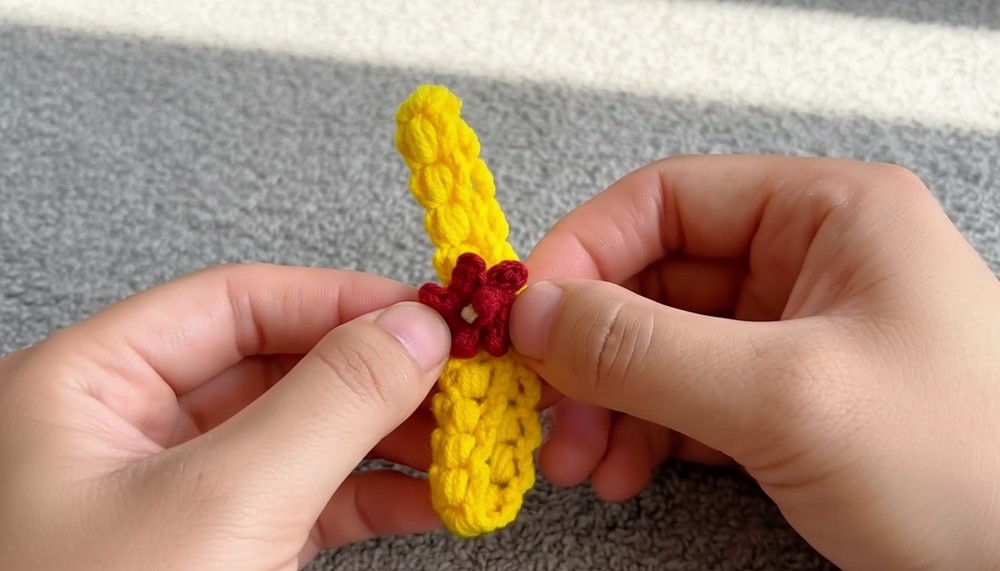
Step 6: Final Assembly
- Attach Pieces Together:
- Twist the wires of the flower, flower buds, and hanging loop base together for a secure connection.
- Wrap the joined area with green yarn for a seamless finish.
- Shape Petals and Buds:
- Spread and curl the petals gently for a natural look. Curve the stems slightly using your hands.
Finishing and Tips
- Glue for Stability:
- Apply glue to the flower and stem connections after assembly to ensure lasting durability.
- Shape Wire with Care:
- Avoid over-bending the wire to prevent breakage in the stem.
- Making it Compact:
- Ensure yarn tails are securely woven at the back, and excess wire is trimmed neatly to avoid sharp ends.

- Ensure yarn tails are securely woven at the back, and excess wire is trimmed neatly to avoid sharp ends.
Final Words
Congratulations on completing your crochet cosmos flower keychain! This beautiful accessory is not only a wonderful addition to your personal collection but also a thoughtful handmade gift for loved ones. The layers, textured petals, and vibrant colors bring this craft to life. Experiment with different yarn colors and sizes to suit your preferences.